
It's time to announce the winners from the Spring-Summer Coffee Lovers Blog Hop.
Congratulations
You won a $25 gift code to Sweet 'n Sassy Stamps.
Please contact Esther at snssassistant@gmail.com to claim you prize.
It's time to announce the winners from the Spring-Summer Coffee Lovers Blog Hop.
Congratulations
You won a $25 gift code to Sweet 'n Sassy Stamps.
Please contact Esther at snssassistant@gmail.com to claim you prize.

Hello coffee fans, Esther here today with something fun! Sweet 'n Sassy Stamps is excited to be among the fabulous sponsors for the Spring/Summer Coffee Lovers Blog Hop! This is a traditional hop with each stop offering prizes for commenting on their company blog post.


Leave a comment on this post and we'll draw a winner for a $25 gift code to the Sweet & Sassy Stamps store. Commenting open through March 22nd and the winner will be announced here on the blog March 23rd.
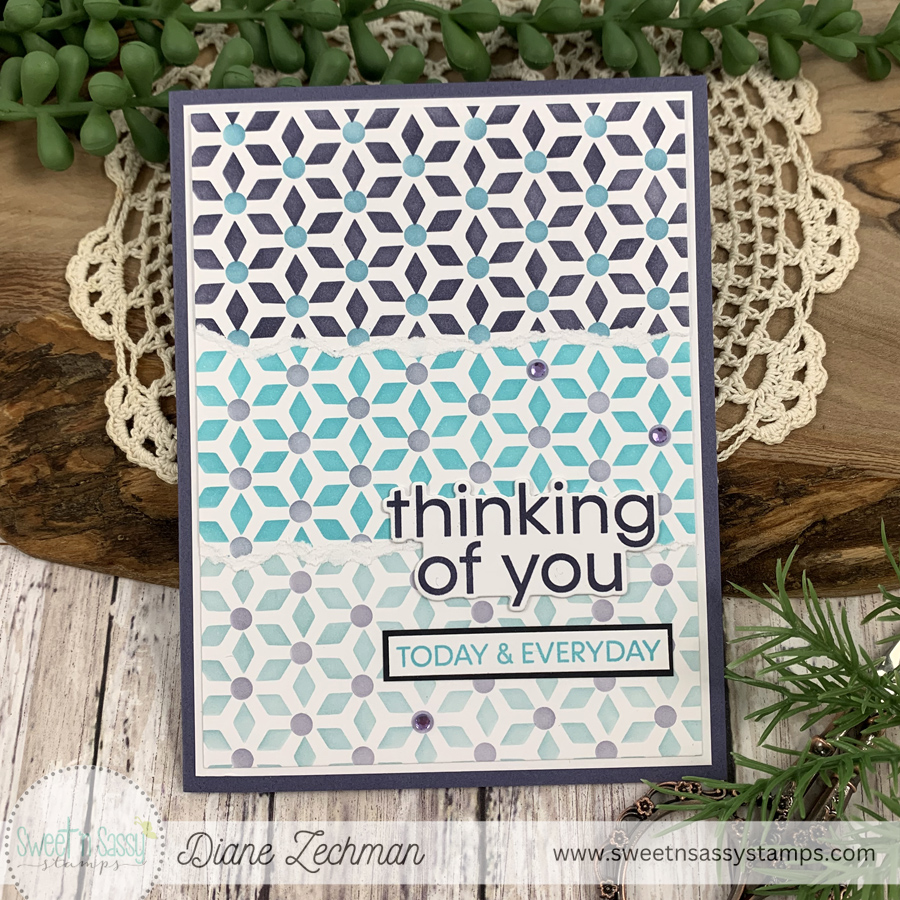
Tuesday Tip - Layered Designs
Diane has another stencil tip for us:
"Make multiple layers with your stencils or background stamps and cut or tear to layer them."


Here’s the finished background.

Supplies used:
Diamond Floral Stencils and Simple Sentiments Bundle


2. Fold your the two sides of your paper to the center, overlapping 1/4 of an inch

3. Fold the bottom up approximately 1/4 of an inch
4. Open your paper back up and trim off the bottom two corners

5. Decide what kind of decorative top you'd like and use pinking sheers or a circle punch to create it
6. Fold your bag back up and adhere together
NOTE: You can use typing paper, card stock, patterned paper, or wax paper (to create faux glassine bags)

Springtime, Springtime Babies, Diagonal Plaid Background, Texture Tiles 4, Stitched Circles Dies Set, and Stitched Circles 2 Die Set
Esther also created treat bags using this method

Supplies used:
Love in is the Air stamps & dies, Delicate Doily Die, Skinny Lowercase Alpha, Sentimental Wordfetti, Texture Tiles 4, and Bold Caps Alpha

Supplies used:
Love in is the Air stamps & dies, Delicate Doily Die, Flourish Background, Your Story, and Scallop Border Dies


Tuesday Tips - Gelli Prints
Are you looking for a fun way to create stained glass windows?
Karen shares "Use your stash of gelli prints to create colorful windows for the Cathedral Window Die."

She turned one of her windows into a fun shape card with a sentiment from the Church Family Stamp Set.


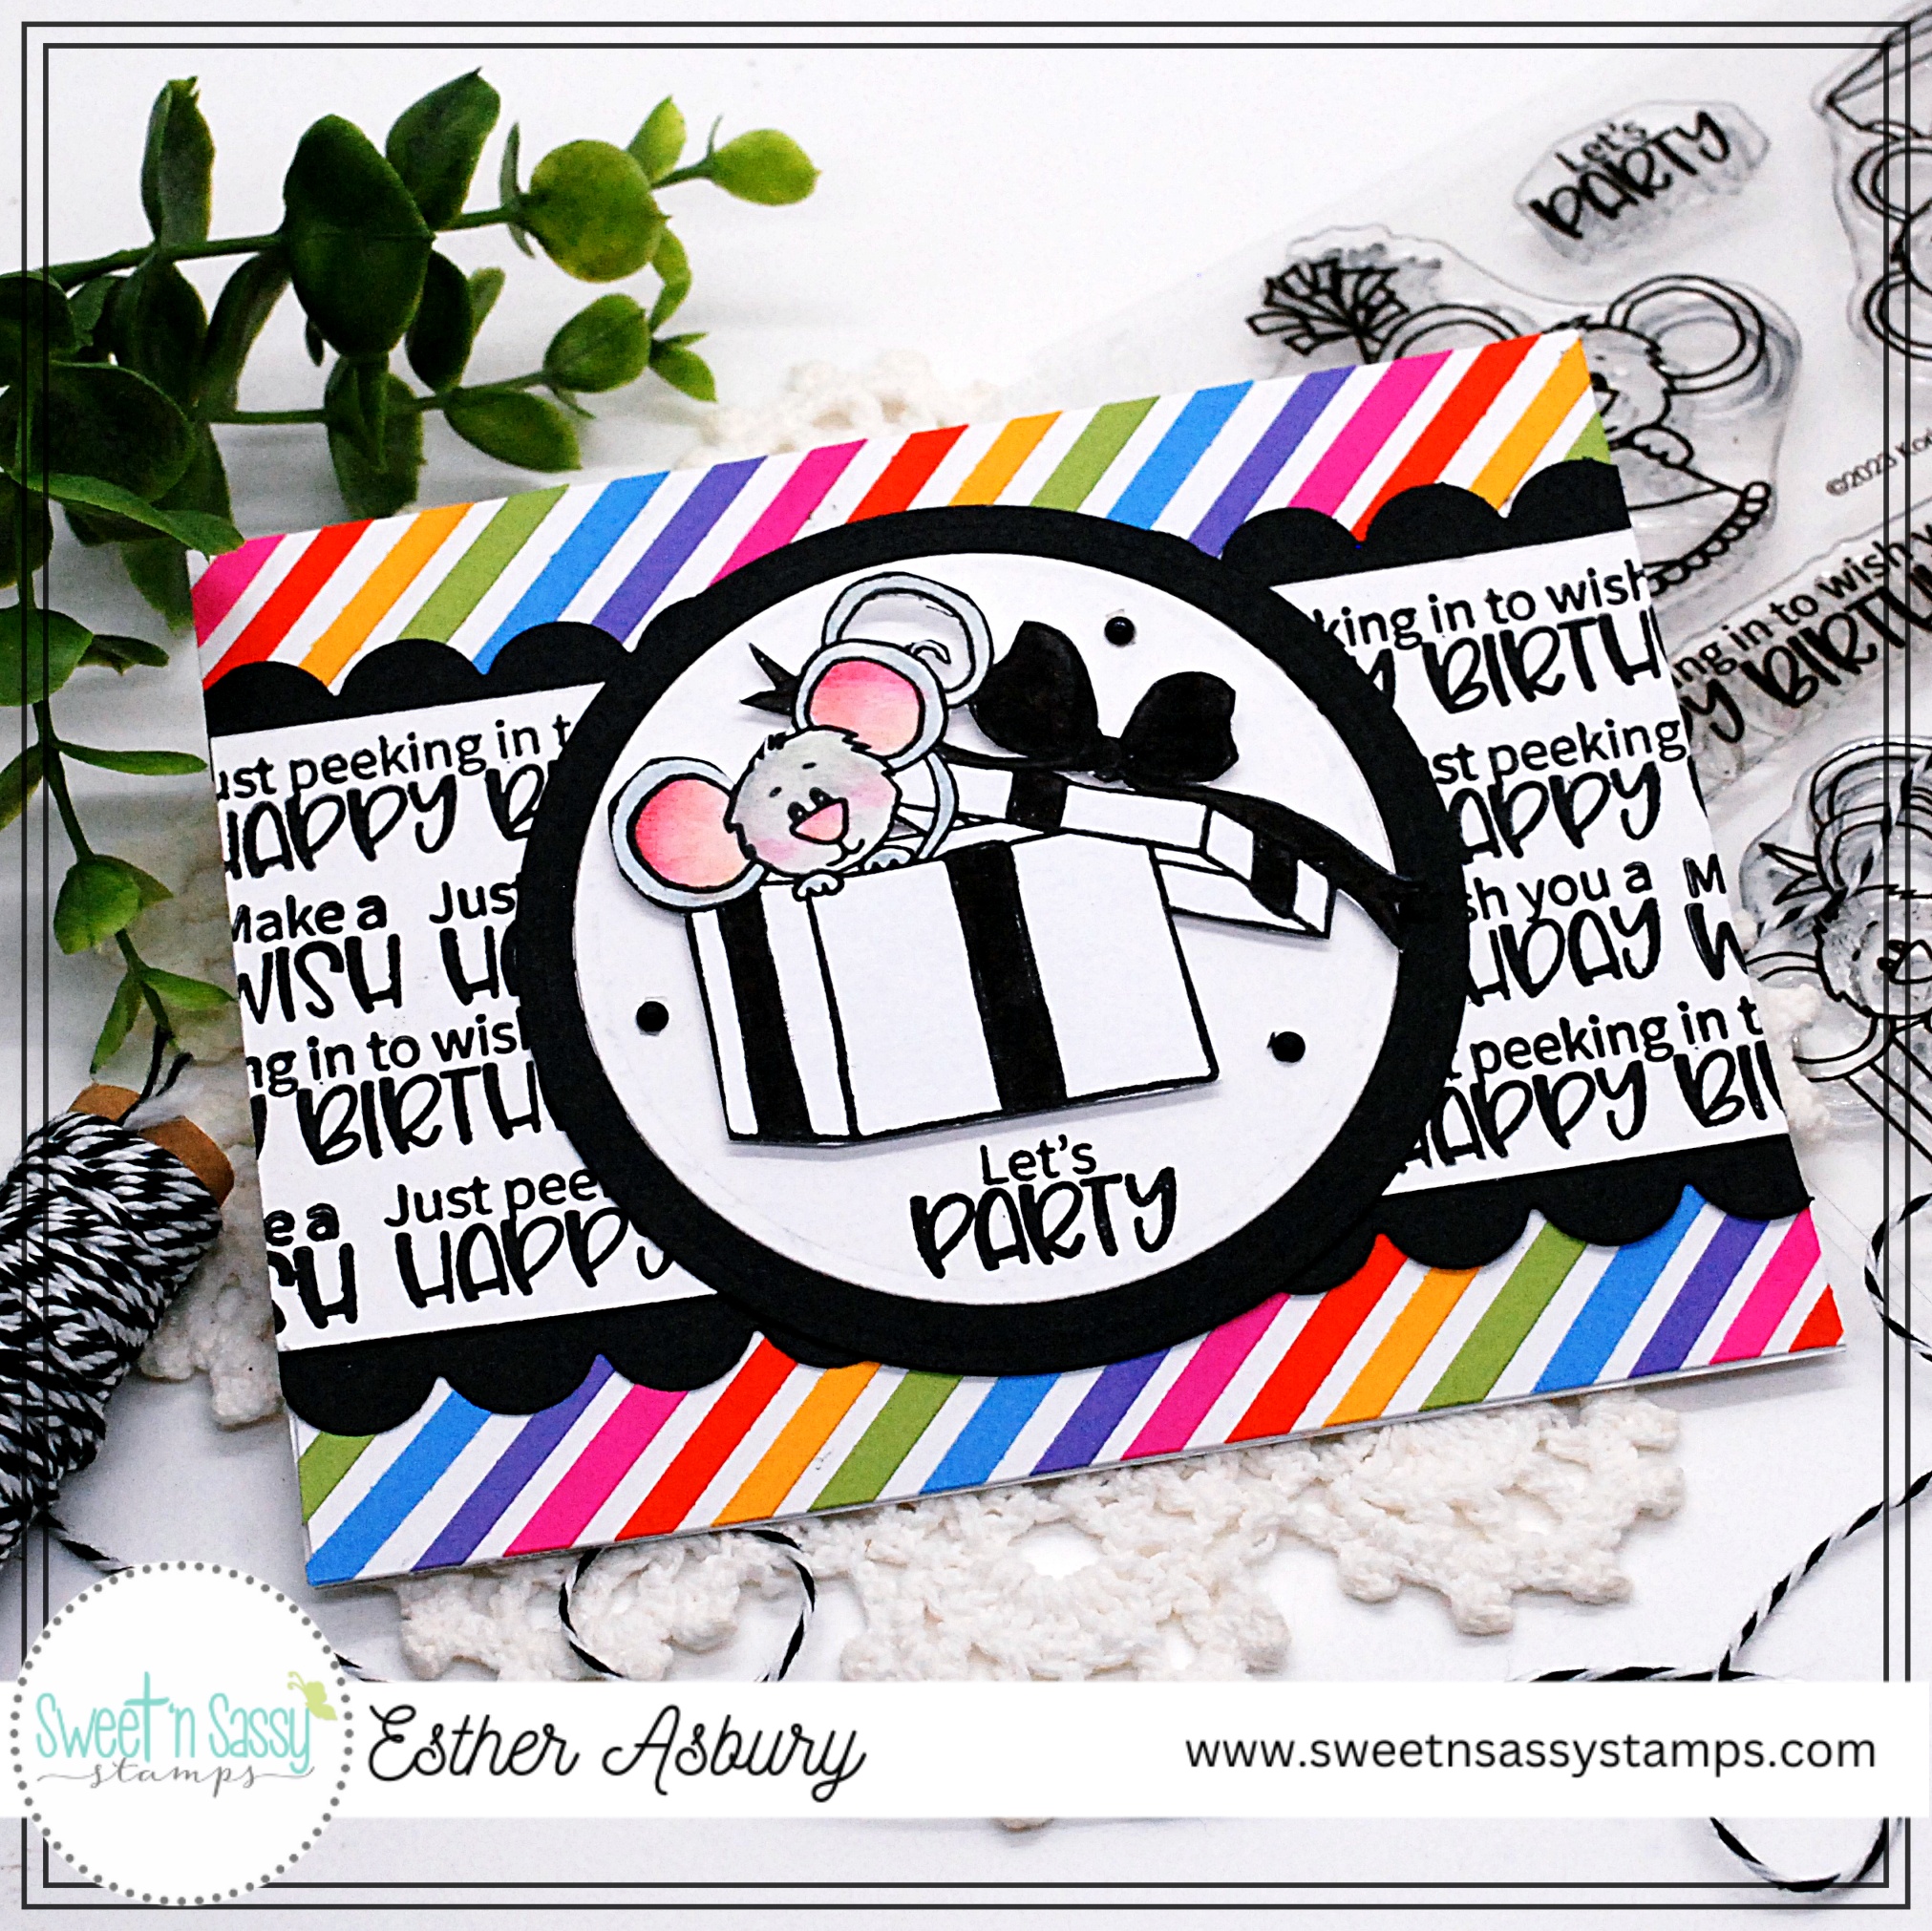
Tuesday Tip - Dryer Sheet
Esther shares a tip for using dies with lots of tiny pieces: "Place a dryer sheet under your paper when die cutting intricate designs."

Not only does the dryer sheet help the design to fully cut out, but it also catches quite a few of the tiny pieces so you don't have to punch them out manually.

Esther's faithdex card uses:
Flourish Background Stamp, Delicate Doily Die, Be Still & Know, Gratitude Matters, and Stitched Circles 2 Die set


Tuesday Tip - Make Multiples
Diane has a stamping tip for us today:
"When you use your big background stamps, stamp extras in various colors to have ready for future projects."
Check out some of the fun ways she used her Diagonal Plaid backgrounds.


Tuesday Tutorial:
Esther shares a fun tutorial for creating a rainbow stripe background using paper strips.

Directions:
1. Cut a bunch of paper strips in rainbow colors
2. Adhere them at an angle on across your card front
3. Trim strips and use the trimmed strips to finish your card front
4. Trim all edges


Tuesday Technique - Adding Dimension
In today's blog post, Esther shows us how to add a bit of dimension to our images.

For the butterfly, she stamped the image twice, fussy cut the wings of the butterfly, and glued them over the original image.

For the flower, she stamped the image twice, fussy cut a second flower, snipped between each petal, and popped it up with dimensional tape over the first one.

Supplies and Tools: Botanical Collages, Floral Doily Stencil, and Versafine Clair Nocturne Ink