Showing posts with label Texture Tiles 6. Show all posts

Saturday, April 2, 2022

With Love & Prayers

Happy Saturday! The April Release is here and you are going to LOVE it! My first card with the new release features the Stamp of the Month, Church Family. I love the mix of fonts and scripture references included in this set!


I recently sat down and created some backgrounds with the knit stencil. Honestly, I had no plans in mind when I created these backgrounds. I just picked some colors I liked and played knowing the ideas would hit me at some point. 


The blue background was the jumping off point for my card. To create the background, I used cool caribbean cardstock, the knit stencil along with cool caribbean, tempting turquoise and taken with teal dye inks. After I created this background, I searched though my stash of already colored images. I was excited when I came across this butterfly I colored a year ago. Yes, you read that right, a whole year ago when Garden Whimsy was first release. I remember coloring this image, trying to make it work for a card and almost pitching it in the trash when nothing panned out. Now, I am really glad I saved it!

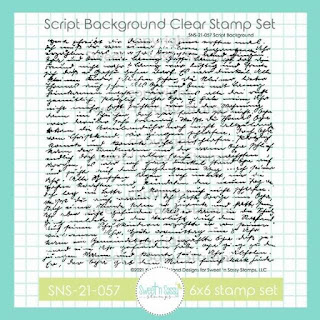
Now that I had the main image selected I knew I had to do more to the background. I added texture and visual interest by stamping the script background in brown, the dots from texture tiles 6 in white and adding black paint splatters to complete the look. 

I stamped the sentiments in black ink, cut to size and added black lines along the edges. I die cut the background panel, matted with black and attached to a white card base. I added some white highlights with a gel pen to the butterfly. I popped the butterfly up with foam tape, glued the sentiments down and added some light blue gems to the front to finish it off. 


I hope you enjoyed today's card and thanks so much for stopping by!

Karen

Sunday, August 22, 2021

Thanks

For today's card I decided to make my first mini slimline card. I cased fellow design team member Sheri Gilson's card layout and directions swapping out colors and sets used.


For the background, I used three different colors of inks to stamp the background because I wanted to the color to vary a bit. I find mini ink cubes are the easiest way to do this type of inking.


Supplies:

Autumn Gnomes

Texture Tiles 6 

Thanks Word Die

Strathmore Bristol Smooth paper

Cardstock: White, Certainly Celery and Garden Green

Arteza Real Brush Pens: Ginger, Orange Rust, Cadmium Orange, Bumble Bee Yellow and Green Tea

Inks: VersaFine Clair Nocturne, Grass Green, Fresh Asparagus, Dried Oregano


Thanks so much for stopping by,

Karen

Wednesday, August 11, 2021

Autumn Blessings and an Instagram Hop


Hi friends! It's time for the SNSS August Release Inspiration Hop on Instagram. You can head over to the Sweet 'n Sassy Stamps Instagram feed to start the hop. I'm so excited about my new stamp set with Sweet 'n Sassy Stamps that I just had to use it for my hop card this month.  I paired it with the adorable Autumn Gnomes set illustrated by my friend, Jenn Nilsson. Isn't this gnome image adorable?


I colored it and the leaves from Fall Breeze with Copic markers and then masked off the gnome and wheelbarrow and sponged the sky and added the ground with the Texture Tiles 6 set, sponging for an earthen look.  

The pretty papers are from last year's Pumkin & Spice pad from Prima. I hadn't used it yet, so I figured there's no time like the present to bust it out! {grin} I added the sentiment from Fall Breeze directly on the patterned paper, matted everything in dark brown and inked the edges, then layered some of the leaves at as a little embellishment to finish things off.

Thanks so much for stopping by today! I hope you have a fabulous day. If you haven't checked it out already, the August SNSS release is a must see!


Saturday, July 3, 2021

Thank You

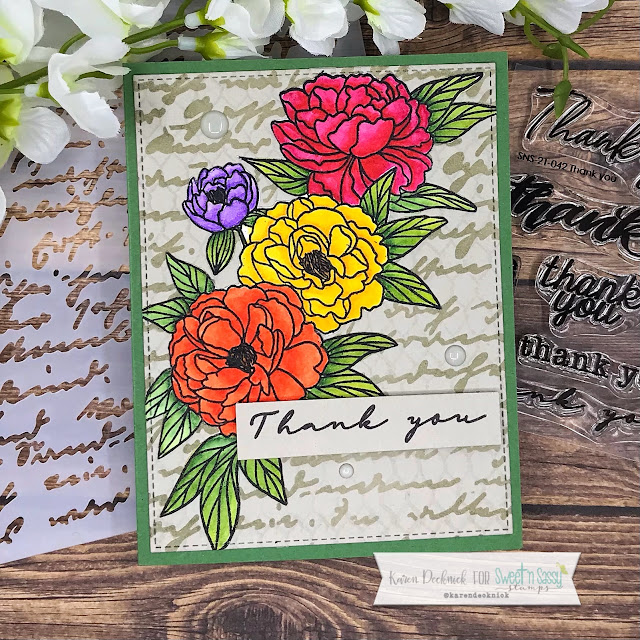
Welcome to July and a brand new release! The July Release is pretty awesome and I know you are going to love it and the inspiration from the team! My card features Thank You (stamp of the month) and Texture Tiles 6 from the new release along with previously released Peony Cluster and Script Stencil

As you may know by now, I have been on a mission this year to use up pieces from my extra bin. I rescued the floral piece from this bin. I colored this image months ago as a practice piece with some new watercolor pens never intending to make it into a card. In fact, I was so unhappy with my results (color of the flowers and the leaves were originally all different colors of greens) that I almost pitched it in the trash. I could hear Korin in my head, practically gasping at me throwing it out that I hung on to it thinking maybe one day I can salvage it. The sand colored piece was also in the same bin just minus the chicken wire.


When a sentiment set, like Thank you, is released I always reach for my bin to see what I might be able to pair it with. When I saw this floral image and the background piece I knew it was time to fix what I did not like about it. I added water with a brush and dabbed off color with a paper towel. Once I was satisfied with lightening the colors I added more color to the flowers, but in darker shades to try to give a little bit of depth. I redid the leaves so they looked like they belonged together. I used a combination of Arteza and Altenew brush pens/markers to color the image both times. I fussy cut the image when it was dry and set aside.

I thought the script background was a good fit for the floral image, but I felt like it needed a little bit more. I used the chicken wire from Texture Tiles 6 and Versamark ink to add a bit of texture to the background. To be honest, I was hoping it would be darker, but I'm kind of glad it's not and is more subtle. I used Wheat ink to stencil the script onto Sahara Sand cardstock.


I glued the floral to the front of the script panel, die cut out and adhered to a Garden Green card base. I stamped the sentiment with VersaFine Clair Nocturne ink on the same cardstock as the background panel. I trimmed the sentiment, attached to the front with foam tape and added three enamel dots to finish off the card. 

This Thank You set has ten sentiments all with different fonts. How often do you go digging through your sets to find just the right sentiment with the font you are looking for? I love having one set with the same sentiment in different fonts to go with my many styles of cards!


Thanks so much for stopping by,

Karen