Showing posts with label Friend word die. Show all posts

Friday, April 15, 2022

Simple and quick card to make


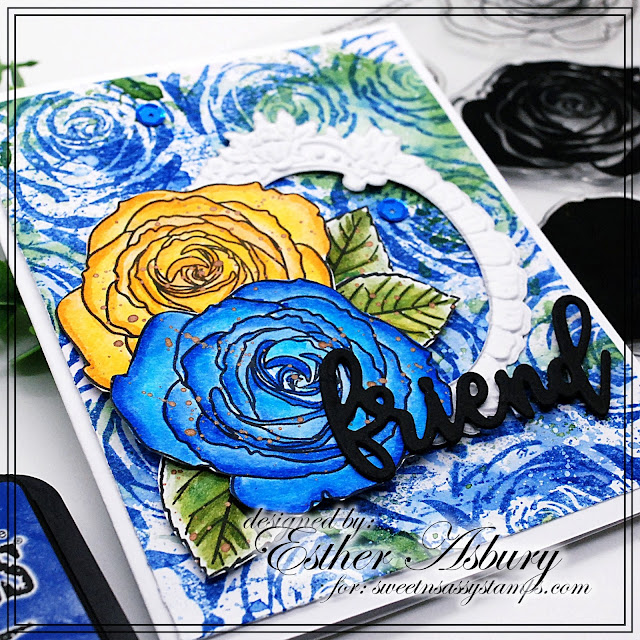
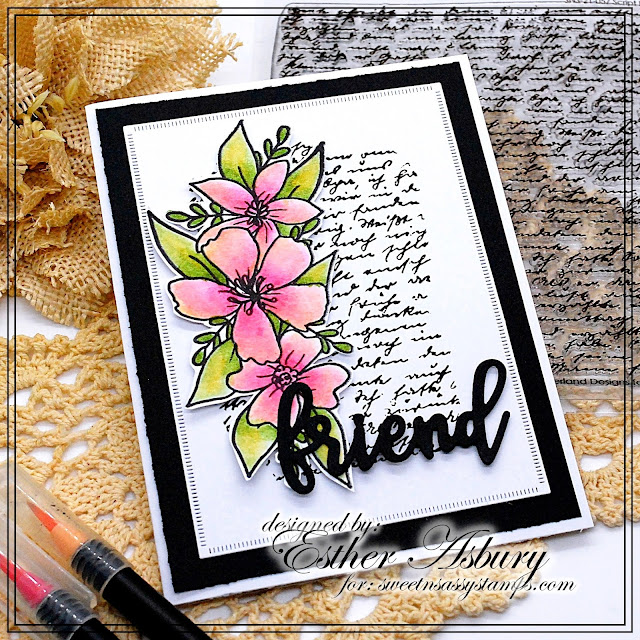
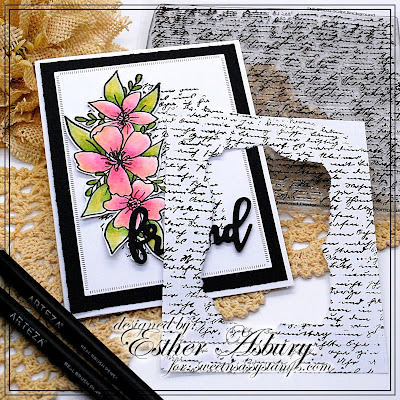
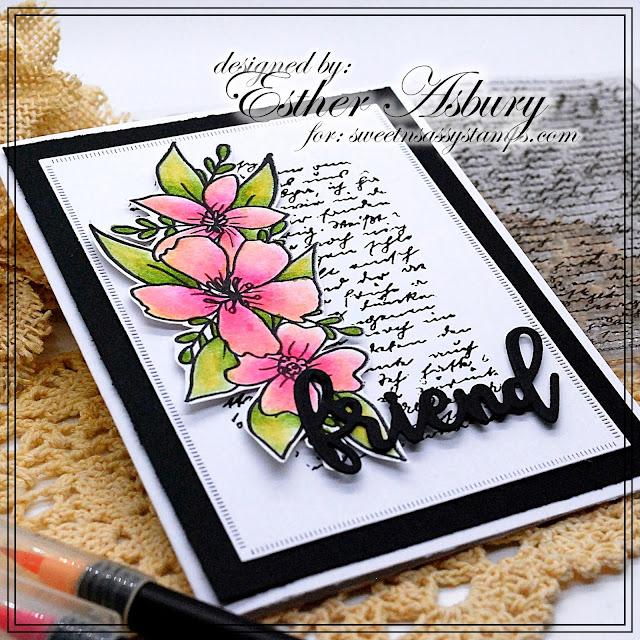
 Hello crafty friends! I hope you had a great week! Today I'm sharing a very simple card I made with supplies from Sweet 'n Sassy Stamps. It's always fun to make elaborate cards, but sometimes it's just as fun to make a simple card! And today's card is all about keeping it simple 😊.


I started by trimming my watercolor paper to use as the front panel for my A2 sized card base. On this panel, I used painter's tape to create a frame (roughly 1/4") that I would use as a guide to paint with my watercolors. When I painted this background, I was just relaxing & having fun painting - there was no planning whatsoever. I was letting the colors do their own thing, hahaha!


Once it dried, I removed the painter's tape, put some foam adhesive behind my new front panel, and adhered it to the card base. Then, out of
holographic & black cardstock, I die cut the Friend word die. I also added a sentiment from the new stamp set called Church Family, which I heat embossed on black cardstock with white embossing powder. Both were glued to the front panel. I added some embellishments to finish the card.

Before I let you go, I want to remind you to check out our Inspiration Hop on Instagram. The team has put together some AMAZING inspiration using supplies from this month's new release! Leave a comment on each post from our team and you will be entered to win a $25 gift code. I hope you join in the fun! Start on the SNSS IG page to get some awesome inspiration!


I hope you have enjoyed today's simple card and that it has give you some inspiration to do something fun & creative this weekend! For more inspiration you can follow me on Instagram.


*Products mentioned contain affiliated links at no extra cost to you.*

Monday, January 24, 2022

Roses


Esther here today sharing a pretty rose card. I created the background by ink smoosing prize ribbon and rustic wilderness ink on mix media paper. I then stamped over it with one of the rose images from True Beauty. I added some text from Texture Tiles 1 and some white paint splatters over that.  

The roses (from True Beauty) were stamped in Versafine Clair Nocturne Ink  and colored with Arteza real brush pens with metallic paint splatters over top. I die cut two of the Friend Word Die in black card stock and layered one over the other for extra thickness. 

Using the barouque frame 3D embossing folder (Altenew) I embossed the frame on white card stock and die cut it with the matching die in the sweet friend die set (Altenew). A few blue sequins finished off this sweet friendship card. 

   ~~~This post contains affiliate links at no extra cost to you~~~


Friday, January 21, 2022

Simple card for a friend

Hello crafty friends! I hope your Friday is going great so far. I’m excited to share with you a quick card I made using one of the new stamp sets from this month’s release, called Let's Get Cozy.

I made an A2 top folding card and cut another piece for the front panel. On this piece I used the Diamond Tile stencil with one of my favorite inks. I only inked the corner where I would place the stamp images.
 

I then stamped the chair image from the Let's Get Cozy stamp set and colored it with Copic markers. Once I was done coloring, I fussy cut the image and glued it onto the front panel with foam tape. I also used the Friend word die and a sentiment from the Sentimental Wordfetti stamp set. To finish the card I used some clear sequins.

On my Instagram (@harshgurl), I also shared another card using the Let's Get Cozy stamp set. This time I made a little scene with it! 


I hope you have enjoyed today's blog post! Don't forget to checkout this month's new release, you will love it! 

For more inspiration you can follow me on Instagram: @harshgurl. As always, I do hope this has given you some inspiration to do something fun and creative today. See you next time!


*Products mentioned contain affiliated links at no extra cost to you.*

Saturday, January 15, 2022

For My Friend

Happy Saturday Everyone! I am loving the chair in the new Let's Get Cozy set by Korin. I just want to curl up in it with a good book and a cup of tea.


I stamped the chair and coffee cups with VersaFine Clair Nocturne ink. I used my prima watercolors(woodland and tropicals) to color the images. I inked a white panel using orchid opulence ink and the delightfully delicate stencil. Love this stencil! I matted it on coordinating cardstock and then onto a grey card base.

I die cut the word friend from the same cardstock as the mat and glued them together. I fussy cut the chair and coffee cups. Then, I figured out placement of the pieces, stamped my friend in black ink and attached the images and sentiment. 


Let's Get Cozy


 Lots of Love


Delightfully Delicate Stencil 


Friend Word Die


I hope you enjoyed today's card and thanks so much for stopping by!

Karen


Monday, December 13, 2021

Masked Background


Hello friend, Esther here today with a clean-and-simple card featuring a quick way to create a masked background. 

I cut a piece of scrap paper the size of a card front and then tore a jagged opening in the middle. I placed this scrap paper over my card front before stamping the script background stamp, and wa-la, a pretty partial stamped background!


Would you like to win FREE STAMPS FOR A YEAR? Come link up to the final challenge for 2021 on Sweet n Sassy Stamp's VIP Facebook page using at least one SnSS product on your creation. (Remember there are digital stamps if you don't own any regular ones!).  

CLICK HERE to be taken to the challenge album. 

~~~This post contains affiliate links at no extra cost to you~~~

Supplies and Tools:


Thursday, September 2, 2021

A few recent cards and a sneak peek!

 Hello! I am sharing a couple of cards that I recently made PLUS I have a sneak peek of some new stamps and dies that will be available to order in the Sweet ‘n Sassy Stamps shop tomorrow!

First, I created several cards with the Blooming Anemones stamp set and the Friend Word Die. Here's two of my favorites. This would be pretty in so many color combinations! I created a reverse mask by die cutting the center of a 4 1/4 x 5 1/2 piece of cardstock with a scalloped rectangle shape. The outside "frame" was placed over the front of my card and then I added three colors of ink to each one with dye based inks and blending brushes. When the center was filled in with color, I removed my mask and stamped the flower image with black ink. Then I layered two Friend die cuts and added it to the front and finished with a few sequins.


My next card was created with the Birds & Blooms stamp set. I needed a few sympathy cards and I almost always lean toward blues, greens, and purples. I skipped the purple here and kept the card CAS.


Are you ready for a sneak peek? Be sure to check out What's NEW tomorrow! In the meantime, I'll share a card and a tag I made. There's FIVE products used here from the new release! :)


Have a great day!
Diane


Wednesday, July 28, 2021

Keep Swimming

 Hi friends! It's Julee popping in today with a colorful little encouragement card.


As soon as I saw the Paint Splatters Stencil I knew I wanted to do a rainbow background with it.  So I pulled out a rainbow of ink pads and got to work.  The background seemed like it would go with the fun critters from Fin-tastic Friends, and Mer-mazing, so I stamped them out, colored with Copics, then cut them out.


The keep swimming sentiment is from Mer-mazing and I embossed it in white on black cardstock and doodled a frame around it,  I thought it would be fun if the lobster was holding the sign.  The friend is cut with the new Friend Word Die, and I added it behind the lobster, so the two sentiments are connected.  A little glossy glaze on the eyes, and this fun card was done.

Thanks so much for stopping by today! I hope you have a fabulous day.


Monday, July 12, 2021

One Stamp Two Ways

Hello friend, Esther here today sharing two cards that use the same stamp in very different ways. 


For this first card I embossed the Blooming Anemones in gold on watercolor paper and used my Zenacolor Watercolor Paints to color it. I then used vintage photo distress ink to stencil the Script Stencil in the background and also inked around the edges with it. 

Next, I die cut the new Friend Die from watercolor paper and inked it up with walnut stain distress ink. I then cut a second one from white card stock and layered it for added dimension. The last step was adding a few white paint splatters for extra interest. 


My second card also features the Blooming Anemones stamp set. This time I embossed it in white on a piece of vellum and fussy cut it. 

Heat Embossing Vellum Tip: If you're having trouble with your vellum crinkling up when you heat emboss -- try embossing from the underside. It works like a charm and doesn't warp the vellum!

I then stamped a panel using Texture Tiles 4  and kitsch flamingo distress oxide and layered it over a piece of white card stock embossed with the intertwine 3D embossing folder from Sizzix. The sentiment (Faith & Hope Word Dies) was die cut from mix media paper and inked with kitsch flamingo and picked raspberry distress oxide.  Last of all I added three pink sequins for a bit of sparkle and bling!


  ~~~This post contains affiliate links at no extra cost to you~~~

Wednesday, June 30, 2021

Hello Friend! by Charmaine Canham

 Hello Friend!

I hope you are doing well!  I made you a card using the brand new Blooming Anemones stamp set and Friend Word dieLet me show you how to make a pocket shaker card.


First, I heat embossed the florals on heavyweight A2 cardstock.
I used Platinum embossing powder with Versamark Watermark ink.


Next, heat emboss the additional flower in the stamp set and color with Copics.
Fussy cut by hand and set aside.


Die cut 3 pieces of the Friend word die. Dip one "friend" in the Versamark and heat emboss.
Be careful to not burn your fingers. I used Gina K Designs Connect glue to adhere the pieces.


I have a die from MFT that cuts out a stitched window, but you can also use any oval or rectangle die. To give the card front a bit more pizzazz, use an embossing folder, like this 3D one from Altenew.

Now, to build the window. Turn the card front around and position the orange floral in the opening. Use double-sided tape right around the window. Cut a piece of acetate to cover the opening. 

Bring out the dimensional foam tape and build up the back. One area for the window and one all-around for the frame. Place glitter or shaker elements in this pocket and place another piece of acetate over the window. This seals all the shakers. 
I used gold paper as the background to compliment the platinum in the front.

Now you have the "framed tape" that will adhere to a top-folding card base. 

Adhere the "Friend" to the acetate; I used Connect Glue again.
Place a few rhinestones around the card to balance the white and platinum.

And there she is! A fairly simple card fit for any occasion.

Have you seen the new release?? Isn't it fantastic? Check it out to save money on early orders!

I hope you liked today's card and will try to make a shaker card!

Stay well,

Charmaine

Follow me on Facebook and Instagram for almost daily inspiration.