Hello everyone! I hope you had a wonderful Christmas time. I still want to keep the 'winter' feeling for today's card so that's the theme I'm going for.
I used the little snowman from 'Snow Much Fun' and colored it with alcohol markers. I die cut a piece of paper and stamped the message on it with a blue ink. I love the lettering for this sentence! I added a little blue border to the die cut paper with the same ink pad.
I realized I didn't have any real 'winter' patterned papers so I looked for papers with matching colors for the image (you could make your own winter background with some of the snowflake from the set too, just wasn't thinking about that at that time).
The snowmen in this set are so cute they don't need a lot to make a great card!
I hope you're inspired to your own cards :)
- Lucinde
Showing posts with label Snow Much Fun. Show all posts
Saturday, December 28, 2019
Friday, December 27, 2019
Baby It's Cold Outside!
For my first card, the background was from when I practiced some ink blending with Distress Oxides (Shaded Lilac, Hickory Smoke, and Black Soot). Squee - the sweetness!

For my next two cards, I created some dimensional hills with a stitched border die. For these backgrounds, I used Chipped Sapphire, Dusty Concord, and Shaded Lilac Distress Oxide.

For this last card, I also added some background trees using the Thrill of Hope Set - I love this silhouette set! I added some snowflake buttons to finish my card.
This was super fun and these critters make me so happy!! Aren't these polar bears so so so cute!
Thanks for stopping by!
Lyn
Tuesday, December 17, 2019
Winter Friends
Hello All!
The countdown to Christmas is on! Are you still making Christmas cards?
Today I am sharing a couple of cards that can be Christmas or general winter cards. The first one uses the brand new Winter Hugs Stamp Set.
He is just the cutest! I colored him with Copics, using the pointillism technique to give him a bit of a warm, fuzzy, baby penguin look.
The background was actually a reject from a prior project. I stamped snowflakes from the Folk Art Stamp Set in Versamark ink and heat embossed them in white. Then I used the Smooshing technique to add pink and red color to the background.
Snowy hills, a sentiment and a few sequins finish it off.
This next card uses some oldies but goodies stamp sets.
I started with the line of trees from the Thrill of Hope Stamp Set. I used my MISTI to get perfect placement and did second generation stamping in red ink. I stamped the larger two trees in the same red ink, again using my MISTI so I could get good coverage of ink.
Next, I stamped snowflakes from the Thrill of Hope Stamp Set as well as the Snow Much Fun Stamp Set in grey. Lastly, I stamped the deer image in the Thrill of Hope Stamp Set in Versafine Black, using the MISTI to get solid ink coverage.
I was inspired by some of Korin's recent cards to use patterned paper and do some layering; this was difficult as it is not something I do often anymore! I do like how it turned out though. I added a sentiment strip across the bottom, heat embossing several sentiments from the Christmas Wordfetti Stamp Set in silver ep. Some embellies and a linen thread bow finish it off!
That's it for me! I would like to wish you all a very Merry Christmas and I will see you back on the blog next year!
Lee Ann
The countdown to Christmas is on! Are you still making Christmas cards?
Today I am sharing a couple of cards that can be Christmas or general winter cards. The first one uses the brand new Winter Hugs Stamp Set.
He is just the cutest! I colored him with Copics, using the pointillism technique to give him a bit of a warm, fuzzy, baby penguin look.
The background was actually a reject from a prior project. I stamped snowflakes from the Folk Art Stamp Set in Versamark ink and heat embossed them in white. Then I used the Smooshing technique to add pink and red color to the background.
Snowy hills, a sentiment and a few sequins finish it off.
This next card uses some oldies but goodies stamp sets.
I started with the line of trees from the Thrill of Hope Stamp Set. I used my MISTI to get perfect placement and did second generation stamping in red ink. I stamped the larger two trees in the same red ink, again using my MISTI so I could get good coverage of ink.
Next, I stamped snowflakes from the Thrill of Hope Stamp Set as well as the Snow Much Fun Stamp Set in grey. Lastly, I stamped the deer image in the Thrill of Hope Stamp Set in Versafine Black, using the MISTI to get solid ink coverage.
I was inspired by some of Korin's recent cards to use patterned paper and do some layering; this was difficult as it is not something I do often anymore! I do like how it turned out though. I added a sentiment strip across the bottom, heat embossing several sentiments from the Christmas Wordfetti Stamp Set in silver ep. Some embellies and a linen thread bow finish it off!
That's it for me! I would like to wish you all a very Merry Christmas and I will see you back on the blog next year!
Lee Ann
Thursday, November 21, 2019
snow much fun
Good morning! Today I have two cards with some more cute snowmen stamps from this month's release at Sweet ‘n Sassy Stamps! This set is called Snow Much Fun. And if you haven't checked out SNSS’s birthday sale yet, it's not too late! This sale runs all month long. No code needed!
I die cut an oval shape from plain copy paper for my first card and used it as a stencil to sponge on a bit of blue. The I stamped the flakes and sentiment and popped the snowman up. There's a little Stickles that doesn't show in the photo.
I also popped up the second snowman...this time in front of a die cut window with patterned paper behind it. If you look closely, there's some subtle red snowflakes stamped on the red cardstock base.
Have a great day!
Diane
Monday, November 18, 2019
Snow Much Fun!
Hello Sweet 'n Sassy Stampers!
It's Ceal, here to share a couple cards with you today featuring one of our super cute November release sets. We released several snowmen/snow sets this month and they are all fabulous!
I hope you enjoyed our release hop and got lots of inspiration from the team. If not you can go HERE and hop through all the participating blogs.
For my cards I used the Snow Much Fun set. The first card I started with a white top folding card base and a white panel. I paired it up with the Thrill of Hope set by using the trees.
The second card I started with a top folding card base and a white panel as well and then used the LCBB to create the hills and a stencil to create the snow. The greeting is from the Deck The Halls set.
Tuesday, November 5, 2019
Snow Much Fun!
Hello, Hello!
Yes, it is that time of year, when everything seems to revolve around Christmas preparations. That includes greeting cards! This month's stamp sets have wowed me! Versatile, compatible with each other and just plain fun! Like these snow peeps!
These adorable snowmen are from the Snow Much Fun Stamp Set designed by Krista Hamrick. Gosh, they are cute! I colored this one with Copics and fussy cut him out.
The background is done with the new Folk Art Snowflakes Stamp set by NinaB Designs. I stamped the largest of the flakes in Versamark ink on watercolor paper and heat embossed white. Next, the background received a light wash of Daniel Smith Watercolor paint in blue. I let it dry and then added a second layer.
The smaller snowflake was done similarly, then it was fussy cut out. I layered the snowflakes and popped the snowman up on dimensional tape.
The perfect sentiment seemed to be 'Be Jolly' from the Deck the Halls Stamp Set. I was able to get a nice,solid image because I used my MISTI which allowed me to stamp multiple times, getting good coverage on the watercolor paper.
The next card is similar (and I do seem to be in a color rut, LOL!), as I used the same Snow Much Fun Stamp Set and did a watercolor wash on the back panel.
Mr. Snowman is again colored with Copics and fussy cut out.
The snowflakes, some of which are from the Snow Much Fun set and some from the Folk Art Snowflakes set, were stamped in versamark and heat embossed with white embossing powder. Next, I did a wash of Daniel Smith Watercolor in teal/aqua shades. I let the first layer dry and added a second layer after that.
Instead of stamping a sentiment, I used a die cut 'Be Jolly'. I came up with the idea of him twirling atop the 'l' in Jolly. I die cut the words 4 times in white cs and glued them together for dimension, after coloring the top die cut in aqua/teal Copics in ombre fashion. Sequins and some Wink of Stella were added for shine.
That's all for me today!
Don't forget, this month's FREE stamp set is the stunning Poinsettia Greetings, with a purchase of $75 or more.
Plus, You can save 10% on the new release bundle until November 9th, so if you were considering shopping, now is the time!
AND, it is Sweet n Sassy Stamps 12 Birthday and we are celebrating this amazing company! All month long you can save 12%- and that includes the new release bundle! See site for details.
Yes, it is that time of year, when everything seems to revolve around Christmas preparations. That includes greeting cards! This month's stamp sets have wowed me! Versatile, compatible with each other and just plain fun! Like these snow peeps!
These adorable snowmen are from the Snow Much Fun Stamp Set designed by Krista Hamrick. Gosh, they are cute! I colored this one with Copics and fussy cut him out.
The background is done with the new Folk Art Snowflakes Stamp set by NinaB Designs. I stamped the largest of the flakes in Versamark ink on watercolor paper and heat embossed white. Next, the background received a light wash of Daniel Smith Watercolor paint in blue. I let it dry and then added a second layer.
The smaller snowflake was done similarly, then it was fussy cut out. I layered the snowflakes and popped the snowman up on dimensional tape.
The perfect sentiment seemed to be 'Be Jolly' from the Deck the Halls Stamp Set. I was able to get a nice,solid image because I used my MISTI which allowed me to stamp multiple times, getting good coverage on the watercolor paper.
The next card is similar (and I do seem to be in a color rut, LOL!), as I used the same Snow Much Fun Stamp Set and did a watercolor wash on the back panel.
Mr. Snowman is again colored with Copics and fussy cut out.
The snowflakes, some of which are from the Snow Much Fun set and some from the Folk Art Snowflakes set, were stamped in versamark and heat embossed with white embossing powder. Next, I did a wash of Daniel Smith Watercolor in teal/aqua shades. I let the first layer dry and added a second layer after that.
Instead of stamping a sentiment, I used a die cut 'Be Jolly'. I came up with the idea of him twirling atop the 'l' in Jolly. I die cut the words 4 times in white cs and glued them together for dimension, after coloring the top die cut in aqua/teal Copics in ombre fashion. Sequins and some Wink of Stella were added for shine.
That's all for me today!
Don't forget, this month's FREE stamp set is the stunning Poinsettia Greetings, with a purchase of $75 or more.
Plus, You can save 10% on the new release bundle until November 9th, so if you were considering shopping, now is the time!
AND, it is Sweet n Sassy Stamps 12 Birthday and we are celebrating this amazing company! All month long you can save 12%- and that includes the new release bundle! See site for details.
Monday, November 4, 2019
Ombre is Snow Fun

Hello Sweet 'n Sassy Stampers!
It's Ceal here to share a card of two with you today.
I absolutely LOVE the November release, it has three snow/snowmen sets in it and I love all things snow!
I used the Folk Art Snowflakes set on both of my cards just different colors of ink. To make them I started with a top folding white card base and a panel of bristol, I love the way ink blends on bristol cardstock. I stamped the snowflake images with embossing ink and then embossed them in white. Next using the Life Changing Blender brushes I blended the background from dark to light creating an ombr effect. To finish the card I added a greeting from the Snow Much Fun set.

Also it's our Birthday, we are 12 years old and celebrating the entire month of November.
Saturday, November 2, 2019
Snow Much Coffee Goodness
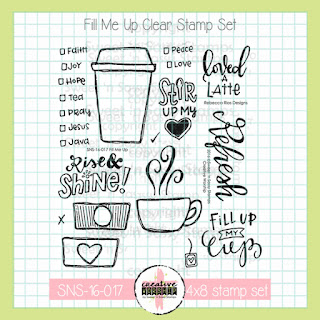
Hi Sweet 'n Sassy friends! It's Julee popping in to share a couple little creations I've been working on lately. It's no secret that I love coffee, so I can never resist making a few cards for the Coffee Lovers Blog Hops. The Fall/Winter hop started yesterday and I shared another coffee card on our Super Sponsor post. Here are a couple others I created dressing up the big to go cup from the Fill Me Up set.
My second card for today, brings a fall spin to the cup, using the Fur-ever Friends set to add leaves and color with Spectrum Noir alcohol markers. I created a sweet little gift card pocket and added a vellum sentiment from the Donut Worry set for the perfect little gifty for a coffee loving friend.
Thanks so much for stopping by today! Be sure to pop over to the website to see the entire NEW release, plus take advantage of the 12% sitewide savings for our 12th birthday month!
![]() | ![]() |
For this first card, I paired the brand new Snow Much Fun set with the cup for a fun wintry feel. This little snow friend is so jolly, I couldn't resist having him skating on top of the cup. I created a fun background by randomly stamping the snowflakes from the set in distress oxides and then blending with distress inks. A few snowflakes and some ribbon and jingle bells finish things off.
My second card for today, brings a fall spin to the cup, using the Fur-ever Friends set to add leaves and color with Spectrum Noir alcohol markers. I created a sweet little gift card pocket and added a vellum sentiment from the Donut Worry set for the perfect little gifty for a coffee loving friend.
Thanks so much for stopping by today! Be sure to pop over to the website to see the entire NEW release, plus take advantage of the 12% sitewide savings for our 12th birthday month!
Labels:
Autumn Bounty,
Coffee,
Donut Worry,
Fill Me Up,
Fur-ever Friends,
Julee Tilman,
November 2019 Release,
Snow Much Fun,
Winter
Subscribe to:
Posts (Atom)