Showing posts with label peaceful peonies. Show all posts

Saturday, April 27, 2019

Peaceful Peonies

Hello everyone! Today I want to share two cards I made with the Peaceful Peonies stamp set.

I stamped the images on marker paper and I used a die to cut the rectangles out of the paper. For the first card I only colored the part that's inside the die cut. I really like the contrast between the black and white background and the colored part. I only added a red ribbon and a couple of sequins to finish this card and to add a bit more color.
For the second card I used the message from John 14:27 that's in the stamp set and stamped it beneath the flower. I colored the flower and added a couple of patterned papers to give the card a bit more color in the background. I kept the rest of the card clean and simple so the focus goes to the message and the flower.
I used the stamp set Peaceful Peonies
http://www.sweetnsassystamps.com/peaceful-peonies-clear-stamp-set/
I hope you're inspired to create!
- Lucinde

Saturday, March 23, 2019

Doodle Florals

Hello everyone! Today I want to show you two cards I made with the Doodle Florals stamp set; this months stamp set of the month!


I stamped a lot of the images, cut them out and colored them with alcohol markes so I had a couple of flowers to work with.


For the first card I made a horizontal arrangement with the flowers and some of the leaves. I added matching background papers and stamped the message Hugs and prayers on the card. It's from the Peaceful Peonies set, a great set if you're looking for beautiful sentiments.


For the second card I die cut a circle from patterned paper and I used it as a guide to arrange the flowers. I just added three flowers and a couple of leaves behind them. This card is really easy to make when you already pre-colored the flowers. Two background papers, a card base, some enamel dots and the stamped images. That's it!


For these cards I used the Doodle Florals and Peaceful Peonies stamp sets.

http://www.sweetnsassystamps.com/peaceful-peonies-clear-stamp-set/ http://www.sweetnsassystamps.com/march-stamp-of-the-month-doodle-florals-clear-stamp-set/

I hope you're inspired to create!
- Lucinde

Saturday, January 20, 2018

A Friend Loveth At All Times

Hi Sweet Friends!

Julie here, today I am sharing an easy mixed media card using Majestic Monarchs along with Peaceful Peonies.


To create the background, I pulled out three colors of distress oxide inks, tapped them onto a silicone craft mat, spritzed lightly with water and placed a piece of white cardstock into the ink. I used a heat tool to dry the ink before adding each color, then spritzed lightly with black soot distress ink before trimming and mounting onto black cardstock.

The Majestic Monarchs butterflies were stamped using versafine ink onto white cardstock and heat embossed with clear embossing powder. I used water-based markers to watercolor the butterflies before fussy-cutting each image and mounting them onto the card front.
 
I heat embossed the sentiment from Peaceful Peonies onto black cardstock with white embossing powder and added to the card front with dimensional foam.

The card was finished off by using a glitter pen for shimmer on the butterflies and a few crystal drops in the background.


Also, don't forget that the Scene Silhouettes: Wetlands is the January 2018 Stamp of the Month and is FREE with a $60 order through 1/31/18.
                              

I hope I have inspired you today and thanks for taking the time to visit us- hugs and God Bless, sweet friends!

Saturday, November 11, 2017

Peaceful Sympathy

Hello Sweet 'n Sassy Stampers!  Have you been having fun with all of our 10th Birthday Celebration activities?  

Yesterday we gave away two wonderful sentiment stamp sets to one lucky winner.  The cards I am sharing today use both the So Grateful and Keep in Touch, Too sets that were given away.

Both cards use a stencil mono printing technique found on Karen Dunbrook's Blog for the background.  Apply inks (Oxide inks were used here) to the back of a stencil.  Spritz with water and press onto a heavy piece of card stock.  Several prints, each getting a little lighter, can be obtained by continuing to spritz and press onto different pieces of card stock.  More colors can be added to each panel, turning the stencil slightly as each layer is added.

Since I found myself needing a sympathy card this week, I reached for the beautiful Peaceful Peonies stamp set.  The same Oxide Ink colors used for the mono printing were applied to my craft mat and spritzed with water.  The craft mat was used as a stamp pad to randomly stamp the peony on another piece of card stock.  One of the sentiments from the same set was stamped randomly over the flowers to finish the background.  The inks on the craft mat also became a paint palette for watercoloring the focal image.  The sympathy greeting from the Keep in Touch, Too stamp set was white embossed on a cut vellum banner and stitched to the card.  The design of the card came from Freshly Made Sketches.

The same mono printing technique was used to create the background for this card.  The Typewriter Text Background was lightly stamped over the panel.  Silhouette images from the Nature Silhouettes set were stamped on the left side.  A quote from Faith Quote Blocks was added along with a white embossed sentiment from the So Grateful stamp set.

Thanks so much for stopping by!


Be sure to check out our Facebook and Instagram pages for more fun discounts and giveaways during the month of November...We're celebrating all month!!! 

Have a wonderful day!
Hugs,
Cathy

Saturday, August 5, 2017

Stamping Backgrounds

I love to use stamps to create my own backgrounds. That way you can completely customize a card and give it the look and feel you like. And when you want to have specific colors, you can add them yourself and you don't have to look for the matching papers. So for todays card I made a background with the 'Scribble Flowers' stamp set. The large flowers are great to make a background!
I wanted to create a background without any hard lines so I decided to color my stamps with Distress markers instead of a regular ink. I used a purple, yellow and green color for the flowers and colored the background with a soft blue color. I colored the stamps with the marker and stamped them onto watercolor paper. I blended out the lines with a waterbrush and added a little bit more color with the markers inside the lines of the flowers. After that I blended that color out too, so that the entire flower would get a little bit more color. If you want a really soft background you could skip this step and only blend out the lines you stamped. I only used two flowers from the stamp set and stamped them repeatedly on my background. When I stamped all the images I added the blue color around them to get rid of the white spaces between the flowers.
I liked the way the background turned out so I decided to only add a little sentiment on top of it. I stamped 'thinking of you' from the 'Peaceful Peonies' stamp set with a white ink on a black background. I cut out a little flag and added it to my card with foam tape. To finish the card I added a couple of sequins too.
http://www.sweetnsassystamps.com/scribble-flowers-clear-stamp-set/

http://www.sweetnsassystamps.com/peaceful-peonies-clear-stamp-set/
I hope my card inspires you to create a background yourself!

- Lucinde

Tuesday, July 25, 2017

Peaceful Peonies- Peace I Leave With You

Hello Sweet Friends!  Julie here, sharing a card created with the Peaceful Peonies Clear Stamp Set (designed by NinaB Designs).  


I absolutely love the Scripture as well as the other sentiments in this set plus the gorgeous peonies- don't you? Perfect for so many occasions!

To create this card, stamp the large peony image multiple times onto white cardstock with embossing ink, heat emboss the flowers with white embossing powder and use water-based markers with a water brush to watercolor the images. 

Once the panel has thoroughly dried, trim the edges and adhere a strip of green satin ribbon (I used a scrap piece from my massive stash-lol!)  before looping metallic silver thread behind the verse sentiment. 

Finish off the card by adhering to a white card base and applying shimmer to the flower petals with a clear glitter pen. 

We are so thankful that you stopped by- may the Lord grant you His Peace this week!

Wednesday, June 7, 2017

A Friend Loveth

Hello Sweet Friends!  Julie here to share a quick Mixed Media card using the Peaceful Peonies Clear Stamp Set (designed by NinaB Designs for Sweet ‘n Sassy Stamps).  


To create this card- heat emboss the large peony image from the  Peaceful Peonies Clear Stamp Set with black embossing powder onto white cardstock. 

Once the embossing has cooled, watercolor the image using water-based markers and distress inks, layering the colors and carefully using the heat tool to dry the layers.  Fussy-cut the image cutting off the leaves, use a clear shimmer pen to add shimmer to the petals and the Sharpie® Extra Fine White Paint Pen  to add highlights to the center of the flower.

For the background panel, tap a bit of picked raspberry distress ink onto a cellophane envelope, spritz with water and lay a piece of white cardstock into the ink, smooshing it around a bit.  Lift up the cardstock and dry with the heat tool. 

Repeat the same steps as above with diluted hickory smoke distress ink and once you are satisfied, use a paint brush to splatter hickory smoke ink onto the panel before trimming and mounting onto black cardstock.

Stamp the sentiment from the Peaceful Peonies Clear Stamp Set with archival black ink and mount the trimmed background panel onto black cardstock.

Mount white cardstock onto a piece of black cardstock, add the layer created with patterned paper before mounting the main focal image layer and the peony.

Adhere the entire card front onto the white card base and add a few ebony black crystal drops to finish off the card.

I just love the Peaceful Peonies Clear Stamp Set and I hope I have inspired you today!   

Thanks for stopping by- have a blessed week, sweet friends!

Sunday, May 28, 2017

God is Our Refuge and Strength

Hello Sweet Friends!  Julie here to share a quick Mixed Media card using Floral Greetings (Graciellie Designs) and Peaceful Peonies Clear Stamp Sets (NinaB Designs)- both available from Sweet ‘n Sassy Stamps.

I love how both of these stamp sets offer such beautiful flowers and sentiments- don't you?


To create this card- heat emboss the floral image from Floral Greetings with black embossing powder onto white cardstock.

Once the embossing has cooled, watercolor the image using water-based markers and tumbled glass distress ink for the watercolor background.

Trim the panel and mount onto the black card base.

Heat emboss the sentiment from Peaceful Peonies with white embossing powder on black cardstock, create the banner points by hand and mount onto the card front with dimensional foam.

To finish off the card, use a clear glitter pen to add shimmer to the flower petals and a Sharpie® Extra Fine White Paint Pen to add highlights to the flower centers.


I hope I have inspired you today to get your Sweet ‘n Sassy Stamps out and be creative this week.  Thanks for stopping by- have a blessed week, sweet friends!

Saturday, April 29, 2017

Mom's Peonies


Hi Sweet 'n Sassy Stampers! 
It's Ceal here to share a card with you using the Peaceful Peonies set. I started with a white card base and a panel cut down with a stitched/scalloped die. I stamped, the image with Memento ink and colored it with Copic markers. 
For the greeting I used the "Happy Mothers Day" from the Mason Jar Bouquet set.


Monday, April 24, 2017

Peace I Leave With You

Hello Sweet Friends!  Julie here to share a Mixed Media card using the new Peaceful Peonies Clear Stamp Set (designed by NinaB Designs for Sweet 'n Sassy Stamps) along with a modified version of the "Smakin’ Acetate" technique.


 To create the background for this card, apply melon and cherry ink to a craft sheet, spritz with water and press acetate into the ink, lay a piece of white cardstock into the ink and keep lifting and re-applying as desired.

Stamp the sentiment from Peaceful Peonies with navy ink, trim the panel and mount onto navy cardstock before adhering to the white card base.

Trim another piece of the background panel for the middle strip, mount onto a stitched rectangle die cut from navy cardstock and adhere to the card front.

Ink the floral image from Peaceful Peonies with black ink, color with alcohol markers and fussy cut the image cutting the leaves apart from the image.

Mount the floral image using dimensional foam and finish off the card by applying shimmer with a clear glitter pen over the petals along with white highlights using an extra fine white paint pen.


I love the images in the Peaceful Peonies Clear Stamp Set and hope I have inspired you today – hugs and have a blessed week, sweet friends!

Saturday, April 22, 2017

DIY Patterned Paper & Stained Flowers Technique

Hello! It's Gracie from Graciellie Design. Today I have a fun technique to share with you... Floral specialty papers can be beautiful, especially when they have a metallic finish. I decided to go ahead and try to make my own using Floral Greetings and Peaceful Peonies from Sweet 'n Sassy Stamps and Laser Silver Lustre paper.


I stamped the flower multiple times to create a pattern. I used Color Box Mix'd Media Inx in Truffe and heat embossed it with Bridal Tinsel embossing powder from Ranger. I then colored the flowers applying a bit of Zig markers and spreading the color using my fingers. I kept layering the color until I was happy with the shading. This technique gives the flowers a stained look. The glossy paper allows the color to glide and you end up getting a different coloring effect.

I used the same ink to stamp the sentiment on Heavyweight Vellum 48# and cut a banner. I decided to fussy cut 2 flowers from the remainding stamped paper and adhere them on top of a simple pink frame cut from Mountain Rose Glimmer cardstock -which goes along perfectly with the Rose Quartz Mica / Metallic card base. To add dimension to the frame and flowers I used 3D Foam Strips and Foam Squares.


I hope you enjoyed today's project idea. Make sure to visit Sweet 'n Sassy Stamps to check out these and other new clear stamp sets available now. For more ideas and inspiration visit SNSS blog!

Thanks for visiting.


Saturday, April 8, 2017

Peace I leave with you

Peace I leave with you... some very encouraging words from the bible and I think they are great for an encouraging card. Just to let someone know you're thinking about them.

For this card I started with a watercolor background. I used a couple of blue/green colors to create the background and stamped the image on it. I thought the image needed a little bit extra color so I used colored pencils to color it. I think the colors turned out a bit too dark because of the watercolors, but I still like it. I stamped the sentiment above the image and die-cut the circle.
I adhered the die-cut panel with foam tape and added a background paper that has a watercolor effect on it. I used a couple of sequins to give the card a bit more sparkle.
http://www.sweetnsassystamps.com/peaceful-peonies-clear-stamp-set/
For this card I used the stamp set 'Peaceful Peonies'.

- Lucinde

Thursday, April 6, 2017

Foiled Stamped Flowers with Floral Greetings & Peaceful Peonies

Hello, it's Gracie Chavez from Graciellie Design. I love using transparencies on cards. I usually use vellum because of how delicate it looks. So I decided to use one of Sweet 'n Sassy's latests flower stamp from a set I designed -Floral Greetings- in a non-traditional way. I used a quick and easy DIY technique to foil the flowers on heavyweight vellum to create these stamped embellishments.


First, I stamped the flowers using pigment ink (which works just as well as any embossing ink), and I then heat embossed the images in gold. But because I wanted to create a metallic on metallic effect I went ahead and foiled the flowers in silver. All I did was cover the images with a piece of silver foil transfer sheet and ran them through a laminator making sure to wrap the stamped flowers within at least 2 copy paper sheets folded in half, to avoid the embossing powder from melting completely. This trick will allow you to get a distressed foil effect that lets some of the embossed areas to show. In the end, you get a beautiful silver on gold metallic finish.


I fussy cut the flowers and used them to frame the wonderful verse from 
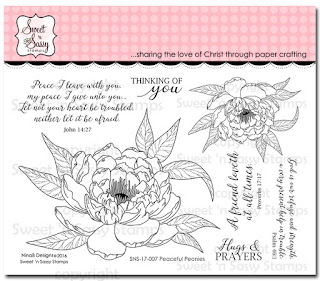
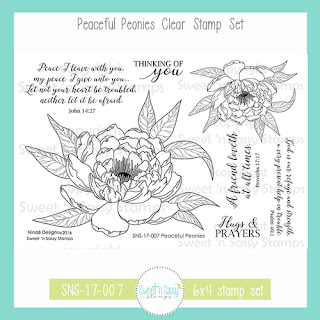
Peaceful Peonies. I layered a few die cuts and used metallic, shimmery, gorgeous papers to go along with the metallic tones on the images. I added a few touches of beige here and there to make the sentiment pop and tie all the monochromatic layers together. I love the result, but I'm sure this card wouldn't have been the same without these beautiful stamps!


For more details on these and other stamp sets from our latest releases please visit Sweet 'n Sassy Stamps shop. For more inspiration make sure to subscribe to the blog so you never miss our design team's projects. (There is so much inspiration here!)

Thanks so much for stopping by.