Showing posts with label CharCards Charmaine Canham. Show all posts

Wednesday, August 4, 2021

You've been on my mind by Charmaine Canham


Good Morning!!! 
I am all for making unique and one-of-a-kind cards, but sometimes the need arises to make multiples. Well, I have a solution for you! 


I am using the Encouraging Peonies stamp set that is just gorgeous. It has the most
simplest sentiments and can easily be paired with any of these flowers.


Here is what I did:
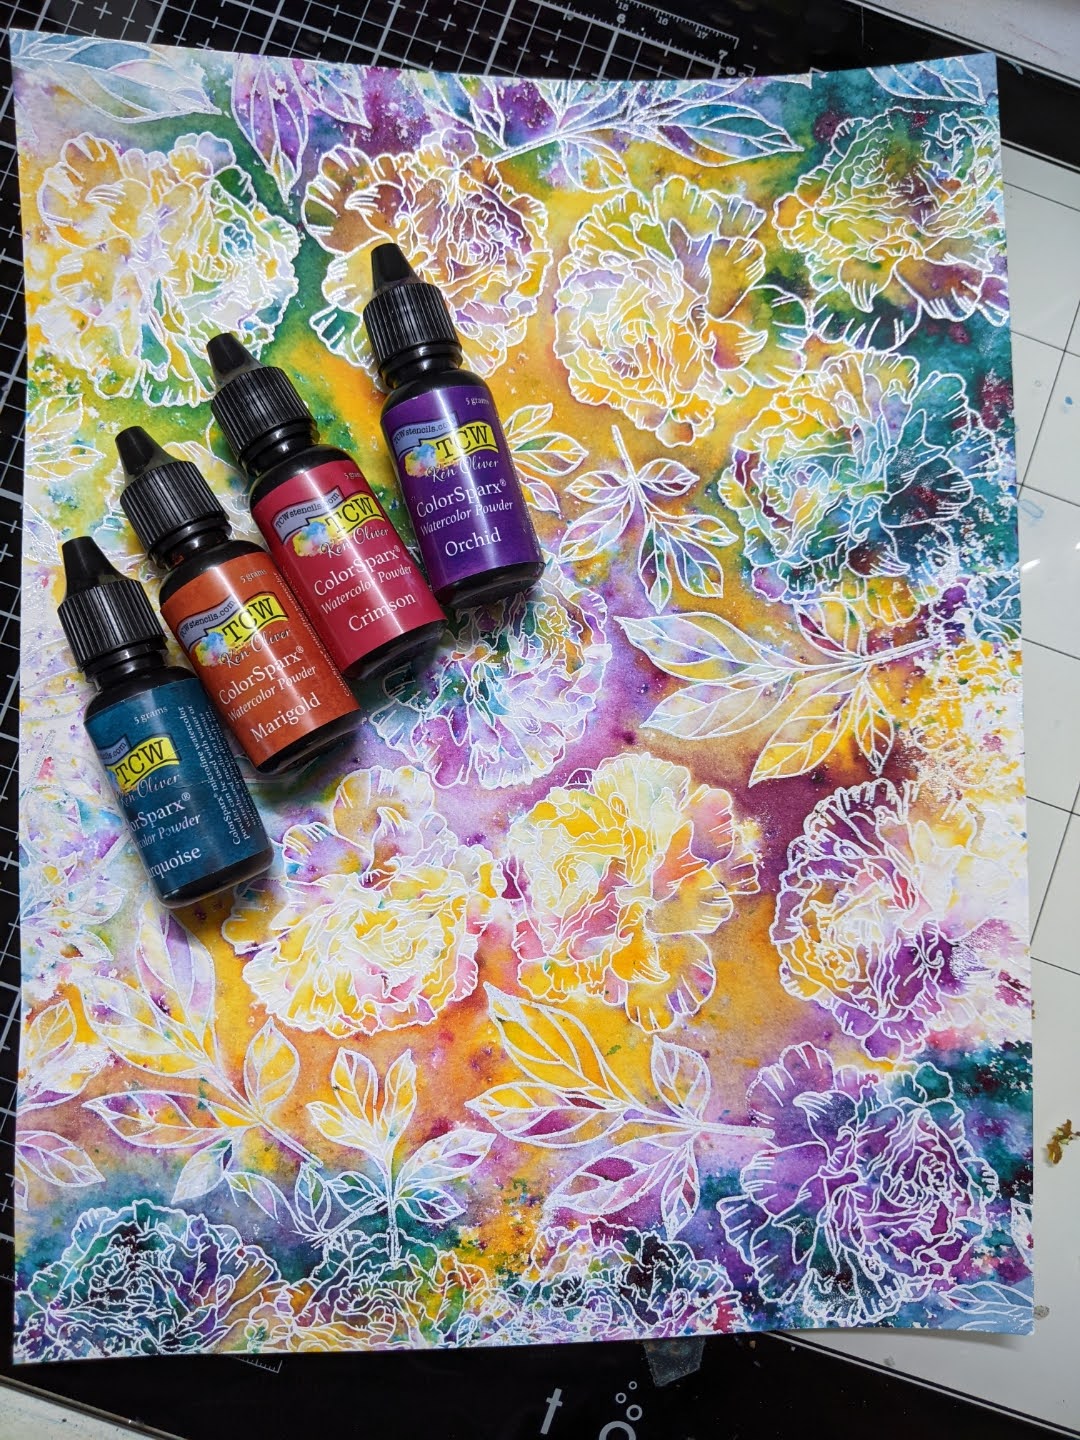
Start with any watercolor paper, like Strathmore, white or clear embossing powder, and Versamark.


Next, randomly stamp flowers and leaves all over an A2-sized sheet. You will need to cut the watercolor paper down as this is a bit larger (or keep it this size, it's not important!)
Make sure to use an embossing buddy before you stamp to not get embossing powder everywhere.

Next, use painter's tape or washi tape and adhere the edges to a waterproof surface. The sheet will buckle when you add water. I am using The Crafters Workshop ColorSparx that comes in packs of three. Use any complementary colors so that you don't inadvertently make mud. 
Wet your paper and start by adding a little at a time.

Add more water to dissolve the pigment. 


You can let this dry naturally or take a dry cloth and soak up all the water. You can also ( I just thought of this!) use a blank sheet of paper and transfer color for another project. If the color is still too strong in some areas, add water and dry it.

Since I am making mini slimline cards, I try to see how I can position my dies (from Gina Marie Designs) to get the prettiest areas onto my card. Run this through your die-cut machine.


Instead of stamping the sentiment on a separate piece of paper, why not try something different and stamp it on acetate?? You will need pigment ink, like Stazon, for it to dry quickly. You can also heat emboss the sentiment!


Once the sentiment is stamped, an easy way to adhere the acetate to the card front is to use brads. Punch holes through both the acetate and card front. Make sure to use double-sided foam tape to "hide" the legs in the back.


Attach the card front to a 6 1/4 x 3 1/4 base for a clean look in the back. Since the mini slimline cards are roughly 6 1/4 x 3 1/4, I still use a top folding A2 base with my pre-printed logo on it. I just cut it down to size. The envelopes I use are #7 (6 1/2 x 3 1/2) and work perfectly. 


And that is it! I use the "friend" die in gold on two cards that matched the brads on the cards. 


I hope you like today's cards and let me know which is your favorite!!!

Talk soon, 


Wednesday, July 21, 2021

Dream Big by Charmaine Canham


Good Morning Flowers! 

I have a quick and fun card to show you today. I wasn't in the mood to color, so I grabbed the next best thing guaranteed to make a big impression!  I just got the Fantastic Flowers stamp set and wanted to play with my Distress Oxide Sprays. Here are the instructions for this happy pairing!

I started with stamping three flowers and clear heat embossing them.
This way, you can easily clean the spray from the black embossed lines. 

Here I used three Distress Oxide Sprays that work well together. Use an old box to spray into and in a well-ventilated area. Alternate the colors, drying them in between spraying again.


Next, stamp the Typewriter Text Background stamp with a dye ink or
 Amalgam ink, like Gina K's, onto the cut-out flowers. This will give the flowers more interest.


For the actual card base, I decided to use a slimline card (8 1/2 x 3 1/2) and spray
that with Distress Oxide spray and Mica Spray for some shine. 


Stamp the leaf stamp with VersaMark and white heat; emboss this. Make sure to use
your antistatic tool and wait for the base to dry.


No card is complete without "bling"! I had an old circular flower die and cut three circles. Glue these to the center of each flower. I then added a gemmed brad to each after piercing a hole through the center with my punch tool. 


Curl and shape the flowers with your hands, and place foam tape under each flower.
Stamp a small sentiment and "hide" it in the folded flowers. 

I hope you enjoyed today's card. Let me know what you think!


Talk soon!
Charmaine 


Wednesday, June 30, 2021

Hello Friend! by Charmaine Canham

 Hello Friend!

I hope you are doing well!  I made you a card using the brand new Blooming Anemones stamp set and Friend Word dieLet me show you how to make a pocket shaker card.


First, I heat embossed the florals on heavyweight A2 cardstock.
I used Platinum embossing powder with Versamark Watermark ink.


Next, heat emboss the additional flower in the stamp set and color with Copics.
Fussy cut by hand and set aside.


Die cut 3 pieces of the Friend word die. Dip one "friend" in the Versamark and heat emboss.
Be careful to not burn your fingers. I used Gina K Designs Connect glue to adhere the pieces.


I have a die from MFT that cuts out a stitched window, but you can also use any oval or rectangle die. To give the card front a bit more pizzazz, use an embossing folder, like this 3D one from Altenew.

Now, to build the window. Turn the card front around and position the orange floral in the opening. Use double-sided tape right around the window. Cut a piece of acetate to cover the opening. 

Bring out the dimensional foam tape and build up the back. One area for the window and one all-around for the frame. Place glitter or shaker elements in this pocket and place another piece of acetate over the window. This seals all the shakers. 
I used gold paper as the background to compliment the platinum in the front.

Now you have the "framed tape" that will adhere to a top-folding card base. 

Adhere the "Friend" to the acetate; I used Connect Glue again.
Place a few rhinestones around the card to balance the white and platinum.

And there she is! A fairly simple card fit for any occasion.

Have you seen the new release?? Isn't it fantastic? Check it out to save money on early orders!

I hope you liked today's card and will try to make a shaker card!

Stay well,

Charmaine

Follow me on Facebook and Instagram for almost daily inspiration.


Wednesday, June 16, 2021

So Tweet by Charmaine Canham

Good Morning and Happy Wednesday! 

Korin has this sweet little stamp and dies set on sale this week, and I thought I
should revisit this cutie and make a sweet evening scene for these two lovebirds!


 How Tweet Stamp and Die Bundle is an older set but so fun to play with. Here is what I did:

I started with a gel print I made but wasn't happy with (but held on to it for days like today!), and it just happens to have blue and orange-pink sections, perfect for our male and female birdies. Since the print was made with acrylic paint, heat emboss the ink to prevent smearing.

Next, I purchased this die from The Ton and have not used it. I think this will be perfect to showcase the stars aligning for these two birds. 

I use Bristol Smooth paper because it is perfect for blending with oxides, I have found. 

After blending the sky, spritz some Shimmer spray on it for a starry glittery sky. Also, glue this piece onto another white piece of cardstock for the white stars to show through from behind.


Play with the placement of the birdies and clouds. I hand cut all the pieces; I wish I had the dies, but it was therapeutic to do. Also, use dimensional foam tape under some elements for interest.


I use Versafine Clair ink for detailed stamping and sentiments.


It was a relatively quick card to make (it would have been faster with dies), but I
 really enjoyed making a cutesie (a different type for me) card. 


I hope you liked today's card and will leave me a comment here or on Instagram.
 I always enjoy reading your feedback!
Have a great day!

Charmaine

Follow me on Facebook and Instagram for almost daily inspiration
Check out my new Website, CharCards.net

*Post includes affiliated links at no cost to you*