Showing posts with label Falling Leaves. Show all posts

Thursday, September 15, 2022

giving thanks

 Good morning! Today I am featuring another one of the new coordinating die sets from this month’s Sweet ‘n Sassy Stamps release, Give Thanks Dies. This stamp set is a previously released one so you may purchase the dies separately, if you have the stamps, or both together in a bundle. I also used Falling Leaves (the September Product of the Month) and Cheerful Hexies.

Product links: Give Thanks Dies, Give Thanks Bundle, Falling Leaves, Cheerful Hexies.

I started today's cards by making a fall card without autumn colors. I really liked the blue falling leaves background that I stamped and decided to "paint" the die cut leaves with other fun colors too. Various inks were dabbed onto my table (it's an old table!) one at a time and spritzed with water. Then I picked the inks up by smooshing a piece of watercolor paper onto them. Let it dry between colors. When completely dry, I stamped and die cut the leaves.


I had a few leftover leaves that I saved and wasn't sure what I would do with them...until I needed an anniversary card! Here I Die cut a square from the white panel, then embossed the square in a woodgrain embossing folder. I then stamped yellow leaves onto the white panel and popped it up onto a card front with foam tape. The embossed square was glued back into place and two leftover die cut leaves were popped up on top.


I have a third card today...for this one I created a background by stamping the Cheerful Hexies first, then the leaves over top with black ink. The photo makes it look a bit busy, but it looks really cool in person!


Be sure to check back tomorrow as SNSS will feature other new products for the second half of the month. ;)
Diane


Wednesday, September 30, 2020

Looking Back on the September Release

 Hello, Hello!

Well, here we are, the last day of September!  Can you believe it!?  Before you know it Thanksgiving and then Christmas will be here.  

Christmas.  September has been all about Christmas!  I simply love this month's release.  Let's take a look at Vintage Van.  What a versatile set this is! Christmas, birthday, Fall.  It covers it all!  


I opted for the fall version of the van for this card.  I started by stamping the van in Versafine Onyx Black Ink and then watercolored it.  I used trees from the Scene Silhouettes-Trees Stamp Set and inked them up with distress inks shades of fall.  The foreground was done with distress inks as well; I smooshed them onto my craft mat and then used them to watercolor.   The leaves in the very front most foreground is stamped in the same color as the ground; the image is from the Falling Leaves Stamp Set.  Once I was done with finishing up little details here and there, I place the panel in the MISTI and stamped the sentiment, from the Fall Remix-Autumn Splendor Stamp Set in Versafine Black Ink.  A hemp twine bow finishes it off. 

Next up, the adorable gnomes.  

I went for a very simple look on this card with a very muted color palette.  I started with the igloo image from the Winter Hugs Stamp Set


I stamped it in a light grey, then masked it off and stamped the gnome.  Everything was colored in neutral shades of Copics with a pop of red added.  The igloo was even decorated for Christmas with the wreath from the Vintage Van Stamp Set.  'Peace on Earth' is also from Vintage Van.  

Next up, the gorgeous sentiment set, Holiday Greetings.  


The pine branch was stamped in various shades of green distress ink and was spritzed some with water to get the ink moving.  The branch is from the Christmas Pine Stamp Set.  Next I stamped the ornament from the Deck the Halls Stamp Set.  Initially I tried some no line watercoloring, but thankfully I had left the stamp in the MISTI so I was able to restamp in Versamark ink and heat emboss in gold when I decided the no line look did not work for this card.  

Once again I used the wreath from the Vintage Van Stamp Set and heat bossed it in the center of the ornament.  It was the perfect size! 

Lastly, I added layers of blues and greens in the background.  The sentiment was heat embossed in gold ep.  

That's it for me! I hope I have inspired you to get out your September stamps and play a little!  


Lee Ann 

Tuesday, October 31, 2017

Leaves Are Everywhere!!

Happy Fall Y'all and Happy Halloween!!
I don't know about you but I have leaves EVERYWHERE. As soon as they are cleaned up a wind blows down an equal or greater amount to replace them! Ughh.
I finally got all my reports done and got a chance to play in ink this weekend. I played with some Splitcoast Stampers techniques and am in L-O-V-E with the results!
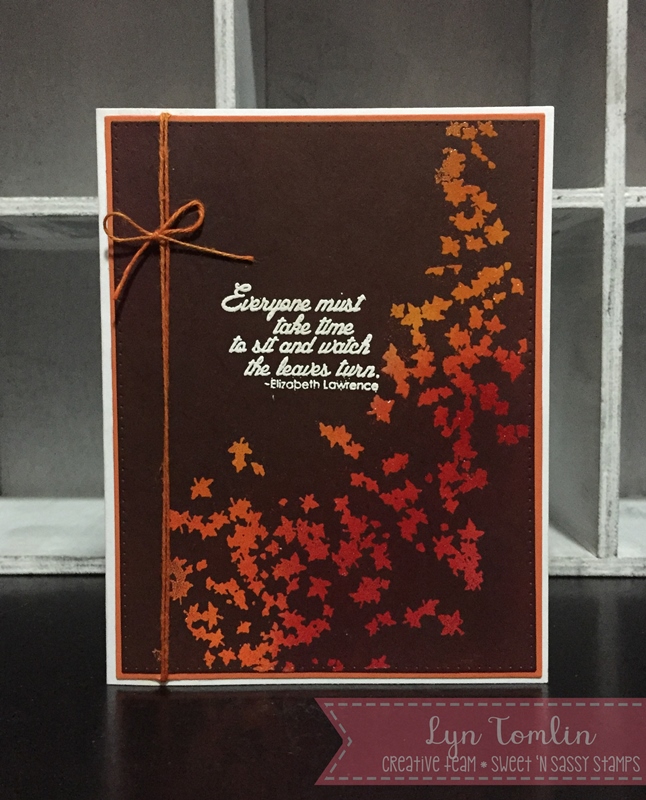
The first tutorial is called Joseph’s Coat.  I used the Falling Leaves Clear Stamp Set and the Autumn Collage Set. I created the background with distress inks (Spice Marmalade, Candy Apple Red, and Mustard Seed) then embossed the leaves over the colors and covered it all with vintage photo ink.  I embossed the sentiment with White embossing powder.
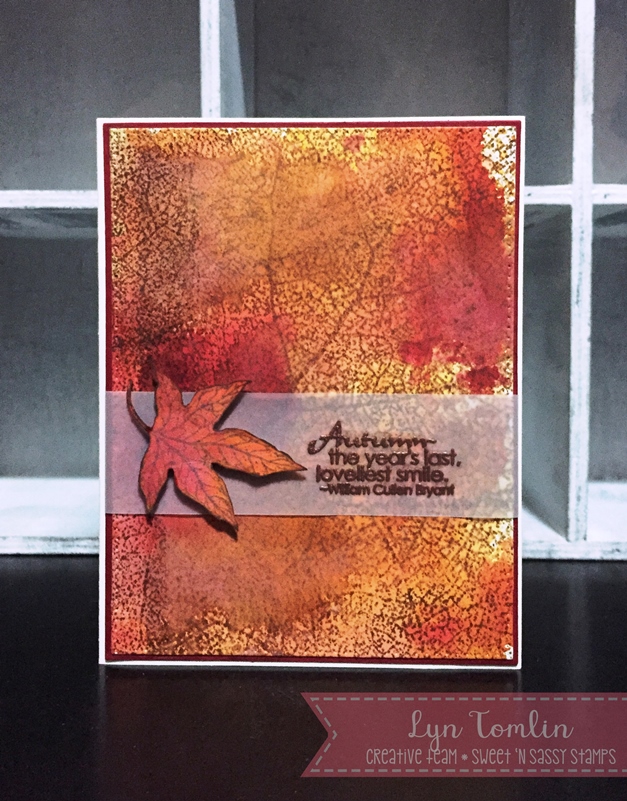
The second technique is a Wrinkle-Free Distress technique and the Leaf Skeleton BG. I created the colors of fall for this fun challenge. I embossed the sentiment from Autumn Leaves Clear Stamp Set with copper embossing powder on vellum.
I hope these inspire you to try something new!
Have a great one!
Lyn

Thursday, October 8, 2015

Owl Be Here

Hi there Sweet 'n Sassy friends, thanks for stopping by! It's Ceal here to share with you today a card I made for the Hope You Can Cling To card drive that is going on the entire month of October. 
To make my card I used three different sets. For the tree I used the Tree Background stamped in Ground Expresso distress ink. The leaves are from the Falling Leaves set stamped in Rusty Hinge, Spiced Marmalade, and Fossilized Amber distress inks,since these inks react with water, I took a damp water brush and lightly went over the leaves to bring them together.  The cute little owl and greeting are from set Owl Be There. I wanted to make the owl a shaker, and using the Owl Die made it super easy. 

Supplies used


Monday, October 5, 2015

Emboss Resist - Monday Morning Technique

Hello! It's Monika here today with a step-by-step tutorial on how I made my emboss resist Fall card.


1. I stamped the silhouette leaves (Falling Leaves Clear Stamp) on a piece of water color card stock with VersaMark ink and heat embossed the images with clear embossing powder. You could also use white embossing powder.


2. Next (starting with the lightest color) I sponged Mustard Seed distress ink on the background with a Blending Tool.


3. Then I sponged Mowed Lawn and Rusty Hinge distressed inks on the background.


4. You can leave the background as is, or add some brown around the edges. I used Vintage Photo distress ink. Then I wiped the background with a paper towel to get the ink off of the embossed areas.


5. To make the coordinating leaves, I sponge green, yellow and rust ink on strips of water color card stock and die-cut some leaves with one of the small leaf dies from the Leaf Silhouette die set. Then I covered the leaves with Glossy Accents.


6. I stamped the greeting on a thin strip of white card stock (from Be Encouraged Clear Stamp Set) with Onyx Black Memento ink. Placed some thread on the background, and adhered the greeting over it with dimensional tape.


7. Next I adhered the die-cut leaves randomly to the card. Then I adhered the card front to a white card base.


I hope I inspired you to get inky today.
Thank you for stopping by,
Monika


Wednesday, September 23, 2015

Falling Leaves...

Hello! It's Monika here today with an encouragement card.


I started the background with sponging light pink distressed ink all over a piece of watercolor cardstock, then I added the clouds with darker pink and blue ink... and finally I went over the edges with black ink.
The silhouette leaves (Falling Leaves Clear Stamp) were stamped with Jet Black Archival ink.
I didn't want to cover up the pretty background, so I just stamped the greeting on a small strip of white cardstock (from Be Encouraged Clear Stamp Set)... and added some small embellishments.


I hope I inspired you to get inky today.
Thank you for stopping by today,
Monika


Sunday, October 12, 2014

Fall Chalkboard

Hello! It is Gloria with you today. Happy Sunday!


I have used the Autumn Mum Greetings stamp set to create a little chalkboard greeting for this fall-themed card. I stamped the two sentiments with white ink onto black cardstock. I then embossed with white embossing powder. When the embossing was cool, I stamped over the top with watermark ink and the Falling Leaves stamp set. I embossed the leaves image with clear embossing powder.


I rubbed the sentiment panel with white ink. I used the Leaf Silhouettes die set to cut out two small leaves from cardstock scraps to add to my card. 

Thanks for looking!

Gloria

Sunday, October 5, 2014

Falling leaves

Hello friends! Giovana here today with a Fall card using one of the latest sets released "Falling leaves" .
This card was a lot of fun to create. I started with a piece of white cardstock, took 3 different colors and applied the ink direct from the pad onto the cardstock, you can see a little bit of the lines from the pad. Then I took Distress ink and stamped the leaves, took my black finest point marker and outline some of the leaves, then added white pen to create a little bit more dimension. I die-cut a leave from Leaf Silhouette Die set, ink all the edges and stamp the sentiment. I added it to the panel with dimensionals.
After that, I matted the piece on a slightly bigger piece of red cardstock and added stitches. Finally, added the panel to a white card base.

Hope you like it!
Have a great day!

Tuesday, September 16, 2014

Leaves and Forest Silhouettes~

Good morning everyone! Mary here to share some leafy inspiration! Korin recently released some amazing new dies for current sets available in the store.
 
My first card is using the leaf silhouettes and newly released matching leaf silhouette dies! I layered these squares onto the leaf skeleton background that is perfect for quick colourful and textured coverage.

The second card is using the falling leaves stamp set with the Forest silhouette dies! I love the look of these images against the sponged background. For the "floor" I sprinkled some stampendous embossing fragments, tinsel and powders and melted them all together. I adhered the deer to the floor with the leaves falling gently. So serene.

Have a wonderful Day!

Materials used: 
stamps: Falling leaves, Skeleton leaf BG, Leaf silhouettes
Paper: SU 
Inks: Versafine inks, SU inks, Ranger distress inks
Accessories: Stampendous powders, SU punch

Sunday, September 14, 2014

Autumn Greetings

Hello! It is Gloria with you today. Wasn't that a GREAT September Release on Friday? What a sweet collection of autumn-themed stamps and dies!

I made a simple tag and pocket project to share with you today, using some of the new goodies!


I found this kraft envelope, (3 1/2 x 6 inches) in my stash, and I made a gift card and tag holder out of it. I rubbed the edges with ink, and then I stamped the leaves from the Falling Leaves stamp set in various colors of orange, red, and gold ink across the center of the envelope.

I die cut the tree from the Forest Silhouettes die set out of brown cardstock and "planted" it to look like the leaves had fallen off the branches. I cut the fence from the Fence and Grass die set out of cream cardstock. I rubbed the fence with a bit of tan ink and added it to the envelope with foam squares.

I stamped the sentiments from the Autumn Mum Greetings stamp set onto gold paper with brown ink. I trimmed the sentiments to look like signs and added them to the envelope with foam squares.


To make the matching tag, I trimmed a Graphic 45 kraft tag a tiny bit on each side to make it fit into my envelope. I rubbed the edges with ink and stamped the sentiment from the Autumn Mum Greetings stamp set with brown ink in the center of the tag.

I used the leaf dies from Leaf Silhouettes die set to trim out a few paper scraps. I rubbed the leaves with ink and added them to the corner of the tag. I tied some ribbon and twine to the top of the tag. The back of the tag is blank to enable me to add a gift card or write a message. 

Thanks for looking!

Gloria

Friday, September 12, 2014

September 2014 Release Day!


Hello, Sweet 'n Sassy  friends!  It's our September 2014 Release Day!  Autumn is such a wonderful time of the year.  Just think of cool crisp mornings, warm colors, ripe, juicy apples, changing leaves, and Thanksgiving and you have the makings of our fabulous release!
  • Stamp set includes 24 mix and match words 
  • Stamp set measures 4" x 4"
  • Designed by Gloria Stengel
  • $11

    Beary Bountiful Autumn

    • Stamp set includes 2 images and 5 sentiments
    • Stamp set measures 4" x 6 "
    • Designed by Korin Sutherland
    • $15

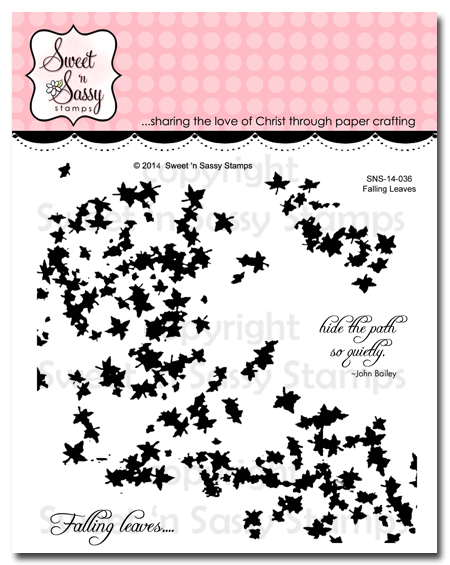
    Falling Leaves
    • Stamp set includes 2 images and 2 sentiments
    • Stamp set measures 4" x 4"
    • Designed by Korin Sutherland
    • $11

    • Stamp set includes 1 image
    • Stamp set measures 4" x 4"
    • Designed by Korin Sutherland
    • $11
    Here are the Sweet Perks Club stamps and dies that can now be purchased individually!

    • Stamp set includes 2 images and 7 sentiments
    • Stamp set measures 6" x 4"
    • Designed by Korin Sutherland
    • $15
    • Die set includes 2 dies
    • $12.50

    Forest Silhouettes Dies
    (Coordinates with the Forest Silhouettes stamp set)
    • Die set includes 9 dies
    • $22.75
    (Coordinates with the Flowers in Bloom stamp set)
    • Die set includes 1 die
    • $10.25

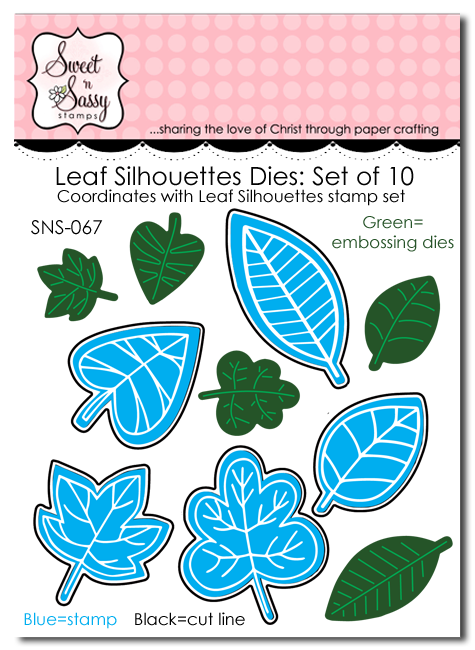
    Leaf Silhouettes Dies
    (Coordinates with the Leaf Silhouettes stamp set)
    • Die set includes 10 dies (5 are embossing dies)
    • $17.75

    Please also join us today for our release day blog hop featuring our talented DT creations.  You are going to FALL for all of their gorgeous projects! :)  The DT blog links can be found in the Linky Tool at the end of this blog post.

    One random commenter from one of the DT blogs will be selected to win a $10 Gift Code to be used at the Sweet 'n Sassy Stamps Store.  You have until Thursday, September 18th at midnight EST to leave your comments.  The winner will be posted on the Sweet 'n Sassy Stamps Blog on Friday, September 19th!

     One more thing before we let you go...

    We can't forget our fun Release Day Challenge!
    "Create a Fall Themed Card"   

    Just a few guidelines to remember as you play:
                
    - You don't have to use a Sweet 'n Sassy Stamps image to enter (although we sure love when you do!)
    - Please create a NEW card (no back linking)
    - We ask that you enter your card in no more than 3 challenges
     - You'll have until Thursday, September 18th at midnight EST to enter

    - We'll draw 1 winner from this week's challenge to receive a $10 credit to the Sweet 'n Sassy Stamps Store!  
    If there are 25 participants, (not including the DT), we'll draw 2 winners!
    - Please use code SNSSEPT2014RC when uploading to Splitcoaststampers or other galleries 

    To enter simply share a link to your creation below, but don't forget to visit the DT blogs to see their beautiful release creations!

    Thanks for joining us today!  Be sure to join us again on Friday, September 19th to see if you've won!