Showing posts with label Birthday Wordfetti. Show all posts

Thursday, May 19, 2022

strike up some fun

 Hello! Today I’m sharing two cards using products from the Sweet ‘n Sassy Stamps May release. Do you know someone who likes to go bowling? Or maybe your kids get invited to bowling birthday parties? Maybe you are just looking to make a fun card? Most of us have bowled at least once in our life and this card would bring back fun memories.

Product links: Masculine Mash-UpShiplap Background, Boss Lady Alpha Dies, Bold Birthdays, Birthday Wordfetti.

I stamped the bowling image on the background of the front of the card, then added a square layer with a popped-up balloon. But...my favorite part is the inside.


I used the Shiplap Background to make the bowling lane and the alpha dies for my sentiment.


I stamped and fussy cut the ball and pins, then added them to a simple pop-up feature. To make the pop-up, I used a 1" x 4 1/4" strip and scored it at every inch (1", 2", 3", and 4"). Then simply fold and glue the 1/4" tab to make a square. Glue one side to the inside bottom, then add adhesive and "close" the top of the card to adhere the pop up to the card front.


I had some diecut letters left over and another fun sentiment in mind, so I made another card. This one is a CAS Mini Slim card so that I could fit all the letters across the bottom. This one is 3 1/2" x 6 1/4". The ball and two pins were stamped again and popped-up. I stamped the "you're" word from the Be Unique set.


Have a great day!
Diane


Wednesday, February 9, 2022

Coffee & Chocolates Gift Card Holder


Hi sweet friends! It's Julee here, popping in with a fun gift card holder idea for a valentine, birthday, or just because. First things first, this is not my original idea. I made one years ago from a tutorial on someone's blog, but I can't remember who posted it. So I measured the prototype I had and drew up my own instructions. You can click on the image for a larger version, then save and print for reference.

It's a fun template, which has a belly band to hold a gift card, and depending on the size of circle you cut, can hold a mini coffee cup, a k-cup, or with no circle you can fill it with chocolates. I of course, went with a coffee theme, and used my new set, Latte Love.


For this holder I added a little embellishment to the k-cup with removable glue dots. The treat yourself sentiment is from the Birthday Wordfetti set, and I added my cup image and steam from Latte Love to the belly band.

You can also make this easily into a treat/gift card holder by not cutting a circle in the base.  I tucked  three ghirardelli squares wrapped in ribbon inside, but you could also use single reese's peanut butter cups, or any little goody bag tucked in the 2.5" square portion. 


If you have mini coffee cups, then you can use an approximate 2" circle for the hole.  I bought my cups off Amazon and filled this one up with chocolates for my boys' awesome teacher.  I deconstructed one of the cups and cut it down to make a template for the mini cup belly band, then cut that from patterned paper and embellished with a heart from the Hearts Die Set.  The happy valentine's day portion is from the Love Wordfetti set, and the rings of coffee behind the Latte Love sentiment piece is from Texture Tiles 9.


Here are the written instructions (included in the graphic above):

  1. Score 11 x 2.5” in cardstock on the long side at 0.75”, 3.25”, 4“ and 6.5” 
  2. If making a coffee cup or k-cup holder, adhere the 2.25” square mat (if using) in the square you will cut the circle from (right of the 0.75” scored edge), then die cut or punch circle. For a chocolate holder, you do not need to cut a circle. 1. Score 11” in cardstock on the long side at 0.75”, 3.25”, 4“ and 6.5” 
  3. crease and burnish scored lines
  4. Apply adhesive to front 0.75” flap then fold up so circle hole is facing up and attach adhesive portion to the longest section
  5. Mat with patterned paper and embellish as desired.
  6.  Score 6.5" x 0.75" belly band piece 1.75” from each side, crease and burnish, then apply adhesive to one end and wrap around holder.
Thanks so much for stopping by today! I hope you're inspired to make one of these gift card holders.  If you do, be sure to share it over in the VIP Facebook group so we can ooh and ahh over it!

Saturday, November 6, 2021

Fake News

Did you hear the news? Sweet 'n Sassy Stamps is turning 14 in November and they have a month of fun things planned to celebrate! So exciting!

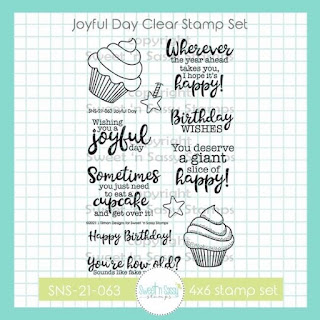
A birthday celebration means a new birthday set!  Joyful Day by Julee Tilman is full of sweet and some sassy sentiments. You know I just had to play with the sassy ones first. I paired the sentiment from Joyful Day with some previously released sets(both are on sale though November 7th).


I stamped the background and images with Versafine Claire Nocturne ink on white cardstock and the sentiment on Barely Banana cardstock then heat set. I colored the images with Altenew Artist Markers and fussy cut out.

I added some green stars to the background with the  Starry Night Stencil and Sprout ink. I wanted to double mat my background but did not have the right green cardstock. So, I cut my mat from white and inked up the edges with the Sprout ink to create a coordinated look. 

I assembled the card as seen, popping the sentiment and images up with foam tape and adding a few gold stars to complete the card. 


Did you know our Sweet 'n Sassy Stamps VIP Group hosts a monthly challenge? November's theme is birthday in honor of Sweet 'n Sassy Stamps turning 14. If your not already a member we would love to have you join us and participate in the fun. 


This sale ๐Ÿ‘‡ends Sunday night.


Joyful Day


A Little Snarky


 Birthday Wordfetti


 Starry Night Stencil


I hope you enjoyed today's card and thanks so much for stopping by!

Karen (๐Ÿ‘ˆ to follow me on Instagram)

Friday, July 23, 2021

Happy Birthday Jesus! (Christmas in July Sale!)

Today I am using All Wrapped Up. It is one of the stamp sets in this week's Christmas in July sale - now through the 26th, Christmas and Winter sets are 25% off.

For my projects today, I have gone with non-Christmas cards and created birthday cards. I mean ultimately, Christmas IS Jesus' birthday so maybe they are Christmas cards. Hmm...

My cards are fairly clean and simple but they are created using different coloring mediums.

For my first project, I did a little masking with most of the gift boxes to create a PILE of gifts. I inked them with Versaclair black ink on Neenah Solar white. I colored everything with polychromos pencils and added a sentiment (heat embossed on black cardstock) from the Birthday Wordfetti set. To finish it, I simply mounted it on a black card base.


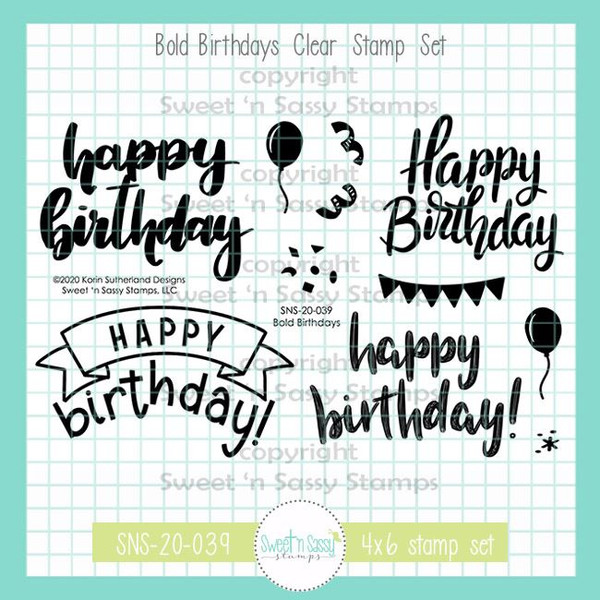
For my second project, I used the stack of gifts again but this time colored it (and the bow) with Copics. I fussy cut the stack and the bow. I cut off the top gift to add to the front of the stack and added the bow to the top gift - I glued these onto a card panel, mounted that on blue cardstock, then mounted that on a Neenah Solar White card base. My big sentiment banner is from Bold Birthdays.


That is both of my Christmas in July projects. I hope you are inspired!! Check out all of the Christmas and Winter stamps - 25% off until the 26th...no coupon code needed!

Thanks for stopping by!
Lyn


Tuesday, June 1, 2021

Versatile Botanical Branches

 Hello, Hello! 

Happy Summer to all of you! 

Have you checked out the new release from Sweet n Sassy Stamps?!  This is a seriously awesome release!  My favorite set is the new Botanical Branches by Nina B.  First off, they are just gorgeous; but second, they are so versatile!  They are perfect fillers for floral sprays but they can also stand alone on a card, as in my first card~


 This gorgeous berry branch was colored with Copics and then fussy cut out.  I added an embossed panel to my card base.  Then, for interest and another pop of yellow, I cut in half a square die cut frame I had in my stash.  It happened to be stamped with an image from the Flower Garden Stamp Set and watercolored with distress ink.  The square halves were adhered to the base and the berry stem was popped up on foam tape.  The sentiment, which is from the Encouraging Thoughts Stamp Set was stamped on a sentiment strip and adhered, along with a few sequins to finish the card. 

Next up, I have used the Botanical Branches set as filler for a floral bouquet.  The flower is from the True Beauty Stamp Set.  


I started with the back panel- color blocked 5 wide stripes with watercolor.  While that was drying, I stamped the flower with distress ink and then colored it with distress inks.  I did the same for the leafy branches that are from the Botanical Branches Stamp Set.  The leaves were heat embossed in white embossing powder on vellum and everything was fussy cut out.  The elements were assembled in the lower left corner and adhered to the card.  The sentiment is from the Birthday Wordfetti Stamp Set and was stamped on blue cs.  A few sequins were added.  

You can check out the entire new June Release HERE!  And check out the new release specials while you are there.  

Thanks for stopping by!

Lee Ann  


Friday, May 28, 2021

Scribble Flowers


(This post may include affiliate links at no cost to you.)

Today I have two different projects using an all time favorite Sweet N Sassy Stamp - Scribble Flowers.

The first project is a CAS card with some very unique pieces. I stamped the Texture Tiles 11 Background onto a piece of tissue paper with archival ink. I adhered it onto a piece of cardstock I cut it into strips with a pierced die then I inked up each piece with Distress Oxides and added it to a card base. Then I water colored the leaf from Scribble Flowers in coordinating colors, fussy cut it, and glued it onto the card. A simple Birthday greeting from Birthday Wordfetti and that is all there is to this one.

This image has an empty alt attribute; its file name is snss-scribble-flower-1.png

My next project is a mixed media ATC Coin. These little canvases are so much fun to work on and this little 2.5" circle has a lot going on.

I created the background with Distress Oxides and the smooshing technique. Using Archival Inks and the Typewriter Text Background, I added a little texture. Then I Copic colored the Flower and bee from Scribble Flowers. Finally, I added a sentiment from the Faith Wordfetti Set and that is all there is to this one. I really love it!

This image has an empty alt attribute; its file name is snss-god-is-bigger-coin.png

I hope you were inspired today! Thanks for stopping by!
Lyn


PS - The entire store in on sale for 15% off until the 31st if you want to grab any of these sets!

Saturday, May 15, 2021

Cute Boots Birthday Wishes

I am playing with the newly released Cute Boots Digi stamp set and Birthday Wordfetti to create this springtime floral birthday card. 


This card was pretty easy to create by keeping the coloring and layout simple. I sized and printed the image on white cardstock. I colored the boots and flowers with Arteza Brush Pens and die cut the panel. I layered that panel onto a purple scallop edge die cut. I stamped the sentiments with VersaFine Clair Nocturne ink on white cardstock. The sentiments didn't really stand out enough so I added some edging with a black marker. I added some yellow washi tape and three clear dots to finish it off. 

Birthday Wordfetti is part of the Customer Choice Stamp of the Month for the month of May. You get to choose your own $11.95 4x4 stamp set with a $60 order.


I hope you enjoyed today's card and thanks for stopping by!

Karen

Monday, April 19, 2021

Itty Bitty Birthday


Hello Sweet 'n Sassy Stampers!
It's Ceal, here. Today I have a couple cards to share with you. The first one uses the Itty Bitty Blossoms set. 
To create this card I started with a top folding white card base and a white panel. I Masked off a one inch strip and then ink blended it with some Peacock feathers distress ink, then stamped some of the florals from the Itty Bitty Blossom set.
This sentiment is from the Birthday Wordfetti set.


The second card uses the Count Your Rainbows set, along with the Coordinating Dies
Wo doesn't love rainbows right?
To make this card I started with a top folding card base, black card stock and some patterned paper. 
I stampd the images and colored then using alcohol markers then cut them outwith the coordinating die. 


Tuesday, April 6, 2021

Morning Glories and Mixed Media

   Good Morning Everyone!  

Last's month's mixed media cards were so much fun that I decided to do it again.  This time I am using the Sympathy Morning Glories Stamp Set.  

I started with a piece of Yupo Paper, alcohol inks ad embossing powder.  Using pink, yellow and orange alcohol inks, I created a inked background.  Next, I stamped the Yupo with Versamark Ink and then carefully heat embossed it in gold embossing powder.  The panel did warp a little, but since I fussy cut the image out, it really did not matter.  

As the image had an Asian flair to it, I decided to go with red and black cs.  I found this black panel in my stash that had been embossed with Translucent embossing paste.  I added that and a red strip of cs and finished off with the flowers, backed with a white circle.  

The sentiment, from the Birthday Wordfetti Stamp Set,  was stamped and heat embossed in gold on black cs on a narrow strip of paper and then adhered to the card.  I did not feel any need to add bling to this.  You can see all of the shine and texture here~


Next up, another mixed media card using the Sympathy Morning Glories stamp set, but much simpler and subdued- much more appropriate for a sympathy card~


This card was started with a gel press print in blue.  I die cut a circle from it.  It would make a good base for some monochromatic blue flowers.  The flowers were stamped with Memento Tuxedo Black ink and colored with Copics.  I tried to stay really light, but I have such a hard time doing that!  

Once colored, I fussy cut the flowers out.  I opted to mount the circle and flowers in the bottom right corner of the panel, but the card seemed to need a little more so I added a white card front die cut.  The sympathy sentiment strip and a few sequins finish the card.  

And I cannot finish this post without sharing something from the new release! 


Yup, still trying to keep things, light, soft and pastel!  This time I colored the beautiful cake from the Just Married Stamp Set and fussy cut it out.  I kept things simple here, adding it to a patterned paper circle with a sentiment strip.  

Monday, March 15, 2021

Whimsy Butterflies


Hello Sweet 'n Sassy friends!
It's Ceal here to share a couple cards with you using the Garden Whimsy set. 
To create these cards I started with white top card base. I stamped the butterfly and colored it with alcohol markers. 
The first card I also stamped the butterfly image on the panel and colored it and then stamped it again on a seperate piece of paper, colored it and fussy cut it out and popped it on top of the other. The sentiment is from the Birthday Wordfetti set.


This second card, I stamped the image on a seperate piece of cardstock, colored it, fussy cut it out and popped it up on the card front. To give texture to the butterfly on this one I used a terry cloth and colorless copic blender. 


Thursday, February 4, 2021

love you big time

 Good morning! It's the beginning of the month, which means there's a great new release at SNSS! Today I am sharing two projects using the new Sweet ‘n Sassy Stamps set called Good Morning. On this first card, I also used Much Love, Vintage Love, and Lollipop Alpha. I stamped and colored the clock, cut it out and layered it onto a patterned paper background. The clock face was stamped again onto patterned paper and paper pieced. This would be good for Valentine's Day or any other time that you want to show someone how you feel.


For my second card, I used the clock from Good Morning again. This time I also used the new Texture Tiles 10 plus Make A Wish and Birthday Wordfetti. Since the background was kept simpler, I paper pieced the balloons!


Have a great day!
Diane


Thursday, January 21, 2021

snail mail

Good morning! Today I am sharing a few CAS projects using the new Sweet ‘n Sassy Stamps set called Happy Mail. On my first card, I also used the ever popular Nature Silhouettes. Since I kept the images to a minimum, I chose to offset my panels to give it a little interest. I drew the tiny heart with a marker and a simple bow in the corner completed the card.


For my second CAS card, I also combined the Happy Mail set with Bold Birthdays and Birthday Wordfetti. The cute little snail is a little late to the party!


I gave him a sparkly little snail trail.


The last card is super clean & simple. I simply masked the snail and added a few envelopes for him to carry.


And I gave him another snail trail.


Have a great day!
Diane


Friday, December 18, 2020

Getting Digi and a Sale

Hi Sweet 'n Sassy friends! It's Julee here, popping in to share some inspiration with our new December digis.

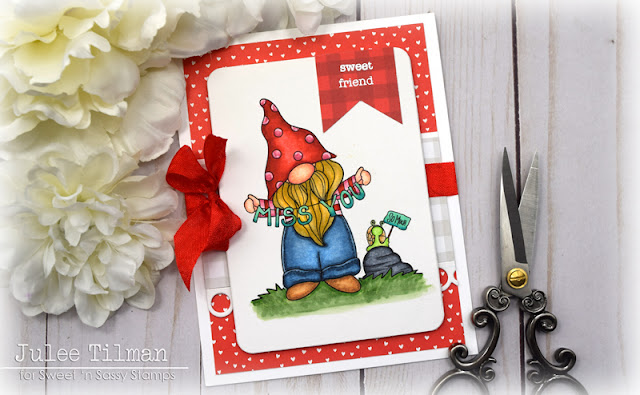
The Miss You Gnome Digi is new in the shop today. I just love this sweet little gnome with his snail friend holding that little sign! So cute! I printed the image, then colored with Copic markers and cut with a rounded rectangle die.  A little patterned paper makes up the layout, and I embossed the sweet and friend words from Birthday Wordfetti in white on the little tag.  I finished with a seam binding bow.


My next card is a mini slimline (4"x6.5") and features the adorable Friendship Bear Digi that released last Friday. Isn't this little guy precious? I thought he was perfect for sending a little paper sunshine to a friend. I printed him out, colored with Copics, then die cut in an oval shape, adding a dark grey mat.  The background is done with a stencil and squeezed lemonade distress oxide.  I acccented with some die cut hearts and finished with a sentiment from the new My Punny Valentine set. Super fun and cheerful!


There's some super exciting new stamps coming in 2021, and we're making room with a Year End Sale!  The sale starts today and runs through December 31, and it's a fabulous one... 25% off site wide, no code needed!  Woohoo! It's the perfect time to pick up a little something from your wishlist!


Thanks so much for stopping by! I hope you have a fabulous weekend!

***This post contains affiliated links at no cost to you ***