Showing posts with label Scene Silhouettes:Woodland. Show all posts

Tuesday, May 25, 2021

Happy Father's Day

 PRODUCT LINKS BELOW CONTAIN AFFILIATE LINKS AT NO COST TO YOU
 
Hello Sweet Friends! Sheri here with a Father's Day card featuring the Scene Silhouettes Wetland Grass, Scene Silhouettes Woodland and For My Father stamp sets. Plus did I mention that all three sets are on SALE!! Sale ends 5/27/21. You can find them all HERE.
 
I wanted a CAS (clean and simple) design so I decided to pull out my ink blending brushes and two shades of blue ink (Gina K. Designs Blue Denim and In The Navy).
 
Directions:
  • Cut White A2 Top Folding card base: 4 1/4" x 5 1/2" (4 1/4" x 11", scored at 5 1/2")
  • Cut Black Mat: 3 5/8" x 4 7/8"
  • Cut White Stitched Panel: 3 1/2" x 4 3/4"
  • Ink blend stitched panel with two shades of blue (light & dark) and let dry. You can use a heat tool to speed up drying.
  •  Using a stamp positioner arrange your images and stamp with black ink. 
  • Assemble card.
 
Card Measurements:
White A2 Top Fold card base: 4 1/4" x 5 1/2" (4 1/4" x 11", scored at 5 1/2")
Black Mat: 3 5/8" x 4 7/8"
White Stitched Panel: 3 1/2" x 4 3/4"
 
 
---------- 

 
Happy Stamping!!


Thursday, February 15, 2018

My Help Comes From the Lord

Hi Sweet Friends!

Julie, here sharing a masculine card designed with several stamp sets- Scene Silhouettes: WoodlandScene Silhouettes: Trees  and Be Encouraged.


To create this card, I stamped the tree image from Scene Silhouettes:Trees with archival black ink onto a piece of designer paper, applied clear embossing powder and heat set with a heat tool.  I used a distressing tool to lightly distress the edges before mounting onto a piece of black cardstock and adding to the white card base.
 
I also stamped the bear image from Scene Silhouettes: Woodland   and the sentiment from Be Encouraged with archival black ink onto a piece of white cardstock, applied clear embossing powder and heat set with a heat tool.  Once the embossing had cooled, I die cut the bear image with a square stitched die and mounted onto a piece of black cardstock.  I decided to hand trim the sentiment, mounted it also onto black cardstock and used a stencil brush to apply antique linen distress ink over both images to “antique” the paper a bit.

I looped a bit of polished hemp twine onto the card front (I used hot glue to adhere behind where the focal image would be located) and finished off the card by mounting the bear focal image along with the sentiment using dimensional foam.

This card was my Valentine for my hubby :-)  We love to drive along Skyline Drive in Shenandoah National Park and are constantly looking for bears. On one particular day trip, we saw ten bears (the highest number for one day for us)!  We also love the majestic vistas and they remind us of God's Creative Handiwork- Our Help Comes From the Lord, we are so thankful to Him!! 

Also, don’t forget this month we are offering Hoppy Easter as the February 2018 Stamp ofthe Month FREE with a $60 order (after discounts and before shipping) through 2/28/18. This set is so cute!! 

Plus we have free shipping and handling (in the US) for orders over $75.00 (after discounts).
                              

Thanks again for taking the time to stop by- hugs and God Bless, sweet friends!

Monday, January 22, 2018

Spotlight on SNSS

Hello sweet friends!  I love the new stamp sets released by Sweet 'n Sassy Stamps this month, but I still love some of the old sets as well.  Today I am featuring the new and the old with two cards I made recently.

This first card uses the new Through the Trees stamp set as well as the Scene Silhouettes: Woodland set and the Thoughtful Words set designed by Nina Brackett.

The scene was stamped twice with the help of my Misti...once on Neenah card stock and once on mixed media paper.  Intense Color Blocks were used to watercolor the mixed media scene and ODBD Pierced Circle Dies were used to cut circles from the top layer.  The sentiment from the Thoughtful Words set was embossed on the top layer as well.  The top layer was popped over the watercolored layer using foam tape.  The animals from the Scene Silhouettes: Woodland set were embossed and cut with my SanNCut.  They were also popped onto the card with foam tape.

My second card uses the old Precious Poppies and Floral Greetings stamp sets.  Unfortunately I needed a sympathy card for a friend who just lost her father and the poppies were perfect.


The poppies were gold embossed on Neenah card stock and watercolored with Intense Color Blocks.  Fossilized Amber Distress Ink was sponged through a TH Burlap Stencil for a little shading behind the flowers.  The sentiment is from the Floral Greetings stamp set and was gold embossed on a black banner.  A bow made with metallic gold thread and black pearls were added to finish the card.
You can find these new and old stamp sets at the Sweet 'n Sassy Stamps Store.


Thanks so much of stopping by!  Hope you were inspired and until next time...happy stamping!
Hugs,
Cathy

Saturday, January 13, 2018

Dark Nights and Bright Stars

Hello sweet friends!  God uses the struggles in our life to make us shine more brightly for him.  As we go through these trials with grace Jesus gets all the glory!  I love this quote from the Inspirational Word Art 2 stamp set available at the Sweet 'n Sassy Stamps Store.

 A galaxy sky seemed the natural choice for a background for this quote.  Blueprint Sketch Distress Ink and Fossilized Amber, Picked Raspberry, Cracked Pistachio, and Wilted Violet Oxide Inks were sponged onto a piece of mixed media card stock.  The colors were well blended before Black Soot Oxide Ink was sponged over all of the colors letting some of the color peek through the black.  The panel was spritzed with water and sprayed with a mixture of Perfect Pearls.  Watered down white acrylic paint was then splattered on creating a night sky full of stars.  Spellbinder Dies were used to make an offset frame. Grass from the Scene Silhouettes: Wetland Grass stamp set was stamped on both the frame and the Galaxy panel.  The little fox from the Scene Silhouettes: Woodland stamp set was black embossed and cut out with my ScanNCut.  The sentiment is from the Inspirational Word Art 2 stamp set and was black embossed on a circle cut with a Taylored Expressions Stitched Circle Die.  A few sparkly gems and sequins were added to the sky to finish the card.  I'm also posting this card over at the Just Us Girls Challenge Blog.

The stamp sets used to make this card are available at the Sweet 'n Sassy Stamps Store.  (**LOVE the new Scene Silhouettes stamp sets**)


Thanks so much for stopping by!  
Remember that our January Stamp of the Month, Scene Silhouettes: Wetlands, is free with a $60 order through 1/31/18.


Hugs,
Cathy

Thursday, January 4, 2018

Quick and Easy Background for Silhouette Images


Hello friends and happy new year! I have three cards to share with you today and each features a quick and easy background, created using water colors, Distress Inks, and Alcohol Inks. These fast background are perfect for showcasing any silhouette image, such as the ones  found in the December stamp sets...Woodland and Tall Grass (LOVE them!!) I created a demonstration video for you to watch the process I took to create all three cards. Take a peek and then head to your crafty space and try out one of these techniques! Share your creation on the Sweet 'n Sassy Facebook page! We love to see what you create! Happy Crafting!

Friday, December 29, 2017

December wrap-up

Hello! Can you believe 2017 has almost come to a close? I hope you had a wonderful Christmas and many blessings come your way in 2018!
 
I am sharing a few cards today using the December Sweet ‘n Sassy stamp sets called Scene Silhouettes: Woodland , Scene Silhouettes: Trees, Hello My Name Is, Scene Silhouettes: Tall Grass, and Thoughtful Words.  CLICK on each photo for more info on each card.
 
an anniversary card to remind you of warm, summer nights...
 
http://papercookies.blogs.splitcoaststampers.com/2017/12/15/anniversary-silhouettes/
 
a masculine card with a cute bunny and bear...

http://papercookies.blogs.splitcoaststampers.com/2017/12/12/on-your-special-day/
 
a Christmas bear...

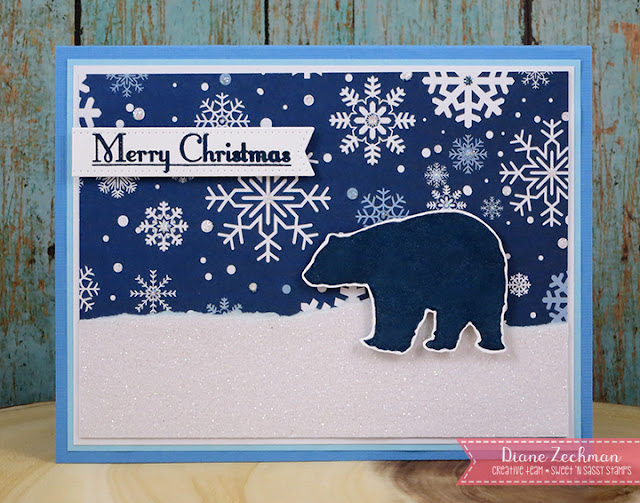
http://papercookies.blogs.splitcoaststampers.com/2017/12/25/christmas-bear/
 
forgiven!...

http://papercookies.blogs.splitcoaststampers.com/2017/12/21/forgiven/
 
and a birthday fox...

 http://papercookies.blogs.splitcoaststampers.com/2017/12/29/birthday-fox/
 
 
Have a great day!
Diane


Monday, December 25, 2017

Merry Christmas!

All of us at Sweet 'n Sassy Stamps want to wish all of you a very
Merry Christmas!

Cathy here and I have one more Christmas card to share using some of the wonderful new silhouette stamps that will officially be released in January, but are available now for pre-order at the Sweet 'n Sassy Stamps Store.

The snowdrifts were masked and the sky sponged with distress Inks, spritzed with water, sprayed with Perfect Pearls for shimmer, and splattered with white acrylic paint.  The snowdrifts were also sponged with the same Distress inks as the sky.  The deer and tree were added with the help of my Misti Tool.  The panel was cut with a Spellbinder square die and then cut into fourths.  Each piece was then matted with an offset piece of black card stock and adhered to a white card front.  I wanted this to be a Christmas card, so I pulled out a Christmas sentiment, but this card could very easily be for any occasion depending upon the sentiment chosen.  

The best part is that the Scene Silhouettes: Woodland Stamp Set is free with your $60 pre-order through December 31st.

The other stamp sets used to make this card include Scene Silhouettes: Trees and Poinsettias & Candles.


Thank you so much for stopping by!

May the blessings of Christmas bring you peace, love, and joy today and throughout the New Year!

Hugs,
Cathy

Friday, December 22, 2017

Scene Silhouette: Woodlands - Thank You

Hello Everyone!  Are you ready for the holidays?  I'm still running around trying to get everything ready but I thought I would share a Thank You card featuring the NEW Scene Silhouette: Woodlands stamp set.  This Set is FREE with a $60 order in the month of December.  The sentiment I used is from the Kindness Matters stamp set.  I came up with a festive looking design perfect to thank someone for their generosity during the holiday season along with being able to wish them a Happy New Year!  

It was super simple to put together and looks like you spent hours creating it.  I used paper scraps for the designer paper and gold mirror scalloped edge.  I tied ribbon around the popped up background and then I embossed the deer and sentiment.  Fancy touches....right?  But trust me this is one that can be massed produced and changed up depending on how many layers you would like to use.  The card measures 4 1/4" x 4 1/4".


Looking for a more masculine version...here's a card that I shared early in the week using the same stamp sets.  You get a totally different look by just changing up the colors.  The strips of gingham is actually washi tape that I found in Target's $ Spot...totally kicking myself for not buying more.


http://www.sweetnsassystamps.com/december-2017-stamp-of-the-month/

Don't forget that the Scene Silhouettes: Woodland is the December 2017 Stamp of the Month and is FREE with a $60 order through 12/31/17.

Happy Holidays!

Saturday, December 16, 2017

Scene Silhouettes- Hope You Feel Better Soon

Hello Sweet Friends!  Julie here and today I am sharing a fun winter card using the December Stamp of the Month- Scene Silhouettes:Woodland (free with any $60 order in the month of December) along with the Scene Silhouettes:Trees and Thoughtful Words!!


I love the silhouettes in the new December release stamp sets- perfect for all types of occasions as well as masculine cards!


This card was fairly simple to create- first, I cut a few masks from scrap paper for the snow banks and punched out a circle for the moon.

Using the masks to cover the snow area, I blended distress oxide inks for the sky and shadows on the snow, then re-masked the hills before stamping the silhouette tree images from Scene Silhouettes:Trees  with an archival black ink and heat setting with clear embossing powder.
 

I repeated the process for the deer image from Scene Silhouettes:Woodland before matting all onto black cardstock and adding the heat embossed sentiment from Thoughtful Words along with a bit of shimmer on the snow banks with a clear glitter pen. 

Quick and easy- just change the sentiment and you could have a quick Christmas card, birthday, anniversary, etc.


I had so much fun creating this snowy scene and hope I have inspired you today! Thanks for taking the time to visit us- hugs and God Bless, sweet friends!