Showing posts with label Fence and Grass dies. Show all posts

Saturday, April 16, 2022

Stand Tall

One of my goals this year is to add more cards for kids into my stash. I also love punny sentiments too. So, when I spotted the adorable Stand Tall set on the Sweet 'n Sassy Stamps site I knew I had a winner that would do both.


The background I made in March with three different colors of green and the Grunge Grid stencil. I die cut the panel and added the fence along with three layers of grass form the Fence & Grass die set. I trimmed the edges, matted with white and attached to a white card base. I stamped the images on white, fussy cut the cloud/sun and die cut the other ones. I left the cloud white and colored the other images with alcohol markers. I assembled as seen and stamped the sentiment directly on the background panel. 


Stand Tall Bundle


 How Tweet Bundle


 Melt for You


 Grunge Grid Stencil


Fence & Grass Die Set 


I hope you enjoyed today's card and thanks so much for stopping by!

Karen

Friday, June 4, 2021

Bundle of Joy!


     Happy Friday! Lieschen here from @harshgurl sharing a new card using stamps from this month's new release at Sweet 'n Sassy Stamps.

    For today's card I used the cute Oh Baby stamp set and the Fence & Grass dies.

    I wanted these cute little outfits to be the main focus on the card so I decided to pretend as if they were left to dry outside! I used two pieces of kraft card stock to be posts and some string that I had in my stash. I then used the Grass dies to add some grass.

    To finish the card I added some glossy accents on those cute baby outfits, some pearls, and a sentiment from the Oh Baby stamp set.

    Remember to check out this month's SNSS release, it is so adorable! Thanks again for stopping by and reading my post. I hope it has given you some inspiration to do something fun and creative this weekend. Until next time!

Friday, May 7, 2021

Groovy Coffee Card

    Happy Friday crafty friends! Lieschen Harshbarger here from @Harshgurl to bring you another fun card I made using the Fill Me Up and Coffee Talk 2 stamp sets and the Fence & Grass dies.

    Before I jump into my project, I would like to let you know that May is Customer Appreciation month at Sweet 'n Sassy Stamps.There will be a lot of fun things happening as well as some really good deals! Starting today through May 13th, all stamp sets illustrated by Nina B Designs are 25% off! Also, if you spend $60, you can pick a 4x4 stamp set of your choice for free.

    To start my card, I had made some die cuts using the Grass die on some scrap card stock that I used on another card project. This left me with the negative space from those die cuts left over, so I used them as a stencil (a great way to stretch your supplies!) on this card.

    I used my mini blending tools and inks to create a fun background.     

    I was able to insert my cardstock through the die cut negative space to create a rainbow colored background for my very colorful coffee card.


     Once I was done with the background I stamped the coffee mugs from the Fill Me up set and cut them with my Brother Scan n Cut machine. I added a sentiment from the Coffee Talk 2 stamp set and some hearts from the Stand Tall stamp/die set. To finish my card I added some glossy accents to those cute hearts.

    I hope today's card project has given you some inspiration to do something fun and creative today. See y'all next time!

Friday, July 29, 2016

His plans far exceed

Good morning!

Today I am sharing two cards using the Celebrate Today and Grunge Elements 2 stamp sets.


Both cards were masked with post-it notes and then I sponged the green and blue.  The flowers were then stamped with Versafine Black ink.  Some hearts from Grunge Elements 2 were stamped lightly in blue.  Then the masks were removed.  I added a few tiny drops of water which turned quite white!

On the first card I added a band of ribbon and a few buttons, and some diecut butterflies from the Monarch dies.


I had a tiny scrap of ribbon left from the strip I cut, so I turned it into a ribbon butterfly for the second card.  A strip of grass was also added from the Fence & Grass dies.


Thanks for popping in and… happy stamping!

Diane


Wednesday, January 13, 2016

Valentine Bookmark

Hello! It's Monika here today bringing you a sweet bookmark. Valentin's Day is just around the corner so I decided to make my project extra SWEET!
 
The bookmark shape was die-cut with the Bookmarks & More die set. I used the cute little teddy from Valentine Critters clear stamp set. To make it quick and easy, I stamped the image on a piece of designer paper, then fussy cut it. Just a note: if you don't like cutting, the stamp set has a coordinating die set.
 
 
The background was stamped with the hearts from Grunge Elements 2 clear stamp set.  To make the background more fun (and because the sweet bear looked a bit too sad against the simple background), I created a scene with the Bare Tree and Fence & Grass die sets. The little hearts were die-cut with the Heart die set.
 
 
I adhered couple of magnet strips inside of the front and back panels, so the bookmark would clip onto a page.
 
I hope I inspired you to create something today!
 
Thank you for stopping by,
Monika


Tuesday, November 17, 2015

Borders & Backgrounds...

Hello Sweet Friends!

It's been a fun month here at Sweet 'n Sassy Stamps as we celebrate our 8th birthday! The DT Divas are sharing Daily Throwbacks with you all month long here on the blog, and over on our Facebook page, to help celebrate!

Today I am re-visiting Borders & Backgrounds clear stamp set (among some other fantastic sets):


I love making shaped cards, so I decided to make a birdhouse card. The scallop border was perfect for the roof of my birdhouse. I used the coordinating die to cut the strips out (which is no longer available). I stamped the scallop image with VersaMark and heat embossed the image with clear embossing powder.


The holly came from Christmas Silhouettes clear stamp set and was die-cut with the coordinating Christmas Silhouettes die set.


The darling birds are from Season's Greetings clear stamp set. I also used the Fence & Grass and Heart die sets.

Monika
 
Get To Know Me:
Monika A. Davis
 
Hello! I was born and raised in Hungary. I've been in the States for 19 years now, living in beautiful New Hampshire. I live with my sweet husband and our 2 boys. I work part time at my sons' school, in the after school program.
I was introduced to rubber stamping 17 years ago and I've been making cards on and off ever since. It's been a great passion of mine. I love making cards and giving them away for birthdays, Christmas, teacher's appreciation day etc. I've been on a number of design teams and have been published a number of times. I taught card making classes in local stamp stores and now I offer classes at my house. These days I am crafting on a smaller scale and concentrating more on my family and on my spiritual journey.
 I love reading, traveling, playing board games... and this summer I took up gardening and canning (which I never thought I'd do).
If you are a new stamper, I'd recommend getting a nice set of ink pads with coordinating card stocks. I made a mistake of buying miss matched items when I started out as a crafter and I never liked the end result. These days, there are many companies offering matching ink pads, papers, even embellishments. 
There are so many fantastic designers who inspire me... I don't think I could name them all here. I visit Pinterest daily for ideas and get inspirations from challenges.
I was introduced to Sweet 'n Sassy Stamps in 2010 (I think) by the talented Kim Schofield. I started out as a Guest Designer, then first joined The Sweet Stop sketch challenge, then the Sweet 'n Sassy Design Divas. It's been such a blessed journey with the other design team members and Korin. I love the different image designs, the Christian sets with beautiful verses and spiritual greetings.
While I have a number of favorite stamp sets, especially the ones with butterflies, I especially love:
 Be Encouraged clear stamp set with it's powerful words:
 
 
These are just the perfect additions to any cards, no matter what the occasion is... and here are some of the cards I've created with this stamp set:


Sunday, September 14, 2014

Autumn Greetings

Hello! It is Gloria with you today. Wasn't that a GREAT September Release on Friday? What a sweet collection of autumn-themed stamps and dies!

I made a simple tag and pocket project to share with you today, using some of the new goodies!


I found this kraft envelope, (3 1/2 x 6 inches) in my stash, and I made a gift card and tag holder out of it. I rubbed the edges with ink, and then I stamped the leaves from the Falling Leaves stamp set in various colors of orange, red, and gold ink across the center of the envelope.

I die cut the tree from the Forest Silhouettes die set out of brown cardstock and "planted" it to look like the leaves had fallen off the branches. I cut the fence from the Fence and Grass die set out of cream cardstock. I rubbed the fence with a bit of tan ink and added it to the envelope with foam squares.

I stamped the sentiments from the Autumn Mum Greetings stamp set onto gold paper with brown ink. I trimmed the sentiments to look like signs and added them to the envelope with foam squares.


To make the matching tag, I trimmed a Graphic 45 kraft tag a tiny bit on each side to make it fit into my envelope. I rubbed the edges with ink and stamped the sentiment from the Autumn Mum Greetings stamp set with brown ink in the center of the tag.

I used the leaf dies from Leaf Silhouettes die set to trim out a few paper scraps. I rubbed the leaves with ink and added them to the corner of the tag. I tied some ribbon and twine to the top of the tag. The back of the tag is blank to enable me to add a gift card or write a message. 

Thanks for looking!

Gloria

Friday, September 5, 2014

One SWEET PERK and an Open House

Hello Sweet 'n Sassy friends!  Happy Friday!  I hope you have all been having a wonderful week!  This has been a very busy week at the Sweet 'n Sassy Studio!  The response to the Sweet Perks Club has been phenomenal and for that we are grateful.  
Thank you for your overwhelming support of this new venture!


BUT there is only one week left to take advantage of the September SWEET deals this club has to offer.  After Thursday, September 11th all of the bundles become available as single items at the regular price…just in time for the new release!    Here is a card that was created using dies from two of the new bundles…Forest Silhouettes and Leaf Silhouettes:


We are also very excited about our OPEN HOUSE this weekend.   
Tonight, from 6:00 - 9:00pm EST and again tomorrow, September 6th from 10:00 - 4:00pm EST, the Sweet 'n Sassy Studio will be opening it doors to YOU!  We will have light refreshments and a Make and Take table, so if you are in the area, please stop by to say hello!

Sweet 'n Sassy Studio
69 Ridge Drive
Mohrsville, PA 19541
(717)202-5496

One more thing before I go…Our new release will be revealed on the Sweet 'n Sassy Stamps Forum at Splitcoaststampers on Thursday evening, September 11th from 8:00 - 10:00pm EST.  Then, on Friday September 12th, we hope you will join us on the Sweet 'n Sassy Stamps Blog for our Release Blog Hop and Challenge!  Here's just a little sneak peek of what you can expect to see:


 Thanks so much for stopping by…have a blessed day and a wonderful weekend!  

Friday, December 27, 2013

God Is...

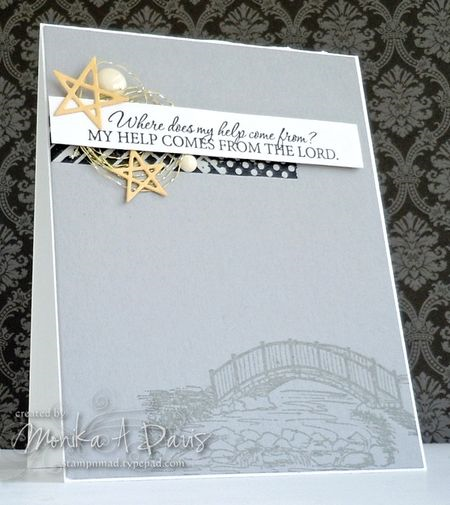
Hello! It's Monika here today, bringing you an all occasion card. 
Now that I officially had to put my Christmas stamps away, I had a hard time picking a set... Finally I decided on God Is clear stamp set, since I had not used it for ages. It is such a sweet set, plus silhouette images are very easy to work with.

I wanted to use a specific sketch from Unscripted Sketches #236... and this is what I came up with:


Simple lines, with a little bit of embellishments... and voila... an elegant and classy card.I used washi tape, silver rhinestones, Baker's Twine, and couple of wood veneer shapes... 
The fence was die-cut with with Fence & Grass Die set.


Thanks for stopping by,
Monika

Wednesday, August 21, 2013

Blessing to Ewe

Hello friends! Giovana here today with a very cute card. I think "Prim Blessings" set is a really adorable set. I tried to create a little scene here.
For this card I stamped the little sheep on watercolor paper (x3) in Jet Black Archival ink, colored them with Inktense pencils, then I cut them out to create a 3D image.
I die-cut grass (here I used the negative too) from Patterned Paper, fence from Brown Cardstock and cloud from White Cardstock. I stamped the coordinated clouds in Memento Summer Sky ink.
I added zig-zag stitches to the front of the card as well as tangerine twine.


Here are the Sweet 'n Sassy Products used:

Hope you like it!
Have a fantastic day!

Saturday, June 22, 2013

Sweet Kiwi Koala

Hello Friends! It's Monika here today bringing you a super cute card, using the brand new Sweet Kiwi Koala clear stamp set. I just love this sweet guy to pieces.


 During the release, you might have seen my circle card, where I 3-D paper-pieced the image.
This time, I only pieced the melon. I stamped the image on the base card, then I stamped it on scrap and cut only the melon part out. Then I colored the image and using a stylus, I rubbed the back side. This gave some dimension to the image. I attached the melon to the main image with dimensional tape.

---------


To embellish my card, I used one of the new shape dies that will be available next week. I cut three of them out of gray card stock and adhere them on top of the Vellum strip. I also used Baker's Twine and Silver rhinestones.
The grass was die-cut with Fence and Grass Die set.

...and just a little tip... make a cloud 'stencil' out of paper and using a sponge dauber, dab ink on the card:


The sketch came from The Sweet Stop, SSS216.

Thanks for stopping by,
Monika