Showing posts with label Made New. Show all posts

Monday, April 25, 2022

Tulips


Esther here today with a pretty purple tulip card. The background was created by sponging wilted violet ink through the script stencil and inking along the edges to give the panel more color. A piece of white lace separates the stenciled design from the solidly inked bottom part of the panel. The flowers, leaves, and butterfly were stamped in waterproof ink on watercolor paper and colored with watercolor brush pens.

     ~~~This post contains affiliate links at no extra cost to you~~~

 Supplies and Tools:


Tuesday, March 22, 2022

Thanks So Much!

 PRODUCT LINKS BELOW CONTAIN AFFILIATE LINKS AT NO COST TO YOU
 
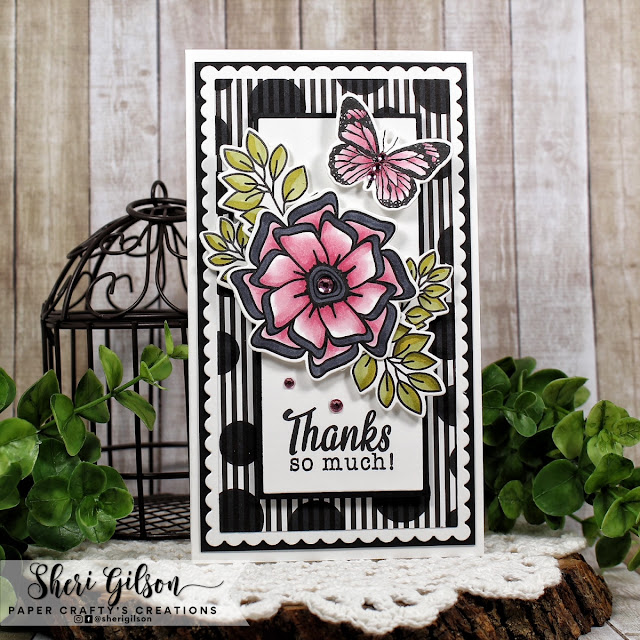
Hello Sweet Friends! Sheri here with a Thank You card featuring the March 2022 Stamp of the Month! The stamp set is called Spotted and is FREE with any $65 order. This is a perfect set to create backgrounds or add texture to your cards. I LOVE polka dots so it has become a fast favorite.
 
Do you ever think about customizing your pattern paper? Well I took a piece of plain black & white stripped pattern paper and stamped the Solid Polka Dot stamp from the SOTM to create a more dramatic backdrop. Depending on where your focal image is placed, you can get away with just stamping around the outer edges of the paper. I think the bold polka dots add a huge impact to the design. What do you think? Hope you will consider giving this technique a try!

Now onto the card design. I stamped images from the Forever Loved and a butterfly from the Made New stamp sets with alcohol friendly ink and used copic markers to color them. Next I took the coordinating dies sets and cut all the images out. Don't have the dies, they can easily be fussy cut out. I then cut a rectangle strip to stamp the sentiment on and arrange all my stamped pieces. For embellishment I added a few rhinestones.

Card Measurements:
Mini Slimline Card Base: 3 1/2" x 6" (7" x 6", scored at 3 1/2" on the 7" side)
Black Panel: 3 1/4" x 5 3/4"
White Scallop Panel: 3 1/8" x 5 5/8"
Pattern Paper Panel: 2 13/16" x 5 5/16"
Black Rectangle Mat: 2" x 4 1/2"
White Stamped Panel: 1 7/8" x 4 3/8"

 
(stamp set also available individually)
 

(stamp set also available individually)
 
-----
 
 
Happy Stamping!!

Monday, February 21, 2022

Blooming Anemones


Hello Sweet 'n Sassy friends! 
It's Ceal, here. Today I am sharing a card using this gorgeous floral set, Blooming Anemones.  I love this color combo and have made other designs using this color combo. 
I have attached them here in case you don't follow my blog, Simply Beautiful or my Instagram @cealp. I would love for you to follow me if you don't already. 

This card uses four different sets


This one uses 


Saturday, August 7, 2021

Made with Love

I am smitten with the new Sweet Treats set! I am having a blast paper piecing the apron and playing with all the accessories! For today's project, I decided to make a Memorydex card also know as a Rolodex card. It was fun to create in a different way!


I started by finding my pattern paper and chose three coordinating patterns from my Ninth Street paper pack (The Paper Studio). I stamped the apron, oven mitts and bowl onto white cardstock with VersaFine Clair Nocturne ink. I stamped the apron and oven mitts onto the pattern paper making sure to stamp the towel portion of the apron a second time on a different pattern. I fussy cut all the pieces and assembled my apron and oven mitts.

I colored the bowl with a variety of watercolor brush pens and set aside to dry. I die cut my memorydex card(Heidi Swapp die) from Kraft cardstock. I added the first layer to the base with antique linen distress ink and the Delightfully Delicate stencil. Then, I distressed the edges with vintage photo distress ink and added little hints of blue with oceanside ink using a small stamp from Going Postal

I stamped the sentiment from Made New in ocenside ink and masked off one of the sentiments from Sweet Treats and stamped the bottom half with black. I assembled the card as seen, popping the oven mitts and bowl up with foam tape and adding a little bit of washi tape.


I hope you enjoyed today's project and have a great day!

Karen

Monday, May 24, 2021

Butterflies and Roses

 Happy Monday! Esther here today sharing two cards that feature my new favorite way to add texture and interest to my card fronts --- by dry embossing over stamped images! 

This first card is done up in a fun collage style. Since it's a stamping-only card it's great for those days you just don't feel like coloring or maybe don't have enough time to do something up right. 

I created the collage background by stamping images from Going Postal and Nature Silhouettes in Versafine Clair Nocturne Ink.

I embossed the background with the organic linen 3D embossing golder from Altenew, and added some sweet little butterflies (Made New stamp set) stamped in three colors of distress oxide (Tumbled Glass, Kitsch Flamingo, and Evergreen Bough).  

 My second card features one of the NEW digital stamps released this month --

Rose in Bloom


 I printed it on all four corners of my card and used Arteza Real Brush Pens to give it a messy watercolor look.  After some text stamping (Psalm 23 Background) and paint splatters, I used the same organic linen embossing folder  to add a bit of texture to my card panel.

I finished it off by printing one of the sentiments from Rose in Bloom and die cutting it with the Elegant Ovals Nestabilities from Spellbinders.


     ~~~This post contains affiliate links at no extra cost to you~~~

 SALE: All Korin Sutherland designs 25% off through the 27th

Tuesday, July 7, 2020

Roses for Days!

Hello Everyone! 

Have you checked out July's release?  Yes, I did say July!  How can that be???  I happen to be in Florida right now, visiting my parents.  I feel like once I get home, I am going to blink and the summer will be over. 
Anyway, back to the new stamps.  True Beauty.  It IS a beauty!  So versatile! 

My first card was super fun to make.  I really did not even plan it out; I was crafting with a friend and it just happened, lol.  I may need to craft with her more often! 


This was so so simple; I did not even put the image on a stamp block!  I used the rose image in the bottom right hand corner.  I simply inked up the stamps with distress inks to create an ombre design. 


Once the background was done, I stamped a butterfly from the Made New Stamp Set with Memento Tuxedo Black ink and colored it with Copics.
The butterfly was grounded with a sprig of leaves die cut from vellum, as well as a sentiment strip in black.  The sentiment is from the Sentimental Mash Up Set ( I love this set!) and is heat embossed in white embossing powder. 
This next card came out of that same crafting session~


This time I used the solid rose image and the outline rose image.  I stamped the outline first, and then, using my MISTI, I inked up the solid image, using two different colors of distress inks on each rose.  Then, using some very simple masking, I stamped the outlines of the leaves followed by stamping the solid leaves, again, using two different colors of green distress inks.  I die cut the rose panel with a scallop frame die and popped the frame up on dimensional adhesive.  The sentiment, from the Mason Jar Bouquet Stamp Set, was heat embossed with white embossing powder.

And lastly, a more typical card, at least for me- there is Copic coloring!

 
I did some no line coloring this time, using the outline rose image again.  The image was stamped with Antique Linen Distress Ink on Neenah Solar White cs and then colored with Copics markers. 
After fussy cutting the flower out, I went to work on the background panel. 
A stencil and some Coloringz spray is all that was used for the background.  And that sprig of leaves pops up again, this time die cut from white cardstock.  'Hello' is stamped in a yellowish green ink that looks more black here than irl. 
That's it for me!  I hope I have inspired you to just PLAY with this set!  I promise you, you will love it. 


Thanks for visiting!

Lee Ann 

Saturday, February 8, 2020

All I have needed...

Hello everyone! Today I want to show you a card that I made with the butterflies from 'Made New' and one of the quote blocks from 'Hymn Word Art'.


I made a background with Distress inks. I added the color to a transparent sheet and sprayed it with water. After that I added my paper on top of the ink. That creates a random background with colors that blend into each other.

I colored the butterflies with watercolor markers and added a bit of sparkle with Wink of Stella to the quote (that's hard to see in the picture).


The edges of the panel are distressed with the purple Distress ink I used for the background. I adhered the panel on top of a patterned paper with a couple of silver details.

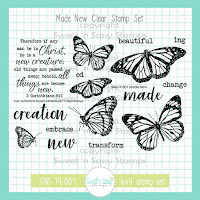
https://www.sweetnsassystamps.com/made-new-clear-stamp-set/

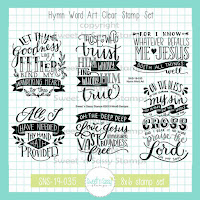
 https://www.sweetnsassystamps.com/hymn-word-art-clear-stamp-set/#

I hope you're inspired to create!

- Lucinde

Wednesday, January 15, 2020

January Release Blog Hop

Welcome to our January Release Blog Hop!

We're feeling the love for the January release and are so excited to share the projects we've been working on with you! Read on for a bit of inspiration and a little walk through of our new release, then hop along to the blogs linked below for all sorts of papercrafting inspiration.

Plus, there's a GIVEAWAY! Leave a little shout out in the comment section on each stop along the way for a chance to win a $10 gift voucher to the Sweet 'n Sassy Stamps shop. Winner will be announced here on the SNSS blog, Wednesday, January 22.


Here's the official hop list. If a link misbehaves along the way,
hop on back here to pick  up where you left off.


For my first card I pulled out the Love Wordfetti set, with the idea of doing a sunny card with the you are my sunshine sentiment.  I grabbed some patterned paper, then grunged it up a bit with the Typewriter Text Background and Delightfully Delicate Background stamps.  I then stamped the several times across the bottom of the panel. Next I started sponging yellow inks in, then unfortunately grabbed an inkpad that had the wrong lid on it! It was a rich brown instead of a yellow, so my card took on a darker feel than I wanted, but I went with it anyhow.

The butterfly is from Made New and I embossed it in copper on vellum, then colored the wings with Copic markers.  I added the hello beautiful sentiment popped up and accented with some sequins and thread to finish off the card.

My next card pairs the Love Wordfetti set with the January Stamp of the Month: Texture Tiles 5. I just love these background stamps!  I started by inking up my stamp with three inks at a time for the rainbow background. First I stamped with candied apple, carved pumpkin, and mustard seed, then mowed lawn, salty ocean, and wilted violet.


Next I found an old rainbow die in my stash and cut it from white cardstock.  I then sponged the red, orange, yellow, and green inks onto it, then taped together, coated with Versamark ink and embossed with sparkle embossing powder.  The you are my happy place sentiment from Love Wordfetti is embossed in white on a thin black strip of cardstock and adhered in the corner.

Okay, the next stop on the hop is my blog, Poetic Artistry

Here's a little look-see at the sets included in the JANUARY release...

First up is the January stamp of the month, Texture Tiles 5Our January stamp of the month is a definite must-have in your stamping collection. It includes some super versatile heart, polk dot, and cross background tiles. This set is available for purchase for $15.95, OR you can get it as a FREE gift with a $75 purchase (after any discounts and before shipping and tax) during the month of January!


In our Lots of Love set, illustrator Jenn Nilsson brings us an adorable set of valentine critters, sure to steal your heart!


Korin brought us the beautiful Grace So Amazing set this month. These grace filled sentiments are simply gorgeous paired with images, but steal the show on their own!


Our Creative Worship set this month is the elegant With Love Alpha set. These beautiful scripted letters make for the most beautiful words!


And if you've loved our previous wordfetti sets, you'll be happy to see this fabulous new Love Wordfetti set. So many fun phrases for Valentine's Day, as well as throughout the year.


That's our January Release in a nutshell! So many fabulous sets to choose from! What's your favorite? 


May you be blessed today and always!

Saturday, July 20, 2019

By the Sea & Sentimental Wordfetti

 Hello! It's Monika here today with cards using some of the new release images (along with some other favorites)...

Have you been enjoying the fun projects with the July stamp sets? I love the summer theme and the sweet images! The July Stamp of the Month set will be one of my go to sets for sure with the awesome sentiments! 

My first card was made with By the Sea clear stamp set:


The background was made with Tranquil Tim Holtz Alcohol ink. It looks really nice in real like... the images were heat embossed with white embossing powder on water color card stock, then colored with Kuretake Gansai Tambi water colors.


The little flower and leaf images are from Itty Bitty Blossoms clear stamp set.
The butterfly image is from Made New clear stamp set.


I hope I have inspired you to craft today!

Thank you for stopping by!

Monika