Showing posts with label Lee Ann Barrett. Show all posts

Tuesday, June 15, 2021

Florals and More

 Hello! 

Have you been enjoying all of the June release inspiration?  

Being the floral lover that I am, I could not resist another card using the new Botanical Branches as a filler.  


I used the pussy willow stems from the Botanical Branches Stamp Set, coloring them in gray with Copics.  The roses and leaves are from the True Beauty Stamp Set and were colored in grays and yellows.  Gray and yellow. The color combination has to be one of the most perfect combos there is!  

All of the images were fussy cut out. An embossing folder was used on the background panel.  All of the pieces were put together and adhered to the card front.  The sentiment is from the Encouraging Thoughts Stamp Set; It was stamped on a grey sentiment strip.  A few sequins finish the card. 

I liked this grouping of images so much that I recreated it in tag form.  I needed this tag for a Bible study I will be starting.  I am not usually one for tags, but something about this was freeing!  


My tag was first sponged with distress inks in various shades of green.  Next, texture was added to it but using a darker green with the Fern Fronds Stencil.   Lastly, I spattered a bit of white acrylic paint on the background. 

Then I used the same rose from the True Beauty Stamp Set and colored it with Copics after stamping with Memento Tuxedo Black Ink.  The branches are again from the new Botanical Branches Stamp Set and were colored with Copics.  Everything was fussy cut out.  I added a bit of vellum to the bottom right corner just to soften things a bit then arranged the elements and adhered them to the tag.  I finished the tag off with my printed steps and hand lettered title.  A couple of ribbons finish it off.  

That's it for me!  Thanks so much for stopping by and have a blessed day!

Lee Ann  

Tuesday, June 1, 2021

Versatile Botanical Branches

 Hello, Hello! 

Happy Summer to all of you! 

Have you checked out the new release from Sweet n Sassy Stamps?!  This is a seriously awesome release!  My favorite set is the new Botanical Branches by Nina B.  First off, they are just gorgeous; but second, they are so versatile!  They are perfect fillers for floral sprays but they can also stand alone on a card, as in my first card~


 This gorgeous berry branch was colored with Copics and then fussy cut out.  I added an embossed panel to my card base.  Then, for interest and another pop of yellow, I cut in half a square die cut frame I had in my stash.  It happened to be stamped with an image from the Flower Garden Stamp Set and watercolored with distress ink.  The square halves were adhered to the base and the berry stem was popped up on foam tape.  The sentiment, which is from the Encouraging Thoughts Stamp Set was stamped on a sentiment strip and adhered, along with a few sequins to finish the card. 

Next up, I have used the Botanical Branches set as filler for a floral bouquet.  The flower is from the True Beauty Stamp Set.  


I started with the back panel- color blocked 5 wide stripes with watercolor.  While that was drying, I stamped the flower with distress ink and then colored it with distress inks.  I did the same for the leafy branches that are from the Botanical Branches Stamp Set.  The leaves were heat embossed in white embossing powder on vellum and everything was fussy cut out.  The elements were assembled in the lower left corner and adhered to the card.  The sentiment is from the Birthday Wordfetti Stamp Set and was stamped on blue cs.  A few sequins were added.  

You can check out the entire new June Release HERE!  And check out the new release specials while you are there.  

Thanks for stopping by!

Lee Ann  


Tuesday, May 18, 2021

Lemons and Lettering

 Hello!  

Have you been enjoying Customer Appreciation Month?  Sweet n Sassy Stamps has such talented artists.  

When I think lettering, Rebecca Rios pops into my head!  I love her calligraphy and sentiments.  Life and Lemons is one of my favorites of hers~


Rebecca's letters are exquisite and because of that you can keep your card fairly CAS and the lettering alone will make it shine!  But this lemon though...I love this stylized lemon.  It was stamped on watercolor paper and colored with Ken Oliver Colorbursts.  It was then fussy cut out.  The card base was stamped with the same lemon and leaf, only this time it was stamped randomly in light gray.  A couple of white panels set the lemon apart and lastly, the sentiment is stamped.  a few sequins finish off the card.  

And I cannot forget one of her newest sets, Count Your Rainbows with coordinating dies.  This is such a fun set!  I needed some thank yous for some students at school; this was the perfect set.  I made simple 3 x 3 cards using the smallest rainbow and coordinating die, along with one of the cloud dies.  


The rainbow is colored with Copics and the sentiment is heat embossed on black cs.  The sentiment is from the Scripty Thoughts Stamp set

Rebecca's sets are currently on sale through May 20th, so now is the time to stock up!  


Thank you for stopping by! 

Have a blessed week!

Lee Ann  

Thursday, April 29, 2021

Road Trip

 Hello Friends!  

I have another desert scene, this time in the form of a road trip!  I combined the two sets, Just Married and Thirsty Soul to create this card.  


I made this with my niece in mind, who is ready to start life as a new RN.  
The VW Beetle was stamped with Memento Tuxedo Black Ink.  I used post it notes to mask off the heart banner and Just Married sign in the back window.  The car was colored with Copics and fussy cut out.  
The cacti were also stamped and colored with Copics,  I stamped the tall Saguaro in varying heights and with various limbs to create a realistic desert of Saguaros in different sizes.  They were fussy cut out as well.  
The background was done with Daniel Smith Watercolors on Arches water color paper.  I had the desert, road and tall mountains in, then decided to add foothills to the mountains using the mountain stamp from the Landscape Silhouettes Stamp Set.  This is where things were almost ruined.  I selected the wrong colors of Distress Inks and then the paper got too wet.  Once the paper was completely dry, I went back in and brushed in a darker color (and I don't even remember what color I used) and this gave the illusion of shadows on the foothills and saved the background. 
The sentiment is from the Inspirational Word Art 1 Stamp Set and was stamped with Versafine Black Ink using my MISTI so I could stamp multiple times and get good coverage, even on the textured watercolor paper.  

Thanks so much for stopping by! 

Lee Ann  


Tuesday, April 6, 2021

Morning Glories and Mixed Media

   Good Morning Everyone!  

Last's month's mixed media cards were so much fun that I decided to do it again.  This time I am using the Sympathy Morning Glories Stamp Set.  

I started with a piece of Yupo Paper, alcohol inks ad embossing powder.  Using pink, yellow and orange alcohol inks, I created a inked background.  Next, I stamped the Yupo with Versamark Ink and then carefully heat embossed it in gold embossing powder.  The panel did warp a little, but since I fussy cut the image out, it really did not matter.  

As the image had an Asian flair to it, I decided to go with red and black cs.  I found this black panel in my stash that had been embossed with Translucent embossing paste.  I added that and a red strip of cs and finished off with the flowers, backed with a white circle.  

The sentiment, from the Birthday Wordfetti Stamp Set,  was stamped and heat embossed in gold on black cs on a narrow strip of paper and then adhered to the card.  I did not feel any need to add bling to this.  You can see all of the shine and texture here~


Next up, another mixed media card using the Sympathy Morning Glories stamp set, but much simpler and subdued- much more appropriate for a sympathy card~


This card was started with a gel press print in blue.  I die cut a circle from it.  It would make a good base for some monochromatic blue flowers.  The flowers were stamped with Memento Tuxedo Black ink and colored with Copics.  I tried to stay really light, but I have such a hard time doing that!  

Once colored, I fussy cut the flowers out.  I opted to mount the circle and flowers in the bottom right corner of the panel, but the card seemed to need a little more so I added a white card front die cut.  The sympathy sentiment strip and a few sequins finish the card.  

And I cannot finish this post without sharing something from the new release! 


Yup, still trying to keep things, light, soft and pastel!  This time I colored the beautiful cake from the Just Married Stamp Set and fussy cut it out.  I kept things simple here, adding it to a patterned paper circle with a sentiment strip.  

Tuesday, March 16, 2021

Mixed Media Birds and Blooms

 Hello Friends!  

Today I am sharing projects made with a beautiful and versatile set, Birds and Blooms.  Both cards are also of the mixed media variety.  

This first card is very much a mixed media card- lots of layers, little white space.  


I wanted to play with some new Distress Ink products I got, Speckled Egg Distress Ink and Broken China Distress Glaze.  Various shades of rust, blue and brown shades of Distress Ink were sponged onto the card front.  I did a lot of distress with water drops. While playing with my new Speckled Egg Distress Ink, I decided to use the direct to paper method across the top of the card.  Being a new pad it was very juicy and stay fairly wet.  I took this opportunity to emboss the ink with Broken China Distress Glaze.  For a girl who loves clean, white, space, I love how this turned out.  

The bird and flowers were both stamped with Versafine Onyx Black Ink and watercolored with various watercolors- whatever happened to be handy!  They were fussy cut out and then white gel pen was added to the flower centers.  The sentiment is from the Begin Again Stamp Set and was stamped in Versafine Onyx Black Ink using my MISTI.  

This next card is more my usual style, but don't be fooled- this is mixed media as well.  


This time I flipped through my stash of backgrounds, many of them gel prints.  I found this one with aquas, yellows, chartreuse and black.  I die cut circles from the panel and then pulled out three of them for this collage style card.  I also settled on a mini slimline card.  
The bird was stamped on watercolor paper with Versafine Onyx Black Ink.  I used Ken Oliver Colorbursts to color the bird.  I also stamped the floral branch.  This I did not color.  The branch and bird were both fussy cut out.  
A strip of black cs was adhered along the left edge, circles were adhered to the card front and the bird and flowers were popped up on foam tape.  The sentiment is from the Everyday Greetings 
Stamp Set and was stamped in Versafine Black Ink with the help of my MISTI.  


Tuesday, March 2, 2021

Spring Has Sprung!

 Hello Friends!

I know the calendar says it is winter, but my mind tells me that it is spring, or at least heading towards spring!  Warmer temps, sunshine and longer days have me wanting to use spring images on cards in all the pretty pastel and bright colors.  

The new Hoppy Spring is the perfect set for this.  Goodness, I love everything about this set, from the adorable bunnies, to the eggs and the adorable bitty chicks.  


Doesn't this card just scream spring?!  I started with coloring the eggs- I had another idea, but it did not work out like it was in my head so on to plan B.  I colored the adorable bunny with Copics and fussy cut him out.  I used 3 of the pastel colored eggs around him.  For the background, I stamped the clover- like image from the Long Stem Silhouettes Stamp Set- I stamped with two different colors of green and did first, second and third generation stamping to get the illusion of depth.  I grounded everything with a sentiment strip that I colored in ombre fashion with Copics, then stamped the sentiment using two different sentiments from the Hoppy Spring Stamp Set.  

The sentiment strip and bunny are popped up on foam tape.  A few sequins finish the card.  


For this card, I wanted to use the new Fern Background Stamp for a technique that I watched Jennifer McGuire do.  I started out by selecting bunches of sentiments (I have listed all of the sets at the end of this post).  I placed them on my cardstock in my MISTI and then closed the door, keeping all of the sentiments perfectly placed.  I actually made 3 backgrounds doing this- so easy- once they are in the MISTI, you can stamp them as many times as you want.  But I am getting ahead of myself.  I stamped the sentiments with white pigment ink.  Once dry, I stamped the Fern Background Stamp in ink that was a close color to the cardstock for a tone on tone look.  

Once my background panel was done, I die cut a circle in the panel.  I then die cut a white frame for the opening. Behind this circular opening, I adhered a pretty,  springy, pastel, floral paper.  My sentiment was made with the new Blessings Die.  I love this die and for the price, you can't beat it.  The word, 'sending' is from the Hoppy Spring Stamp Set.  I heat embossed it in white on black cs.  I love how the black ties in with the black in the patterned paper.  3 little yellow sequins finish off the card.  

If you have not checked out the Sweet n Sassy Stamps March Release, head over to the store; there are so many great new products.  The Fern Background Stamp is also the stamp of the month and is free with a $60 purchase.  The Hoppy Spring Stamp Set also comes with dies in a bundle, saving you some $$. And if you need the whole release (trust me, it is worth it) you can save over $30 when you purchase the New Release Bundle.   

And here are the stamps that I used various sentiments from for the Blessings card~


Thanks so much for stopping by!  

Lee Ann  

Tuesday, February 16, 2021

Florals on a Wintry Cold Day

 Hello, Hello!

I have some florals to share with you today. 

The new Floral Background Stamp is super versatile- use it on your whole background and highlight a sentiment, or use in smaller doses, as I have done with this coffee card. 

I started with the I Like Big Cups Stamp Set and Stamped the To Go Cup on Neenah Solar White cs.  I then stamped the Floral Background Stamp over the cup, giving it a floral pattern.  The image was then colored with Copics.  The lid was stamped twice, the second lid being popped up on dimensional tape.  I added a corrugated cup cozy to finish the cup.  I cut strips in red, yellow and navy and then did some tone on tone stamping on each strip using the Texture Tiles 1 Stamp Set.  The sentiment from the Punny Love Stamp Set is perfect with this set.  The little hearts are also from the Punny Love Set.  

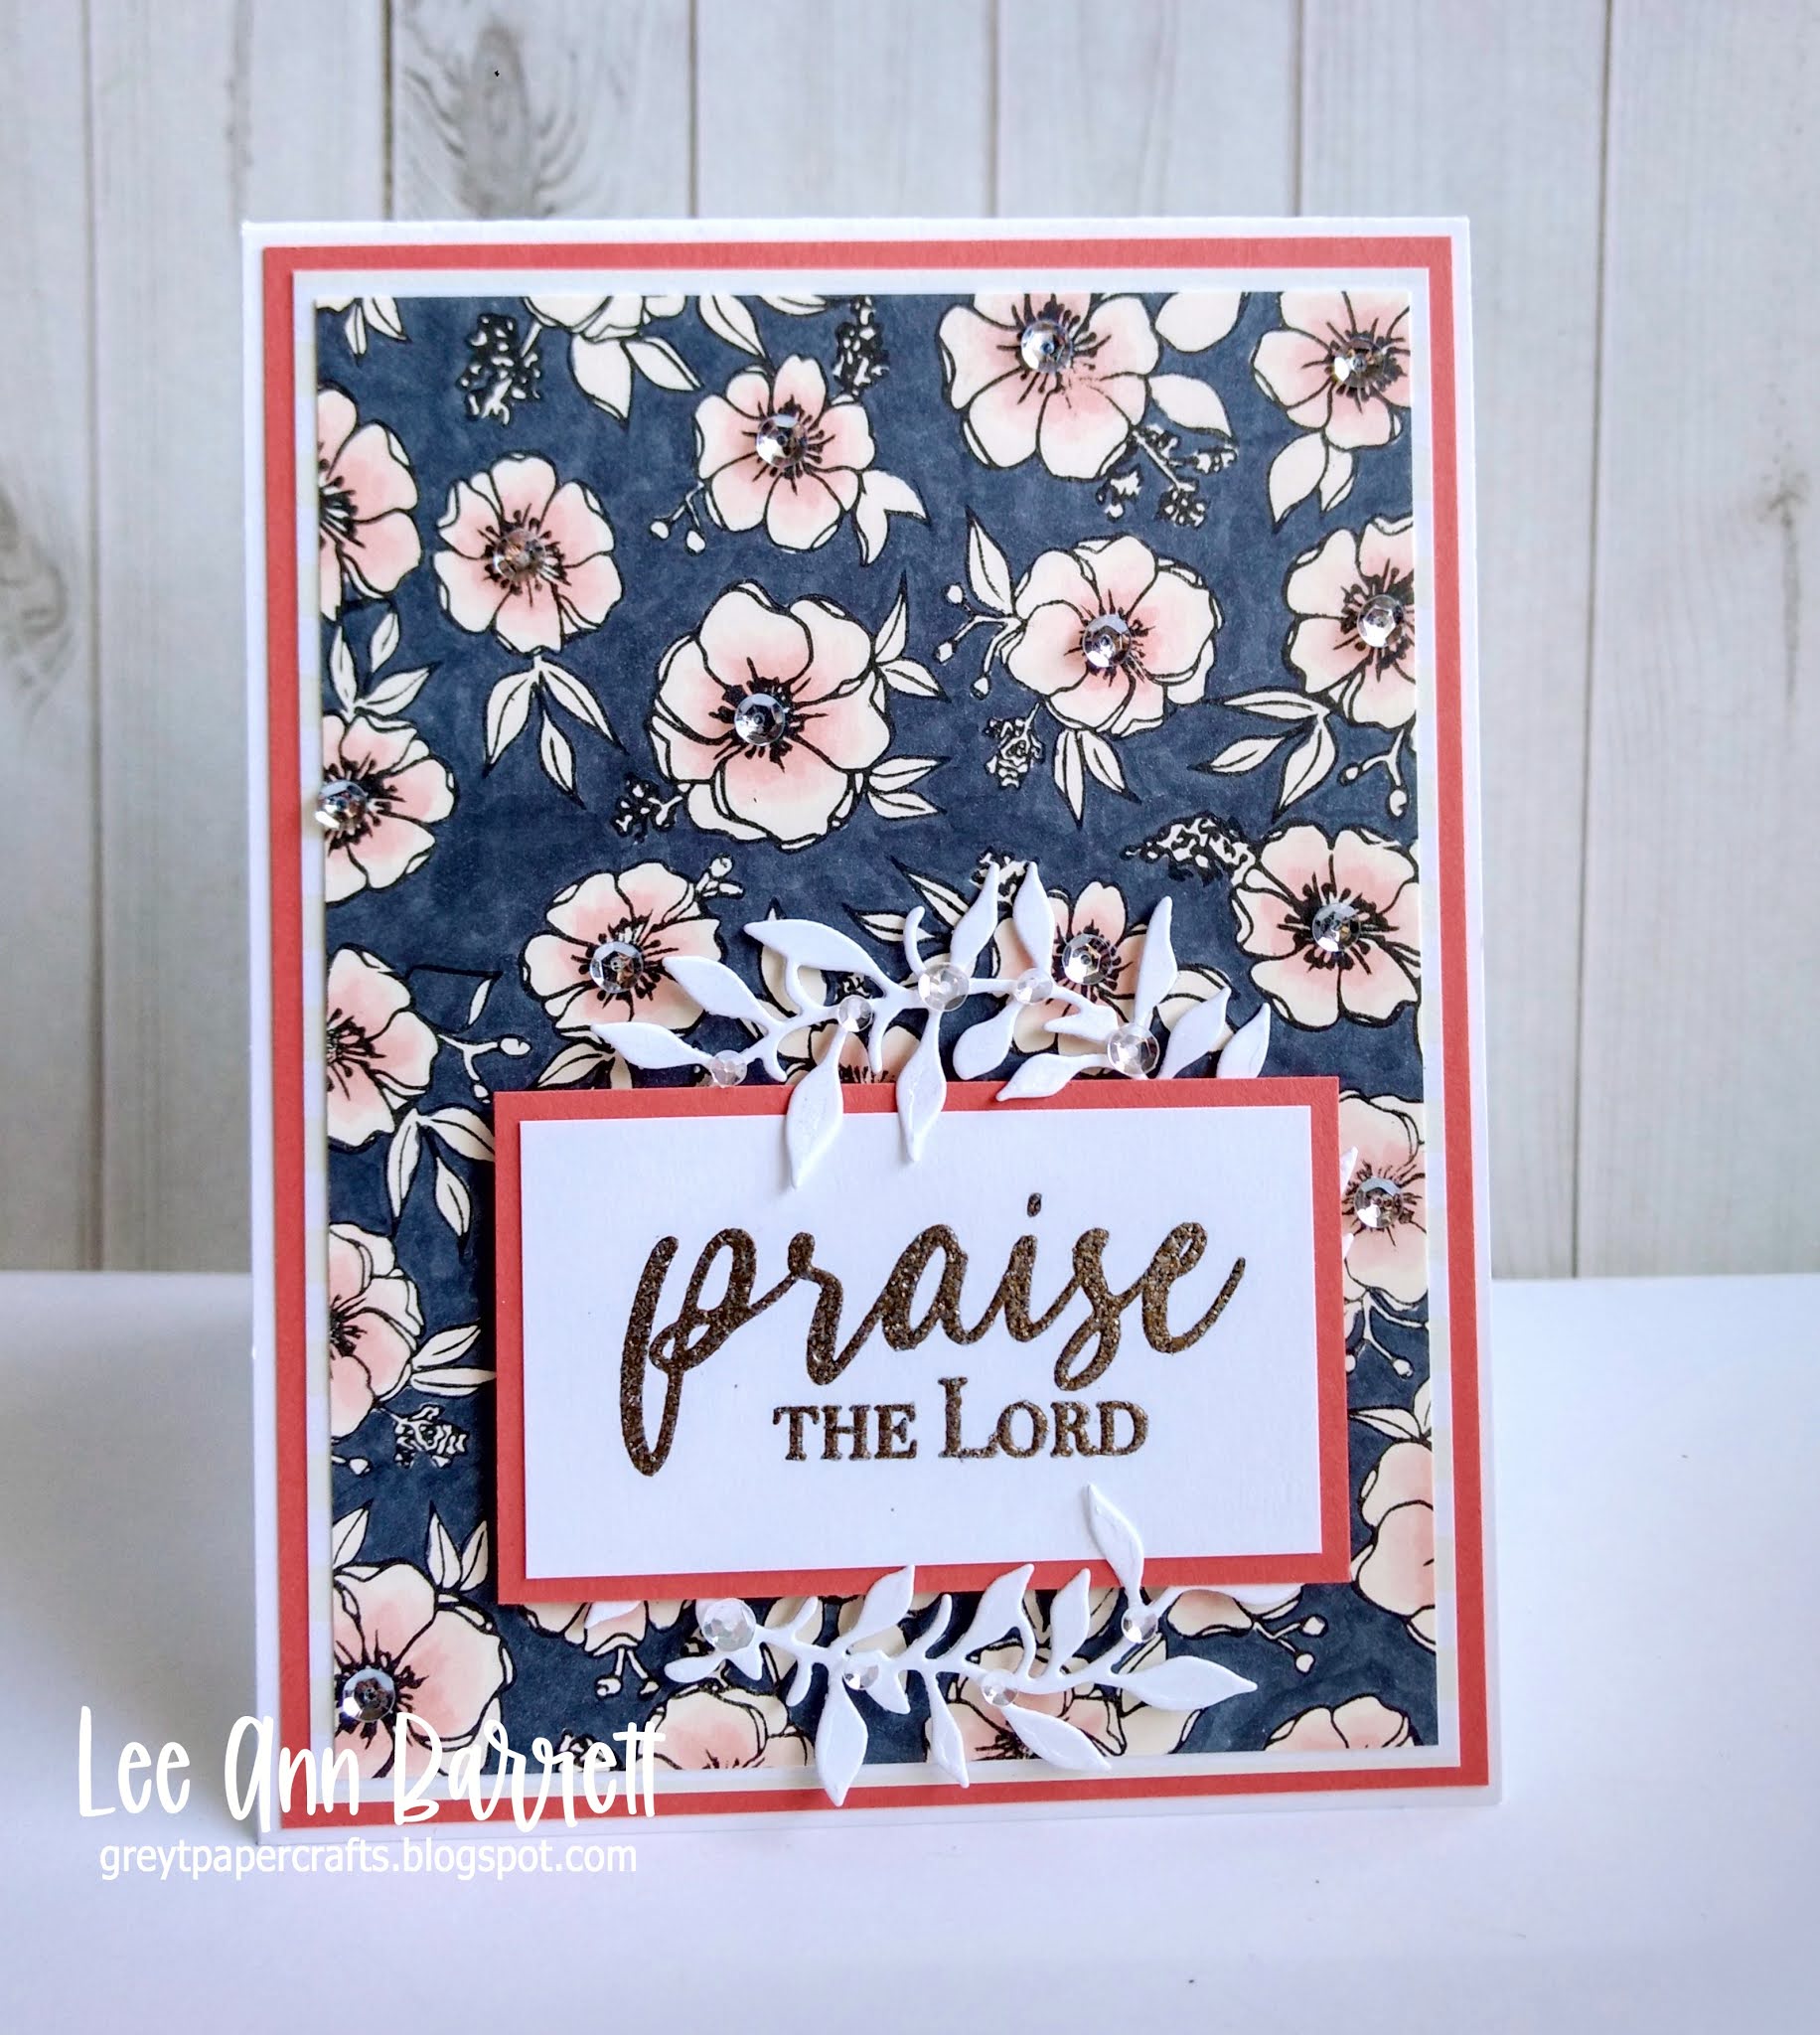
Here is the same Floral Background Stamp, this time being used for the entire background panel.  


The background was stamped multiple times using my MISTI to cover the panel.  Then background was then colored with a 'C' Copic marker.  The flowers were colored a very pale peachy red color.  I added a sequin to every flower center. The sentiment, Praise the Lord, is from the Faith Phrases Stamp Set.  I heat embossed it in Pewter embossing Powder.  A die cut wreath and more sequins finish the card.  

This last card uses one of my favorite florals that I really don't use enough.  Especially with all of the sentiments it comes with.  


I used Arches Watercolor paper and Versafine Onyx Black ink to stamp this gorgeous image.  I then used some Jane Davenport Watercolor Brush Pens that I found on clearance at Micheal's.  $5- what a steal!   This was the perfect time to practice watercoloring 'loosely'.  Loosely is not in my vocab when it comes to crafting.  This was my best shot at it.  It ended up being not so loose.  

I fussy cut the image out and then found a panel in my stash that I had made with acrylic paints.  The colors were perfect with the image.  Some texture was added to another panel using an embossing folder.  Finally some gouache spatters and sequins finish the card.  

I hope I took you away to warmer days for a few minutes and also inspired you to craft!  

Thanks for stopping by and have a blessed rest of the week!

Lee Ann  

Tuesday, January 19, 2021

Sweet Valentines Using Old and New

 Hello!  

I have a couple of Valentines to share with you today, both of which are a mash up of old and new Sweet n Sassy Stamps Stamp Sets.  


This card is so easy; just 3 little stamps and done!  I stamped the airplane from the new Going Postal Stamp Set.  The 'old' is the wonderful heart 'jet stream', which is actually the steam from the Tea for Two Stamp Set.  I love this double duty for these hearts!  The sentiment is perfect for this combination of images and is from the Happy Mail Stamp Set.  And that's it!  No coloring, masking or anything time comsuming.  I added three die cut clouds and some patterned paper.  

Card number two also uses the Happy Mail Stamp Set~


I stamped two of the envelopes from the set multiple times and connected them with dashes.  At the end of the trail is the adorable hot dog from the Lots of Love Stamp Set, another 'oldie but goodie'.  The images were stamped on watercolor paper and colored in with Daniel Smith Watercolors.  The sentiment, from the Love Wordfetti Stamp Set, connects everything together.  

What do you have in your stash that you can mash together?  For Valentine's cards, these sets can't be beat!  

Thanks for stopping by and have a blessed week!

Lee Ann  

Tuesday, January 5, 2021

Roses are Red and So are Penguins!

 Hello Friends!  

I hope everyone enjoyed Christmas, New Year's and time off with your families.  

As you have probably already noticed in stores, we are headed full speed towards Valentine's Day.  I got this wacky idea (trying to think outside the box, lol) that I needed a red penguin on a Valentine's Day card.  Here is the end result!


So, I kind of love him!  I did add a heart to his tummy- I used a heart stamp from the Sweet Little Lamb Stamp Set.  This sweet guy is from the Winter Hugs Stamp Set, as is the sentiment.  He was colored with Copics and then fussy cut out.  I was a bit stumped from there.  Several different backgrounds, layouts, and color schemes later, I was still without anything but this cute bird.  I rifled through some patterned paper and happened across this pink and red graphic paper that is perfectly 'Valentiney'.  Best part is it already had the heart shape die cut from it from some previous project.  It was the perfect way to finish off this cutie.  I added some sequins and stamped Happy Valentines Day on the side- the stamp I used is from the Lots of Love Stamp Set.  I tried to get a picture here, but with bad lighting due to a very dreary day, I could not get a good photo of the inside of the card.  Here are both stamp sets that I used~


This next card is also monochromatic red and it started out as a Valentine's card as well, but as you can see, it did not end up as such.  


Isn't this just the best bird image?!?!  If you like realism (like me!) then this is THE bird image for you.  This guy is from the Singing Praises Stamp Set.  I stamped him with Versafine Onyx Black Ink using my MISTI and then water colored him with my well loved Ken Oliver Colorburst Watercolors.  The bird was fussy cut out.  

For the background, I decided to use the faux water coloring technique.  The floral image is my favorite in the Flower Garden Stamp Set.  Once the background was dry, I die cut a circle out of it and them popped up the negative panel on the card base. I stamped the sentiment and added a few sequins and called it done.  If you want to see my inspiration for this card, head over to my blog!  

Please excuse the photos, all.  I am still getting used to a new computer, new editing program and trying to take photos with my phone.  I will get there eventually!  
Don't forget, the January Release Bundle is available through January 9th- you can save over 10%!  
And with your purchase of $75 or more you get free shipping!  AND, with a purchase of $60 or more, you get the January Stamp of the Month- Happy Mail- for free!  


That's a lot of free! 

Thanks so much for stopping by and have a wonderful week!

Lee Ann  

Tuesday, December 15, 2020

Vintage Love

 Hello Friends!  

While Christmas is still about 2 weeks away, the December Sweet n Sassy Stamps release has me making Valentines.  The My Punny Valentine Stamp Set is so  cute, with lots of simple and fun images with punny sentiments.  The sewing machine image is perfect for girlfriends so I got busy creating.  


These are a nonstandard size card- about 4.25 x 3.75 inches.  I wanted a vintage look for the cards, using the same color scheme and basic card layout.  I opted for stenciling a design on the left instead of patterned paper.  the sewing machines were colored with Copics, fussy cut out and popped up on dimensional tape.  I have gotten into thrifting and vintage items lately, so this image was right up my alley.  

OK, so this  is not really a Valentine card, but the set, Vintage Romance,  makes some beautiful Valentines.  But these perfume bottles are great for other occasions as well.  I made this card for my mom.  


Pastels are not really my thing, but I challenged myself- which means this whole card was a struggle.  The perfume bottles were colored with Copics and fussy cut out.  I stamped the sentiment, which is from the Time Well Spent Stamp Set, onto a light aqua background and used a scrap of paper that I had used to pick up left over distress inks on my craft mat after doing the smooshing technique to add more interest along the bottom.  In the end, I love how this turned out.  

If you haven't checked out the December release yet, head over to the store to check them out!  The Much Love Stamp Set is free with a purchase of $75 or more.  


Thanks for stopping by- I won't be back on the Sweet n Sassy Stamps blog now until the new year, so have a Very Merry Christmas!

Lee Ann  


Tuesday, December 1, 2020

Vintage Romance and a Christmas card

 Hello, Hello!  

I hope you all had a very blessed Thanksgiving, despite the fact that some of our gatherings may not have looked like they did in past years.  I have learned to be grateful for and enjoy the quiet, no frills holidays as I have no family in town.  That means more turkey for me!   

Jenn Nilsson knocked it out of the park with her newest stamp set in the December release, Vintage Romance.  Have you checked out the whole release yet?  If not you really should go see all of the pretties this month.  

There are no references to Valentines Day in this set, so it is really quite versatile- I'm thinking anniversaries and birthdays in addition to Valentine's Day.  

My first card is done in red with a touch of blue, perfect for a Valentine card for your sweetie~ 

 The locket was colored with Copics and fussy cut out.  I paired it with a bit of a background panel I had in my stash; it was made by inking up bubble wrap and stamping with it!  A bit of red patterned paper and a kraft colored mat are all that was needed to finish the card.  The sentiment is separate from the blue panel as I wanted to pop it up on dimensional tape.  

The next card using the Vintage Romance set is a lovely bit of mixed media and no red to be found anywhere on the card!  


This beauty was colored with Copics and fussy cut out- I searched 'perfume' bottle on the web and found a perfume bottle of green glass.  That was my inspiration.  

The background was done with a stencil and embossing paste.  To get the gold specks, I dropped in course ep while the embossing paste was still wet.  When the paste was partially dry, I hit the ep with the embossing gun.  Once the paste was dry, I used some distress inks as watercolors and painted the background in.  

This set- it is a must have!  I love, love, love the images~


And how could I not share a Christmas card with it being December 1st??


The background is basic ink blending with Distress inks.  I used Picked Raspberry,  Seedless Preserves, and Chipped Sapphire inks.  Using my MISTI, I stamped the trees on the left with Versafine Onyx Black Ink, then stamped the tree on the right, and then stamped the deer.  I filled in the ground with a black Sharpie.  The moon was stamped on white cs and fussy cut out.  All of these images as well as the sentiment are from the Thrill of Hope Stamp Set.  I used watered down acrylic ink for the snow.  

That's all for me!  I hope I have inspired you to get creative- not an easy thing to do during the busy Christmas season!  Thanks for stopping by, 

Lee Ann  

Tuesday, November 17, 2020

Poinsettias for Christmas

 Hello, Hello, All!  

Today I am revisiting the gorgeous Poinsettia Greetings Stamp Set.  This is a favorite of mine that I reach for again and again.  

I like to make my parents a special card for Christmas so given the popularity of the slimline card, I decided to go that route.  I used two shades of red Ken Oliver Color Bursts to color this monochromatic card.  


I started out with a 10 x 4 inch piece of Canson Watercolor Paper.  I spritzed it with water and sprinkled on some Alizerin Crimson Color Burst Water Color Powder.  I used a large brush to move the color around and add water where needed.  I also sopped up some of the color with a paper towel as I did not want it too dark.  

Next, using my MISTI, I Stamped the poinsettias 3 times.  I then painted them all, using the Alizerin Crimson as well as Cadmium Scarlet color bursts.  A little mixture of black, blue and purple color bursts was used for the shadows.  The panel was then cut down for a 8.5 x 4inch card.  

When the flowers were dried, I used Winsor and Newton white gouache that was watered down to make splatters.  The flower centers were filled in with a Uniball Signo white gel pen.  

The sentiment is from the Holiday Greetings Stamp Set.  Both the sentiment and the image panel were matted with shiny gold wrapping paper.  Some sequins finish it off.  


Thanks for stopping by!  I won't be back on the blog 'til December so have a Happy, Happy, Thanksgiving!  

Lee Ann  

Tuesday, November 3, 2020

Snarky is My Superpower!

 Hello Hello!

It is so good to be back after a month long break.  We are celebrating Sweet n Sassy Stamps' 13th birthday this month!  I can still remember the first stamp set I bought from SnSS- cutest snowman ever!  We have so many fun stamp sets to share with you this month; many of them are birthday themed.    

One of my favorite sets is the A Little Snarky Stamp Set-oh how we have needed this set!  LOL!  


I colored the snarky lady with Copics and fussy cut her out.  My card background was done using a stencil and sponging on color in ombre fashion.  I have finished it off with my favorite sentiment, Sarcasm is My Superpower (and it is, lol).  

Next up.  Make a Wish Stamp Set~


This is such a versatile set!  Love, love, love it.  The piece of cake was colored with Copics and then fussy cut out.  I stamped and masked a single candle multiple times to get a grouping of candles.  These were colored with Copics as well and fussy cut out.  I picked out another stencil, this one scattered numbers, perfect for a birthday card.  I sponged the background, then stamped the sentiment from the Humorous Birthday Innies Stamp Set.  I grounded the cake and candles with a black circle and added black sequins to finish off the card.  

Lastly, I had a little bit of fun with the Make a Wish Stamp Set!  Is it bad that this is the first thing I 'saw' when I saw this icing???  


I kept the card CAS, stenciled a background and popped up the 'emoji' on dimensional tape.  I added a sentiment from the A Little Snarky Stamp Set.  

Head over to Sweet n Sassy Stamps to check out all of the November release stamps.  Buy the bundle and save some money!

Thanks for stopping by!  Have a blessed week all!


Lee Ann  

Wednesday, September 30, 2020

Looking Back on the September Release

 Hello, Hello!

Well, here we are, the last day of September!  Can you believe it!?  Before you know it Thanksgiving and then Christmas will be here.  

Christmas.  September has been all about Christmas!  I simply love this month's release.  Let's take a look at Vintage Van.  What a versatile set this is! Christmas, birthday, Fall.  It covers it all!  


I opted for the fall version of the van for this card.  I started by stamping the van in Versafine Onyx Black Ink and then watercolored it.  I used trees from the Scene Silhouettes-Trees Stamp Set and inked them up with distress inks shades of fall.  The foreground was done with distress inks as well; I smooshed them onto my craft mat and then used them to watercolor.   The leaves in the very front most foreground is stamped in the same color as the ground; the image is from the Falling Leaves Stamp Set.  Once I was done with finishing up little details here and there, I place the panel in the MISTI and stamped the sentiment, from the Fall Remix-Autumn Splendor Stamp Set in Versafine Black Ink.  A hemp twine bow finishes it off. 

Next up, the adorable gnomes.  

I went for a very simple look on this card with a very muted color palette.  I started with the igloo image from the Winter Hugs Stamp Set


I stamped it in a light grey, then masked it off and stamped the gnome.  Everything was colored in neutral shades of Copics with a pop of red added.  The igloo was even decorated for Christmas with the wreath from the Vintage Van Stamp Set.  'Peace on Earth' is also from Vintage Van.  

Next up, the gorgeous sentiment set, Holiday Greetings.  


The pine branch was stamped in various shades of green distress ink and was spritzed some with water to get the ink moving.  The branch is from the Christmas Pine Stamp Set.  Next I stamped the ornament from the Deck the Halls Stamp Set.  Initially I tried some no line watercoloring, but thankfully I had left the stamp in the MISTI so I was able to restamp in Versamark ink and heat emboss in gold when I decided the no line look did not work for this card.  

Once again I used the wreath from the Vintage Van Stamp Set and heat bossed it in the center of the ornament.  It was the perfect size! 

Lastly, I added layers of blues and greens in the background.  The sentiment was heat embossed in gold ep.  

That's it for me! I hope I have inspired you to get out your September stamps and play a little!  


Lee Ann 

Tuesday, September 8, 2020

Vintage and Versatile!

 Hello, Hello!  

The new Vintage Van Stamp Set is just adorable; better yet, it is soooo versatile!  

It is certainly fun to use for Christmas cards as in this card below~


The background was made with various blue and purple Colorburst Watercolor powders.  I simply wet the paper, sprinkled on color and wet some more.  I dried with my heat gun and then sprinkled and spritzed another layer.  Voila!  Prefect night sky!  For a more wintry look, I splatted the background with water and pressed a papertowel to it to pick up the water along with some of the color.  Then I splattered lots of watered down white guoache paint to create a blizzard. 

The van was colored with Copics but first,  I masked off the logo/heart in the center of the van and then stamped the wreath with the word 'Joy' in green.  I used a black water based marker on the word 'Joy' and stamped over it several times.  Once I was happy with the wreath, I colored the rest of the van with copics and fussy cut it out.  I also stamped the tree with Memento Tuxedo Black ink and fussy cut it out, then adhered it to the back of the van. 

The Sentiment comes from the set Christmas Pine.  

This next card has more of a 60's vibe with a background that was made with the shaving cream technique. 


 It was the perfect background to pair with a van that was colored orange with a pink heart.   I added the bunch of balloons and the roof rack of presents, all colored with Oranges, yellows and pinks.  I colored in pavement under the van and then fussy cut the pavement and around the top and sides of the van.  I adhered it to a white panel matted in pink.  The sentiment was stamped in Versamark ink and heat embossed with white embossing powder.  I popped the panel up on dimensional tape and adhered it to the psychedelic background.  A few sequins finish it off.  

I love the two very different looks AND uses for these cards!   

Thanks for stopping by!

Lee Ann

Tuesday, August 18, 2020

Heading Into Fall

 Hello All!  

Things are getting a little crazy around here as I finally get to head back to work/school tomorrow.  We have a whole host of new guidelines and procedures to follow.  And back to school means fall is right around the corner.  Whaaaat??  

Of course with fall come the fall holidays, including Veteran's Day.  The new stamp set, The Lord's Battle is perfect for that thank you card for a veteran. 

I cannot tell you how much I love this stamp set!  It is so versatile. And I don't know what it is but I love coloring these boots!  The boots were stamped in Memento Tuxedo Black Ink using the MISTI, and then colored with Copics.  Once I was happy with the coloring, I put the image panel back in the MISTI and stamped over it again, this time using Versafine Onyx Black ink for crisp, dark lines.  

Next up, the background panel.  I loosely drew in an oversized flag on some Fabriano Hot Press Watercolor Paper.  I wanted a smooth surface so that the large words would stamp with complete coverage.   I painted the flag with Kuretake Gansai Tambi watercolors.  

When the panel was dry, I stamped the sentiment, which is from the God Bless America Stamp Set. I again used the MISTI so I could double stamp the words if necessary.  Versafine Onyx Black ink was used for the sentiment.  The boots were popped up on dimensional adhesive.  

Fall also ushers in all of the goodness of nature- colorful leaves, fall harvest, and pumpkins.  I really do love fall! This next card is ALL things fall!  It is the newest by Jenn Nilsson, Bushel of Blessings.  

This card got all mixed media'y' mostly because I had no mojo and everything I did made it worse!  The gorgeous image was stamped in Antique Linen Distress ink and then colored with Copics.  And the more I colored, well, it just wasn't looking good.  So,  when all else fails, throw more at it!  So I added in detail with Prismacolor Pencils.  But I still was not getting into things, so I ended up fussy cutting the image out.  I decided it needed a dark background, so pulled out a gel plate print I had in my stash.  

I was finally getting somewhere.  I added a partial circle behind the wheelbarrow and then added an orange mat to the print panel.  To tie in the orange, I added orange sentiment strips.  The sentiment is from the Lots a Spots Stamp Set.  Finally, a few sequins finish the card! 

There are a lot of great stamps in the shop that are on sale right now.  Check them out HERE.   

Have a Blessed Day All!  

Lee Ann 

Tuesday, August 4, 2020

Two Cards, Same Color Palette

Hello! 

I hope you are enjoying all of the new release inspiration; I have been having so much fun creating with the August stamps. 
I decided it would be fun to make two completely different cards , but in the same color palette.  Let's start with the more subtle of the two~


This beauty is from the stamp set, Bushel of Blessings; the image is stamped on Neenah Solar White cs and colored with Copics.  I am really trying to loosen up in my coloring; I hope it shows here!   I used a sentiment from the set as well- don't you just love the font!!?! - and stamped it in a dark brown ink.  Then I embellished the image panel with layers of patterned paper and cardstock.  A few sequins and a hemp twine bow finish it off. 
Next up, the EXACT same marker colors, using the Like a Sunflower Stamp Set.   


Yep, this one is BOLD!  I stamped the image multiple times on Neenah Solar white cs with Memento Tuxedo Black ink, then colored the images and the background with the Copic markers.  I also added Glossy Accents to the flower centers. The sentiment, from the Rose Banner Stamp Set, was heat embossed in white on black cs.  I die cut a small circle from a sponged scrap panel I had sitting on my desk and used it to ground the sentiment strip. 
Here are the marker colors that I used~


That's it for me!  Don't forget, you can get a great discount on this month's release when you buy all 4 stamp sets! 


And with a $75 purchase you get the August Stamp of the Month for Free! 


And if that isn't enough, a $75 purchase gets you FREE shipping!  (US only)


Have a crafty day! 

Lee Ann