Showing posts with label True Beauty. Show all posts

Tuesday, August 9, 2022

Thinking of You - HUGS

 PRODUCT LINKS BELOW CONTAIN AFFILIATE LINKS AT NO COST TO YOU

Hello Sweet Friends! Sheri here today to let you know that a NEW VIP Challenge has started over in the Sweet 'N Sassy Stamps VIP Group over on Facebook. Each month a new challenge is posted on the first of each month and runs for the entire month. One random winner is selected at the end of the challenge to WIN a SNSS stamp set of their choice!
 
This month we are challenging you with a "Back 2 School" Theme! 


For my sample I pulled out the NEW Bold Caps Alpha die set and practiced my ABC's by spelling out the word HUGS out on my card. 
 
Steps to Create Card:
  • Cut White A2 Top Fold Card Base: 4 1/4" x 5 1/2" (4 1/4" x 11", scored at 5 1/2").
  • Cut Blue Mat: 3 7/8" x 5 1/8"
  • Cut White Panel: 3 3/4" x 5"
  • Take White Panel and lightly ink blend using the Mosaic Stencil and blue ink to create background (Used Gina K In the Navy ink).
  • Stamp flower and leaves from True Beauty stamp set. I used the sold & line images. You will need to fussy cut the images out (Used Gina K. Powder Blue and In the Navy ink) .
  • Stamp "Thinking of You" sentiment from the Sentimental Wordfetti stamp set and trim into a sentiment strip (Used Gina K. In the Navy ink).
  • Cut out the word "HUGS" using the Bold Caps Alpha die set in blue card stock. 
  • Assemble Card. The flower, top leaf & sentiment strip are all popped up with foam tape (optional)
  • For embellishment I added a few clear solid sequins. (optional) 
 
Card Measurements:
White A2 Top Fold Card Base: 4 1/4" x 5 1/2" (4 1/4" x 11", scored at 5 1/2")
Blue Mat: 3 7/8" x 5 1/8"
White Panel: 3 3/4" x 5"
White Sentiment Strip: 1 15/16" x 1/4"


-----
 
 
Happy Stamping!!
 

Monday, January 24, 2022

Roses


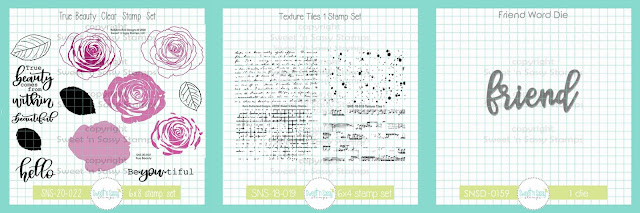
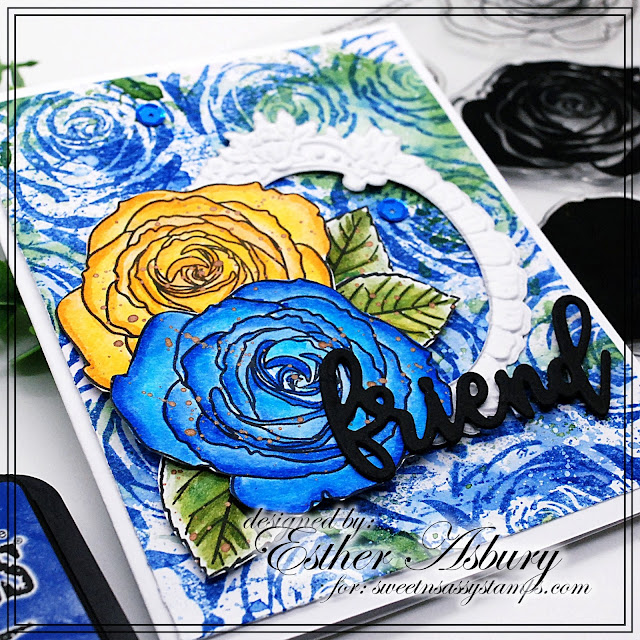
Esther here today sharing a pretty rose card. I created the background by ink smoosing prize ribbon and rustic wilderness ink on mix media paper. I then stamped over it with one of the rose images from True Beauty. I added some text from Texture Tiles 1 and some white paint splatters over that.  

The roses (from True Beauty) were stamped in Versafine Clair Nocturne Ink  and colored with Arteza real brush pens with metallic paint splatters over top. I die cut two of the Friend Word Die in black card stock and layered one over the other for extra thickness. 

Using the barouque frame 3D embossing folder (Altenew) I embossed the frame on white card stock and die cut it with the matching die in the sweet friend die set (Altenew). A few blue sequins finished off this sweet friendship card. 

   ~~~This post contains affiliate links at no extra cost to you~~~


Tuesday, June 15, 2021

Florals and More

 Hello! 

Have you been enjoying all of the June release inspiration?  

Being the floral lover that I am, I could not resist another card using the new Botanical Branches as a filler.  


I used the pussy willow stems from the Botanical Branches Stamp Set, coloring them in gray with Copics.  The roses and leaves are from the True Beauty Stamp Set and were colored in grays and yellows.  Gray and yellow. The color combination has to be one of the most perfect combos there is!  

All of the images were fussy cut out. An embossing folder was used on the background panel.  All of the pieces were put together and adhered to the card front.  The sentiment is from the Encouraging Thoughts Stamp Set; It was stamped on a grey sentiment strip.  A few sequins finish the card. 

I liked this grouping of images so much that I recreated it in tag form.  I needed this tag for a Bible study I will be starting.  I am not usually one for tags, but something about this was freeing!  


My tag was first sponged with distress inks in various shades of green.  Next, texture was added to it but using a darker green with the Fern Fronds Stencil.   Lastly, I spattered a bit of white acrylic paint on the background. 

Then I used the same rose from the True Beauty Stamp Set and colored it with Copics after stamping with Memento Tuxedo Black Ink.  The branches are again from the new Botanical Branches Stamp Set and were colored with Copics.  Everything was fussy cut out.  I added a bit of vellum to the bottom right corner just to soften things a bit then arranged the elements and adhered them to the tag.  I finished the tag off with my printed steps and hand lettered title.  A couple of ribbons finish it off.  

That's it for me!  Thanks so much for stopping by and have a blessed day!

Lee Ann  

Tuesday, June 1, 2021

Versatile Botanical Branches

 Hello, Hello! 

Happy Summer to all of you! 

Have you checked out the new release from Sweet n Sassy Stamps?!  This is a seriously awesome release!  My favorite set is the new Botanical Branches by Nina B.  First off, they are just gorgeous; but second, they are so versatile!  They are perfect fillers for floral sprays but they can also stand alone on a card, as in my first card~


 This gorgeous berry branch was colored with Copics and then fussy cut out.  I added an embossed panel to my card base.  Then, for interest and another pop of yellow, I cut in half a square die cut frame I had in my stash.  It happened to be stamped with an image from the Flower Garden Stamp Set and watercolored with distress ink.  The square halves were adhered to the base and the berry stem was popped up on foam tape.  The sentiment, which is from the Encouraging Thoughts Stamp Set was stamped on a sentiment strip and adhered, along with a few sequins to finish the card. 

Next up, I have used the Botanical Branches set as filler for a floral bouquet.  The flower is from the True Beauty Stamp Set.  


I started with the back panel- color blocked 5 wide stripes with watercolor.  While that was drying, I stamped the flower with distress ink and then colored it with distress inks.  I did the same for the leafy branches that are from the Botanical Branches Stamp Set.  The leaves were heat embossed in white embossing powder on vellum and everything was fussy cut out.  The elements were assembled in the lower left corner and adhered to the card.  The sentiment is from the Birthday Wordfetti Stamp Set and was stamped on blue cs.  A few sequins were added.  

You can check out the entire new June Release HERE!  And check out the new release specials while you are there.  

Thanks for stopping by!

Lee Ann  


Thursday, May 20, 2021

featuring Rebecca Rios

 Good morning! It's Customer Appreciation month at Sweet ‘n Sassy Stamps and this week SNSS is spotlighting illustrator Rebecca Rios with a 25% off sale. But hurry…the sale on Rebecca’s stamp sets ends today! Also, don’t forget that this month you get to choose your own $11.95 value Stamp Of The Month with each $60 order!


I used one of my favorite sets by Rebecca, True Beauty, for my cards today. I started by stamping a background of flowers with black ink on a piece of cardstock. I cut a large panel from it for my first card and colored the "negative" space with a purple Copic marker. I liked the result and decided not to stamp or color in the flowers. I think layering the piece with a black & white stripe paper made it striking as it is!


I used the leftover strip from the background of my first card and stamped the flowers with purple to color them. Then I stamped an additional flower and cut it out. Instead of adding a separate sentiment, I stamped the "hello" right onto the flower and popped it up.


Have a great day and don’t forget to check out the SALE!
Diane


Saturday, February 20, 2021

Wishing You

Happy Saturday everyone, today I am sharing a floral card with an old fashioned vibe to it. The old fashioned look was not part of my original plan, but how it turned out and I really like it.


This card was pretty easy to stamp and complete. I mixed and matched inks from various companies to stamp the roses and leaves from True Beauty on white cardstock and hand trimmed out. I used Background Builders: Stripes to stamp the lines on the white (pale pink ink) and pink (versamark) cardstock. I like to use VersaMark when I want a more subtle tone on tone effect. I die cut those panels with scallop and stitched edge dies. I stamped the sentiment from So Happy with Versamark and embossed with white embossing powder. I assembled as seen popping the white panel up with foam tape.


My card also fits the February VIP Challenge over in the Sweet 'n Sassy Facebook Group. We would love to have you join us!


The So Happy set is part of the Overstock Sale going on during the month of February at Sweet 'n Sassy Stamps.


I hope you enjoyed today's card and have a wonderful day!

Karen

Saturday, October 3, 2020

You are Simply Amazing

Happy weekend everyone! I hope you all have a chance to get crafty today for World Cardmaking Day. Today's card features the October Stamp of the Month, My Thoughts of You. This sentiment kit is perfect for sending an encouragement card to someone you love! You will want to add this one to your collection.

This card is clean and simple and I love how the pink and green pop against the gray background.


I started by die cutting the background and sentiment panels (dies from GMD & MFT) from basic gray  and white cardstock. I stamped the sentiment with VersaFine Clair Nocturne ink. Next, I embossed the roses and leaves from True Beauty in white onto Canson mixed media paper. I colored the roses and leaves with watercolor brush markers (Altenew, lime & rubellite). Once dry, I hand trimmed the leaves and flowers out. I assembled the card as seen, popping up the sentiment panel and parts of the leaves and flowers with foam tape. 


Thanks for stopping by and have a fantastic day,

Karen

Sunday, July 19, 2020

True Beauty

The new True Beauty set is gorgeous and I love the fonts! It's one of those sets that you don't truly appreciate the beauty of it until you start to create with it. I had an idea for a card and it turned out exactly as I envisioned it! Don't you just love when that happens?

For today's card, I chose to use just one of the floral outline images and leaves. I decided to heat emboss it with VersaMark and Sterling Silver embossing powder onto Canson mixed media paper.


I colored the images with Spring Garden watercolor brush markers (midnight violet, rubellite and moss) and hand trimmed. I die cut the white layering panel with a lattice panel die and attached with glue to my bashful blue card base. I die cut a stitched scallop oval from white and stamped the sentiment with VersaFine Clair nocturne ink. I popped up the oval with foam tape and attached the images as seen using foam tape under sections as needed.


Thanks for stopping by and have a fabulous day,

Karen

Thursday, July 16, 2020

flower garden

Good morning! Today I have two cards to share with some new Sweet ‘n Sassy Stamps sets. Here I used Flower Garden, True Beauty, and Bee Sweet. Such fun sets to work with...it's another month with awesome new sets! Aren't these flowers pretty?


Both of my cards today are pretty quick and easy. Some simple coloring is all that's needed! I added an embossed border to my second card and attached the butterfly in the center so it's wings can pop up.


Have a great day!
Diane


Wednesday, July 15, 2020

July 2020 Release Blog Hop

Welcome to our July Release Blog Hop!

July is here and our release is hot, hot, hot! Read on for a bit of inspiration and a little walk through of this month's new goodies, then hop along to the blogs linked below for all sorts of papercrafting inspiration.

Plus, there's a GIVEAWAY! Leave a little shout out in the comment section on each stop along the way for a chance to win a $10 gift voucher to the Sweet 'n Sassy Stamps shop. Winner will be announced here on the SNSS blog, Wednesday, July 22.


Here's the official hop list. If a link misbehaves along the way,
hop on back here to pick  up where you left off.


My card for today mixes three of the new sets. Once I started playing with the True Beauty set, I may have gotten a little carried away.  Seriously fun, and each one was created with two colors of ink. Lightest ink with the solid, then the darker ink with the outline or detail stamps. So much fun to just play. Then I fussy cut each one and lightly sponged around the edges with the darker inks.


When they were all sitting there together, I decided I wanted to add a few of them to a card.  I've been on a slimline kick lately, so decided to keep on kicking it slimline style.  The card base is 3.5" x 8.5". For the main panel, I took a 3.25" x 7.25" panel and stamped the sentiment.  The "you're simply the" portion is from the Summer Fruits set.  I masked off the ZEST portion, so I could add in the BEST with the new County Fair Alpha.  This alpha is so playful, and I just love it with the roses.


After my sentiment was done, I dry embossed the top and bottom portions of the card with a brushed dot embossing folder, then layered the flowers and leaves together.  I added the whole panel to a foam sheet for some dimension, then accented with a few enamel dots to finish things off.

Here's another slimline card I created with the some of those flowers from the True Beauty set.


Okay, the next stop on the hop is my blog, Poetic Artistry. 

Here's a little look-see at the sets included in the July release...

First up is the July stamp of the month, Summer Fruits. This set is available for purchase for $15.95, OR you can get it as a FREE gift with a $75 purchase (after any discounts and before shipping and tax) during the month of July! Please note you MUST add this set to your cart to receive the discount. Once your order qualifies, the discount will apply to the set in your shopping cart.


Next up is the gorgeous Flower Garden set by Jennifer Nilsson Art. This set is filled with blooms and greenery perfect for building your own garden card, or as focal points.


If you love to mix and match, you can pair the set above with the grogeous new Bee Sweet set also from Jennifer Nilsson.


Rebecca Rios brings us a beauty of a set with the new True Beauty.  Designed to maximize options, there are so many different looks you can achieve by layering different flowers together. Note: the stamps are not meant to line up perfectly all together. Play around with different pairings and we know you'll fall in love with this versatile set.


Rebecca also brings us the gorgeous new Grace Upon Grace set this month.  This lovely journaling set is perfect for exploring God's amazing grace.


Our final set this month is the fun and playful County Fair Alpha from Rebecca Rios. 


That's our July Release in a nutshell! So many fabulous sets to choose from! What's your favorite? 


May you be blessed today and always!

Sunday, July 12, 2020

bloom

Good morning! Today I have two cards to share with some new Sweet ‘n Sassy Stamps sets. Here I used County Fair Alpha, True Beauty, and Flower Garden. For both cards I wanted the words to stand out so I first stamped the alphabet in black ink. I stamped the flowers on the first card in lighter shades of blue and layered it onto a matching card base. So simple but pretty!


For my second card I decided on the word "bloom" and then had the idea to have a flower actually blooming from it. Another simple card but whimsical and cute.


Have a great day!
Diane