Showing posts with label Timeless Hymns. Show all posts

Wednesday, November 10, 2021

Wish Big

Hi Sweet 'n Sassy friends! It's Julee popping in to share a little inspiration with some stampy goodness. We're celebrating 14 years of Sweet 'n Sassy this month with weekly mini releases + sales!  This week's sale is 20% off stamps in our Backgrounds and Creative Worship Stamps categories. While supplies last, through November 14.

Today I'm going to share a few cards that feature stamps from these two categories. First up is one combining the NEW Script Background (just released on Monday) with my Joyful Day set (new this month), and a previously released Creative Worship set, Old Fashioned Alpha.


I placed the Script Background in my MISTI, then inked up with a rainbow of Catherine Pooler mini inks and stamped. I then went over the stamp lightly with a waterbrush and stamped again to give a little watercolor effect to the script. When this was dry I lightly blended the same color of ink over each color of stamping on the background. The cupcakes are from the Joyful Day set and colored with Copics and then fussy cut.  I then used the Old Fashioned Alpha set to create the wish big sentiment. I finished off with some sequins and bling.

My next card uses the beautiful Creative Worship: Wonder of Wonders set from our October release.  I colored up these rejoicing women with Copic markers, then trimmed around with scissors.  The sentiment from Timeless Hymns is embossed in white onto purple cardstock. I then stenciled the Vintage Doily Stencil onto white cardstock with villainous potion distress ink. 

My third card features the Spectacular Snowflakes set from our Backgrounds category.  I stamped them randomly in versafine clair fallen leaves onto kraft cardstock, then added a little ink blending around the edges.  The focal snowflake is created with the Large Snowflakes Die Set. I die cut the snowflake three times, then layered together for dimension.  I then inked the edges with brown ink.  Next I coated the entire snowflake with versamark ink and embossed with sparkle embossing powder.  This is added to my card with dimensional foam tape for some extra life.  The sweet little tag is from the Mini Tags Die Set, and I stamped the Noel sentiment from Christmas Wordfetti on it, then tied with some string.

Thanks so much for stopping by! I hope you're inspired to create something today.


Monday, April 26, 2021

Morning Glories Two Ways

Esther (from Shoregirl's Creations) here today sharing two cards using the Sympathy Morning Glories stamp set.


This first card is a one layer card with the morning glories stamp around the edges of a watercolor panel in  Versafine Clair Nocturne Ink. I then used a dabbing method to watercolor the flowers and leaves. (I dabbed on two colors of watercolor paint and used a wet paint brush to spread the color around.) After my paints were dry I added some text using the Typewriter Text Background  stamp and black soot distress ink. I then splattered the piece with white acrylic paint. The final step was adding a sentiment from the Timeless Hymns stamp set and a few black jewels. 


My second card is a clean-and simple card with lots of fussy cutting and paper piecing. 


To color my image I created two ink smooshed backgrounds (on mix media paper) using dusty concord and worn lipstick distress ink for the first and shabby shutters and rustic wilderness for the second. I stamped the morning glories on the first one and the leaves and stems on the second. Next I fussy cut all the flowers and leaves, and stamped a third image stamped in Versafine Clair Nocturne Ink on white card stock. I glued the leaves down first and popped up the flowers with foam mounting tape. I fussy cut around this third image and added a bow using purple burlap string.

The black background was embossed with Swirl Motif 3D embossing folder from Altenew, and I stamped the sentiment in Yeti ink from Lawn Fawn. 

 ~~~This post contains affiliate links at no extra cost to you~~~

Friday, March 30, 2018

Jesus Paid It All


Hello Sweet 'n Sassy Stampers!
Happy Good Friday to you! 
It's Ceal here to share with you a card using an oldie but goodie and one of our new sets to celebrate Jesus' resurrection. I can't believe it is Easter already, next thing ya know it will be Christmas again lol. Every year on good Friday I wake up with this song in my head Jesus paid it all, all to him I owe. My sin was like a crimson stain, He washed it white as snow! Praise God for the death and resurrection of our Lord and Savior Jesus Christ! 

To create my card I started with a top folding white card base and a white panel cut dow with a stitched die. I Masked off the bottom portion of the panel with post-it notes and then used the rotating rays stencil and distress oxide inks in Carved Pumpkin and Squeezed lemonade to create the background. Next I removed the stencil and stamped the three crosses image from the set Jesus Paid it All using Catherine Pooler's Midnight ink. To finish the card I removed the masks and stamped the greeting from the Timeless Hymns set also in Midnight ink.


Tuesday, March 27, 2018

All Blessings


It’s starting to look a little more like spring!  I’m sharing a colorful background I created using Whimsy Bouquet and some Distress Oxide inks. I used a glossy card stock that really allowed the inks to blend easily.  After cutting a circular window, I added a sentiment from Timeless Hymns and a butterfly from New Creation.  The smaller butterflies are from an older cutting/embossing folder.

Just a sweet Easter reminder ;)

Have a great week! Jane

Friday, March 23, 2018

He watches over me

Hello everyone, I want to share another card with the new releases today :). For this one I used the Birds and Blooms set and the Timeless Hymns. They are great if you want to let someone know you're thinking about them.
I stamped the bird on marker paper and colored it with my markers. I cut it out and made a 'sky background' for it. It's just a rectangle I die-cut with blue distress ink. I stamped the sentiment on this panel too. To make the bird stand out a little bit more I added some foam tape behind it and I let it peek out on top of the rectangle. The bird and background are pretty bright so I decided to go for a black background with botanical images on it. The botanicals work great with the bird :).
http://www.sweetnsassystamps.com/timeless-hymns-clear-stamp-set/

http://www.sweetnsassystamps.com/birds-blooms-clear-stamp-set/
Have a nice day!
- Lucinde

Monday, March 19, 2018

Faux Bleached Birds & Blooms

Hello Sweet 'n Sassy Friends!  I have two cards to share today using the Alcohol Faux Bleach Technique and the new Birds & Blooms stamp set.  This is a fun technique and the bonus is...you end up with two great backgrounds instead of just one!

Begin by embossing your image on a piece of glossy card stock with clear embossing powder.  Using a felt application tool, dab on a variety of alcohol inks or Copic Refill inks and blending solution or rubbing alcohol to make the inks move.  Play around with the inks until you get the desired results.  Place the panel on a paper towel on an ironing board and cover with another piece of regular card stock.  Iron off the embossing using heat with no steam.  The image will transfer onto the second piece of card stock and leave a bleached look on the first.  And there you have it....two wonderful backgrounds!  To see a video tutorial on this technique at Splitcoaststampers, click HERE.

Now all you need to do is finish off your cards.  Birds & Blooms, Texture Tiles 1, and Timeless Hymns were the sets used to create these two cards and they are all from the March Release and are now available at the Sweet 'n Sassy Stamps Store!


Thanks so much for stopping by!  I hope you were inspired to give this fun technique a try!
Have a blessed day!
Hugs,
Cathy

Sunday, March 18, 2018

'Tis So Sweet

{jane bosi}  Happy Sunday, Sweet Friends!!  I wanted to pop in to share some cards I made in a shabby chic style, featuring some of the March goodies!    I can't help but sing my way through the Timeless Hymns set featured in the above card.  I also used several of the images from the stamp of the month, Texture Tiles 1 on the background piece and the tag.  So subtle, but just the right element to finish things off perfectly!

The card below also features Texture Tiles 1 and both cards use Spring Blossoms.  Those flowers are soooo addicting! 


Enjoy your day!!  TTFN, Jane

Saturday, March 10, 2018


Hello everyone! Today I want to share a fun spring card with you. I love how you can build a colorful scene with the new Birds and Blossoms stamp set.


For this card I stamped the branch with flowers three times and a couple of the flowers and one of the birds. I stamped everything on watercolor paper and colored it with watercolor markers and a water brush. I added a black strip with the message on top of the stamped scene so I didn’t have to mask anything and I could hide a couple of overlapping parts of the branches behind the strip. I stamped the message with an embossing ink and added a white embossing powder to make it stand out. I distressed the edges of the watercolor piece with a blue ink and adhered everything onto a kraft colored card.

http://www.sweetnsassystamps.com/timeless-hymns-clear-stamp-set/ http://www.sweetnsassystamps.com/birds-blooms-clear-stamp-set/

I used the Timeless Hymns and Birds & Blooms for this card.

Have a great day!
- Lucinde

Saturday, March 3, 2018

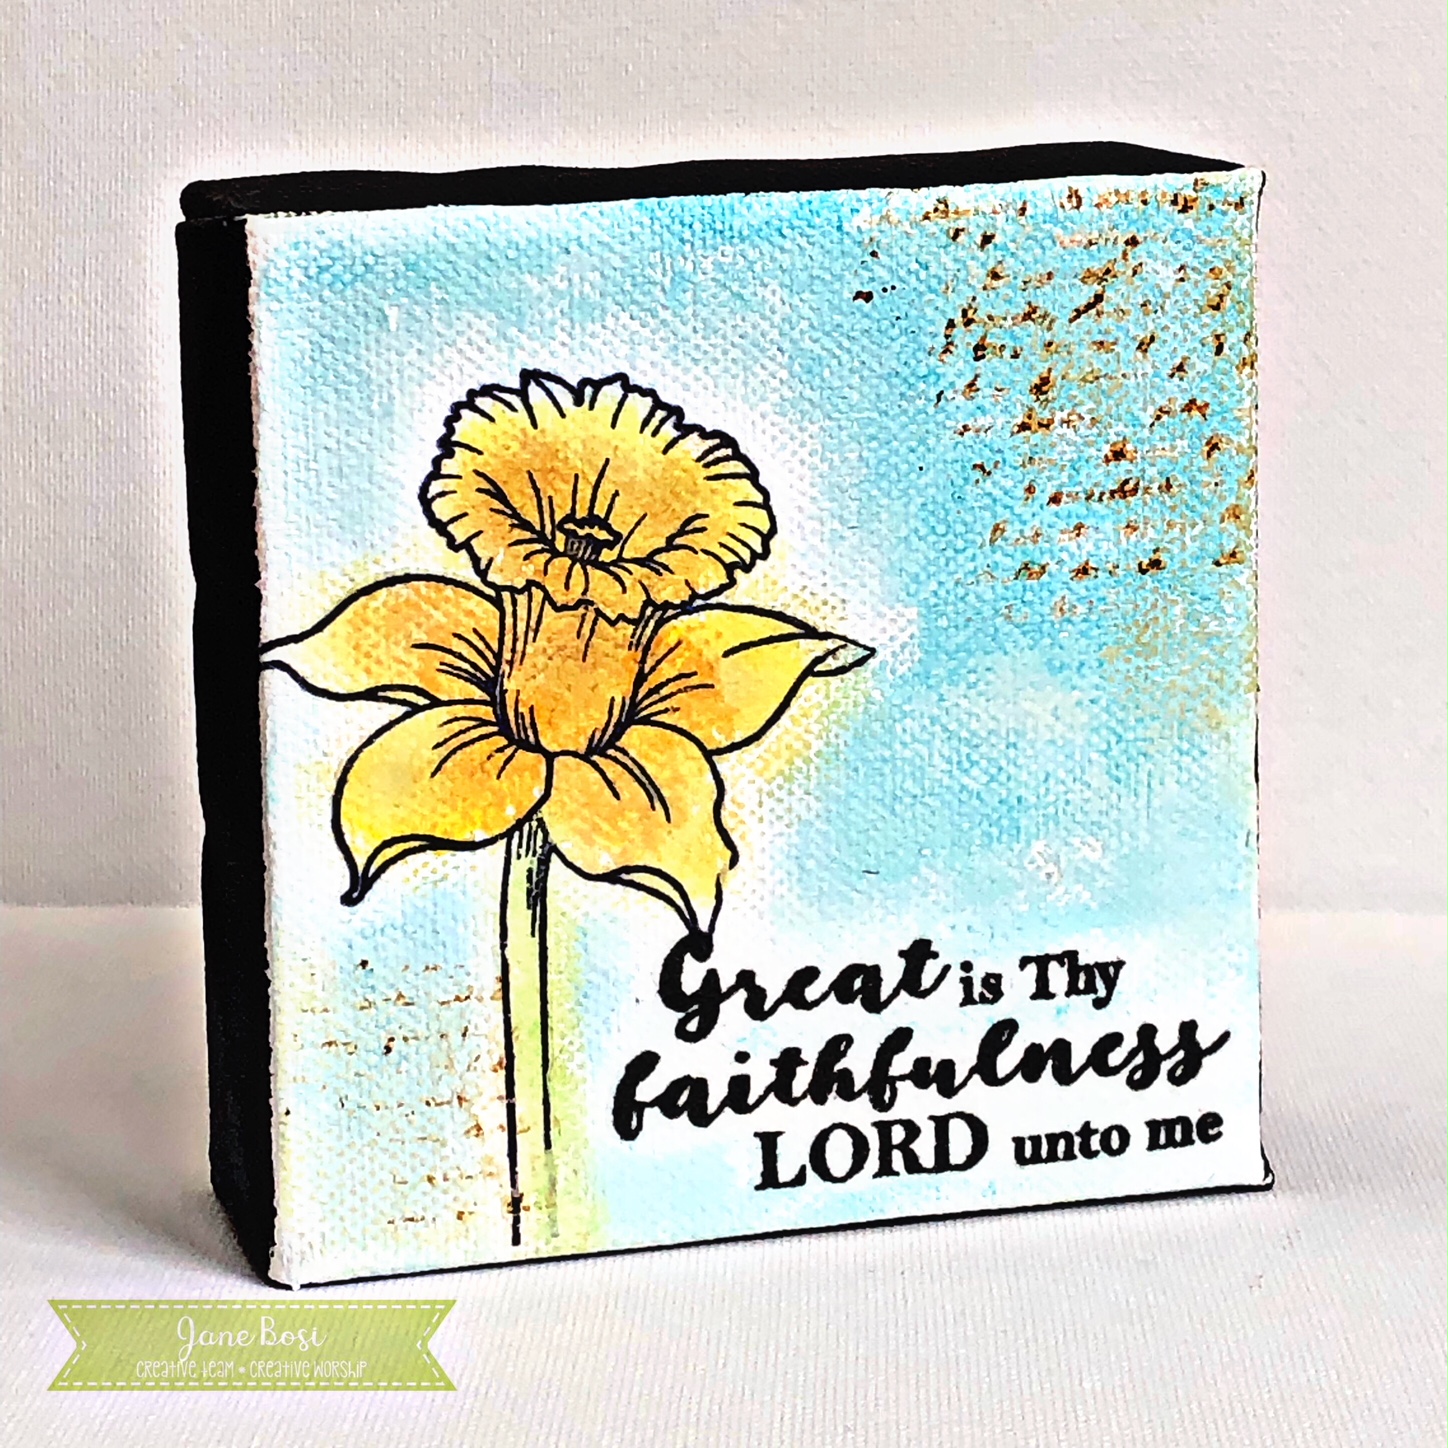
Great is Thy Faithfulness

{jane bosi}  You guys!!!  I'm singing!!!  The brand new Timeless Hymns set is contagious!  I cannot look at this set with out finding a song in my heart.  I love it!  Worship is my very favorite and this set is such a great tribute to some of my most favorite hymns.

I combined a sentiment from the Timeless Hymns set with the beautiful daffodil found in the Spring Blossoms set to create this springy 3 x 3 mixed media canvas.  It makes me happy and hopeful just looking at it despite the blanket of deep snow that still covers my outside.


To make the canvas, I first applied a layer of gesso and then added the stamped image.  To color the back ground, I used a Faber-Castell PITT pen and then moved the color around with my fingers.  I love how this created a shadowy effect.  I added color to the flower in much the same way.  To add some extra interest, I used this months FREE with purchase set, Texture Tiles 1.

You'll get this set--which is so versatile--FREE with your purchase of $75 or more!  This set is perfect for adding that last little something, the final touch!

Enjoy!  Jane