Showing posts with label birthday. Show all posts

Tuesday, August 23, 2022

Make a WISH

 PRODUCT LINKS BELOW CONTAIN COMPENSATED AFFILIATE LINKS AT NO COST TO YOU

Hello Sweet Friends! Sheri here today with a BIRTHDAY card featuring the Make a Wish stamp set and Bubbles Stencil. The Bubbles Stencil is the current Product of the Month and is FREE with any $50 order!

I don't know about you but I'm always in need of birthday cards and had fun creating the fun background with the NEW Bubbles stencil and two shades of teal ink and offsetting the stencil with each color. Then I took a lighter (third shade) and went over the whole panel to add color. The candles were stamped, colored and fussy cut out. Coordinating dies are now available. The sentiment was stamped and embossed in white. I kept the design simple and on the focal point.
 
Card Measurements:
White A2 Top Fold Card Base: 4 1/4" x 5 1/2" (4 1/4" x 11", scored at 5 1/2")
Black Mat: 3 7/8" x 5 1/8"
White (Stenciled) Panel: 3 3/4" x 5"
Black Rectangle Mat: 2 3/8" x 3 3/8"
White Double Stitched Rectangle: 2 1/4" x 3 1/4"
Black Sentiment Strip: 2 3/8" x 1 1/8"
 
 
Happy Stamping!!

Saturday, August 13, 2022

Edge to Edge Birthday Shaker Card

 Happy Saturday Stampers!

It's Michelle from East Bay Stamp Chick with another card share. I

First, though, did you know Sweet 'n Sassy Stamps is having an amazing sale?


It's just thru Sunday, the 14th! Everything including the new release!

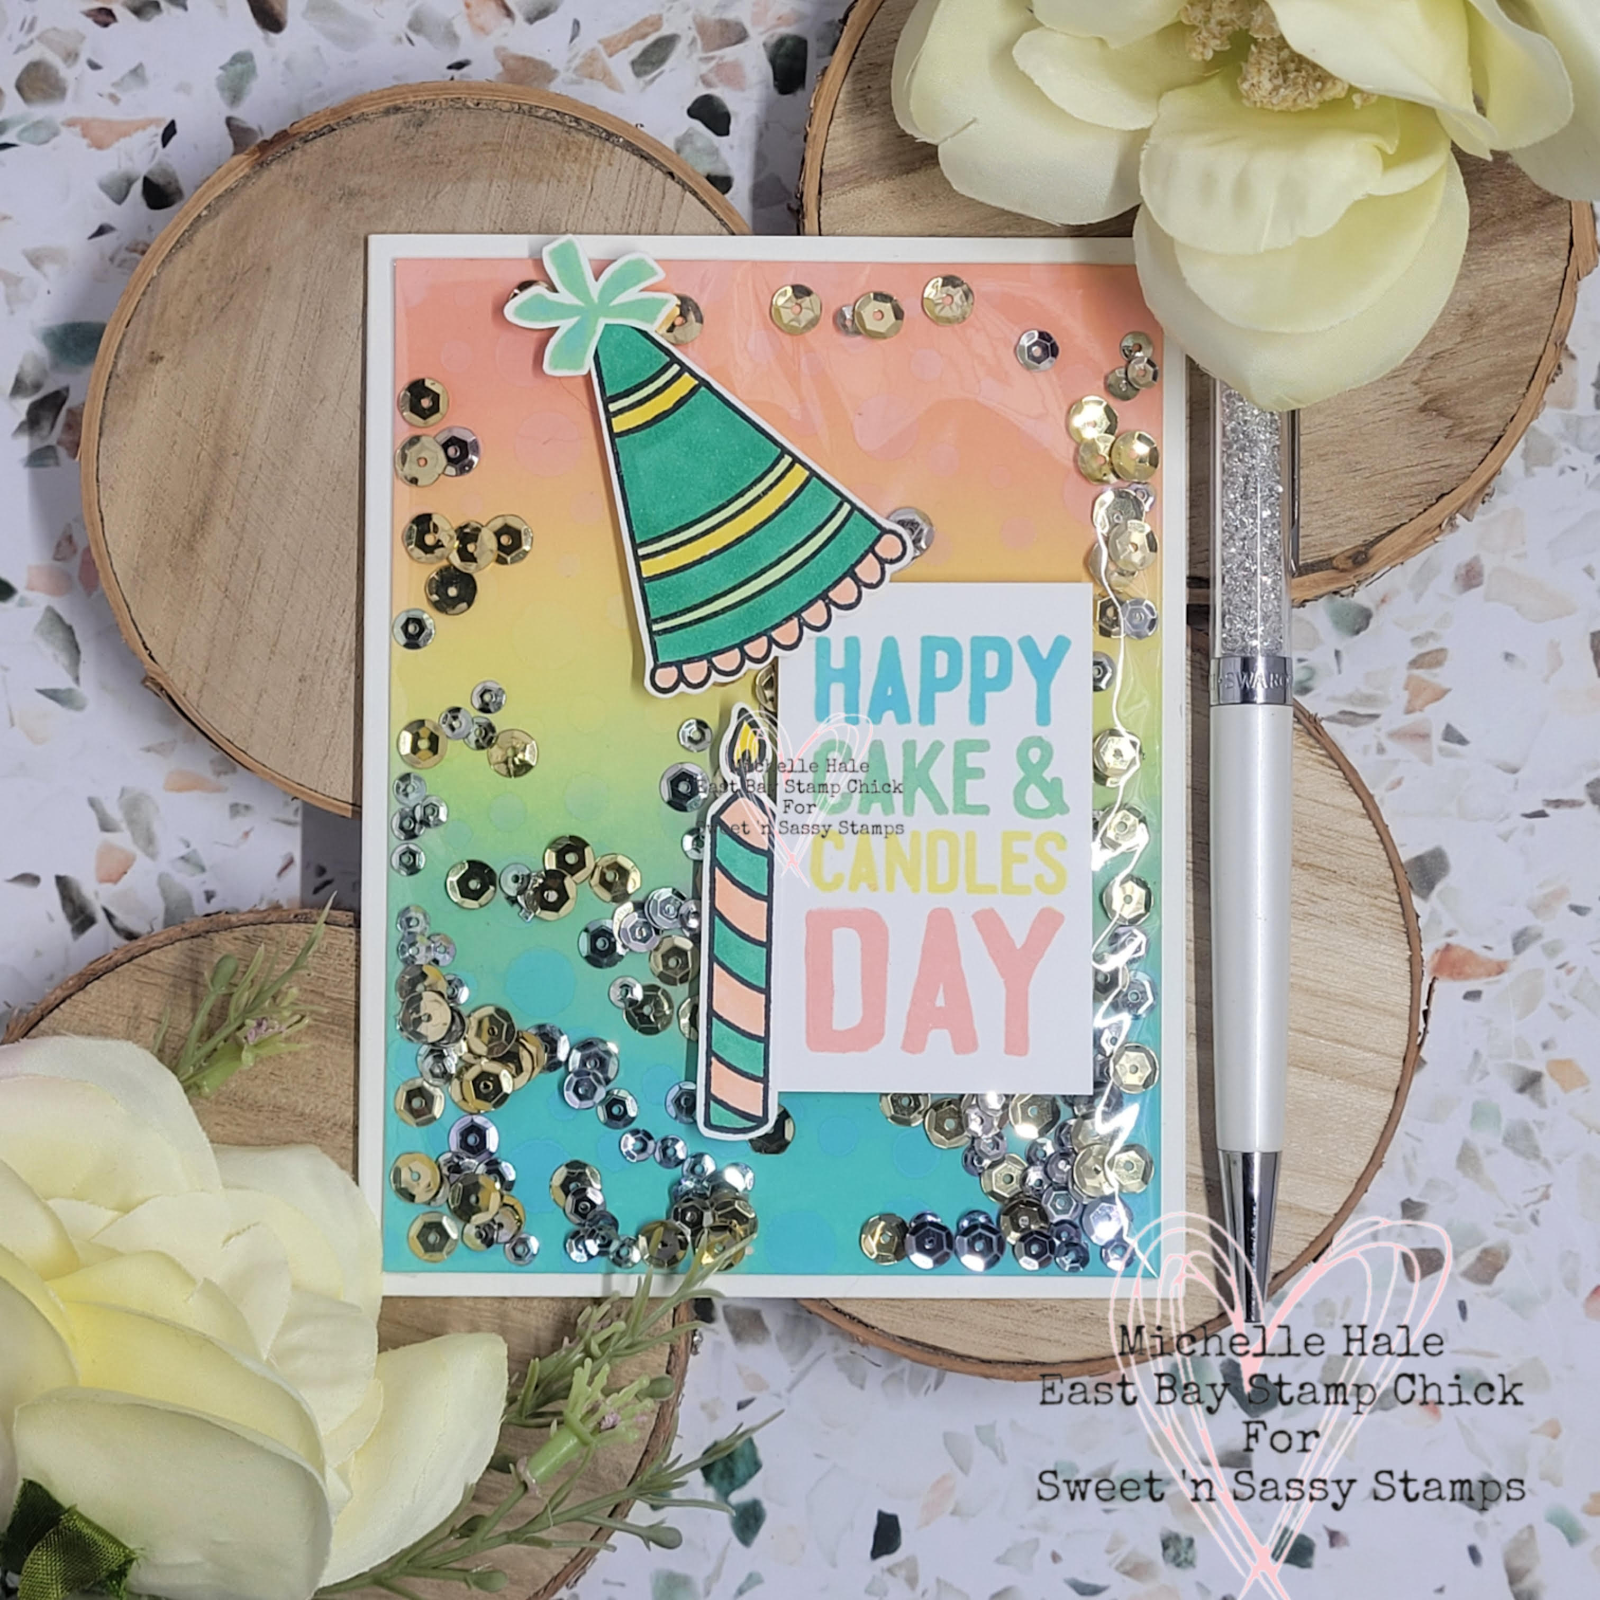
My card share today is an edge to edge shaker card. Here it is.


This is an A2 size card, 4.25x5.5 inches. I cut a card panel of white cardstock at 4x5.25 inches. Then I ink blended 4 colors of ink. I then took the new Bubbles Stencil and went over the panel with the same inks I blended. it's hard to see the pattern of the stencil in this photo. The next step was to cut a piece of cellophane slightly larger than the panel. I used double sided tape to adhere the cellophane on 3 sides. Then I added the sequins and closed the last side with the tape. I colored and fussy cut the hat and candle from the Make a Wish stamp set. I also stamped the sentiment from the same stamp set using the inks I ink blended the background with. I adhered all the elements and it's done. Very easy!

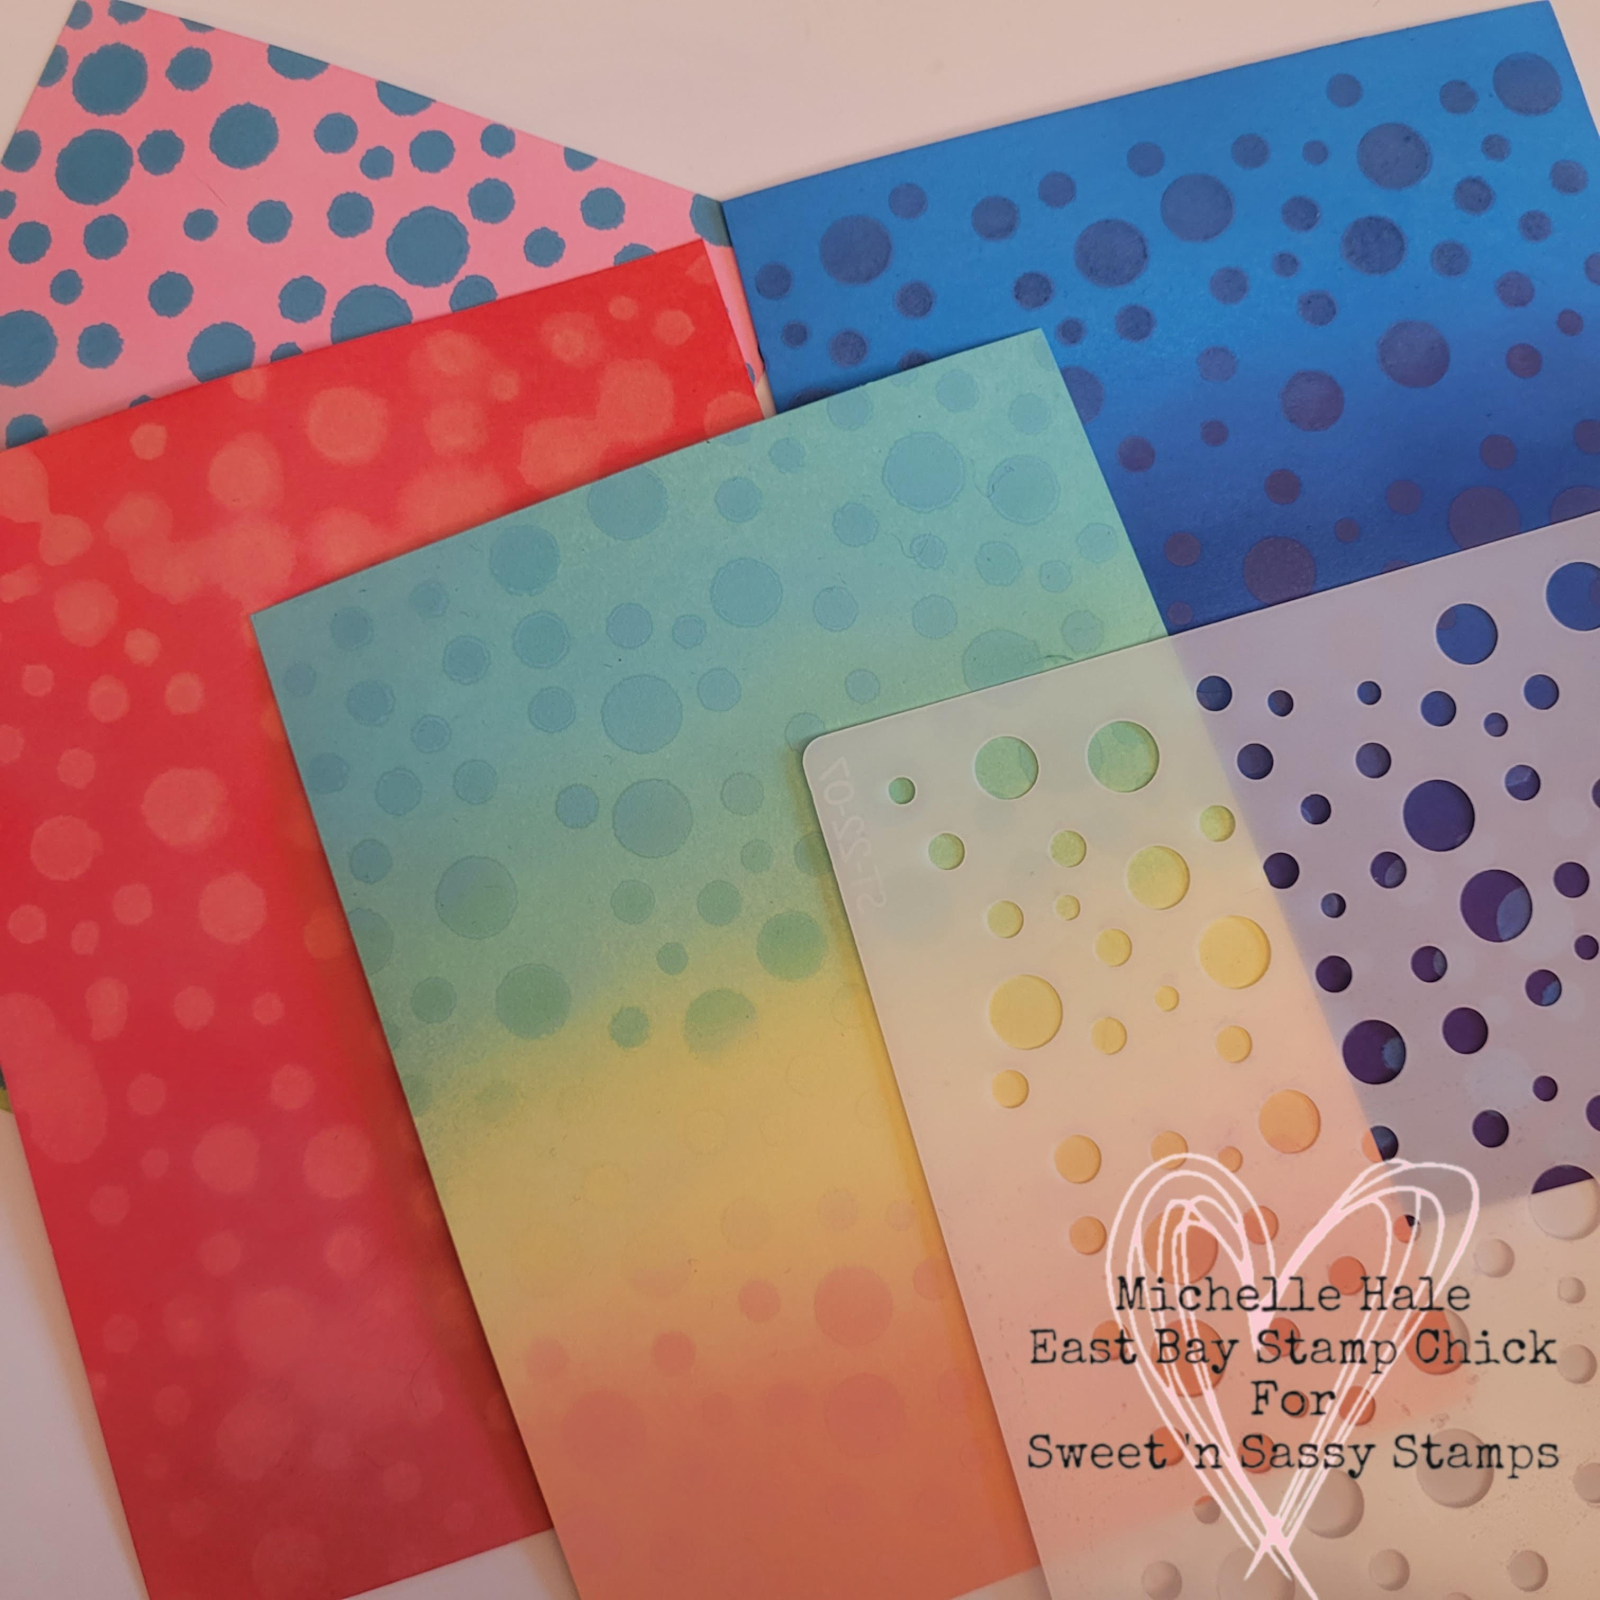
Here is a look at the panel and a few others, so you can see the stenciling.


Let's take a look at what I used to make the card.


Edge to edge shaker cards are perfect for fun occasions like birthdays. I hope you give it a try! And don't forget to check out the sale this weekend! Thank you for visiting with me! And don't forget to get crafty this weekend!

Tuesday, June 14, 2022

Happy Birthday | #SNSSVIP0622

 PRODUCT LINKS BELOW CONTAIN AFFILIATE LINKS AT NO ADDITIONAL COST TO YOU

Hello Sweet Friends! Sheri here today to let you know that a NEW VIP Challenge has started over in our Sweet 'N Sassy Stamps VIP Group over on Facebook. Each month a new challenge is posted with a chance to win s SNSS stamp set! This month in honor of Father's Day we are challenging you with a Masculine Card Theme. You can find the challenge HERE.
 
I just had to use the NEW Grunge Gears Stencil to create another sample. During the Month of June, you can earn this stencil FREE with any $50 order. I also pulled out the Everyday Greetings 2 stamp set. I'm normally not a very messy crafter so this card really took me out of my comfort zone with ink blending and ink splatters. I do have to admit I love how it turned out and how it pops against the white card base.  I hope you are inspired and will stop by and play along!
 
Steps to Create Card:
  • Cut & Score White A2 Top Fold Card Base: 4 1/4" x 5 1/2" (4 1/4" x 11", scored at 5 1/2")
  • Cut Black Mat: 3 5/8" x 4 7/8"
  • Cut White Panel: 3 1/2" x 4 3/4"
  • Take White Panel, Grunge Gears Stencil, Blue Inks (used Gina K Sea Glass, Tranquil Teal, Blue Denim & In the Navy) to create background.
  • Take background and add paint splatters (used White Gouache & Brushed Pewter Distress Paint)
  • Cut Black Strip (3 1/2" x 4 3/4") for Birthday sentiment from Everyday Greetings 2 stamp set and stamp and emboss with VersaMark and White Embossing Powder.
  • Assemble Card. Black mat is popped up with foam tape (optional).
  • For embellishment I added a few black enamel dots.
Card Measurements:
White A2 Top Fold Card Base: 4 1/4" x 5 1/2" (4 1/4" x 11", scored at 5 1/2")
Black Mat: 3 5/8" x 4 7/8"
White Panel: 3 1/2" x 4 3/4"
Black Sentiment Strip: 3 1/2" x 4 3/4"
 
 -------
 
 
Happy Stamping!!

Tuesday, May 10, 2022

You're the Best Dad

 PRODUCT LINKS BELOW CONTAIN AFFILIATE LINKS AT NO ADDITIONAL COST TO YOU
 
Hello Sweet Friends! Sheri here today with a card featuring the NEW Masculine Mash-up stamp set from the May 2022 Release!  This is a great set to add to your collection for your masculine themed cards.
 
Today's card could be used for Father's Day or a Birthday! Nothing better than telling Dad that he's the BEST!
 
Steps to Create Card:
  • Cut & Score White Card Base: 4 1/4" x 5 1/2" (4 1/4" x 11", scored at 5 1/2")
  • Cut Mustard Mat: 3 7/8" x 5 1/8"
  • Cut Navy Panel: 3 3/4" x 5", then emboss with your favorite masculine embossing folder. I used an older one, Houndstooth (Cuttlebug) from my stash.
  • Cut a 2 3/4" Circle out of the center of the navy panel.
  • Create a Mustard Mat for window in navy panel by Cutting out a 3" Mustard Circle and then cut a 2 1/2" Circle out of it.
  • Cut 1 DAD Word die out of Mustard card stock and 2 in Navy card stock so you can stack for dimension.
  • Stamp Tool image from the Masculine Mash-Up stamp set and color with your favorite coloring medium. I stamped with alcohol friendly ink and used my copic markers to color. This image will then need to be fussy cut out.
  • Stamp "You're the Best" from the Sentimental Wordfetti stamp set with embossing ink and emboss it with a White Fine Detail Embossing Powder (this is very helpful to getting detailed and small sentiments to embossing crisply).
  • Assemble Card. I did use foam tape to pop up the card panel, tool image and small sentiment which is totally optional.
  • For embellishment I added a few metal star embellishments from my stash.
Card Measurements:
White A2 Top Fold Card Base: 4 1/4" x 5 1/2" (4 1/4" x 11", scored at 5 1/2")
Mustard Mat: 3 7/8" x 5 1/8"
Navy Panel: 3 3/4" x 5"
Navy Window: 2 3/4"
DAD: 3 1/2" x 15/16"
Black Sentiment Strip: 1 1/8" x 1/4"
 
Copic Markers:
Yellow: YR23 & YR21
Gray:   T4, T2 & T1


-----------


 Happy Stamping!!


Monday, October 11, 2021

Rainbow Birthday


Hello friend, Esther here today with a bright and cheery rainbow birthday card. I started by painting a background with distress oxides on Canson Mix Media paper. (These are the colors in order from top to bottom: Kitsch Flamingo, Festive Berries, Wild Honey(mixed with Festive Berries), Squeezed Lemonade, Twisted Citron (mixed with Salty Ocean), Salty Ocean, Blueprint Sketch, Wilted Violet.) 

Next I spot stamped the  Geometric Background in Yeti Ink (Lawn Fawn) and embossed it with white embossing powder. I added some white paint splatters to fill in the empty spaces.

The Chinese lanterns are from the Shine Your Light stamp set, and are stamped in Versafine Clair Nocturne Ink  and painted with distress oxides. After they were dry, I inked them up with Versamark Watermark Ink and embossed them with Clear Ultra Thick Embossing Powder to give them some shimmer. 

Last of all I stamped the sentiment from Bold Birthdays  in  Versafine Clair Nocturne Ink  and added some sequins. 

   ~~~This post contains affiliate links at no extra cost to you~~~

Tuesday, September 14, 2021

Happy Birthday | #SNSSVIP0921

 PRODUCT LINKS BELOW CONTAIN AFFILIATE LINKS AT NO COST TO YOU
 
Hello Sweet Friends! Sheri here with a card for the September 2021 VIP Challenge over in our Facebook Group. Each month we host a new challenge and a chance to WIN a $10 Gift Code to the SNSS shop. One random winner is selected each month.  You can find the details on how to play along HERE.
 
This months we are challenging you with a
 "Nautical Theme Challenge"
 

You just need to create a project with a nautical theme using at least one SNSS product. Don't have an image that will work...we have a FREE digital image over in the VIP that you can download and use!
 
For my sample I created a masculine birthday card using the Master of the Sea and a sentiment from the Sentimental Mash Up stamp set.

Card Measurements:
White A2 Top Fold Card Base: 4 1/4" x 5 1/2" (4 1/4" x 11", scored at 5 1/2")
Kraft Layer: 3 15/16" x 5 3/16"
Navy Mat Strip: 2" x 5 3/16"
Red & White Stripe Pattern Paper Strip: 1 7/8" x 5 3/16"
Navy Circle Mat: 3"
White Stitched Circle: 2 7/8"


We hope you will be inspired to play along! 
You can find the challenge details HERE.

 
 Happy Stamping!!

Tuesday, August 24, 2021

Birthday Treats Are Calorie Free

  PRODUCT LINKS BELOW CONTAIN AFFILIATE LINKS AT NO COST TO YOU

 
Hello Sweet Friends! Sheri here with a mini slimline card featuring the NEW Sweet Treats stamp set from the August 2021 Release.

Have you tried the latest fad and created a fun Mini Slimline card yet? They are super easy to create. I love the 6" x 3 1/2" size. So you just need to start with a piece of card stock cut to 7" x 6", and score at 3 1/2" on the 7" side.

For my sample today I stamped a bunch of the images with alcohol friendly ink and used copic markers to color. I used the coordinating dies but you can also fussy cut them out.  I then cut a few layers and created a fun little scene. I added a sentiment and sprinkled on a few clay red hearts for embellishment.
 
Card Measurements:
Mini Slimline Card Base: 6" x 3 1/2" (6" x 7", scored at 3 1/2" on the 6" side)
Red Scallop Layer: 5 5/8" x 3 1/8"
Sea Glass Mat: 5 1/8" x 2 5/8"
White Panel: 5" x 2 1/2"
 
(Stamps and Dies are also available Individually)
 

 Plus there's still time to shop our Alphabet SALE!
Happy Stamping!!

Tuesday, November 24, 2020

Celebrate

  Hello Sweet Friends!  Sheri here today with a fun birthday card featuring the NEW Birthday Gnome digi along with Texture Tiles 8 and Make A Wish stamp sets.

***THIS POST CONTAINS AFFILIATE LINKS AT NO ADDITIONAL COST TO YOU***

I had a little fun with this one. I like to challenge myself to try new layouts and thought a window would be fun for the Birthday Gnome Digital image to peek out of.

1. Stamp multi-sized polka dots from the Texture Tiles 8 set down the left side of your card panel in orange ink to create a border.

2. Stamp sentiment from the Make A Wish stamp set at the bottom of the panel in blue ink.

3. Create Window in Blue Card Stock. I used a 2 5/8" Square die & 2 1/8" Square die to create this.

4. Print out Birthday Gnome Digital Stamp at 3 1/2", color with your favorite coloring medium (I used copic markers), and then fussy cut him.

5. I popped up my window frame with foam tape (except for the bottom so I could slip the Gnome under). I then added foam tape to the Gnome and slipped him under the frame. His balloons, Hat and sign with be sitting on top of the frame.

6. I attached the white panel to a blue top fold card base. I also added a white piece of card stock to the inside to make it easier to see your message to the recipient.

Card Measurements:
Blue A2 Top Fold Card Base: 4 1/4" x 5 1/2" (4 1/4" x 11", scored at 5 1/2")
White Panel: 3 15/16" x 5 3/16"
Blue Window: 2 5/8" Square (Outside), 2 1/8" Square (Inside)
White Panel (Inside): 4" x 5 1/4"


This Months Stamp of the Month, is called Bold Birthdays and is FREE with any $75 order.  Plus if you are in the US you will also qualify for FREE SHIPPING!


Plus don't miss Birthday SALE - Week #3
Sale Category HERE

Happy Stamping!!

Tuesday, November 10, 2020

Happy Birthday

  Hello Sweet Friends!  Sheri here today with a card featuring the NEW Bold Birthdays. This is the November Stamp of the Month stamp set and is FREE with any $75 order. Plus if you are in the US you will also qualify for FREE Shipping! 
 
***THIS POST CONTAINS AFFILIATE LINKS AT NO ADDITIONAL COST TO YOU***
 
I love large sentiment sets as they can be made the focal point of a card. This is especially helpful when creating masculine cards and you want to keep the design simple.  I picked a monochromatic color pallet and added a pop of lime green to brighten things up. I think this card would be perfect for any teen or guy in your life.
 
To keep your eye on the focal image (sentiment) I build up a back drop with layers of pattern paper, a circle, and a flag banner. This is also a great way to use up scraps. For embellishment I added three enamel dots.
 
Card Measurements:
A2 Top Fold Card: 4 1/4" x 5 1/2" (4 1/4" x 11", scored at 5 1/2")
Lime Mat: 3 3/4" x 5"
Black Mat: 3 5/8" x 4 7/8"
Stripe Pattern Paper Layer:3 1/2" x 4 3/4"
Black Rectangle Mat: 2 3/8" x 4 1/8"
Star Pattern Paper Layer: 2 1/4" x 4"
Black Circle: 2 3/4"
Lime Flag:5/8" x 3 1/4"
Black Rectangle Mat: 3" x 2"
White Stitched Rectangle Panel: 2 7/8" x 1 7/8"
 
 
Plus don't miss out on this weeks Birthday Celebration Sale!
Click HERE


 Happy Stamping!!
 

Friday, June 5, 2020

Dahlia Birthday


Hi friends! It's Julee popping in with a fun birthday card featuring the gorgeous new Dazzling Dahlia set. Have you seen this huge, beautiful flower?  I started this card during a fun little informal team virtual meeting, stamping the big dahlia in black, then watercoloing with Zig clean color real brush markers. When I was done with that, I flicked on some dylusions white linen spray, then fussy cut the flower.

Next I stamped the leaf and colored with Copics and fussy cut.  I layered this behind the flower and adhered with foam tape to the card base, adding some fun flicks with black and purple inks


The sentiment is from the Birthday Word Art set that recently came out of the vault. I just love these big sentiments! I embossed the hooray it's your birthday in white on black cardstock, then added white flicks to finish things off.

Thanks so much for stopping by today! I hope you have a fabulously creative day.


***This post contains affiliated links at no cost to you ***