Showing posts with label Christmas Blocks. Show all posts

Friday, December 17, 2021

Sending a Snowy Hello!


Hello crafty friends! Lieschen here hoping you are having a great Friday so far! I can't wait to share with you a couple of things, but let's begin with this simple card I made using the Christmas Blocks, Holiday Greetings, and Diamond Tile Stencil from Sweet 'n Sassy Stamps. It's just a perfect card to send a snowy hello during the holidays.

I created a mini slimline base card measuring 7x6 with scoring on the 7 inch side at 3½. Then I trimmed a piece of cardstock measuring 5½ x 4¼. I used this piece of cardstock to stamp the cute snowman from the Christmas Blocks stamp set.

I masked the snowman so I could ink the background using nice blue ink pad and the Diamond Tile Stencil. Then I used my Copic markers to color that adorable snowman. To finish the card, I heat embossed a sentiment from the Holiday Greetings stamp set, added some glossy accents on the snowman, and used some clear sequins to make the background pop more.

This was such an easy/fun card to make! I hope you give it a try with your supplies.

I also want to take advantage to remind you of two things:

Sweet 'n Sassy Stamps has the last Inspiration Hop for the year! Make sure you join in the fun and leave some love comment on the design team's post for a chance to win $25 to shop at Sweet 'n Sassy Stamps! Check their Instagram page for more info.


Are you following Sweet 'n Sassy Stamps VIP page on Facebook? If not you should start today! Not only is there daily inspiration with fun crafty projects and fun announcements before we make them public, but this month we have the VIP challenge "Anything Goes!". And like it says in the picture, YOU REALLY DON'T WANT TO MISS IT! A winner will be selected from the December challenge album for a...are you ready for this???? TO WIN ONE YEAR OF FREE STAMPS IN 2022!!!! How awesome is that! Again, you need to follow their Facebook VIP page!

That is all I have to share with you today. I hope that you have enjoyed today's post and crafty project. For more inspiration make sure you follow me on Instagram: @harshgurl

I hope you and yours have a Merry Christmas and a blessed New Year!

See you in 2022!


*Products mentioned contain affiliated links at no extra cost to you.*

Friday, September 17, 2021

Christmas Shaker Card

Happy Friday crafty friends! I hope your week has been going well and that your weekend gets even better.

Today I want to share with you a slimline card I made using the Berry Branch background stamp from this month’s new release and the Christmas Blocks stamp set.

To start my card, I made a slimline base measuring 7" x 8 1/2" with scoring at 3 1/2". I then trimmed a red card stock 3 1/4" x 8 1/4". Finally, I trimmed a white card stock 3" x 8". Once I was done trimming, I stamped the Berry Branch stamp on the white card stock with a green ink pad, and glued a slightly smaller piece of acetate onto the back of it. I then used one of my square nesting dies, which fit perfectly around the Christmas Blocks stamp images, to die cut the background.


I used another white card stock to stamp the cute images from the Christmas Blocks set, and colored them using my Copic markers. I glued that on top of the red card stock and placed some chunky blue glitter to make this into a shaker card. To finish the card, I added some Nuvo drops on the berries and added a sentiment from the Holiday Blocks stamp set.

I really hope you have enjoyed today’s post! For more inspiration follow me on Instagram: @harshgurl.

As always, I hope this has given you some inspiration to do something fun and creative today. Until next time!

Friday, September 3, 2021

Getting A Head Start with Christmas Cards!

Hello my friends! Thanks for stopping by the Sweet 'n Sassy Stamps blog. I hope all of you are doing well! It's already September, can you believe it? Time sure is going by fast, it needs to slow down a bit.

Even though it is September, I'm getting ready to work on some Christmas cards with the hopes I can send them early this year, hahaha!

For today's card, I'm using the Christmas Blocks stamp set. I love this set, it is so adorable! I love how they look like if they are picking out of a window!

To make the background of this card I simply used one of my Christmas patterned paper. After I colored the images with my Copic markers, I used one of the square nesting dies that fit perfectly for this set.


 To finish the card, I heat embossed the sentiments that come in the Christmas Block stamp set and used some Nuvo drops to color in the cute Santa hat on the sentiment.

I hope you have enjoyed today's crafty project. For more inspiration, you can follow me on Instagram @harshgurl .

Wishing you a very crafty weekend, until next time!

Wednesday, October 18, 2017

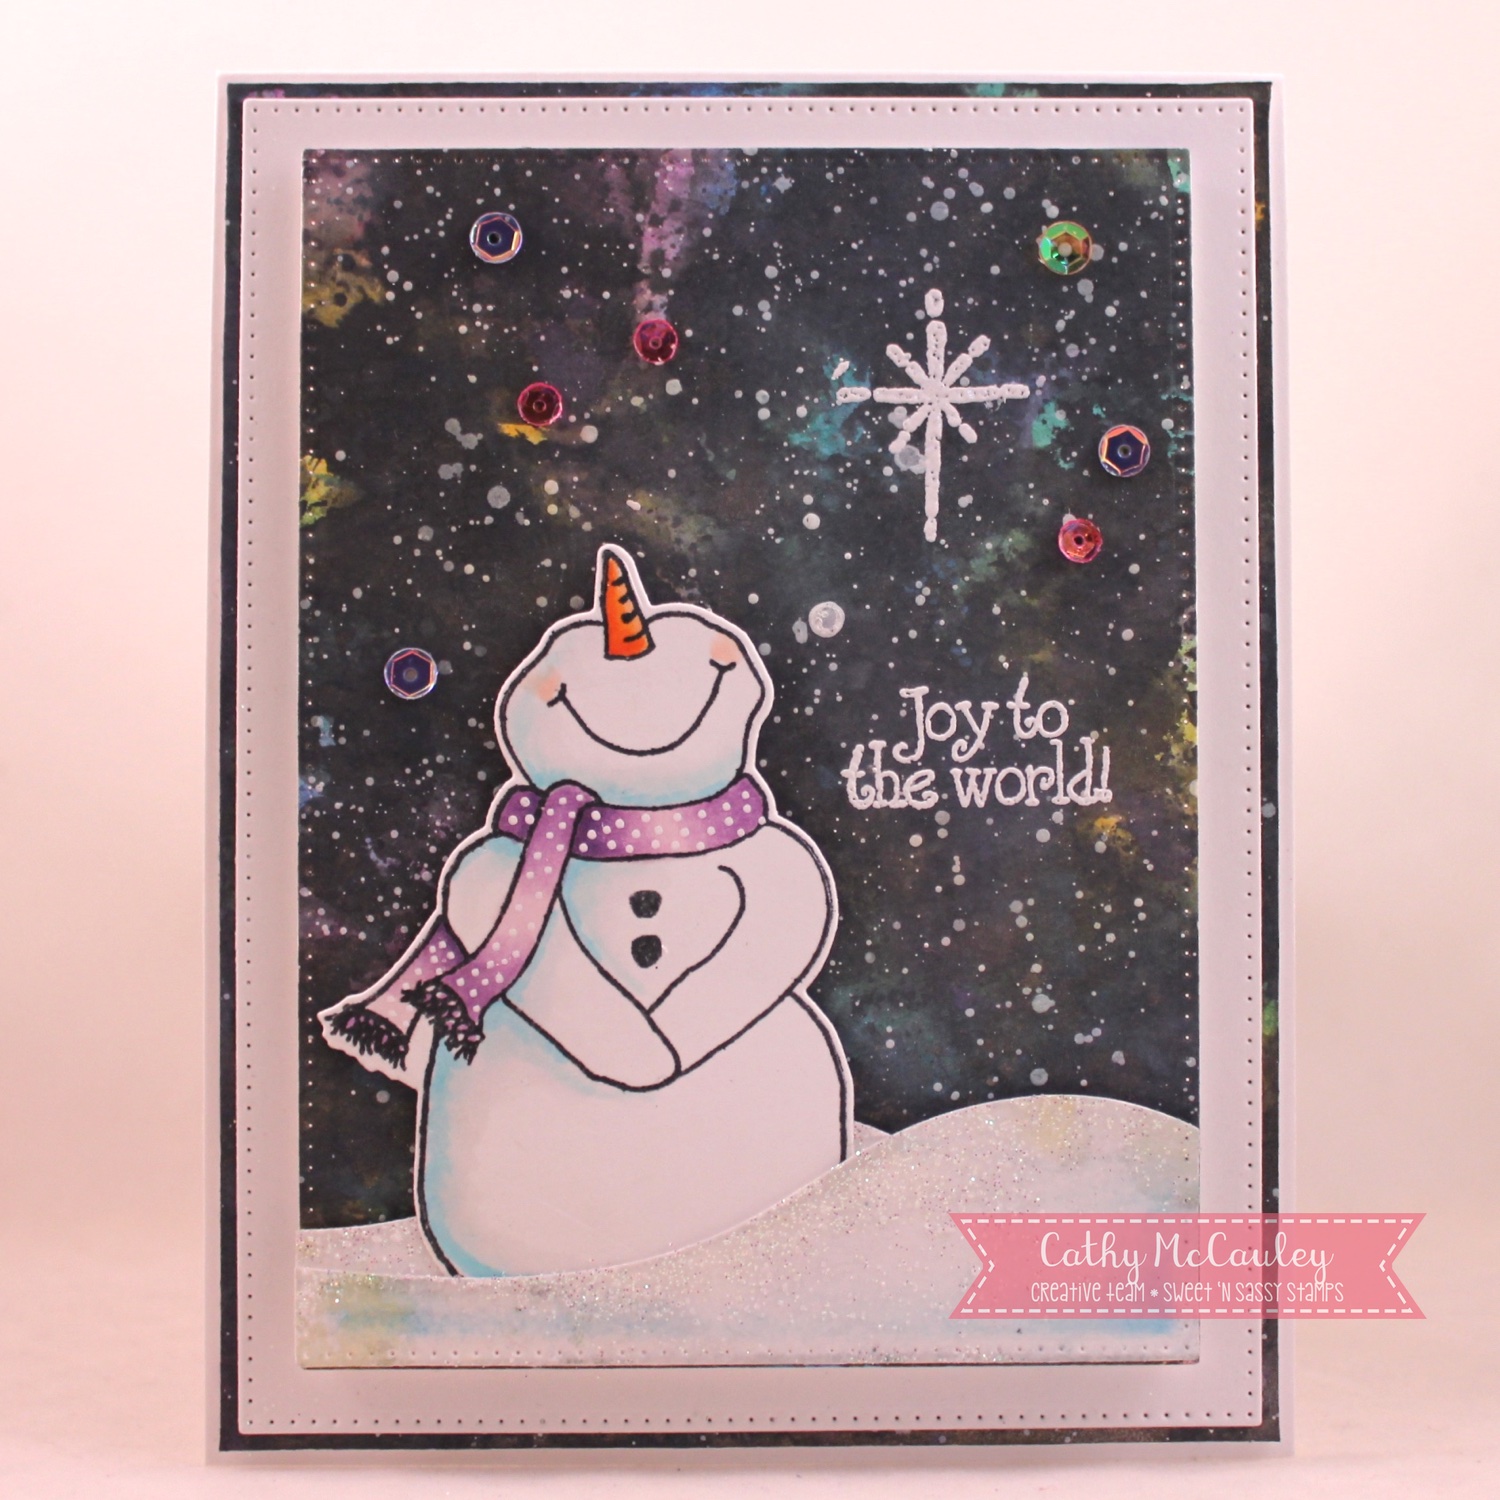
Snowman Hugs

Hello sweet friends...hope you are having a wonderful week!  SNSS has so many adorable snowmen sets that just make me smile!  Here are a couple of them on two Christmas cards created for today's post.


This smiling snowman is part of the new Christmas Blocks stamp set.  The background was created with the snowflakes from the Holiday Hugs set and Distress Oxide Inks.  Perfect Pearls mixed with water and sprayed onto the background add just the right amount of shimmer behind the embossed vellum frame.


The galaxy sky on this charming Christmas card was also created with Distress Oxide Inks.  Several colors of ink were sponged onto a mixed media panel.  Black Soot Oxide Ink was then added on top of the colors, spritzed with water and again sprayed with Perfect Pearls.  Several Sequins were added to add to the shimmer.  I found this Galaxy Sky Technique on Jennifer McGuire's Blog and had to give it a try.  The cute snowman and sentiment are from the Welcome Jesus stamp set.

Here are the adorable snowmen stamp sets available at the Sweet 'n Sassy Stamps Store that were used to make these cards:
Love the new look!

I'm snow glad you stopped by...be sure to stop again for more SNSS inspiration!
Hugs,
Cathy

Saturday, September 30, 2017

Christmas Blocks

Hi Everybody,

Have you started making your Christmas cards?  Hopefully I will inspire you to start them with this super cute stamp set from Sweet 'N Sassy Stamps.

The stamp set I used is called Christmas Blocks, the blocks are easy and quick to color and so many ways to use them.


I used kraft card stock for the base, layering white for bottom layer and cherry red card stock for the plaid die, all card stock from Gina K Designs.

I decided to go with a star theme since the reindeer has stars in his block.  I used Copic Markers to color the blocks and added a little shine with a clear Spectrum Noir pen.  I used Gina K Designs cherry red ink to match the card stock, don't you just love when things match like that? I stamped the sentiment on a banner die using the MISTI.  To add a little more embellishment, I used the Star Dies from Sweet 'N Sassy.  Matter of fact, the star dies are currently on sale.  I cut them out with red glitter paper. 

This card has several layers but is an easy card to make.  I hope I inspired you to start your Christmas cards in September lol. 

For more inspiration stop by my blog at http://cardsbyregina.blogspot.com

Thanks for stopping by and have a great day!

Regina

Thursday, September 28, 2017

Mini Note Cards


Hello Sweet 'n Sassy Stampers!
It's Ceal here to share with you today a cute gift Idea, Christmas will be here before we know it so I am getting started on some gifts to give to my friends. The Christmas Blocks set is perfect to make cute little 3x3 notecards with.

 I stamped the Moose image on some pieces of Neenah solar white 80lb cardstock, and colored it with Chameleon pens. I chose some plaid design paper to use because I think it goes well with this image. Next I fussy cut the moose out and before placing them on top of the plaid designer paper I added a little linen thread under each image and foam tape to pop them up.
 Next I put the envelopes with the notecards and tied them together with some juste twine. For the mini pizza box I added some of the plaid design paper to the to and cut out another moose image for the top of the box. The greeting for you is from the Christmas Wishes set.


Monday, September 25, 2017

Naughty or Nice


Hello friends, I have a quick and easy card for you today using one of our new release sets Christmas Blocks by Krista Hamrick.  This set is just the sweetest, with 10 stamps.  There was barely any coloring on this one.  The paper is from The Paper Studios.  Make sure you check out the sales going on in the discounts section HERE, some really good sales for you to get in on.
Hugs,
Stephanie

Saturday, September 9, 2017

Christmas Tags

It is still warm, but fall is definitely peeking in and if I don't get started with Christmas projects now, the next thing you know, it will be here and I won't have time....SOOOO today's project, using one of the adorable new sets called Christmas Blocks Clear Stamp Set, is some fun Christmas tags. I had this huge box of tags in my stash (I'm not sure how long I've had them but I'm I thought I NEEDED them at the time and this is the first time I have used them, but they were perfect so I am glad I had them :).


Some ink smooshing, embossed images, and colored pencils, and voila! I hope this inspires you. It is fun and easy to create as many as you need in a sitting. I did the inking on a bunch of them, then the stamping and embossing then brought out the colored pencils, and finally I added the twine and I had a handful ready to go! Is it crazy that now I just want to get a Christmas present to wrap??

Here is a close up of the cute Santa!


Now it is your turn! I can't wait to see what you do!


Thanks for stopping by!
Lyn


Friday, September 8, 2017

Christmas Blocks

Good morning!
 
Today I am sharing two cards using the new Christmas Blocks stamp set released this week on the Sweet 'n Sassy website.  When it comes to making Christmas cards, I am usually making multiples so I need to make them quick & easy!  One great way to make CAS cards is to start with an assorted box of pre-printed card bases.  Just add your stamps and embellishments!
 
For the first card, I stamped and colored the Santa face, popped him up with foam tape, and stamped the sentiment.  Some Stickles and Wink of Stella add a bit of sparkle to complete the cards.
 

The second card had a snowman pre-printed on the front.  I simply die cut a speech bubble window and stamped the sentiment on the inside to peek through.


When opened, you see a second sentiment stamped beneath the first one. I also added the little present image in the corner and kept the coloring minimal.  Some Stickles added to the card front finished this one as well.


Have a great day!
Diane