Monday, December 14, 2015
Holly, Jolly Christmas
Saturday, September 5, 2015
Holly Jolly Christmas...
I went with a clean look, using die-cuts to add a little bit of interest to the scene.
I love the sweet snowman from Holly Jolly Christmas clear stamp set... and now it has a coordinating die set! Please read Sweet Perks Club information HERE!
My little guy was:
1. Stamped with Tuxedo Black Memento ink on white card stock.
2. Colored with Copic Markers.
3. Cut out.
4. Popped up with dimensional tape.
The cloud was die cut out of vellum with a die from the Happy, Happy Die Set.
The background was die-cut with dies from the Hillside Edges Die Set.
Friday, September 4, 2015
September 2015 Sweet Perks Reminder
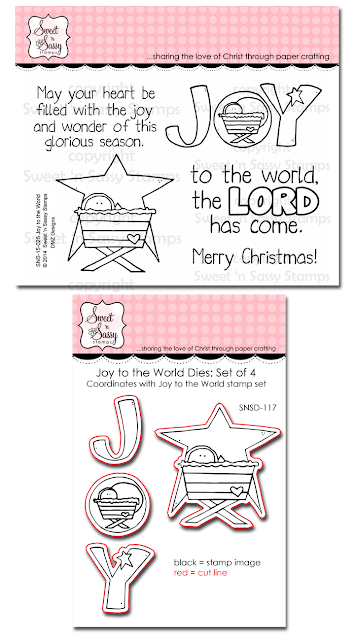
Joy to the World
Thanks so much for stopping by!
Be sure to join us again next Friday for our September Release!
Have a blessed day!
Friday, August 28, 2015
Check out our September Sweet Perks Club Bundles!
The random winner is #13 from the Sweet 'n Sassy Stamps Blog…
Congrats, Julie!
Sweet Perks ClubIt's the last Friday of the month and that means SWEET PERKS CLUB time! :) This month we are gearing up for Christmas. Yes, I know, it's still August, but not for long and soon it'll be time to get working on those Christmas cards, if you haven't already started, that is. ;)
Without further ado, here they are...we're sure you're going to love them!
Looking ahead...
Mark your calendars for our next release Friday, September 11th. We've planned a fun and fabulous blog hop right here on our blog where we'll be featuring 5 new stamp sets! We can't wait to share with you!!!
Until next time...Happy Stamping!
~Korin
Monday, January 21, 2013
Sending You Warm Thoughts
This is just one of the cute snowmen in Sweet 'n Sassy Stamps lineup of adorable snowmen. It is from the Holly Jolly Christmas clear stamp set, but is also available as a digi. This jolly fellow was colored with Copic Markers, fussy cut, and popped up on some decorative label dies. A piece of Echo Park DP was the perfect background along with some snowflake embossing for texture. The sentiment is from the Cozy Friends stamp set. Some ribbon, a snowflake punch, and some rhinestones finish the card. The sketch used is from The Sweet Stop this week and the "spin" was to use a snowman somewhere on your card creation. Hope I've inspired you to grab a sweet snowman image and send your own warm wishes!
Thanks so much for stopping by! Have a blessed week and stay warm!
Hugs,
Cathy
Thursday, November 10, 2011
Freezin' Season Snow-globe card...

Here are directions to help you make the snow-globe shape. Start out with die-cutting a circle out of acetate/window sheet. I used my largest, 3-3/4" Spellbinder Circle die for that.Next trace the circle on a folded 11-1/2" x 4-1/4" card stock, and drew in the rest of the globe:
Cut the snow-globe out (make sure you don't cut apart front and back panel). Next cut front panel as indicated:
Trace bottom piece onto a dry embossed red card stock, which is going to be the front-bottom panel of the globe. You will end up with the following pieces:
When assembling card, first adhere window sheet to top (you might have to trim a small piece off the top of acetate circle so it fits properly), then just sandwich bottom part between the 2 front panel pieces. Decorate as desired.
I used Maraschino Baker's Twine, Black Lace, Silver Rhinestones, a Gold Bell, and some punched leaves on my card. The image was colored with Copic Markers. I also added some Stickles as snow.
The original greeting is 2 lines, but I inked the words up individually and stamped them on one line.
Hope I inspired you to make a snow-globe card of your own. The sweet images from Freezin' Season stamp set are just perfect for that.
Thanks for visiting,
Monika