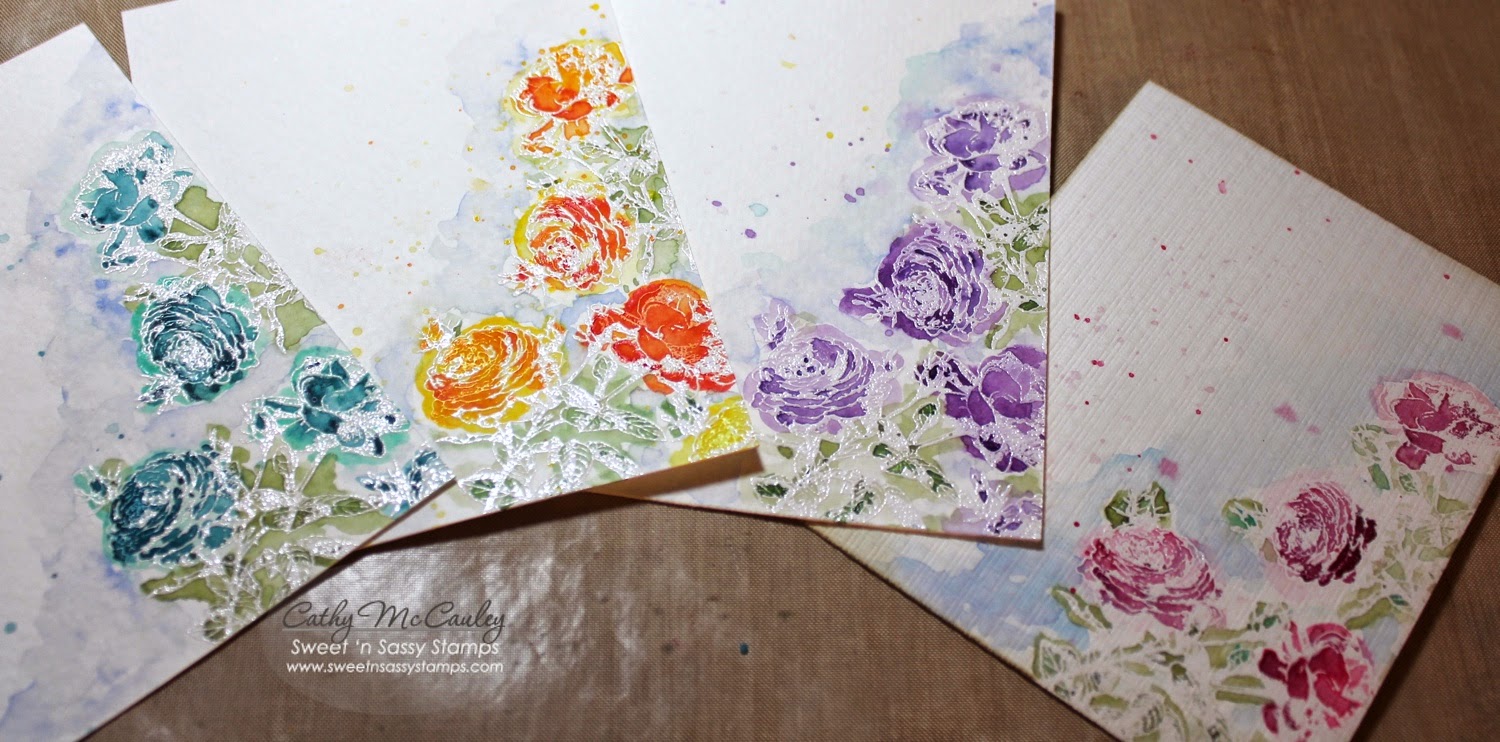
Hello sweet friends…it's Monday and that means it's time for a Design Diva Demo! At the end of this month our church is having a women's retreat. I'll be rooming with two precious ladies from our church, so I decided to make a set of notecards for each of them.
It's Cathy here and it is my turn to share a demo with you. I love trying new techniques and the one I'm going to share with you today is the watercolor resist technique I used to make my set of notecards.
It's Cathy here and it is my turn to share a demo with you. I love trying new techniques and the one I'm going to share with you today is the watercolor resist technique I used to make my set of notecards.
Start by gathering the supplies you need to make the notecards. Choose colors and papers that coordinate. I'm using Bo Bunny papers and the rose image from the new Parisian Postcard stamp set by Sweet 'n Sassy Stamps.
To prepare the card bases cut Neenah Solar Crest card stock to 4 1/4" x 11" and score at 5 1/2".
Cut watercolor paper into panels measuring 4" x 5 1/4". I used Strathmore Cold Press Watercolor Paper for my project which has a smooth side and a textured side, but any watercolor paper or mixed media paper would work for this technique.
Stamp the rose from the Parisian Postcard stamp set on the smooth side of the watercolor paper with VersaMark ink and emboss with white embossing powder. You could also use clear powder if you don't have white. I plan where I want the stamping to go on a scrap piece of paper and use a stamp positioner to make sure the image is in the same place on all four cards. Rub an embossing buddy over the watercolor paper before stamping to make sure the embossing powder sticks only where you want it to stick. Click on any of the pictures to see a close up of the details.
Since these watercolors are new to me, I wanted to test the colors on scrap pieces of watercolor paper to make sure they would match my papers.
Now comes the fun part. Use plain water to wet the areas where you want the color to be and drop the color you are using onto the wet area using a paint brush. The water and the paint do all the work. Start with the lightest color and keep adding darker layers for shading. I am using a set of Kuretake Gansai Tambi watercolors, but you can use any watercolor set, distress inks, or stamp pad refills to do this step. The embossing will resist the watercolor. Don't be afraid to go outside the lines for a softer look.
Wait until each area is dry before moving onto the next part. The flowers were dry before moving onto the leaves, and the background and splatters were added last. Too much water can be dabbed off with a paper towel. Remember…watercolors will dry lighter than they look while wet. Each of my cards will be a different color.
I put my panels between two pieces of copy paper and ironed off some of the embossing to cut down on the shine. If you decide to do this step, be sure to turn off the steam on your iron. At this point, you can dry emboss your watercolored panels for extra texture if you want. I used a Canvas Impression Plate on mine. Now it's time to assemble the cards...I used one of my favorite layouts. Cut border strips of DP to 1 1/4" x 5 1/4" and die cut matching pieces of card stock using the
Attach the Doily Border to the DP strip and mount this to the left side of the watercolored panels. I decided to stitch mine on since I love to sew on cards.
Now it's time for the finishing touches. Sponge your edges. Wrap some twine twice around the watercolor panel before attaching it to your card base. The sentiments I used came from the fabulous Keep in Touch, Too stamp set which has tons of greetings perfect for any occasion. The really cool thing about this sentiment set is that all the sentiments fit on one of the new Banner Dies! Add a little twine bow and the cards are finished!
Wrap the finished cards in ribbon or package them however you want to give as a gift. I made a little card purse to put mine in, but that is another tutorial for another time! LOL!
Here are the supplies from the Sweet 'n Sassy Store that were used to
make these cards:
Let us know if you decide to give this fun technique a try!
Thanks so much for stopping by…have a marvelous Monday!


7 comments:
awesome card, thanks for the amazing tutorial!
How blessed are your roomies to be able to receive these cards!!!! Great, detailed tutorial too, thanks for sharing!
Beautiful set of cards, Cathy. Such a lovely, soft effect of the water color resist. I may have to give this a try!
Oh Cathy! What a stunning set! I am soooo am impressed with how the rose looks embossed and watercolored! Gorgeous set! This will be treasured!
Cathy your cards are very pretty. Great job.
Gorgeous cards, & great tutorial. Love the colors, too. Tfs!
Oh, Cathy... these are beautiful! Love how the water coloring looks with the white embossed images. So dreamy and elegant.
Post a Comment