Showing posts with label Laura Williams. Show all posts

Tuesday, November 27, 2012

Giving thanks for YOU!


Thanksgiving Day has come and gone. . .but I am not finished giving thanks. (Nor do I plan to be, any time soon!)  It's been such fun joining you all at Sweet 'n Sassy Stamps this month.  I have one last project to share with you here on the SNSS blog. . . and if you'll stop by my blog, I'll share one more bonus project too! 

I used the fabulous Grunge Borders set along with Leaf Silhouettes again today because there are  limitless combinations with these two sets! I stamped the woodgrain border on my card base, and then inked the edges to add a little more dimension and texture.   I stamped my leaves in two colors of ink, trimmed them and adhered them to a matted cardstock block.  As a finishing touch, I added the sweet small sentiment and a few twine stitches. (I told you, I cannot STOP myself when it comes to that dark brown twine!) 

Warm and bright. I love the way the colors just popped on this card.  

Thanks so much for having me this month, at SNSS.  It's been a blessing!
Have a beautiful holiday season, and I'll be seeing you around, for sure!
Laura,
xoxo

Tuesday, November 20, 2012

Sweet 'n Sassy blessings

Hello, hello! It's my day here on the Sweet 'n Sassy blog!
It's the week of Thanksgiving, and I thought I'd share something warm and cozy, and filled with autumn.  I've used a few of my favorite things on this card. Would you like to hear about them?

First off. . .RED. This deep red cardstock and ink is so warm and  cozy for autumn and winter projects.   I stamped the chevron border across ivory cardstock and almost gasped, because the texture on the Grunge Borders  is SO fabulous.  It's hard to find a REALLY good looking textured-looking stamp, and this set, by Dina Kowal takes the CAKE baby. Gorgeous. One of my new favorite things!! 
I love the way the border works so nicely with the crisp leaves of Leaf Silhouettes too! 

My next favorite thing. . . .twine. Especially this dark brown twine from May Arts. You may have noticed, I use it on almost EVVERYTHINGGG! (I'm a little obsessed.) Thankfully it comes on a giant roll so I can use it to my heart's content.

I pray your Thanksgiving holiday is filled with family (whether by birth or by blessing) and lots of delicious food and fun.  There's not much better than cool crisp air, delicious smells in the air, and lots of laughter!
Hugs!
xoxo
Laura,

Tuesday, November 13, 2012

Autumn for Christmas

I just love spending Tuesdays here on the Sweet 'n Sassy blog! Thanks so much for coming by today!

Today I have used the autumn-themed Leaf Silhouettes stamp set to create. . .a Christmas card!
I stamped the leaves in dark red ink onto red cardstock to create my poinsettia petals, plus dark green ink on light green cardsstock to create the leaves. 

I pieced it all together, adhered it with foam tape to some lovely textured cardstock, and added a sentiment and twine.  Really, to mass produce this card wouldn't be too bad, because you could cut out all the leaves and petals while watching tv, or sitting in the school car line! (I get a lot of cutting done in the car line!)

I love to mix things up and use stamps outside of their theme because it breathes new life into our stamp stash.  I challenge you to see what stamps you can repurpose for other themes. 

I'm so glad you stopped by today! I'm over at my blog, Lauralooloo, today too, if you'd like to stop by and say HI! :)


Tuesday, November 6, 2012

Leaf Silhouettes with Laura Williams

Hello! I am so happy to be here at Sweet 'n Sassy this month!
I have a trio of projects to share with you today, which will help you get all ready for Thanksgiving. 

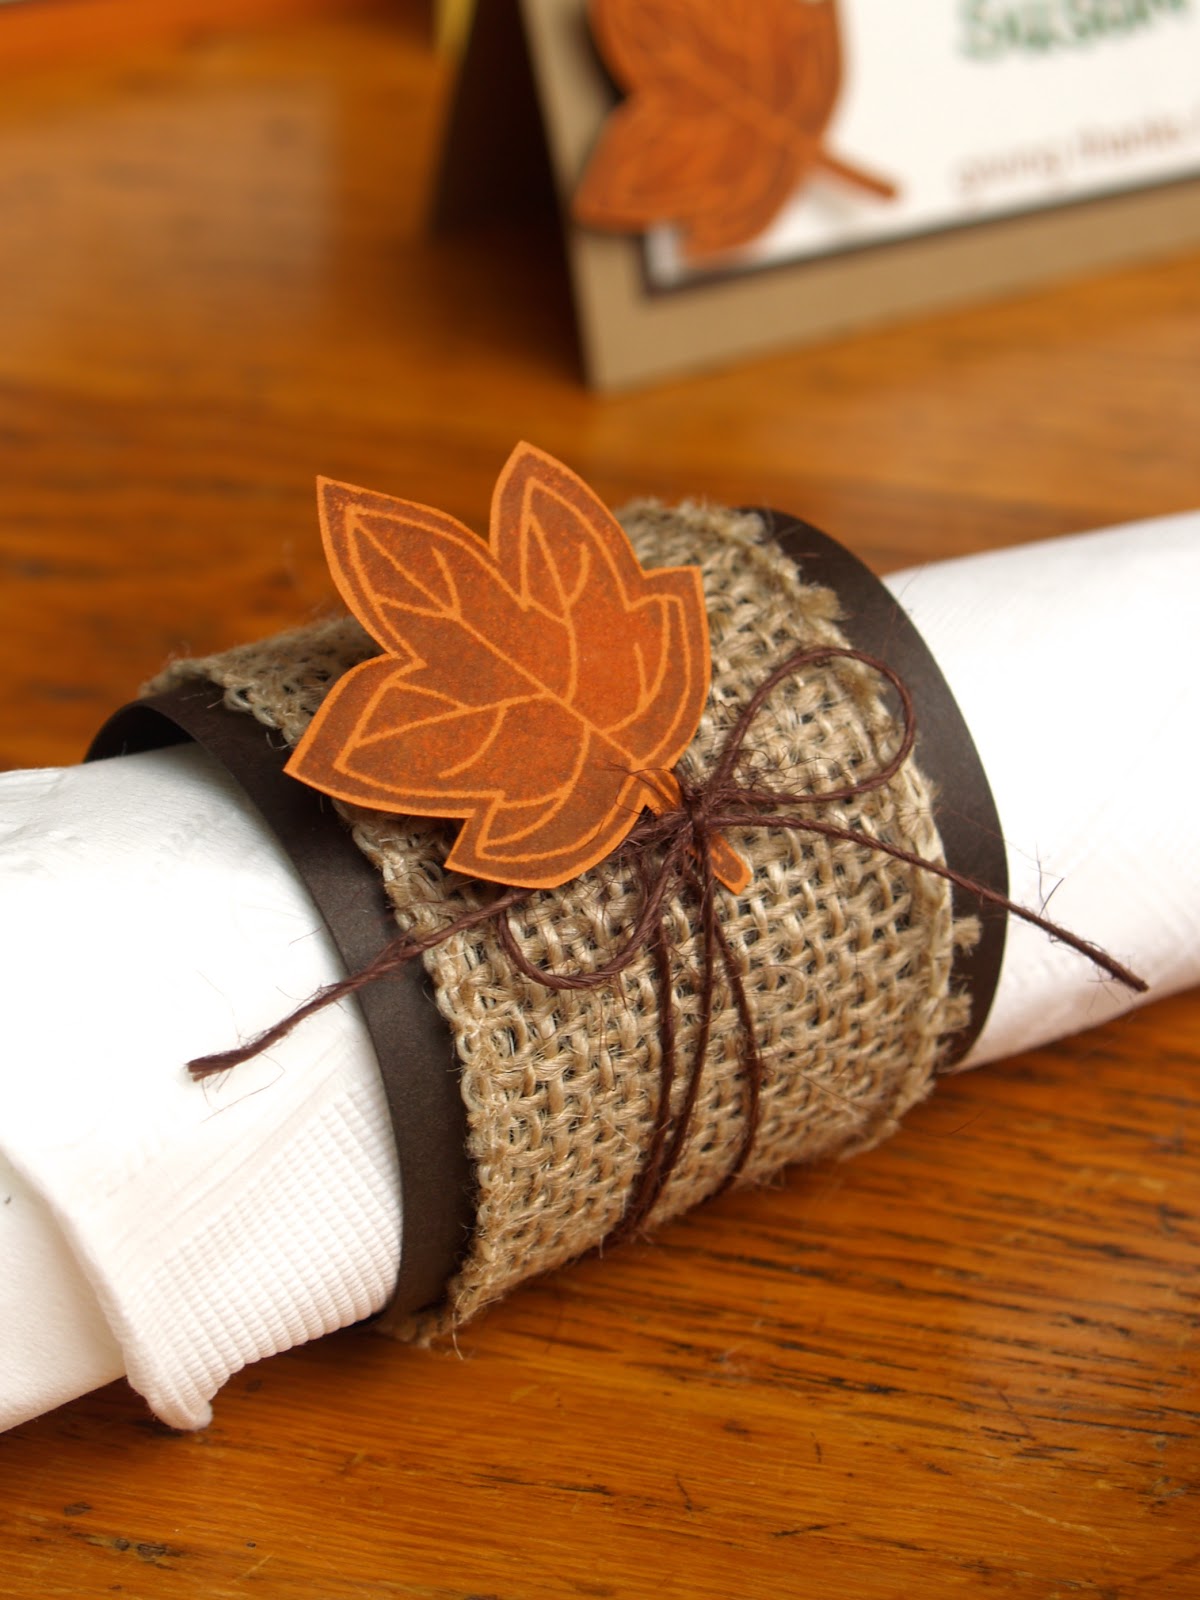
I used the Leaf Silhouettes stamp set to create napkin rings, placecards, and a thank you card.  


To create a simple napkin ring, trim a strip of cardstock (I usually do mine about 1.5x6 inches.) Roll it gently, and add adhesive.  I then wrapped mine with a layer or burlap ribbon, twine, and then tucked my stamped leaves into each one. (I added a dot of foam tape behind each leaf to secure it.)

I stamped the leaves on colored cardstock, and used two colors of ink on each one.  The trick is to start with the lightest color. Dab it on the ink, and then roll the edges of your stamp in the darker colored ink.  It creates a fun look and creates unique leaves that are never exactly the same.

Using matching cardstock and ink, I whipped up placecards. (Any size you prefer will work, but i generally cut a 4x4 inch square, and fold it in half.) Twine, and the oh-so-cute stamps make this quick and FUN work! I followed the same basic format for a sweet and simple (and sassy) thank you card. 

I can't wait to come back next week! I have a holiday card to share with you using a non-holiday stamp set.  Goodness knows, by the time Thanksgiving rolls around, we better be working on our holiday cards, so hopefully this will get you moving, if you aren't already!

Thanks for being here with me, at the Sweet 'n Sassy blog today! 
xoxo
Laura,