Showing posts with label Vintage Postcard. Show all posts

Tuesday, March 24, 2015

Mini Flower Blocks 1

Hello! It's Monika here today with a Spring card. 

We still have snow on the ground so I am ready for some pretty flowers and Spring colors.I decided to use one of the mini blocks from Mini Flower Blocks 1 clear stamp set


I stamped up 3 Daffodil images. After coloring the images with Prismacolor Watercolor Pencils, I cut one whole flower out, and the upper part of the second flower. Then I popped the pieces on the third, main image with dimensional tape.


The background was stamped with images from Vintage Postcard clear stamp set (out of stock). I also spritzed black ink over the background with my Spritzer Tool. The greeting is from Keep in Touch Too clear stamp set


I also added a sweet little butterfly, stamped and heat embossed on vellum. The image is from Majestic Monarchs clear stamp set. It was die-cut with the coordinating Monarchs Dies

Thank you for stopping by today,
Monika


Monday, January 19, 2015

Thinking of You, Paris.....


{jane bosi}  Happy Tutorial Monday, Sweet N Sassy Stampers!  I'm excited to be sharing my first SNSS tutorial with you today!  I received many wonderful comments on my release day Parisian Postcard collage card, so I thought I'd show everyone how I created the vibrant background.  Plus, I added a design-ie twist ;)
This Sprayed Cut Panel Card is easy and fun to make!
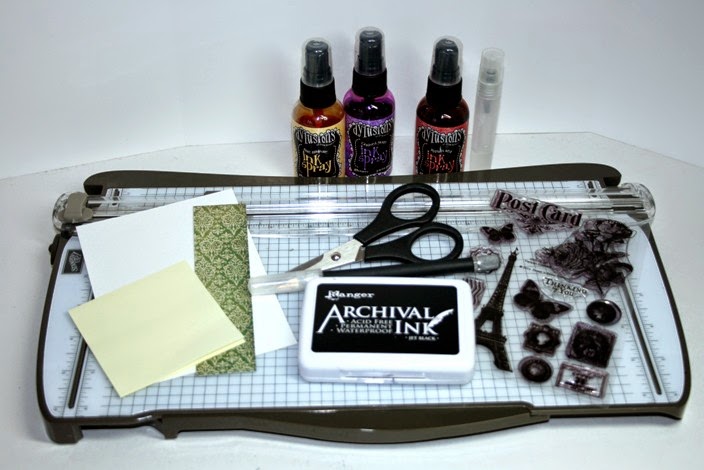
You will need:
Black Archival Ink (Permanent, Waterproof Ink)
Water Mister
Watercolor Paper, Designer Paper
Post It Notes
Cutting Tools:  Trimmer/Scoring Tool, Scissors, Straight Edge
Large Focal Stamp

The first step of my project was to prepare my card front, which was my main palette.  I cut my watercolor paper to 4” x 5 ¼”.  Then, I stamped the focal image off to one side, keeping in mind the cut panel I had in mind.  I also stamped the image on a post it note and trimmed it as a mask for my card front image.


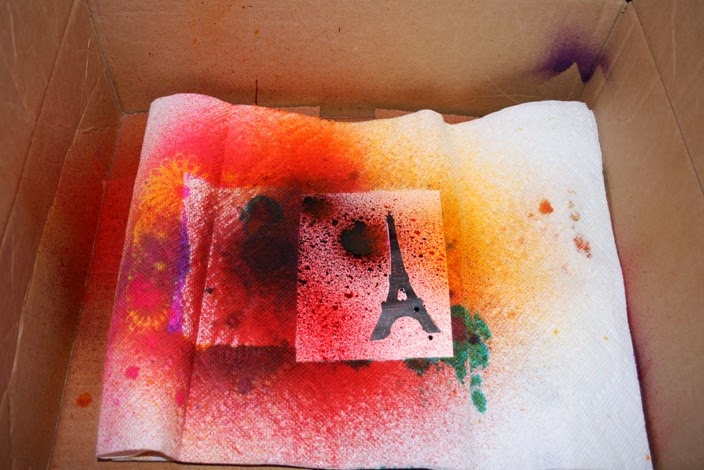
Next, I placed my card front in my tres chic spray booth…..(it’s just a box…..with the sides taped up to avoid over spray….)


And, added several sprays of Dylusions ink!  The colors I used:  Postbox Red, Crushed Grape and Pure Sunshine.  Be generous…you can always remove the sprays with paper towel if it gets to be too much.  


Next, spritz water on the whole project.  This will encourage the inks to blend.  Don’t be afraid to let the inks puddle.


I like to roll the inks around my watercolor paper.  I use the paper towel to absorb the excess ink that pools at the paper’s edge.  I rarely use paper towel to absorb directly as this tends to mute the vibrant colors I’m seeking as an end result.


Only because I am completely devoid of crafty patience, I used my heat tool to dry the piece.


Using the paper trimmer, cut two channels in the panel.  Be mindful of the stamped image, making sure enough of the image remains on either side of the channels.


Use your scissors or straight edge to trim the paper that exists between the two cut lines.  Trim around the stamped image, also


Add a piece of designer paper to “bridge the gap” and you are all set to complete an amazing project!

As I stylized my project using Parisian Postcard and Vintage Postcard, it became a prayer offering for the people of France, in light of recent events in that country....

I love the verse that is the focus of the Vintage Postcard set:  Proverbs 25:25.  "As cold waters to a thirsty soul, so is good news from a far away country."  It's my prayer that the Good News reaches all far away countries...to mend the broken hearted, to provide hope....we all need that!

That's all for me today....may you be blessed!
TTFN, Jane

What I got crafty with:
http://www.sweetnsassystamps.com/parisian-postcard-clear-stamp-set/http://www.sweetnsassystamps.com/products/Vintage-Postcard-Clear-Stamp-Set.html