Showing posts with label Save the Turkeys. Show all posts

Sunday, November 2, 2014

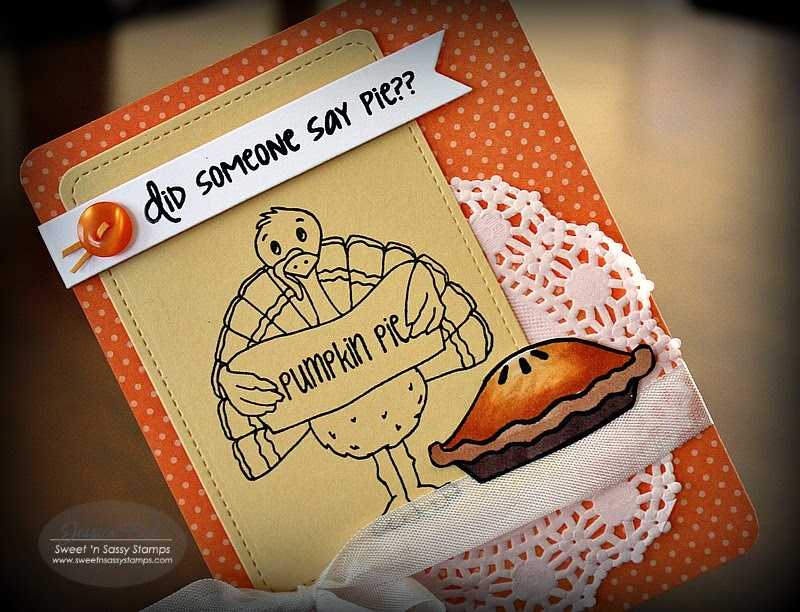
did someone say pie?


Good morning!

Jessica here with a card to share with you today using a new Sweet 'n Sassy stamp set along with an older one.  SNSS has just released their November Sweet Perks Club stamp sets - be sure to pop over to this SNSS blog post for all the details and great pricing on the new products now available at club member prices.

I used the new Baked for You stamp set


along with the older, adorable Save the Turkeys stamp set for my card:


I know the pie isn't supposed to be a pumpkin one, but that's the beauty of stamping - adapting stamps to be what we 'interpret' them to be, right?  I wanted the pie to stand out the most from the card, so I only stamped the turkey in brown ink and didn't color Tom in this time.

Have a great rest of your weekend!
Jessica

Sunday, November 18, 2012

Save the Turkeys

Hello everyone!  Cathy here with today's post for the Sweet 'n Sassy Stamps Blog.  I just can't get over the fact that Thanksgiving is this week!  Where has the fall gone?  My DH and I always have Thanksgiving dinner at his second cousin's house who LOVES to cook, but I always take along something to contribute to the feast, AND the table favors.  In my search for favor ideas, I stumbled upon this "Flat-Backed Treat Box" in the tutorials at Splitcoaststampers and thought it might be just right for the table this year.


This little box is made from one 7" X 9" piece of card stock and perfectly holds three little Hershey Chocolate Nuggets.  Each section of the box was covered by "Citron" designer paper by My Mind's Eye.  The Fence and Grass Die Set was used to add interest to the background and ground the turkey which was colored with Copic Markers and fussy cut before popping him onto the box.   The turkey image is from the Save the Turkeys Clear Stamp Set, but is also available as a digi image!  A button, twine, and a sentiment finish off the treat box.  Now all I need to do is make eight more!  LOL!

I hope you've gotten some inspiration today and will give this little treat box a try.  It would look just as adorable with a Christmas Cocoa or Rhubarb image, many of which are also available as digis.  And the good news is... as part of our ongoing Birthday celebration this month, digital images are on sale right now for 25% off until November 21st at the Sweet 'n Sassy Store!

I hope you will also take some time this week to reflect on all the many blessings in your life and give thanks to the Lord from whom all good things come.

Thank you for being such wonderful friends of Sweet 'n Sassy Stamps...
Have a wonderful Thanksgiving!

Hugs,
Cathy

Thursday, August 9, 2012

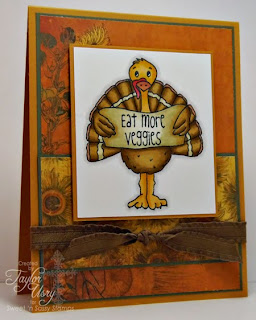
Eat More Veggies


This month there are eight fantastic sets being released; I honestly cannot choose my favorite!  But the first one I inked up was Save the Turkeys!  How cute is that guy?  He comes with all sorts of interchangeable sentiments that you can put in the banner.  I colored him with my Spectrum Noir markers:

Body/Feathers: GB10, GB9, GB8, TN4, EB2, EB1
Head/Legs: GB5, GB4, GB2
Beak/Waddle: TN3, TN4, CR5, CR6, CR7
Banner: GB4, EB2, EB1
Outline: BG2, BG1

This card is just hanging out on my desk - it makes me smile so much, I don't want to give it away!

Supplies:
Stamps: Save the Turkeys (Sweet 'n Sassy Stamps)
Card Stock: More Mustard, Aways Artichoke (SU); White (Neenah)
Patterned Paper: Forever Fall (Bo Bunny)
Ink: Memento Tuxedo Black (Tsukineko)
Accessories: Ribbon (May Arts)

Friday, November 18, 2011

Save the Turkeys!

When I realized Thanksgiving is less than a week away, I knew what I wanted to do for my SNSS Blog post!  Every year my DH and I get invited to Thanksgiving dinner, and every year I make a table favor for everyone, so it was time for me to come up with this year's idea!  Korin had just added a new "Save the Turkeys" digi to the SNSS Store that would be just perfect.  I started playing around with the Spellbinders Label 10 die because the ends reminded me of turkey feathers...okay...maybe that's a stretch, but bear with me!  This is what I came up with...AND...6 Hershey Nuggets or little cello bags of mixed nuts fit perfectly in this little favor box!


Here's how to make this cute little turkey box!

Step 1: Die cut the largest Label 10 die from card stock.  Now would be a good time to add texture if you want.  Center the die between the left end and the 6" mark on a Scor-Pal and score at 2 and 4 inches.  (Or use whatever scoring tool you have.)  Then turn the die vertically and score at the ends of the scallops on each side.  Cut the tabs up to the score line as shown.


Step 2:  Apply adhesive to the tabs on the right side of the die cut.


Step 3:  Fold on all the score lines.  Tuck the tabs in and adhere.  At this point you can decorate your box...or...make a liner.  


Step 4:  Cut a complimentary piece of card stock 4 1/2" X 4 1/2".  Score at 1 1/4" on all four sides.  Cut corner tabs to score line and add adhesive to the tabs on the right side of the box.


Step 5:  This is what you end up with.  This liner will tuck perfectly into the little die cut box.  I added some adhesive to the bottom to hold it in place.   
Step 6:  I decorated my box by cutting a piece of DP with the next size smaller die and wrapped it around the box. The great thing about digi images is that I was able to size the turkey to fit the box perfectly!  The "Save the Turkey" image was colored with copic markers, cut out, and popped up on the front of the box.  A 6" piece of ribbon was adhered to the sides of the box and buttons were added for decoration.  


And there you have it!   Be sure to check out all the other new digs and wonderful stamp sets at SNSS!  For this week, every $25 gift certificate you buy, you get a $5 gift certificate for yourself!  Thanks for stopping by!  I'm off to make several more of these turkey favors...Hope everyone has a Happy Thanksgiving!