Showing posts with label baby. Show all posts

Tuesday, March 24, 2020

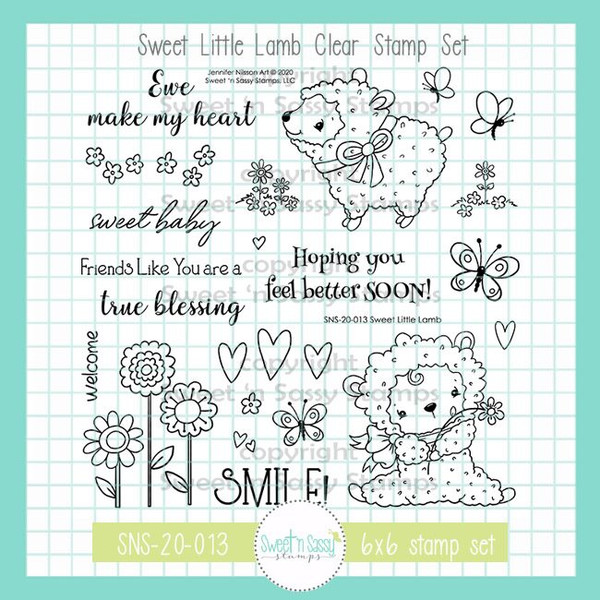
Sweet Little Lamb: Baby Cards

Hello Sweet Friends!  Sheri here today with two baby cards featuring the adorable NEW Sweet Little Lamb stamp set. 

***THIS POST CONTAINS AFFILIATE LINKS AT NO ADDITIONAL COST TO YOU** 

I wanted to keep the sweet little lamb the star of the card so I stamped them in copic friendly ink and then used copics to color. I then used some pattern papers and embellished with ribbon.


Tip: 
Create your own fun Faux Enamel Embellishments by adding Glossy Accents to any Die Cut or Punched shape to coordinate with your project!

https://shrsl.com/1p6qi

 https://shrsl.com/1p6qi   

Happy Stamping

Saturday, March 7, 2020

Sweet Baby Cards

Hello Sweet 'n Sassy friends! Today I'm sharing two sweet baby cards I made with the darling new set Sweet Little Lamb.  For both cards, I used the smaller images in the set and a technique called popping pastels to create the colored panels. If you are unfamiliar with popping pastels, all you need to do is stamp images with versamark ink onto white cardstock then rub chalk pastels over the top using cotton balls (rub the cotton ball onto the chalk then on the cardstock). The images you stamped will magically pop darker than the rest of the cardstock. I love this oldie, but goodie technique!

For my first card, I used our very own Julee Tilman's Mojo Monday 532 sketch.  I stamped the lamb on canson xl mixed media paper with versafine clair nocturne ink, colored with Arteza Real Brush Pens (ginger, rouge pink, ash black, smoke gray, wisteria purple) and fussy cut out. I stamped the words using the same ink onto white cardstock, cut with a circle die and stamped the small hearts with purple ink. I embossed the white panel with a dot embossing folder. Then, I attached the purple panel to the white panel, positioned ribbon and attached to the back then adhered the panel to the purple card base. Next, I positioned and popped up the sentiment and lamb with foam tape. As the final step, I tied a small piece of of ribbon towards the top of the card.


For my second card, I used the same paper and ink. I colored the image with Aretza Real Brush Pens (ginger, rouge pink, ash black, smoke gray) and cut with a circle die. I stamped the words, then adhered the heart panel, gray and pink pieces to the gray cardstock base. Finally, I popped up the lamb with foam tape.


Thanks so much for stopping by and have a fabulous day!

Karen

Tuesday, September 17, 2019

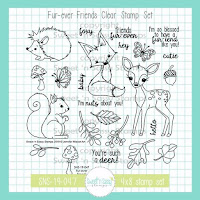
Fur-ever Friends- Two Different Looks

Hello Everyone!

Lee Ann here again, and its no surprise that I am back with more ideas for the Fur-ever Friends Stamp Set!  I cannot get enough of this set.  And talk about being versatile! 

This first card is a seasonal card, using the leaf stamps in the set.  I also used Typewriter Text Background Stamp and Skeleton Leaf Background Stamp.


Obviously very CAS, I colored the leaves with Copics and fussy cut them out.  I stamped the Skeleton Leaf and Typewriter Text Stamps on a piece of gray cardstock, using gray ink and black ink.  The sentiment is from the So Grateful Stamp Set.  Super simple!
Now this next one uses the same set and looks TOTALLY different!


I have a couple of friends who are expecting grandbabies, so his set came at the perfect time.
I used all of the critters in the set, stamping them in light colored ink and water coloring them.  I then water colored stripes of the same color paints on a larger sheet of watercolor paper. 
I wanted a tone on tone look, but the images got lost in the background, so I put them back in my MISTI and stamped them with a gray ink.  To add even more contrast, I used the Falling Leaves Stamp and some white ink to add texture and a hint of white behind the critters.


Once I was happy with the background, I fussy cut the critters out, used a black Micron pen to color in their eyes, noses, etc. then popped them up on Dimensional tape over their respective color.
The image panel was mounted on gray cs and then that was mounted on a sheet of white cs.  This was trimmed down to fit in a 8 x 10 frame.

Stamp Sets used~

https://www.sweetnsassystamps.com/typewriter-text-background-clear-stamp/http://shrsl.com/1ti31


http://shrsl.com/1ti2thttp://shrsl.com/1ti2w

        
http://shrsl.com/1ti2n

Thanks for stopping by!  
Lee Ann 


Thursday, November 20, 2014

Congrats!

Hello! It is Gloria with you today. I am sad to say that this is my last post as part of the SNSS Design Divas. While I am stepping down from the team, I hope to continue behind the scenes designing stamps! Thank you to Korin and the other Divas for their love and support! And thank you, Readers for stopping by!

I used the super cute Baked For You stamp set to make a sweet baby card.


I love the playful style of this set. It is perfect for creating "sweet" cards!


I stamped and colored the bun, and then added Frosted Lace Stickles to create frosting!


And, a sweet message on the inside!

Thank you all for being SWEET to me over the past months.

Gloria

Tuesday, October 2, 2012

Vintage Baby

Good morning! It is Gloria Stengel with you today, from Scraps of Life. I am so happy to be here! I have been looking forward to this guest spot all summer! I will be posting a card each Tuesday in October, plus taking part in the October Blog Hop! I am such a lucky ducky!

Here is my card for today. I used the Vintage Baby stamp set. This is a clear stamp set, and it stamps up perfectly! You would swear it is rubber!


I colored the image with Copic Markers and cut it out with a die cut template. I used a lot of layers and the beautiful Graphic 45 Little Darlings paper.


Here is the inside of the card. The Vintage Baby stamp set has the sweetest phrases. Just lovely!

I hope you enjoyed my guest post! I will be back next week with another!

Cardstock: American Crafts Coffee; Copic Xpress Blender White; Stampin' Up! Whisper White Designer paper: Graphic 45 Little Darlings 8x8 pad Stamps: Sweet n Sassy Stamps Vintage Baby (SNS-12-032) Ink" Memento Rich Cocoa; Clearsnap Colorbox Fluid Chalk Ice Blue; Copic Markers Die cuts: Spellbinders Big Scalloped Circles Large, Standard Circles Large and Small, Large and Small Labels Ribbon: Really Reasonable Ribbon Adhesive: Scotch 3M tape runner; Beacon Fabri-tac; Glue Dots adhesive dots; Scrapbook Adhesives by 3L foam squares Tools: Bow Easy; Spellbinders Grand Calibur