Monday, March 12, 2018

A couple cards from the March release!

Hello! I am sharing a few cards today using stamps from the March release
For the first card, I used Birds & Blooms and Texture Tiles 1.
 
 
I wanted to use two of the Texture stamps together, with two colors, but I didn't like the combo I tried first so I ripped the bottom off and flipped it over. Sometimes those accidents make us get creative and the results are better than what we originally visualized! lol.
 
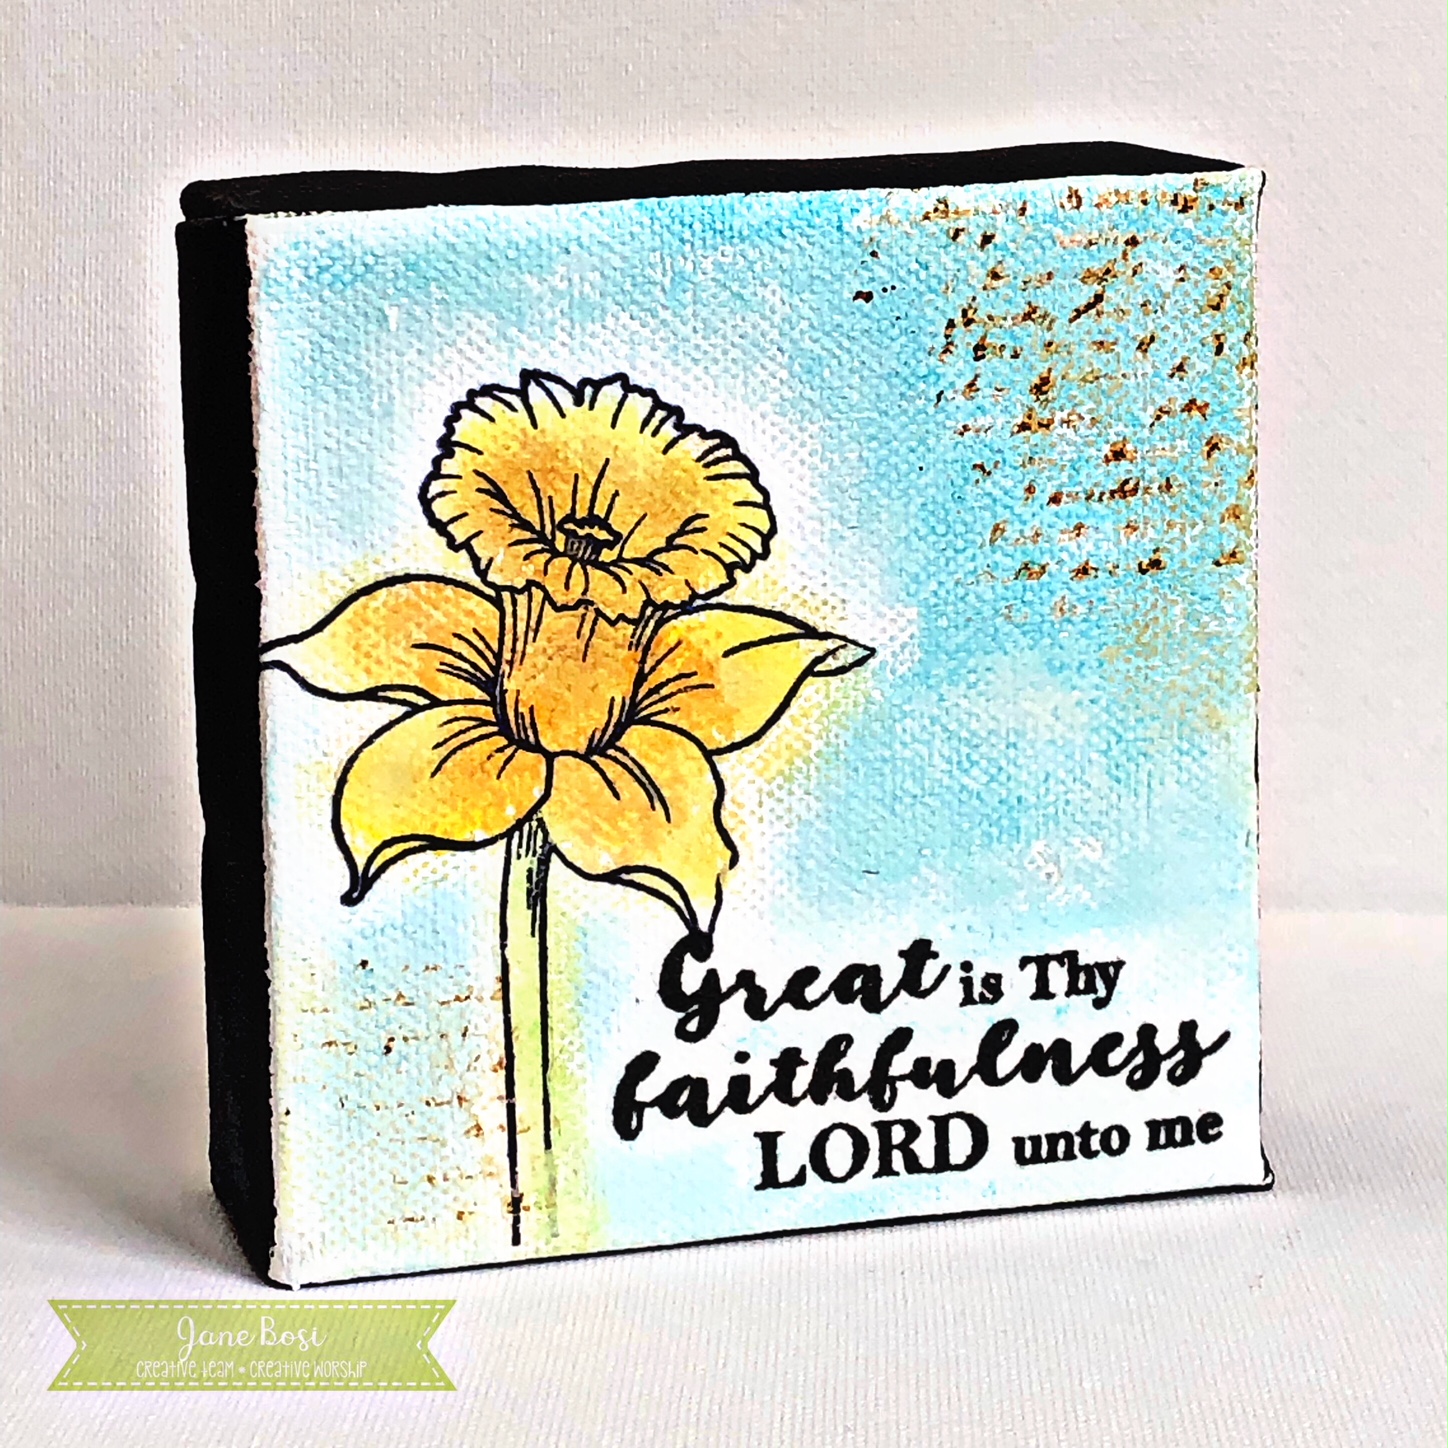
On my second card, I used Texture Tiles 1 and Long Stem Silhouettes. I kept the card to two colors and let most of the background show. A paper flower in my stash was the perfect color to match!
 
 
For my last card, I used the awesome new SNSS alphabet, Skinny Minnie Alpha, with an oldie but goodie... So Sweet Cocoa!

 
I stamped Cocoa Mouse and the alpha letters by lining them up in the MISTI. Then I simply used a ruler to quickly draw some lines to "box him in".
 
Have a great day!
Diane


Saturday, March 10, 2018


Hello everyone! Today I want to share a fun spring card with you. I love how you can build a colorful scene with the new Birds and Blossoms stamp set.


For this card I stamped the branch with flowers three times and a couple of the flowers and one of the birds. I stamped everything on watercolor paper and colored it with watercolor markers and a water brush. I added a black strip with the message on top of the stamped scene so I didn’t have to mask anything and I could hide a couple of overlapping parts of the branches behind the strip. I stamped the message with an embossing ink and added a white embossing powder to make it stand out. I distressed the edges of the watercolor piece with a blue ink and adhered everything onto a kraft colored card.

http://www.sweetnsassystamps.com/timeless-hymns-clear-stamp-set/ http://www.sweetnsassystamps.com/birds-blooms-clear-stamp-set/

I used the Timeless Hymns and Birds & Blooms for this card.

Have a great day!
- Lucinde

Friday, March 9, 2018

SNSS - Birthday Pals and Inky Backgrounds

OH boy did I have a fun, inky weekend. I played with my Distress Oxides and various paper types (from bristol, to glossy cardstock.) I wanted to create some water backgrounds for some cute critter cards. But the more I inked up, the more backgrounds I had and I decided ALL the critters from my Birthday Pals set needed to be used.

Still thinking about the water backgrounds for my fishes...after I inked up the paper and let it dry, I went back with the darker ink and using the "spot looking" stamp from the Texture Tiles - the March Stamp of the Month (Free with a $75 purchase). I thought it added to the water illusion - what do you think?


Here are my non-water cards....


I added birthday hats to all my critters and used the punny sentiments from the set - I think these turned out awesome!!

I hope you are inspired! Thanks for stopping by!

Lyn


Thursday, March 8, 2018

Birds & Blooms

Hello Sweet 'n Sassy Stampers!
It's Ceal, here to share with you a card using one of our newest sets, Birds & Blooms. I just love this dogwood branch. We had a dogwood tree in our front yard when I was growing up and as a child I always wanted to climb it because it was easy to climb. My mom used to fuss at me each time I did because it was such a special tree. I don't know how true it is but legend is a dogwood is the tree that the cross was made of and after Jesus was crucified he would not allow that tree to become large enough for a cross to be made from its branches again.  


To make my card I started with a top folding Powder Pink card base and a white panel cut down with a stitched die. I randomly stamped the dogwood branch to cover the front and colored it with Copic markers. The greeting is actually from two different sets, Hoppy Easter and Spring Blossoms.


Tuesday, March 6, 2018

Textured Birds and Blooms

Hello sweet friends!  Cathy here with a card to share using two of the new stamp sets released earlier this month...Birds & Blooms and Textured Tiles 1.


The base background was made with the grid from the Texture Tiles 1 stamp set stamped in three different colors of distress ink and then sponged using the same three colors...Worn Lipstick, Broken China, and Scattered Straw.  The script tile was embossed in white and sponged for the bottom panel.  An oval window was cut from a white piece of Solar Crest card stock and framed with Smokey Shadow.  The mixed media panel showing through the frame was sponged with the same three colors, spritzed with water, and overstamped with the script tile.  Copic Markers were used to color the images from the Birds & Blooms stamp set and my trusty ScanNCut was used to cut out the images.  These were popped onto the card with foam tape and the sentiment was clear embossed in the corner to finish the card.

I love, Love, LOVE the Texture Tiles 1 stamp set and there are just three more days to receive this stamp set free with your $75 purchase from the Sweet 'n Sassy Stamp Store!


In fact...the whole March Release Bundle is still available until March 9th as a preorder!

What are you waiting for...head on over to the store and pick up a great bargain!

Thanks so much for stopping by!
Hugs,
Cathy

Monday, March 5, 2018

Thinking of You

Hello Sweet Friends!  It's Sheri here today to share a card featuring the NEW Birds & Blooms stamp set.

I stamped the images with Versafine Onyx Black ink and embossed them with fine detail clear embossing powder before coloring with copic markers.  I went will a bold color combo of turquoise & red.  I then layered the image on an embossed background.  I used an older Cuttlebug embossing folder called, Houndstooth.  For a final touch I added ribbon and tied a bow.


http://www.sweetnsassystamps.com/birds-blooms-clear-stamp-set/

The Texture Tiles 1 stamp set is the March 2018 Stamp of the Month and is FREE with a $75 order (after all discounts and before shipping & tax) through 3/31/18.

http://www.sweetnsassystamps.com/march-2018-stamp-of-the-month-texture-tiles-1/

 Happy Stamping! 

Saturday, March 3, 2018

Spring Is Coming


Great is Thy Faithfulness

{jane bosi}  You guys!!!  I'm singing!!!  The brand new Timeless Hymns set is contagious!  I cannot look at this set with out finding a song in my heart.  I love it!  Worship is my very favorite and this set is such a great tribute to some of my most favorite hymns.

I combined a sentiment from the Timeless Hymns set with the beautiful daffodil found in the Spring Blossoms set to create this springy 3 x 3 mixed media canvas.  It makes me happy and hopeful just looking at it despite the blanket of deep snow that still covers my outside.


To make the canvas, I first applied a layer of gesso and then added the stamped image.  To color the back ground, I used a Faber-Castell PITT pen and then moved the color around with my fingers.  I love how this created a shadowy effect.  I added color to the flower in much the same way.  To add some extra interest, I used this months FREE with purchase set, Texture Tiles 1.

You'll get this set--which is so versatile--FREE with your purchase of $75 or more!  This set is perfect for adding that last little something, the final touch!

Enjoy!  Jane

Friday, March 2, 2018

Birds & Blooms


Hi Sweet Friends!

Julie, here sharing a quick mixed media card using the new Birds & Blooms Clear Stamp Set along with the March Stamp of the Month, Texture Tiles I Clear Stamp Set. 


I love all of the different sentiments as well as the floral and bird images in the new Birds & Blooms Clear Stamp Set! 


The Texture Tiles I Clear Stamp Set has four different gorgeous texture designs– both sets are perfect for all types of cards, home décor, Bible Art Journaling and more!


Please stop by to check out all the details on the Pre-Order Release of the new March stamp sets here.  For every $60 purchase (not including discounts or shipping), you will receive the Texture Tiles I Clear Stamp Set free for the month of March!  Plus, Sweet ‘n Sassy Stamps has free shipping and handling on your $75 order (in the US) so this is a great deal!!


This card was very easy to create-


1). Stamp the bird image from Birds & Blooms  with Versafine™ Onyx Black  onto white cardstock, apply clear embossing powder and heat set with a heat tool.  Repeat these steps with the floral branch image as well as the sentiment.

2). Once the embossing has cooled, watercolor the images with water-based markers and ink, re-applying color as needed.  Deepen some of the shadows and background with watercolor pencils and stamp the script tile from Texture Tiles I  onto the background using distress ink.  Once you are satisfied, die cut the panel with a stitched rectangle die.

3). Mount the panel onto a piece of coral cardstock (also die cut with a stitched rectangle die), mount again onto a piece of blue cardstock and onto the white card base.

4). Finish off the card by adding white highlights to the flowers and the bird’s eye with a Sharpie® Extra Fine White Paint Pen and shimmer to the bird’s feathers with a clear glitter pen.

Thanks for taking the time to stop by! Hugs and I hope you have a blessed week, sweet friends!

Thursday, March 1, 2018

Me & You Love Themed Cards


Greetings, crafty friends! Today I'm sharing the Valentine's Day cards that I created for my kiddos and hubby using the fabulous You & Me stamp set. I know it's a bit passed Valentine's Day, but any day is a good day to share a love-themed card, right?

One of the other highlights of these cards, and is something I talk about in today's video, is how to effectively showcase smaller stamped images. It seems like a small image in a stamp set can sometimes create a design challenge. How do you use a small image on a large card space? Today's three cards demonstrates a similar techniques - create visual interest in the background and give your small image a "home" - but here are a few other ideas to consider:

1) Create a smaller card, a 3" x 3" or 4" x 4"
2) Use a neutral ink to repeatably stamp your small image over a piece of cardstock, creating your own designer paper
3) Create "windows" in your card and have your small images peek out from behind the windows.
4) Pop up small images on tiny tags, positioned on a card base
5) Create a spotlight by stamping the image multiple times in a neutral color, but only color one of the images.

These are just a few ideas for you to try! Below is the technique video, which will walk you through the steps I took to create each card. Enjoy and happy crafting!