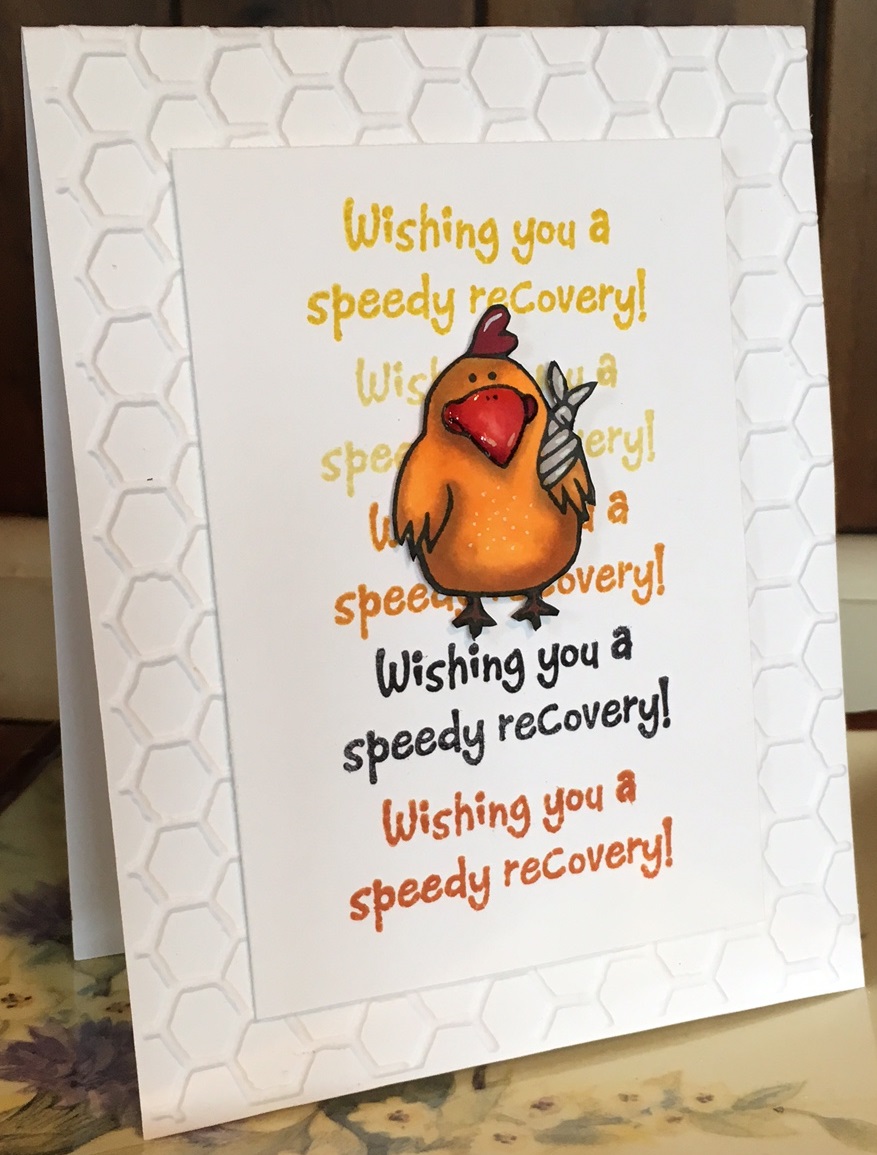
Supplies: -Through the Trees Stamp Set - http://bit.ly/2DU6hJB -Majestic Butterflies Stamp Set - http://bit.ly/2nhoXbL -Typewriter Text Stamp - http://bit.ly/2Eja94R -Wetland Grass Stamp Set - http://bit.ly/2CMYbCa
Showing posts with label kim schofield. Show all posts
Tuesday, March 13, 2018
Emboss Resist Technique on Scrapbook Page
Supplies: -Through the Trees Stamp Set - http://bit.ly/2DU6hJB -Majestic Butterflies Stamp Set - http://bit.ly/2nhoXbL -Typewriter Text Stamp - http://bit.ly/2Eja94R -Wetland Grass Stamp Set - http://bit.ly/2CMYbCa
Thursday, March 1, 2018
Me & You Love Themed Cards
Greetings, crafty friends! Today I'm sharing the Valentine's Day cards that I created for my kiddos and hubby using the fabulous You & Me stamp set. I know it's a bit passed Valentine's Day, but any day is a good day to share a love-themed card, right?
One of the other highlights of these cards, and is something I talk about in today's video, is how to effectively showcase smaller stamped images. It seems like a small image in a stamp set can sometimes create a design challenge. How do you use a small image on a large card space? Today's three cards demonstrates a similar techniques - create visual interest in the background and give your small image a "home" - but here are a few other ideas to consider:
1) Create a smaller card, a 3" x 3" or 4" x 4"
2) Use a neutral ink to repeatably stamp your small image over a piece of cardstock, creating your own designer paper
3) Create "windows" in your card and have your small images peek out from behind the windows.
4) Pop up small images on tiny tags, positioned on a card base
5) Create a spotlight by stamping the image multiple times in a neutral color, but only color one of the images.
These are just a few ideas for you to try! Below is the technique video, which will walk you through the steps I took to create each card. Enjoy and happy crafting!
Tuesday, February 13, 2018
What a Savior
Greetings friends! Kim here with you today, sharing three cards, featuring the new What a Savior stamp set, which includes eight sentiments, four of them jumbo sized, and five floral images. You can see the full set of stamps below.
This week's video and project features three tri-fold cards, each showcasing a Distress Oxide technique. On each of my cards, I'll demonstrate three different quick and easy ways to add Distress Oxide ink to card fronts. I'll also show you how to create an easy frame utilizing simple shaped dies. Be sure to watch the video below for the step-by-step instructions, and if interested in products click on the links below the supplies title. Enjoy and happy crafting!
Thursday, February 1, 2018
Faith Sees the Invisible - Distress Ink Backgrounds with Silhouette Images
Hello, crafty friends! Kim here with you today! Welcome to today's project featuring two of my all time favorite sets, Wetlands and Wetland Grass, which were introduced in January. (I love me some silhouette stamps!)
I created two cards with the new sets, showcasing a Distress Ink background technique. The video below will take you through each step of the process, showing you the technique so that you can reproduce the same look. Links to products below the video. Enjoy and happy crafting!
Supplies:
Thursday, January 4, 2018
Quick and Easy Background for Silhouette Images
Hello friends and happy new year! I have three cards to share with you today and each features a quick and easy background, created using water colors, Distress Inks, and Alcohol Inks. These fast background are perfect for showcasing any silhouette image, such as the ones found in the December stamp sets...Woodland and Tall Grass (LOVE them!!) I created a demonstration video for you to watch the process I took to create all three cards. Take a peek and then head to your crafty space and try out one of these techniques! Share your creation on the Sweet 'n Sassy Facebook page! We love to see what you create! Happy Crafting!
Tuesday, October 17, 2017
Warmest Wishes
Hello crafty friends and welcome to today's blog post! I'm sharing a quick and easy card technique with you today that only requires a few Distress Oxide inks (the regular Distress Inks would work too), an detailed outline stamp, such as the Christmas Pine stamp set, watercolor paper, clean water, a water brush, and a few embellishments or Nuvo Crystal Drops.
Start by using Distress Oxide inks to stamp the pine branches (I used Peeled Paint, Vintage Photo, and Broken China). Use a fine tip water brush to color the pine needles. Due to properties of Distress Ink, which reacts with water, they're perfect for creating a water color look.
Smoosh some Vintage Photo ink on a non-stick craft sheet and use the water brush to pick up ink and paint the branches. Next, stamp the pine cones and follow the above procedure. I used a heat gun to dry the pine cones and then added another layer of Vintage Photo ink to darken the edges of the pine cone and cover where I had stamped over the pine needles. The Oxide inks have been coverage than the regular Distress Inks, which aren't as opaque.
Once the pine branches were completely dry, I used Broken China to water color the background. You can add clean water to the paper first and then drop in color. This creates a beautiful fluid background with lots of visual interest.
Once my entire piece was dry, I used a regular Distress Ink pad in Antique Linen to ink up a background stamp (the text) and randomly stamped the image on top of the entire piece. I then used the Antique Linen and a blending tool to add some color to the edges of my panel and card base. I attached my panel to the base with foam tape and added a few Nuvo Crystal Drops, in bright gold, to the card.
A close up look is below along with links to purchase the stamp sets. Happy Crafting!
Stamp sets used:
Tuesday, September 5, 2017
Art Journal Layout - God Writes the Gospel
Hello friends! Kim here with you today to share an art journal layout I created using the Fantastic Flowers stamp set. This beautiful set features three large flower stamps along with a variety of leaf designs, and the generous size of these images make them perfect for art journaling. I created a video to walk you through the steps I took to create this spread. It all started with two pages that I had basically ruined with a background. A little tissue paper, some paint, and this set covered up the mistakes and created a fun design. I hope you enjoy today's project! Happy crafting!
Wednesday, June 21, 2017
With Thoughts and Prayers
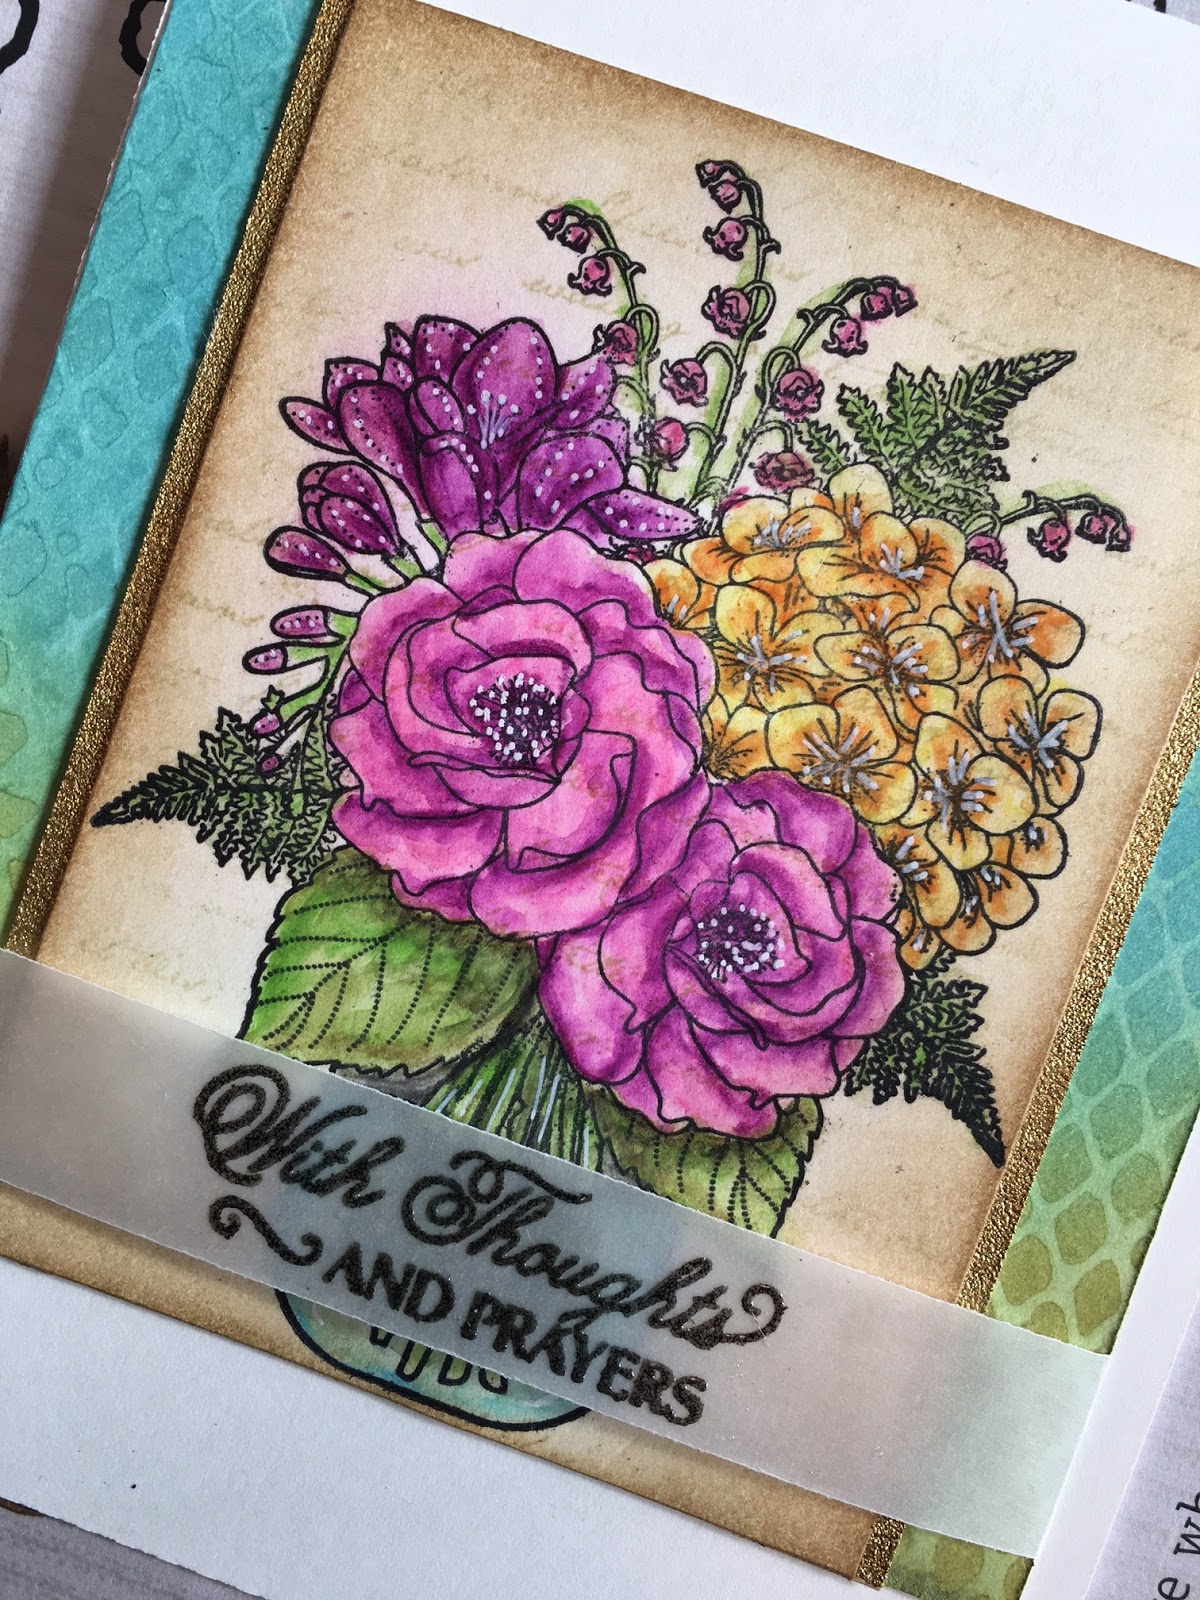
Hello crafty friends! Kim here with you today sharing a card I created using the beautiful Mason Jar Bouquet stamp set. Isn't this image divine?! It's a great line image for coloring with you favorite coloring medium.
My background started with Distress Inks and a stencil. I inked the background using a blending tool and Distress Inks, laid a stencil on top of the inked background, and spritzed the stencil with water. Because Distress Inks react with water, the stencil design appeared. You can use a heat tool to dry the paper.
Next, I stamped the image on watercolor paper, using Archival Ink, and colored the flowers with more Distress Inks. Just smoosh some of the ink onto a non-stick craft sheet or acrylic block and use a water brush to pick up and apply the color.
After my coloring was complete, I used a script background stamp to very lightly stamp on the edges of the vase and flowers, and then aged the edges of the paper using more Distress Ink (Vintage Photo).
I mounted my floral piece on to a piece of gold embossed paper (just emboss the edges of cardstock since the middle won't be seen), and finished with a black embossed sentiment, which was stamped on vellum.
I hope you enjoyed today's card! Happy Crafting!
Monday, June 5, 2017
Hello friends! Kim here with you today, I'm so sorry for the delay in posting today. My card today features the Pretty Potted Florals and Words of Life.
I started making my card I began by covering a piece of white cardstock with Pan Pastels. Then I stamped the sentiments from Words of Life repeatably in VersaMark ink on top of the Pan Pastel covered paper. I then went over the piece of stamped paper with the Pan Pastels again. Once the Pan Pastels hit the VersaMark stamped words, the ink grabs the pastel and creates a tone on tone look. Cool, right?
I cut down my paper to fit onto a standard card base. My flower pot was stamped, colored, and fussy cut. I did the same with the butterflies. I die cut and embossed a piece of black cardstock, which serves as a home for my flower pot.
Why not give the Pan Pastel technique a try sometime...it's a great way to make quick and easy backgrounds! Quick tip...this technique works best with solid stamps.
I hope you enjoyed today's project! Just a reminder that Sweet 'n Sassy is holding a 25% moving sales! Happy crafting!
Wednesday, March 22, 2017
Hugs & Prayers
Hi everyone! Kim here today to share a card I created using the new Peaceful Peonies stamp set. This is a stunning stamp set that features two floral images and five sentiments.
This was an easy card to create...I simply stamped the large peony image twice on water color paper using Archival Ink. I colored both flowers with Zig Clear Color Water Brush Markers, and added a thin strip of gold embossed paper to the right edge. I only needed to add the stamped sentiment to finish the card. *Tip* When using the Zig Water Brush Markers you do need to work on water color paper in order for the colors to move and blend. While you could use these markers to color an image on regular cardstock, you won't have the ability to easily move the color around with water. However, on water color cardstock, these markers are the best...I love them!
Here's the entire Peaceful Peonies stamp set, along with a link to purchase. Enjoy and happy crafting!
This was an easy card to create...I simply stamped the large peony image twice on water color paper using Archival Ink. I colored both flowers with Zig Clear Color Water Brush Markers, and added a thin strip of gold embossed paper to the right edge. I only needed to add the stamped sentiment to finish the card. *Tip* When using the Zig Water Brush Markers you do need to work on water color paper in order for the colors to move and blend. While you could use these markers to color an image on regular cardstock, you won't have the ability to easily move the color around with water. However, on water color cardstock, these markers are the best...I love them!
Here's the entire Peaceful Peonies stamp set, along with a link to purchase. Enjoy and happy crafting!
Wednesday, March 1, 2017
Mr. & Mrs. Wedding Card

My opted to turn my floral embossed card into a wedding card and focused on keeping the colors monochromatic. (You could use any color to create the same look!) I first embossed the flowers with Wendy Vecchi's Potting Soil embossing powder. Once the powder was cool, I colored the entire piece using Zig Clear Color Water Brush Markers. Just scribble a little color on the card and then move the color using a water brush. To ensure the best results, be sure to use water color paper when using Zig markers. These babies will not move when using regular cardstock (although you could just color with them). My sentiment was embossed in gold and added to the front with foam tape. And my sweet butterflies were embossed, colored, and fussy cut before attaching to the front of the card. Super quick and easy card!
Be sure to check out all of the new stamp releases this month...They're amazing!
Kim
Wednesday, February 15, 2017
Greetings! Kim here today to share a Bible journaling layout featuring the As the Deer stamp set. I am relatively new to Bible journaling and I confess that I love it! I purchased a Bible just for art journaling and its one that includes some pre-printed designs and Scripture verses that you can color or paint. I find this option can be a great source of inspiration.
For today's layout, can I share that I love this set! It features so many sweet images that are perfect for creating scenes. This is a perfect set for creating cards as well...so many options!
On my pages I used gelatos for the background color and Prismacolor Water Color pencils for all of the coloring. And...I created a video to take you through my creative process. Enjoy!
Tuesday, January 31, 2017
Hello friends! Just a quick post from me today, sharing another brand new Sweet 'n Sassy stamp set, God is for You. The new set features six encouraging sentiments that can be used to mix with any type of images or designs.
I broke out my brand new Zig Clean Color Watercolor Brushes for this project. (Ohhh...I'm so excited about these markers...they rock!) I started by stamping and embossing a few flowers from the Lovely Lotus stamp set with white embossing powder. Once my embossing was cool, I colored the flowers and background with the Zig markers. The sentiment and dragonflies were stamped in black Archival Ink and the panel was mounted on black cardstock. Pretty simple card, but those great Zig colors pack a powerful punch.
Be sure to head to the Sweet 'n Sassy store to check out all of the new products and to take advantage of the Beat the Winter Blues sale...save 30% off of select products! Enjoy!
Kim
Wednesday, January 18, 2017
A Friend's Love
Hello crafty friends, Kim here today, welcome to our post! Today I'm sharing two of my favorite stamp sets, Scribble Flowers and Rebecca Script that I combined into one card. This project features the no-line water coloring technique, and I produced a video that demonstrates the steps I took to create my card. You can click on the video below to watch! Enjoy and happy crafting!
Tuesday, November 8, 2016
CAS Cards Using Sentiments as a Background Design
Hi crafty friends! Today I'm sharing a few clean and simple (CAS) cards that use the sentiment as a background design. Now, I confess that I saw a similar technique on a Jennifer McQuire video. *smile* I loves the idea so much that I ran straight into my craft room and whipped up these two cards!
These couldn't be easier to create and there are so many options for how to vary this idea...You can use sentiments to stamp all over a card base, similar to this card that I made a few weeks ago, you can stamp in just one color, stamp, emboss, and watercolor...the options are limitless!
I decided to go with an ombre effect, using similar colors to create the background. Since SNSS stamps are clear, lining them up in super easy, but you could use a Misti tool for stamping as well. I used Distress Inks for all of my stamping, with the exception of the little critters, who were stamped in Memento Ink and colored with Copics. Each of my little guys were attached on to of the sentiment backgrounds using foam tape.
This type of design is perfect for quickly creating a bunch of cards that can be used for a whole host of occasions. That's some of my favorite type of stamping...fast, easy, and oh so cute!
Happy Crafting!!
Stamp sets used:
Tuesday, October 25, 2016
Music Speaks
Hello crafty friends! Welcome to today's project, featuring two beautiful sets, Music to my Ears (a fantastic background set!) and Scribble Flowers.
Here are the steps that I took to create my 5" x 5" card...
- Using VersaMark and black embossing powder, stamp the music background stamp on a piece of 5" x 5" cardstock. (I used Neenah solar white) Be sure to keep the image towards the center as you'll only see the image through the circle cut out.
- Using Distress Inks, smoosh some ink out on a non-stick craft sheet, and a water coloring brush add color to the background. The embossed areas will resist the inks. Since I wasn't using water color cardstock, I just dropped the ink on to the cardstock and let it spread on its own, which preventing the paper from peeling. Set aside to dry.
- Using Memento Ink, stamp various images from the Scribble Flowers stamp set on to a piece of scrap cardstock, color with Copics, fussy cut.
- Using a Spellbinders circle die, cut a large circle out of a piece of 4.75" x 4.75" cardstock, use foam tape to attach to the cardbase.
- Using a Spellbinders scalloped circle die, with a smaller circle die nested inside the scallop circle, cut a frame out of black cardstock, attach around circle opening.
- Stamp sentiment on piece of white cardstock, cut out with ribbon cut on one end.
- Attach sentiment, flowers, and bee using foam tape.
- Use Glossy Accents and Wink of Steller glitter pen to add some sparkle and shine, see up close photo below.
Thanks for stopping by today, I hope you enjoyed the project! Be sure to check out the Sweet 'n Sassy web site for the two sets used on my card (there is also a new die that coordinates with the Scribble Flowers set!)!
Happy Crafting!
Sunday, September 25, 2016
Noel Ornament Garland
Ohhh...I'm excited to share today's project! It's a Christmas garland, created with the brand new Christmas Bulb Die Set! This is the cutest die set that includes the bulb, the ornament top, and a dove. There's a round bulb die set too! Use either of these sets to create gift tags, Christmas tree ornaments, or a holiday garland!
To create my garland, I started by die cutting eight bulbs, using coordinating designer paper. I layered one bulb shape on another...can you tell? I positioned the top bulb die cut sideways, creating the fun, curved shape that runs across the bulbs.
I then created a piece of silver cardstock by inking a piece of cardstock with VersaMark and embossing with silver embossing powder. Once the powder was dry, I die cut four ornament tops and attached them with a strong liquid glue.
The circles on the front of each ornament were die cut using a small circle die. I then used the Light of Christmas Background stamp to add design to each circle. Everything is better with text...
The fun letters are from the Outline stamp set; each were stamped on cardstock and water colored, using Distress Inks. Once the letters were dry, I fussy cut them, and attached them to the circles with foam tape. Here are a few close up photos...
To create my garland, I started by die cutting eight bulbs, using coordinating designer paper. I layered one bulb shape on another...can you tell? I positioned the top bulb die cut sideways, creating the fun, curved shape that runs across the bulbs.
I then created a piece of silver cardstock by inking a piece of cardstock with VersaMark and embossing with silver embossing powder. Once the powder was dry, I die cut four ornament tops and attached them with a strong liquid glue.
The circles on the front of each ornament were die cut using a small circle die. I then used the Light of Christmas Background stamp to add design to each circle. Everything is better with text...
The fun letters are from the Outline stamp set; each were stamped on cardstock and water colored, using Distress Inks. Once the letters were dry, I fussy cut them, and attached them to the circles with foam tape. Here are a few close up photos...
All of the edges were distressed using Pumice Stone Distress Ink. Once I threaded the ornaments on to my burlap ribbon, I decided this bulbs needed some bling so I used a gel medium and mica flakes from Prima to add some chunky glittery shine to each of the ornaments. Super fun! Can't wait to display this over the holidays...well...I can wait for the snow and cold weather...*smile*
I hope you enjoyed today's project! Happy Crafting!
Kim
Wednesday, September 7, 2016
Come and Adore Him
Hello friends and welcome to today's card! Today I'm sharing a quick and easy card featuring a wonderful Bible journaling set, called All Your Heart. And, yes, you can use Bible journaling stamp sets to create cards too!
I started my card by creating a background using Strathmore water color paper. The water coloring was done with Distress Inks. To use Distress Inks, simply smoosh some ink onto a non-stick craft sheet and then pick up the ink with a water color brush. If you lay down a layer of water on to the paper before adding the ink, you'll get lots of great blending of the colors.
Once my water coloring paper was completely dry, I used white embossing power to add the sentiment. To make the letters stand out a bit more, I used more ink to color in each word. Next, I added a sweet Glossy Accents covered heart along with some small paint splatters in black. I mounted the water color piece on a piece of black cardstock and attached to a white card.
I hope you enjoyed today's card! You can use this easy technique to create any card...give it a try!
Happy Crafting!
I started my card by creating a background using Strathmore water color paper. The water coloring was done with Distress Inks. To use Distress Inks, simply smoosh some ink onto a non-stick craft sheet and then pick up the ink with a water color brush. If you lay down a layer of water on to the paper before adding the ink, you'll get lots of great blending of the colors.
Once my water coloring paper was completely dry, I used white embossing power to add the sentiment. To make the letters stand out a bit more, I used more ink to color in each word. Next, I added a sweet Glossy Accents covered heart along with some small paint splatters in black. I mounted the water color piece on a piece of black cardstock and attached to a white card.
I hope you enjoyed today's card! You can use this easy technique to create any card...give it a try!
Happy Crafting!
Thursday, August 25, 2016
When Words Fail
Hi friends! Kim here today to share a card I recently created using the brand new stamp sets Scribble Flowers and Music to My Ears. First, I need to share that Scribble Flowers may be my favorite set ever...so many design options available! OK, now I can chat about my card...
I stamped the Music to My Ears background stamp on 100 lb. Neenah Solar White Cardstock, and then added color using Distress Inks and a water brush. Setting that piece of cardstock aside to dry, I worked on the flowers, which were stamped on the Neenah paper and colored with Copic Markers.
I created the circle cut out in my card using Spellbinders dies. (The scalloped frame was created using a large Spellbinders scalloped die nested with a plain circle die). The sheet music image was placed behind the circle die cut, the frame was attached to the outer edge of the circle.
The flowers were fussy cut (although there's no need to...this set has a matching die set!) and attached to the card using foam tape. I also added that cute little bee and the sentiment, which is from the Music to My Ears set. I added a tiny bit of shimmer, using a Wink of Stellar glitter pen, and shine, using Glossy Accents, to finish my card.
Happy Crafting!
Supplies:
Scribble Flowers
Music to My Ears
I stamped the Music to My Ears background stamp on 100 lb. Neenah Solar White Cardstock, and then added color using Distress Inks and a water brush. Setting that piece of cardstock aside to dry, I worked on the flowers, which were stamped on the Neenah paper and colored with Copic Markers.
I created the circle cut out in my card using Spellbinders dies. (The scalloped frame was created using a large Spellbinders scalloped die nested with a plain circle die). The sheet music image was placed behind the circle die cut, the frame was attached to the outer edge of the circle.
The flowers were fussy cut (although there's no need to...this set has a matching die set!) and attached to the card using foam tape. I also added that cute little bee and the sentiment, which is from the Music to My Ears set. I added a tiny bit of shimmer, using a Wink of Stellar glitter pen, and shine, using Glossy Accents, to finish my card.
Happy Crafting!
Supplies:
Scribble Flowers
Music to My Ears
Subscribe to:
Posts (Atom)