
Hello! It's Monika here today, bringing you a Christmas card... I know, I know... you are all ready for Spring! I am ready too, but Mother Nature thinks otherwise, and we still have snow on the ground and another snow storm on its way! So might as well be Christmas... and on that note, have you seen the ON SALE promotion? There's a pretty SWEET deal going on on some of the products. Perfect time to do some shopping! Just call it Christmas in March!
Back to my card... I wanted to make more Christmas cards this year, and my plan was to make one every week... well, I am way behind, but today I can add one more to my slowly growing stash!
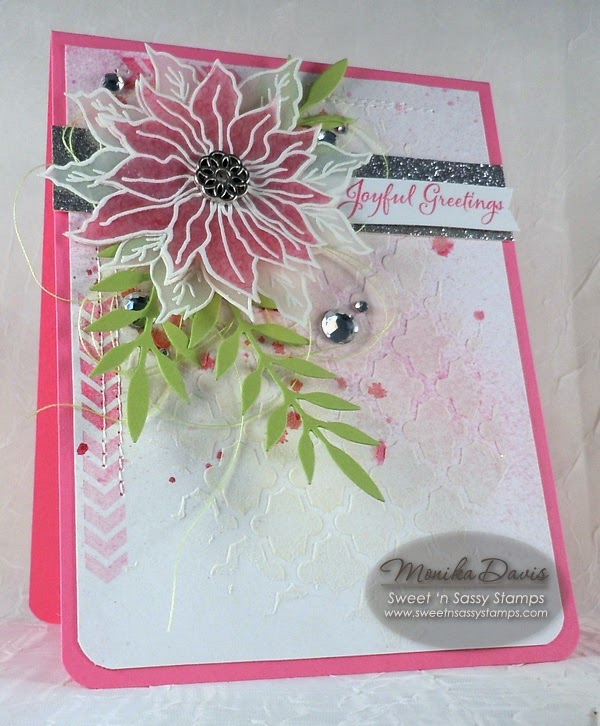
There's so much going on my card, so I wanted to break it down for you and show you what I did:

First I used Embossing (Modeling) Paste and a stencil, and added some pretty pattern (and texture) to my white card stock, then I misted it with pink glimmer mist. (Note: while the paste dries very fast, you might want to set the card aside, or dry it with a heat tool.)

Next I stamped the arrow lines from the new Pick Me Up clear stamp set, stitched some lines, and adhered a strip of silver glitter paper.

Then... I added green thread to my card. I love that subtle look it gives to your project. I used a sticky dot, and adhered the thread. I like to do it in a figure 8 pattern. (Note: I made sure the loops were big enough so they would show from underneath the poinsettia image.)

My poinsettia flower (Poinsettia clear stamp set) is stamped on vellum with VersaMark ink and heat embossed with white embossing powder. (Note: I usually stamp and heat emboss a bunch and cut them out while watching TV). To add color to the flower, I used a Copic marker on the back side of the smaller flower. The greeting is from Christmas Tags clear stamp set (on sale and will be gone... so pick it up now!).
To further embellish my card, I die-cut some leaves and added some blings... the bottom corners were punch with a corner punch.
The sketch came from Cardabilities Sketch #95.
Hope I inspired you to make something pretty today! Whether it's a Christmas card or a Spring card, create something for FUN!
Thanks for stopping by,
Monika


