Showing posts with label Garden Whimsy. Show all posts

Saturday, April 2, 2022

With Love & Prayers

Happy Saturday! The April Release is here and you are going to LOVE it! My first card with the new release features the Stamp of the Month, Church Family. I love the mix of fonts and scripture references included in this set!


I recently sat down and created some backgrounds with the knit stencil. Honestly, I had no plans in mind when I created these backgrounds. I just picked some colors I liked and played knowing the ideas would hit me at some point. 


The blue background was the jumping off point for my card. To create the background, I used cool caribbean cardstock, the knit stencil along with cool caribbean, tempting turquoise and taken with teal dye inks. After I created this background, I searched though my stash of already colored images. I was excited when I came across this butterfly I colored a year ago. Yes, you read that right, a whole year ago when Garden Whimsy was first release. I remember coloring this image, trying to make it work for a card and almost pitching it in the trash when nothing panned out. Now, I am really glad I saved it!

Now that I had the main image selected I knew I had to do more to the background. I added texture and visual interest by stamping the script background in brown, the dots from texture tiles 6 in white and adding black paint splatters to complete the look. 

I stamped the sentiments in black ink, cut to size and added black lines along the edges. I die cut the background panel, matted with black and attached to a white card base. I added some white highlights with a gel pen to the butterfly. I popped the butterfly up with foam tape, glued the sentiments down and added some light blue gems to the front to finish it off. 


I hope you enjoyed today's card and thanks so much for stopping by!

Karen

Thursday, January 6, 2022

let's get cozy

 Good morning and Happy New Year! Today I have two cards using new Sweet ‘n Sassy Stamps images from the January release. This is a fun release full of stamps related to snow and bundling up warm and cozy!

When I saw the furniture images in the Let's Get Cozy set, I wanted to create a scene and decided to make this card a Collapsible Room Card. It was actually pretty easy and fun to do. I added extra black layers to the inside to make the panels "pop" but next time I will stick with the measurements provided since the layer with the chair wants to slightly catch on the bottom when closing the card. When folded and closed, an added ribbon can tie it shut. The sentiment on the front is from Garden Whimsy.


The right side of the card base is scored diagonally and the panel with the chair is only adhered on the left so that it pivots to fold flat. Such a fun card!


For the next card, I also used the new Knit Stencil. How cute is the stretching kitty?!


Have a great day and stay warm!
Diane


Friday, May 14, 2021

Butterfly

Happy Friday!! I have a bright fun card for you today. With all of the beauty that spring is bringing those warm days are starting to produce a few butterflies. 

I have been in love with the Garden Whimsy set from day one and had this little guy colored up on my desk. This month, I am trying to use my stash of colored images and backgrounds to create actual cards (haha!) so I paired this image with the sentiment from the new digi set called Favorite Mom. This set has lots of great flowers and sentiments but the one I chose was so perfectly how I feel about my mom, that I had to use it on a card for her! She loved it!


The background is Distress Oxide on kraft - if you haven't tried that, you definitely should! I stamped the image with Archival Ink on top after the Oxides dried and colored over it with Polychromos pencils. 

I hope you are inspired and have a great weekend!

Hugs, 

Lyn

Psst....PS and By the Way, there is a sale going on this week for any images by Rebecca Rios, I am playing with some of them now and will post soon!


Wednesday, April 21, 2021

Whimsical Wishes by Charmaine Canham

 Good Morning!

Spring is here, and everything is starting to get back to life!
Today I have a fun and fluttery card that is sure to lift your spirits!


I am using the Garden Whimsy Stamp Set today with a few other mixed media elements.


I start with randomly water coloring a page using Ecoline watercolor, blue and pink, and dry. Next, I white heat emboss the butterfly onto the watercolor page. Cut out, and set aside.

In creating the background, I start with a cloud builder and Tumbled Glass Distress Oxide.
 Fill the whole page with clouds. 


I love playing with different mediums to create textures. That is why I love
The Crafter's Workshop's Light and Fluffy Modeling paste. 


You can smear it through a stencil, heat it for more dimension, and even watercolor it like I did here.
 I heat set it here before I painted it with watercolor and a green  Posca Pen. 


This month we released Everyday Greetings 2, and I used the Best Wishes sentiment for the top right. Make sure to rub the stamp with your fingers before you use it. That removes the film on all new stamps and will ensure that the stamp picks up enough ink. 


I heat embossed this WOW Gold Super Fine embossing powder. Place double-sided foam on the bottom of the body only; this will give the wings "motion" and freedom to move.


To give the card a more whimsical look, I used a Micron 0.1mm pen and added a
frame with doodles all around it.


I hope you liked today's card and enjoy a little whimsy today!!


Butterfly wishes, 
Charmaine


Thursday, March 18, 2021

fern background

Good morning! Today I have 2 cards in which I used the March Stamp of the Month: Fern Background, along with Garden Whimsy and Happy Day. For the white border on my first card and the die cut center on the second one, I also used Bookmarks & More Dies.

The fern stamp makes such a pretty background and I love it in purple! I definitely need to make more purple cards! I embossed a little texture on the black layer and colored the flowers with Copic markers. 


The second card turned out bright and fun. I blended a few colors of Distress ink and stamped the ferns on top. The panel was cut down and layered onto a horizontal gate-fold card. I used a die from Bookmarks & More Dies to cut a window in the center. (I lined it up, cut one side, then lined it back up and cut the other side.) A left-over strip from the background was adhered to the left side of the card. The dragonfly was stamped onto another piece of ink-blended cardstock. This time I added a bit of blue.


The card opened...I added the scrap pieces that were die cut from the front panel to the inside.


Have a great day!
Diane


Wednesday, March 17, 2021

March 2021 New Release Blog Hop + GIVEAWAY

Welcome to our March 2021 Release Blog Hop!

Who's loving all the fabulous new products this month? Well, you're in luck! There's a whole lot of inspiration, plus a chance to win a $25 gift code to the Sweet 'n Sassy Stamps shop to be found featuring the March release along today's hop

GIVEAWAY: Leave a little shout out in the comment section on each stop along the way for a chance to win a $25 gift voucher to the Sweet 'n Sassy Stamps shop. Comment deadline for the prize drawing is 10 pm ET on Tuesday, March 23. Winner will be announced here on the SNSS blog, Wednesday, March 24. Happy hopping!


Here's the official hop list. If a link misbehaves along the way,
hop on back here to pick  up where you left off.


My card for today features the gorgeous dragonfly in the new Garden Whimsy set. I stamped the dragonfly on cardstock and colored with Copic markers, hand trimming just the body and wings.

Next I took a panel I had created as a "clean up" page from another use of the Delightfully Delicate Stencil. I loved the look of it and thought it would make a pretty background for my dragonfly.  So I stamped the dragonfly again where I wanted it on the background, then paper pieced my colored dragonfly, popping up the wings just a bit for a little texture. This set has some fabulous all occasion sentiments. I picked miss you for this one, stamped in black, then matted the panel in black and was finished.


Let's take a little gander at the March release...

First up is the March stamp of the month, Fern Background. This set is available for purchase for $11.95, OR you can get it as a FREE gift with a $60 purchase (after any discounts and before shipping and tax) during the month of March! Please note you MUST add this set to your cart to receive the discount. Once your order qualifies, the discount will automatically apply in your shopping cart.


We're so excited for the newest addition to our Texture Tiles line. These small repeatable backgrounds are perfect for creating backgrounds and texture on your projects.  We're seeing flowers and leaves in both outline and silhouette styles in our new Texture Tiles 11 set.


Bursting with promise is a our new Count Your Rainbows Bundle. These beautiful images are brought to us by Rebecca Rios. The bundle includes both the Creative Worship: Count Your Rainbows stamp set and coordinating die set bundled together at a discount. The stamp set and die set are also available separately at regular price.


Our next bundle brings us some adorable spring bunnies illustrated by Jenn Nillson. The Hoppy Spring Bundle includes both the Hoppy Spring stamp set and coordinating die set bundled together at a discount. The stamp set and die set are also available separately at regular price.


Our next set in the spotlight is the beautiful Everyday Greetings sentiment set from Korin Sutherland.


This month also brings us some more gnomes from Jenn Nilsson. The Gnome-one Like You set is so adorable!


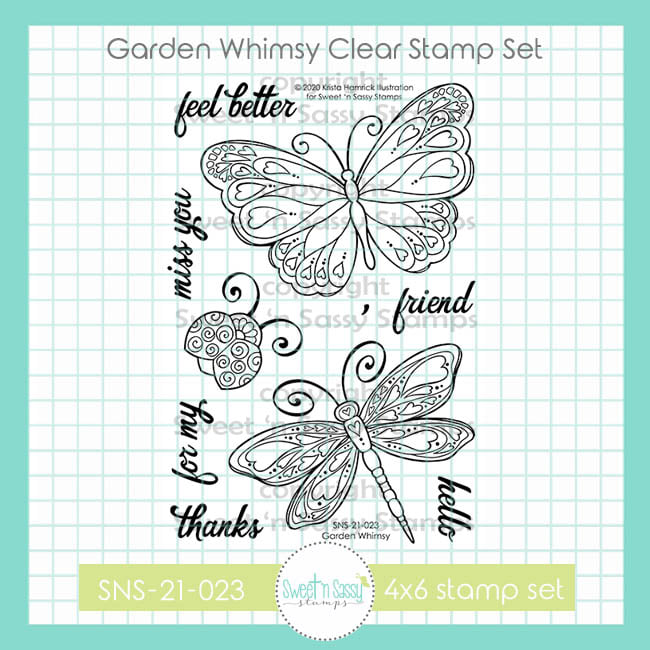
No spring release would be complete without a butterfly, and Krista Hamrock has brought us a beautiful one in the Garden Whimsy set.


Along with new stamps and coordinating dies, we have two new stencils and a word die set debuting this month.


That's our March Release in a nutshell! So many fabulous sets to choose from! What's your favorite? Let us know in the comments.

Your next stop on the hop is my blog, Poetic Artistry.

May you be blessed today and always!

***This post contains affiliated links at no cost to you ***

Monday, March 15, 2021

Whimsy Butterflies


Hello Sweet 'n Sassy friends!
It's Ceal here to share a couple cards with you using the Garden Whimsy set. 
To create these cards I started with white top card base. I stamped the butterfly and colored it with alcohol markers. 
The first card I also stamped the butterfly image on the panel and colored it and then stamped it again on a seperate piece of paper, colored it and fussy cut it out and popped it on top of the other. The sentiment is from the Birthday Wordfetti set.


This second card, I stamped the image on a seperate piece of cardstock, colored it, fussy cut it out and popped it up on the card front. To give texture to the butterfly on this one I used a terry cloth and colorless copic blender. 


Friday, March 12, 2021

GARDEN WHIMSY

Have you had a chance to play with any of the March Sets? They are so fun and they compliment each other so well to create adorable projects!

Today I am working with the the Garden Whimsy set and the Everyday Greetings set. I love the unique style of the critters in Garden Whimsy. They are super fun to color - you can really use your imagination. And the sentiment set is just what I have been looking for. They are perfect for any occasion, just thinking of you type cards.

My first card features the dragonfly and the Thanks sentiment. I never really have many of those in my stash so I am happy to have this one. I created the background with Distress Oxides and the new Puffy Clouds stencil. I added a lot of water so the cloud shapes are very subtle. (I have another panel that I created at the same time that is much clearer. You will likely see that soon.) My dragonfly is stamped on top of the background then colored with Polychromos pencils. I got out my color wheel and tried to use colors that aren't my norm and I love the final look. I added the sentiment on the card front and didn't do anything else.

My second card is actually part of a set. I did a swap with some of the team members at Sweet N Sassy and I decided to create cards for everyone. I laid down inks of blues and purple Distress Oxides onto my mat, added water then smooshed the card front through - this is a one layer made from watercolor paper and cut to a fun Bar 4 size of 3 1/2"x4 7/8". Once the background dried, I inked the sentiment and the ladybug onto all of my cards. I inked the ladybug body onto copic friendly paper and colored them rich pinks and blues - they are so much fun! I fussy cut the body and glued them onto the inked image on my card front. Now it has antennae and I didn't have to cut them out :)

This image has an empty alt attribute; its file name is snss-ladybug-copy.jpg

These are so cute in real life - they make me smile out loud! I hope you are inspired to pay with colors today and have a blast doing it! AND...If you need anything from the new release...Sweet N Sassy is moving and they are having a sale so they don't have to load it all up - Just use the Code MOVING... winner!!

This image has an empty alt attribute; its file name is 159275691_10225983633918852_835637448339034559_o.jpg

Thanks for stopping by!

Hugs,
Lyn

SNSS Garden Whimsy is now scheduled. It will go live on March 12, 2021 6:00 am.

What’s next?

Convert to audio

Seamlessly turn this post into a podcast episode with Anchor - and let readers listen to your post.

Create a podcast episode