Showing posts with label Script Stencil. Show all posts

Monday, April 25, 2022

Tulips


Esther here today with a pretty purple tulip card. The background was created by sponging wilted violet ink through the script stencil and inking along the edges to give the panel more color. A piece of white lace separates the stenciled design from the solidly inked bottom part of the panel. The flowers, leaves, and butterfly were stamped in waterproof ink on watercolor paper and colored with watercolor brush pens.

     ~~~This post contains affiliate links at no extra cost to you~~~

 Supplies and Tools:


Monday, February 14, 2022

Spring Blossoms


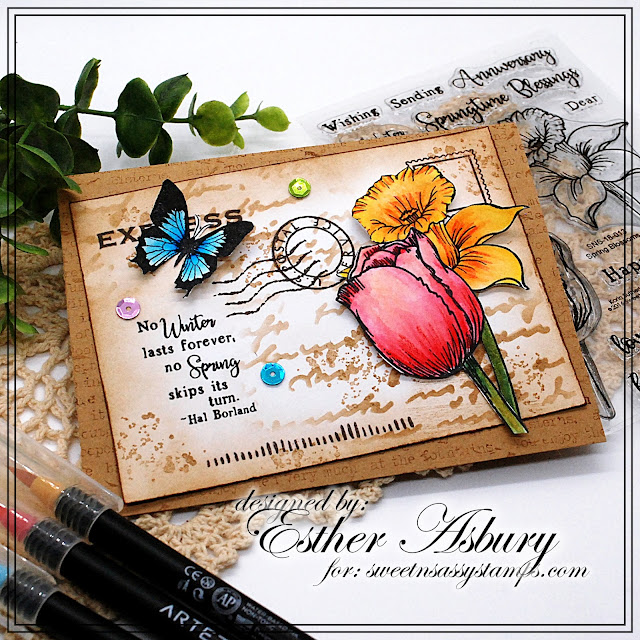
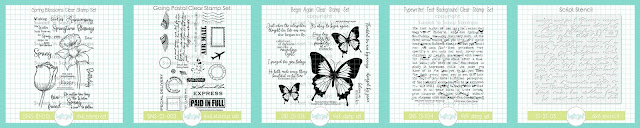
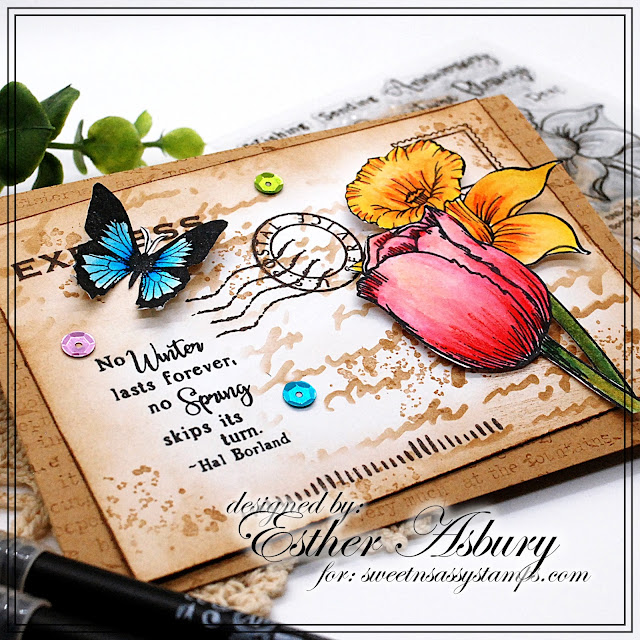
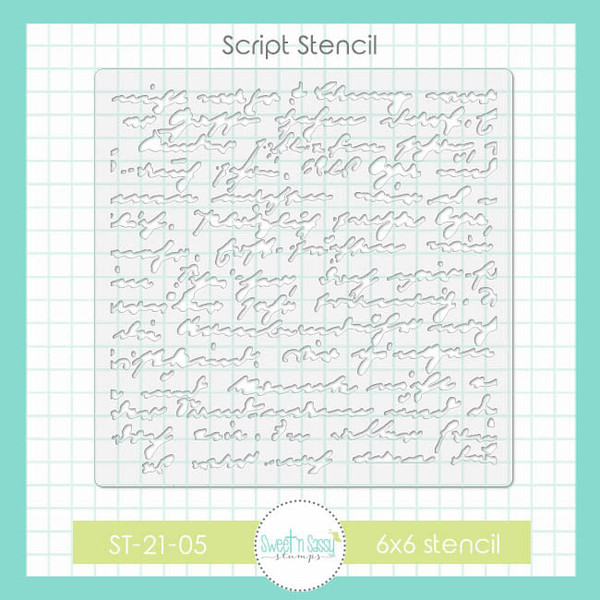
Esther here today sharing this pretty spring card! I started by stamping the Typewriter Text Background   in Vintage Photo Distress Ink (Ranger) on kraft card stock. Next I used the Going Postal stamp set to create a background on white card stock using Versafine Clair Fallen Leaves Ink. I used vintage photo distress ink again to add the  Script Stencil to in the corners and to ink around the edges of my cardstock. 


    ~~~This post contains affiliate links at no extra cost to you~~~

 The flowers are from the Spring Blossoms stamp set and were stamped in Versafine Clair Nocturne Ink  and colored with Arteza Real Brush Pens. I added a little butterfly to the corner from the Begin Again  stamp set. A few sparkly sequins finish off this card. 

Monday, July 12, 2021

One Stamp Two Ways

Hello friend, Esther here today sharing two cards that use the same stamp in very different ways. 


For this first card I embossed the Blooming Anemones in gold on watercolor paper and used my Zenacolor Watercolor Paints to color it. I then used vintage photo distress ink to stencil the Script Stencil in the background and also inked around the edges with it. 

Next, I die cut the new Friend Die from watercolor paper and inked it up with walnut stain distress ink. I then cut a second one from white card stock and layered it for added dimension. The last step was adding a few white paint splatters for extra interest. 


My second card also features the Blooming Anemones stamp set. This time I embossed it in white on a piece of vellum and fussy cut it. 

Heat Embossing Vellum Tip: If you're having trouble with your vellum crinkling up when you heat emboss -- try embossing from the underside. It works like a charm and doesn't warp the vellum!

I then stamped a panel using Texture Tiles 4  and kitsch flamingo distress oxide and layered it over a piece of white card stock embossed with the intertwine 3D embossing folder from Sizzix. The sentiment (Faith & Hope Word Dies) was die cut from mix media paper and inked with kitsch flamingo and picked raspberry distress oxide.  Last of all I added three pink sequins for a bit of sparkle and bling!


  ~~~This post contains affiliate links at no extra cost to you~~~

Saturday, July 3, 2021

Thank You

Welcome to July and a brand new release! The July Release is pretty awesome and I know you are going to love it and the inspiration from the team! My card features Thank You (stamp of the month) and Texture Tiles 6 from the new release along with previously released Peony Cluster and Script Stencil

As you may know by now, I have been on a mission this year to use up pieces from my extra bin. I rescued the floral piece from this bin. I colored this image months ago as a practice piece with some new watercolor pens never intending to make it into a card. In fact, I was so unhappy with my results (color of the flowers and the leaves were originally all different colors of greens) that I almost pitched it in the trash. I could hear Korin in my head, practically gasping at me throwing it out that I hung on to it thinking maybe one day I can salvage it. The sand colored piece was also in the same bin just minus the chicken wire.
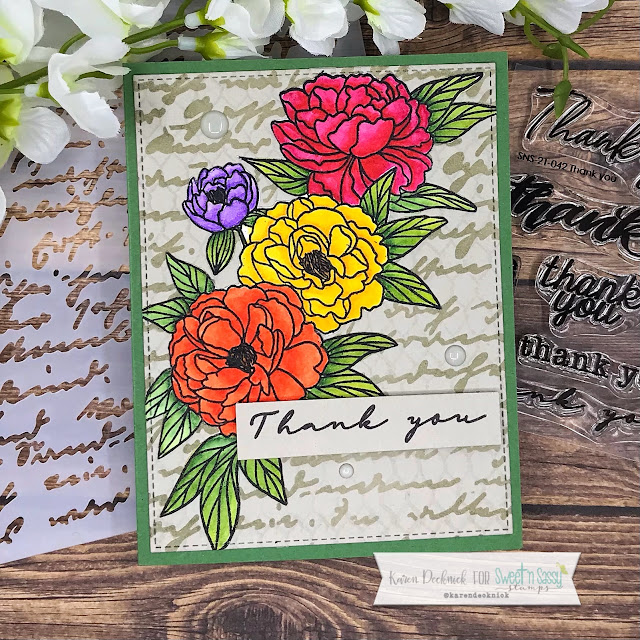


When a sentiment set, like Thank you, is released I always reach for my bin to see what I might be able to pair it with. When I saw this floral image and the background piece I knew it was time to fix what I did not like about it. I added water with a brush and dabbed off color with a paper towel. Once I was satisfied with lightening the colors I added more color to the flowers, but in darker shades to try to give a little bit of depth. I redid the leaves so they looked like they belonged together. I used a combination of Arteza and Altenew brush pens/markers to color the image both times. I fussy cut the image when it was dry and set aside.

I thought the script background was a good fit for the floral image, but I felt like it needed a little bit more. I used the chicken wire from Texture Tiles 6 and Versamark ink to add a bit of texture to the background. To be honest, I was hoping it would be darker, but I'm kind of glad it's not and is more subtle. I used Wheat ink to stencil the script onto Sahara Sand cardstock.


I glued the floral to the front of the script panel, die cut out and adhered to a Garden Green card base. I stamped the sentiment with VersaFine Clair Nocturne ink on the same cardstock as the background panel. I trimmed the sentiment, attached to the front with foam tape and added three enamel dots to finish off the card. 

This Thank You set has ten sentiments all with different fonts. How often do you go digging through your sets to find just the right sentiment with the font you are looking for? I love having one set with the same sentiment in different fonts to go with my many styles of cards!


Thanks so much for stopping by,

Karen

Wednesday, June 9, 2021

Botanical Branches + June Insta Hop


Hi friends! It's Julee popping in to share a little June inspiration with you. Today is our monthly hop over on Instagram, so be sure to hop on over there for even more inspiration from the team and a chance to win a $25 gift code to the shop! Winner will be drawn from comments across the hop and announced on the SNSS Instagram page on June 16.

On the hop today, I'm sharing a couple of cards with the gorgeous new Botanical Branches set. For the first one, I pulled out a watercolor palette to color up the main image as an olive branch. I trimmed by hand with a slight white border, then added a bit of twine to the stem.


I created a mini slim background using the Fern Fronds Stencil in a few different distress inks, then then over stamping randomly with the Psalm 23 Background stamp. I went with black accents for the mats, and a white embossed sentiment for contrast. The finished size is 3.5 x 6"


For the second card I stamped the same image a few times on kraft cardstock then colored with prismacolor pencils. I rarely use colored pencils, but I love the way they pop on kraft cardstock! This was a super fun and pretty simple image to color with just a few pinks, greens, and a white pencil. I added some texture to the background with distress ink and the Script Stencil The sentiment from Truth Quotes 1 is embossed onto vellum to finish things off, since I couldn't bear to cover up the coloring!

Today (June 9) is the final day of early bird savings! Save 10% on individual new releases in the shop, no code needed.


Thursday, April 15, 2021

just married

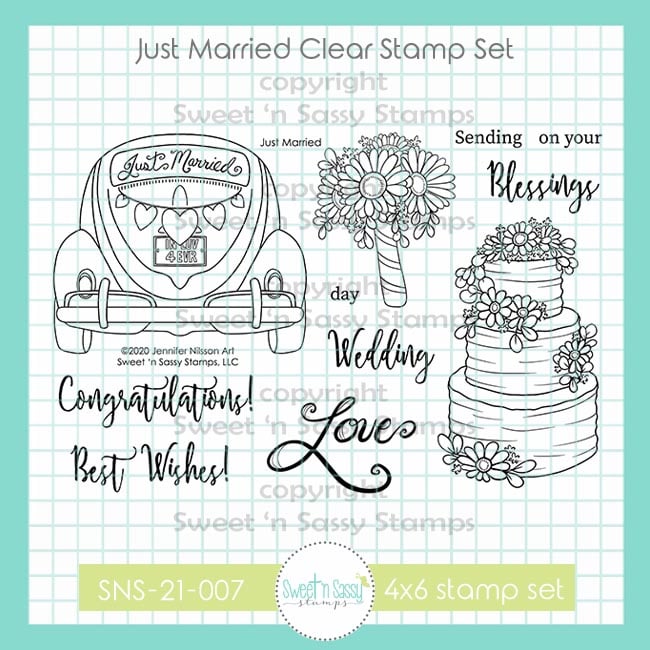
Hello! This month Sweet ‘n Sassy Stamps has some great wedding sets in the new release. I used the Just Married set on two cards for today, along with the  Script Stencil and a previous set, Engagement & Wedding Innies.

For the background on the first card, I blended some Distress inks and then sponged a darker color of ink over top with the stencil. I added a piece of paper doily, some linen thread, and a few sequins. The cake and word are popped with foam tape. I used the bouquet image on the inside.


The bouquet was used again on my second card, this time as the focal image. I simply colored it in soft pinks and layered it over an embossed strip.


Have a great day!
Diane


Wednesday, April 14, 2021

April 2021 Release Blog Hop + Giveaway

Welcome to our April 2021 Release Blog Hop!

Who's loving all the fabulous new releases this month? Today we're excited to be sharing a hop full of inspiration with the April release, plus a chance to win a $25 gift code to the Sweet 'n Sassy Stamps shop

GIVEAWAY: Leave a little shout out in the comment section on each stop along the way for a chance to win a $25 gift voucher to the Sweet 'n Sassy Stamps shop. You'll have 2 weeks to comment, with the winner announced here on the SNSS blog, Wednesday, April 28. Happy hopping!


It's also our first hop with our newest cardmaking Creative Team Member... Charmaine Canham! She's been a repeat guest designer for us, and we're so happy to have her and her lovely creations joining the team. Be sure to give her a welcome shout out (and a happy birthday wish, since today's her birthday) when you hop along!


Here's the official hop list. If a link misbehaves along the way,
hop on back here to pick up where you left off.


This month is also Korin and Colleen's birthday month, so in honor of them all, I thought I'd share a birthday card featuring Colleen's new Grunge Elements 3 set and Korin's new Everyday Greetings 2 set and the Script Stencil.

I started with a gel print background from my stash, then stenciled the script using black embellishment mousse and set it aside to dry.  The sentiment from Everyday Greetings 2 is embossed in silver on black paper and I added the dotted line from Grunge Elements 3, then tore around the sentiment to layer over the card.  When the mousse was dry I stamped the stars hearts and grid circles randomly around the panel in grey and black inks, then added some black ink smudged around the edges to finish things off.

Okay, let's get on with things.


Here's a little walk-through of our April release...

First up is the April stamp of the month, Butterfly Background. This set is available for purchase for $11.95, OR you can get it as a FREE gift with a $60 purchase (after any discounts and before shipping and tax) during the month of April! Please note you MUST add this set to your cart to receive the discount. Once your order qualifies, the discount will automatically apply in your shopping cart.


The lovely sample card in the graphic is from Karen and features Butterfly Background, Everyday Greetings 2, and Happy Day.


Creative team member Colleen Gaddie designed the next set, perfect for backgrounds and mixed media. Grunge Elements 3 is sure to be a much reached for set in your collection.


'Tis the season of new beginnings, and what better way to celebrate the happy couples in your life than with these fabulous images illustrated by Krista Hamrick? The Mr. & Mrs. Stamp & Die Bundle includes both the Mr. & Mrs. stamp set and coordinating die set bundled together at a discount. The stamp set and die set are also available separately at regular price.


Our next bundle brings us our first collaboration with Hillary Krippaene of Creative Faith Co. The Thirsty Soul Bundle includes both the Thirsty Soul stamp set and coordinating die set bundled together at a discount. The stamp set and die set are also available separately at regular price.


This month brings us Everyday Greetings 2, another collection of  hand-lettered all-occasion sentiments from Korin Sutherland.


If you loved Nina Brackett's Vintage Van set, then the Just Married set with it's sweet little love bug might be right up your alley.


Along with new stamps and coordinating dies, we have two new stencils debuting this month.


That's our April Release in a nutshell! So many fabulous sets to choose from! What's your favorite? Let us know in the comments.

Your next stop on the hop is Sheri Gilson.

May you be blessed today and always!

    ***This post contains affiliated links at no cost to you ***

Thursday, April 1, 2021

Mr. & Mrs.

 Good morning! It’s the beginning of April already, which means there’s a great new release at SNSS! Today I am sharing a card using the new Sweet ‘n Sassy Stamps Mr. & Mrs. set and the coordinating Mr. & Mrs. Dies. I also used one of the new stencils this month…Script Stencil.

I blended a soft background with some Distress inks and then applied Versamark ink over the stencil to heat emboss it with silver embossing powder. The dress and sentiment were also embossed with silver e.p.


I added some paper doily pieces to the corners and a few sparkly white enamel dots.


Have a great day!

Diane