Showing posts with label Peony Cluster. Show all posts

Saturday, July 3, 2021

Thank You

Welcome to July and a brand new release! The July Release is pretty awesome and I know you are going to love it and the inspiration from the team! My card features Thank You (stamp of the month) and Texture Tiles 6 from the new release along with previously released Peony Cluster and Script Stencil

As you may know by now, I have been on a mission this year to use up pieces from my extra bin. I rescued the floral piece from this bin. I colored this image months ago as a practice piece with some new watercolor pens never intending to make it into a card. In fact, I was so unhappy with my results (color of the flowers and the leaves were originally all different colors of greens) that I almost pitched it in the trash. I could hear Korin in my head, practically gasping at me throwing it out that I hung on to it thinking maybe one day I can salvage it. The sand colored piece was also in the same bin just minus the chicken wire.


When a sentiment set, like Thank you, is released I always reach for my bin to see what I might be able to pair it with. When I saw this floral image and the background piece I knew it was time to fix what I did not like about it. I added water with a brush and dabbed off color with a paper towel. Once I was satisfied with lightening the colors I added more color to the flowers, but in darker shades to try to give a little bit of depth. I redid the leaves so they looked like they belonged together. I used a combination of Arteza and Altenew brush pens/markers to color the image both times. I fussy cut the image when it was dry and set aside.

I thought the script background was a good fit for the floral image, but I felt like it needed a little bit more. I used the chicken wire from Texture Tiles 6 and Versamark ink to add a bit of texture to the background. To be honest, I was hoping it would be darker, but I'm kind of glad it's not and is more subtle. I used Wheat ink to stencil the script onto Sahara Sand cardstock.


I glued the floral to the front of the script panel, die cut out and adhered to a Garden Green card base. I stamped the sentiment with VersaFine Clair Nocturne ink on the same cardstock as the background panel. I trimmed the sentiment, attached to the front with foam tape and added three enamel dots to finish off the card. 

This Thank You set has ten sentiments all with different fonts. How often do you go digging through your sets to find just the right sentiment with the font you are looking for? I love having one set with the same sentiment in different fonts to go with my many styles of cards!


Thanks so much for stopping by,

Karen

Friday, March 5, 2021

Lovely Peonies


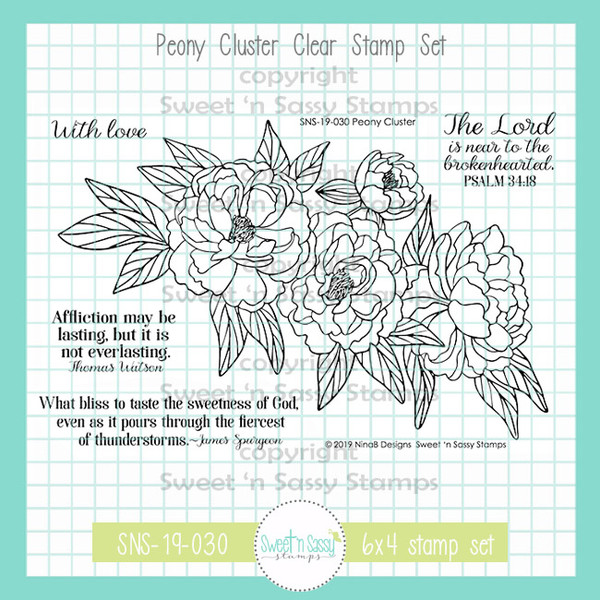
    Hello crafty friends! Lieschen here with a fun card featuring the Peony Cluster stamps & the Delightfully Delicate stencil.

    Peonies are such beautiful flowers, don't you think? I had a lot of fun coloring them with my Prismacolor pencils. After I colored them, I used my Brother Scan & Cut to cut the flowers.

     For my background, I used the Delightfully Delicate stencil with some iridescent glitter gel to give some shine in the background. To finish the card I added a sentiment from the Peony Cluster stamp set and some embellishments.

I hope this has given you some inspiration to do something creative today. Until next time!

Friday, January 29, 2021

Coffee Loving Cardmakers + Sweet 'n Sassy Stamps Collaboration Blog Hop

Hi friends! Today we're super excited to be teaming up with the Coffee Loving Cardmakers design team to bring you a super fun collaboration hop filled with tons of coffee loving inspiration and a PRIZE! This is the first stop on the hop so grab a cup of something awesome and settle in for a fabulous lineup of inspiration!


Leave a little comment love at each of the designers' blogs on the hop list below before February 5 at 11:59pm Pacific to be entered in a prize drawing for a $25 gift code to the Sweet 'n Sassy Stamps shop! Winner will be announced on the Coffee Loving Cardmakers Blog on Sunday, February 7. 


For my card today, I am sharing a little cuppa comfort. It features the I Like Big Cups set, which I paper pieced onto some pretty paper, then I stamped, colored, and cut the flowers from Peony Cluster (on sale now) to fill the cup and add as an accent on the side. I used an ephemera piece from the paper pack for the frame, masking off the frame and stamping the Delightfully Delicate Background (also on sale) in pink. I then added the verse from Peony Cluster and glued everything together.  The background paper is lightly sponged around the edges and I finished off with some enamel dots.


Next up is this gorgeous card from Deeds featuring I Like Big Cups, Background Builders: Stripes, Going Postal, Birds & Blooms, and Walk Humbly.  I just love her coloring on the cup!


Finally, this amazing card by guest designer Charmaine Canham just blows my mind! The Coffee Talk 2 set completely speaks my language, and that gel press background with the text tile from the Texture Tiles 9 stamp is completely fabulous.  Add that to a big old cuppa from the I Like Big Cups set and you've got one amazing card!

Alright, be sure to leave a little comment to be entered in the prize drawing!   The full hop list is below.  Be sure to check out our coffee themed stamps and digital stamps in the shop!

Your next stop on the hop is our fearless leader, Korin's blog.

***This post contains affiliated links at no cost to you ***

CLC + SNSS Collab Blog Hop

You are invited to the Inlinkz link party!

Click here to enter

Friday, August 21, 2020

Happy Anniversary

Hello everyone! I would like to share another watercolor card with you :).


I stamped the peony cluster on watercolor paper and colored it with watercolor markers. I blended a light blue background around the peonies and stamped the message with stamps from the Scripty Thoughts stamp set. It takes a bit of time to watercolor the image, but the result is really nice :).


I used the stamp sets Peony Cluster and Scripty Thoughts.


I hope you're inspired to create!
- Lucinde


Tuesday, April 21, 2020

Two Cards, One Color Palette

Hello All! 
I am back with a couple of cards to share today, both using the same color palette. 
I was itching to use the hummingbird in the Beautiful Birds Stamp Set. I  matched the bird up with the peonies in the Peony Cluster Stamp Set


Here is the how-to~ 
1.  Using MISTI, stamp peonies on edge of 51/2 x 4 1/4 panel of Neenah Solar White CS using Memento Tuxedo Black ink. 
2.  Color peonies and background with Copics.
3.  Determine position of hummer on the panel, and mount onto MISTI door.  Mask the area of the flower that is a part of the hummer image.
4.  Stamp the hummer with Memento Tuxedo Black ink and color with Copic markers.
5.   Draw a very light pencil line with a ruler, from the top of the panel to the bottom of the panel, avoiding the hummer. 
6.  Fussy cut around back end of hummer up to the pencil line. 
7.  Cut the rest of the panel along the pencil line, using a trimmer.
8.  Add Wink of Stella to the hummer.
9.  Fold a kraft cs cardbase and determine placement of sentiment. 
10.  Stamp sentiment with MISTI using Versafine Onyx Black Ink.  Sentiment is from the Mason Jar Bouquet Stamp Set.
11.  Adhere image panel to card base using dimensional adhesive. 

Next up, a card using the Country Garden Stamp Set~


This one has a little surprise in it! 
1.  The bike was stamped on a piece of Neenah Solar White Cardstock with Memento Tuxedo Black ink. 
I did not want to put grass behind my bike again as I had done that with my previous bike card.  I thought a flowering bush or garden of some sort would be pretty, but I doubted my ability to pull that off.  Then I got an idea.  I used the wheelbarrow image from the Country Garden Stamp Set and using Memento Desert Sand Ink, stamped just the flowers in the wheelbarrow- twice.  I masked out the wheel barrow to the best of my ability but other than that, I pretty much stamped right over the bike as I new I would be coloring over it anyway.  I think I may have masked out the basket of flowers. 
OK, back to the steps.
2.  Stamp the flowers in the wheelbarrow two times behind the bike.
3.  Loosely color in the flowers with Copics. 
4.  Color the bike with Copics.
5. Using Copics, color in a side walk and a bit of grass along the edge of the sidewalk. 
6.  Stamp the sentiment from the Beautiful Birds Stamp Set using the MISTI with Versafine Black Ink.
7.  Mount image panel on black cs. 
8.  Add patterned paper to horizontal card base. 
9.  Add white gel pen to centers of flowers in the bike basket.  Add sequins to finish off the card.

 I have not written up a blog post in this step by step fashion before.  I usually just do a narrative of how I made the card.  I would love to know which style of write up you prefer!  Please comment and let me know! 

OK, that's it for me!  I hope I I have inspired you to get out your stamps! 


Lee Ann 

Saturday, April 18, 2020

Thinking of You

Hello Sweet 'n Sassy friends! Today I am sharing a card I made for the April Sweet 'n Sassy VIP Group challenge on Facebook. We would love to have you join us and play along!

I used Peony Cluster and the brand new April Stamp of the Month Friendship is a Blessing. I stamped the floral image onto Canson XL watercolor paper using VersaFine Clair Nocturne ink. I then colored the image with a variety of pink, coral and green inks, continuing to add layers until I was happy with it. Once it was dry, I colored a light blue all around the image and die cut the panel. I stamped the sentiment from Friendship is a Blessing on the front of a gray panel and dry embossed with a honeycomb embossing folder. I must confess, I have a little addiction to using the honeycomb folder. I especially love it with floral images! Finally, I attached the honeycomb panel to the card base, popped the floral panel up with foam tape and added a couple of sequins.


Thanks for stopping by and happy stamping!

Karen

Saturday, July 6, 2019

Pop-up Floral Card and Paper Clip Bookmark

 Hello! It's Monika here today with couple of flowery projects. YES... more flowers! I just LOVE, LOVE, LOVE flower images!

Have you been enjoying the beautiful projects with the July stamp sets? Oh, they are so much fun... but today, I'm using favorite stamp sets from previous releases...

First up is a cool pop-up bridge card. Jennifer McGuire had an amazing video tutorial the other day and I just had to try to make this fairly easy dimensional beauty... 


The big flower came from Delightful Daisies clear stamp set. The image was heat embossed with white embossing powder, colored in with Jane Davenport Mermaid water color markers, and fussy cut... The little flowers are from Itty Bitty Blossoms clear stamp set and they were colored in the same way as my big bloom...
I love clustering these pretty images on top of each other... 


The greeting came from Peony Cluster clear stamp set... the banner image came from a retired stamp set, Give Praise... but even a paper strip (or vellum!) would work as the 'bridge'...


My next project is a sweet paper clip bookmark... sometimes the tiniest things can bring the most joy! I had more of the sweet flowers laying on my desk so I just clustered them onto the black die-cut label.


The heat embossed vellum butterfly was sitting on my desk too, so it had to go on it... it's from Made New clear stamp set

I hope I have inspired you to craft today!

Thank you for stopping by!

Monika


Saturday, June 22, 2019

Floral cards with a message


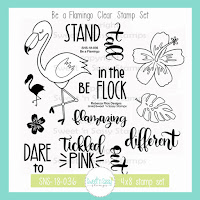
Hello everyone! I love to use short messages on my cards so the Peony Cluster stamp set and the Surrounded in Prayer set had some beautiful stamps for me. I used the stamp sets in combination with the flower and leaves from the Be a Flamingo set.


I stamped the images on white paper and colored them with alcohol markers. After that I cut them out and searched for some matching floral patterned papers.


I stamped the messages on papers with a soft background color or pattern so the message would still be readable.

When you're in doubt about the colors that you want to use for your images; take a look at all the beautiful patterned papers. You can get a lot of color inspiration from them!

https://www.sweetnsassystamps.com/be-a-flamingo-clear-stamp-set/  https://www.sweetnsassystamps.com/peony-cluster-clear-stamp-set/  https://www.sweetnsassystamps.com/stamp-for-a-cause-surrounded-in-prayer-clear-stamp-set/


I hope you're inspired to create :)

- Lucinde

Saturday, June 8, 2019

Hello everyone! Today I want to show you a card that I made with a limited color scheme. I used black/white and 1 other color: red. I like the way this makes the red color pop out of the card.


I stamped the peony cluster with a black ink and cut out a mask for it. After that I added a stencil on top of it and I stenciled the hearts on the card. I decided to add a little bit more red ink around the stamped image without the stencil too. This makes the flowers stand out even more.


To finish this card I stamped the sentiment with black ink on red cardstock. I used clear embossing powder to give the message a bit of a glossy look. I used a bit of white thread behind the sentiment and a couple of sequins to finish the card.

https://www.sweetnsassystamps.com/peony-cluster-clear-stamp-set/

I used the stamp set Peony Cluster.

I hope you're inspired to create!
- Lucinde

Friday, June 7, 2019

It's Mer-Mazing

Hello sweet friends!  Cathy here with several cards to share from the new Sweet 'n Sassy Stamps MER-MAZING June Release!

My first card uses the new Mer-Mazing stamp set created by our newest designer, Jenn Nilsson, and the oldie but goodie,


Some of the spots from Lots-a-Spots were white embossed on mixed media paper.  Distress Oxide Inks were sponged over the embossed spots and other spots from the stamp set were stamped with the same Oxide Inks to create the underwater background.  Circle dies were then used to cut bubbles from the background.  Images from the Mer-mazing stamp set were colored with Copic Markers and cut out using the Scan 'N Cut.  Some of the images were then placed behind the popped up background while other images were popped on top of the background to finish the card.

My second card used the new Hymn Word Art stamp set designed by Nina Brackett.


Distress Oxide inks were pressed onto an acrylic block, spritzed with water, and stamped onto a piece of mixed media paper to create the background.  This panel was cut with a stitched rectangle die.  One of the hymns from the Hymn Word Art stamp set was black embossed onto the background.  A white paint pen was used to color in some of the letters.  A black gingham bow was added along with some sequins to finish the card.

My final card used the Peony Cluster stamp set which was the stamp of the month last month, but is now available for purchase.


The background panels were created with Ranger Alcohol Inks on Yupo paper.  The peonies were white embossed on vellum and fussy cut.  The vellum flowers were popped onto the card with foam tape.  Netting ribbon was added to one layer and the sentiment from Happy Couple was embossed on a die cut banner to finish the card.

These stamp sets from the Sweet 'n Sassy Stamps Store were used to create the cards above:


Well...that's all for now.  Thanks so much for stopping by!

Blessing to you,
Cathy