Showing posts with label Christmas Silhouettes. Show all posts

Wednesday, October 6, 2021

Peppermint Stripes & National Coffee Day Hop Winner


Hi friends! It's Julee sharing some of my first makes with the Peppermint Stripe Stencil I designed for our October release. I'm a huge fan of peppermint and diagonal stripes, so this is a match made in heaven for me!  

Before I get to the creative details, it's also time to announce the winner of our National Coffee Day Blog Hop prize...


Congrats VanessaB! Please send an email to snssassistant@gmail.com to claim your prize.

I designed the free digi below with the sentiment Vanessa suggested in her winning comment. Just right click and save to your computer. Thanks to everyone for hopping along! Please give credit to J Tilman Designs @vervegirl if you use it. Please and thank you.😁


Okay, on with my creative shares for the day.  I had fun with my first pass with this stencil, testing it with ink, glitter paste, and a mix of both. So much fun!

For my first card, I used mint tape to mask off the trio of thin stripes, then stenciled the bold lines in red.  Next I moved the tape to cover the red lines and added pink glitter paste to stencil the stripes.  I love how it looks like a real candy cane!


I recently received the coordinating dies for the classic Precious Poppies set, and could wait to use them. Poppies are red, so I figured they work for Christmas, right?  I added a sentiment tag with two sentiments from the Christmas Wordfetti set, then accented with a few little images stamped and die cut from the Wonder of Christmas Bundle.


My next card was inspired by my favorite wint-o-green mints. I did some masking and used sea glass on just the two outer thin stripes, then evergreen on all the other stripes for a fun wintergreen look.

I used the Christmas Silhouettes set and Karin markers for a soft watercolor effect, first stamping with the brusho, then coating the stamp lightly with water and stamping over it. When that was dry, I stamped again in clear embossing ink then embossed in clear. I love the look. I cut with the coordinating die cuts, then added the peace die cut from the Peace & Joy Word Dies, and a splash of color with the Doily Border Dies in cranberry and finished off with a gold poinsettia.


That third stenciled background hasn't made it onto a card yet, but I'm sure it won't be long. I used the stencil as is (no masking) with pink glitz glitter gel on red cardstock.

Thank so much for stopping by today! If you saw something you have to have, be sure to take advantage of our Earlybird Savings with 10% off individual new releases through Saturday, October 9.


Friday, December 14, 2018

Fun with Wood Backgrounds


Hi Sweet Friends!  Julie, here and today I am sharing two different cards using the December Stamp of the Month, Wood Backgrounds along with several other new and previously released sets.


My first card uses the large image from Wood Backgrounds along with the buffalo check from TextureTiles 4, the reindeer image from Christmas Silhouettes and the sentiment from Home for the Holidays.   The images were heat embossed and layered onto dry embossed panel for a fairly quick Christmas card.


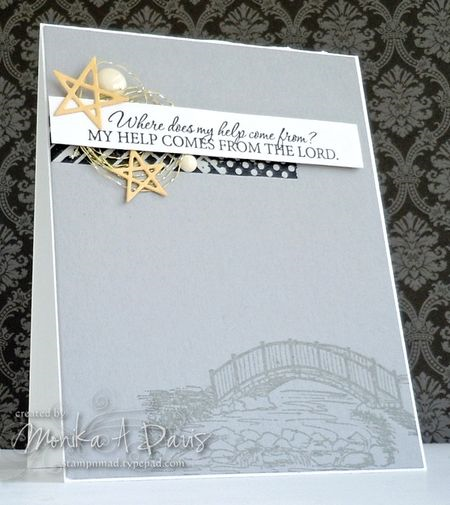
My second card uses the smaller image from Wood Backgrounds stamped several times with a light gray ink to create a panel for the front of the card.  The dove and sentiment are from the new stamp set, Doves of Peace  and I finished off the card with silver cord and sequins. 


You have until the end of the month to receive the December Stamp of the Month, Wood Backgrounds free with any $75 net order (US$) plus you receive free shipping and handling with net orders over $75 (US).


Thanks again for taking the time to stop by!  I hope all of you have a fabulous week and a very Merry Christmas!

Tuesday, November 27, 2018

Merry Christmas- A Quick Mixed Media Card


Hi Sweet Friends!  Julie, here and today I am sharing a quick Mixed Media Christmas card using non-traditional colors along with one of my favorite Christmas stamp sets, Christmas Silhouettes and images from Home for the Holidays and Texture Tiles 1 .


The background panel was created using distress oxide inks, smooshing the ink onto a piece of white cardstock and when the ink had dried, adding splatter with the splatter image from Texture Tiles 1.

The reindeer image from Christmas Silhouettes was stamped with archival black ink and heat embossed with clear embossing powder before fussy-cuting.  The sentiment from Home for the Holidays was created in the same way on another piece of white cardstock and die cut with a stitched circle die. 

The script image from Texture Tiles 1 was stamped onto the diagonal die-cut square before mounting onto the card front with dimensional foam.

A bit of silver cord and a few rhinestones were added to finish off the card.

Don’t forget, we are still celebrating our 11th Birthday Celebration all month long!  This week, you can save 11% off Sentiment, Fall and Christmas stamps (good through 11/30/18 with HAPPY11SFC code) plus....

Check out the special stamp sets you can choose from for your Stamp of the Month with a net order of $60 (US) and don't forget, add a few more $$ to your order to get free shipping and handling (with net orders over $75 (US)). 


Thanks again for taking the time to stop by!  I hope all of you have a wonderful week!

Sunday, November 11, 2018

Merry Christmas with Christmas Silhouettes


Hi Sweet Friends!  Julie, here and today I am sharing a card using one of my favorite Christmas stamp sets, Christmas Silhouettes along with images from the Texture Tiles 1 and Texture Tiles 4 stamp sets.


This layered card was fairly easy to create- a few layers, images and a large bow to finish it off! 


I started with creating the white background panel by heat embossing the snowflake image from Christmas Silhouettes and watercoloring with a light wash of light gray distress ink for a heat resist background.. 

The banner was created with the buffalo plaid image from Texture Tiles 4- I love how easy it is to line up the plaid to create your own background paper!  I die cut the banner with a stitched die, split it in half to layer onto the white background with a horizontal panel of black cardstock and burgundy grosgrain ribbon.


The reindeer image from Christmas Silhouettes was heat embossed in black, fussy cut and mounted with dimensional foam onto a circle created with the music image from Texture Tiles 1.

The card was finished off with sentiments from Christmas Silhouettes along with a large bow, snowflakes and rhinestones.


Don’t forget, we are celebrating our 11th Birthday Celebration all month long!  Right now, until 11/14 we are offering Free Shipping and Handling on any order!  
Plus for any order $60 and over (net US $), you can choose one of four stamp sets as your Stamp of the Month in November!

Thanks again for taking the time to stop by!  I hope all of you have a blessed week!

Tuesday, October 10, 2017

season's greetings

Hello! It's Monika here today with a Christmas card. I love circle cards so I decided to make one:


The scallop circle base was die-cut out of heavy designer paper. The birdhouse image is from Season's Greetings clear stamp set. I stamped an extra holly cluster and after coloring the images and cutting them out, I adhered the cluster to the main image with dimensional tape. I added psychedelic embossing powder to the snowy areas and red rhinestones as berries. The greeting is from Christmas Pine clear stamp set. I also added some holly branches from a retired stamp set... just to fill in some empty areas... 
The black frame (die-cut with 2 circle dies), the birdhouse and holly leaves underneath, and the greeting are all popped up with dimensional tape... to finish off the card, I added more rhinestones and red/white baker's twine.
If you are really creative, by adding a clear window sheet you could easily turn this into a circle shaker card!

Thanks for stopping by,
Monika


Tuesday, December 13, 2016

Merry Christmas

Hello! It's Monika here today, with a holiday card.
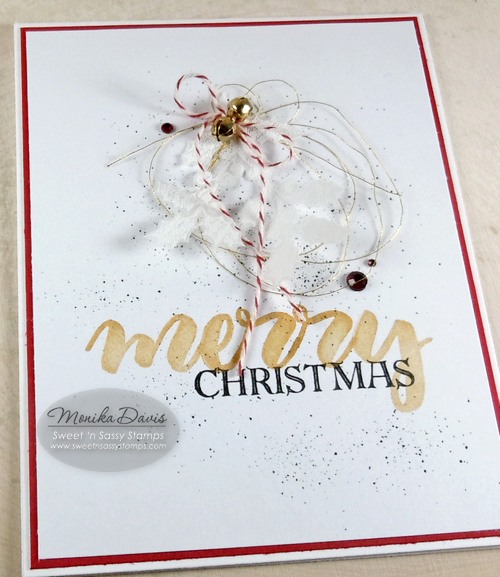
One of my favorite holiday images (other than nativity scenes) is the holy from Christmas Silhouettes clear stamp set. I just love the delicate look. So I decided to use that on my card:


I love the delicate look of heat embossed image on Vellum. It gives an airy look to it...
I totally forgot that I had the coordinating die (Christmas Silhouettes Dies) so I fussy cut the image... imagine how easy it would have been if I simply die-cut it. Silly me!

 
The greeting was stamped with the new Rebecca Script Alpha clear stamp set. It is part of the Creative Worship line. I also used one word from the Christmas Morn clear stamp set. The two different fonts worked really nicely together.

Thank you for stopping by,
Monika


Sunday, December 20, 2015

clear-ly Christmas

Hello Sweet 'n Sassy friends and Merry Christmas! 
 
I can't believe Christmas is just a few days away...yikes!  The time just always seems to fly in the weeks prior...I hope you've had time to stop, reflect, and enjoy this wonderful season.
 
I have a quick card today that is good for those last minute needs. I made a clear card (love these!) with the Sweet ‘n Sassy Stamps Christmas Silhouettes images, the Christmas Silhouettes dies, and the Hillside Edges dies.


It was hard to photograph without getting a glare.  The front of the acetate card was embossed with a snowflake embossing folder.  The reindeer is on the front and the tree is on the inside of the front.  Some deco labels were cut and adhered to the inside back.  Then the hillside edge die was cut and layered with the sentiment stamped on it.


An additional white layer was cut and adhered to the back to hide the tape and provide a place to write a greeting.
 
Wishing you all a blessed Christmas!
Diane


Tuesday, November 17, 2015

Borders & Backgrounds...

Hello Sweet Friends!

It's been a fun month here at Sweet 'n Sassy Stamps as we celebrate our 8th birthday! The DT Divas are sharing Daily Throwbacks with you all month long here on the blog, and over on our Facebook page, to help celebrate!

Today I am re-visiting Borders & Backgrounds clear stamp set (among some other fantastic sets):


I love making shaped cards, so I decided to make a birdhouse card. The scallop border was perfect for the roof of my birdhouse. I used the coordinating die to cut the strips out (which is no longer available). I stamped the scallop image with VersaMark and heat embossed the image with clear embossing powder.


The holly came from Christmas Silhouettes clear stamp set and was die-cut with the coordinating Christmas Silhouettes die set.


The darling birds are from Season's Greetings clear stamp set. I also used the Fence & Grass and Heart die sets.

Monika
 
Get To Know Me:
Monika A. Davis
 
Hello! I was born and raised in Hungary. I've been in the States for 19 years now, living in beautiful New Hampshire. I live with my sweet husband and our 2 boys. I work part time at my sons' school, in the after school program.
I was introduced to rubber stamping 17 years ago and I've been making cards on and off ever since. It's been a great passion of mine. I love making cards and giving them away for birthdays, Christmas, teacher's appreciation day etc. I've been on a number of design teams and have been published a number of times. I taught card making classes in local stamp stores and now I offer classes at my house. These days I am crafting on a smaller scale and concentrating more on my family and on my spiritual journey.
 I love reading, traveling, playing board games... and this summer I took up gardening and canning (which I never thought I'd do).
If you are a new stamper, I'd recommend getting a nice set of ink pads with coordinating card stocks. I made a mistake of buying miss matched items when I started out as a crafter and I never liked the end result. These days, there are many companies offering matching ink pads, papers, even embellishments. 
There are so many fantastic designers who inspire me... I don't think I could name them all here. I visit Pinterest daily for ideas and get inspirations from challenges.
I was introduced to Sweet 'n Sassy Stamps in 2010 (I think) by the talented Kim Schofield. I started out as a Guest Designer, then first joined The Sweet Stop sketch challenge, then the Sweet 'n Sassy Design Divas. It's been such a blessed journey with the other design team members and Korin. I love the different image designs, the Christian sets with beautiful verses and spiritual greetings.
While I have a number of favorite stamp sets, especially the ones with butterflies, I especially love:
 Be Encouraged clear stamp set with it's powerful words:
 
 
These are just the perfect additions to any cards, no matter what the occasion is... and here are some of the cards I've created with this stamp set:


Sunday, December 14, 2014

snowy scene tag

Christmas will soon be here...are you ready? I hope you are enjoying the holiday preparations. May you have peace and joy as we celebrate the true meaning of Christmas!

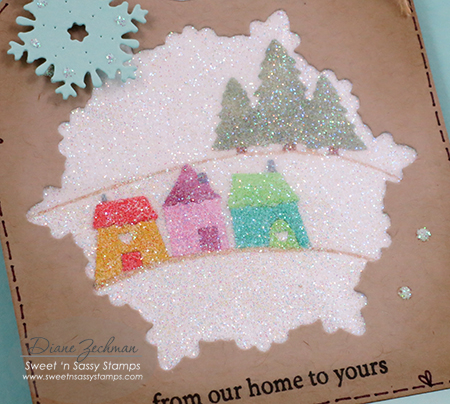
Today I have a snowy tag using the Sweet 'n Sassy Hillside Edges dies, Spectacular Snowflakes dies, Small Snowflakes dies, and Christmas Silhouettes stamp set (sentiment). The snowy scene was created with an old technique using packing tape and ultra fine glitter.

hillside edges tag diane zechman

hillside edges tag close diane zechman
 
To create this tag, I started with a 3 1/2 x 8 1/2 inch piece of cardstock and scored it at 4 1/4". The fold will be at the top of your tag.
 
To make the tag shape, I cut a 1 inch square in half diagonally and traced one of the pieces on each top corner and cut on the traced lines.
 
Next I diecut the second largest snowflake die (Spectacular Snowflakes dies) from the front of the tag.
 
At this point you can decorate the "inside" of the tag however you want. I used the Hillside Edges dies and colored them with markers.
 
Now the fun part...adhere clear packing tape to the inside of the front layer, making sure you completely cover the diecut opening. Then apply ultra-fine glitter to the front of the tag (it will stick inside your diecut window where the packing tape was placed).
 
Adhere the front to the back with double-sided tape (Scor-Tape works great!) and finish as desired. I used a Small Snowflake diecut and a sentiment from Christmas Silhouettes.
 
Thanks for visiting our blog...have a wonderful day!
♥ Diane