Showing posts with label Typewriter Text Background. Show all posts

Monday, December 26, 2022

Birds n Blooms Postcard


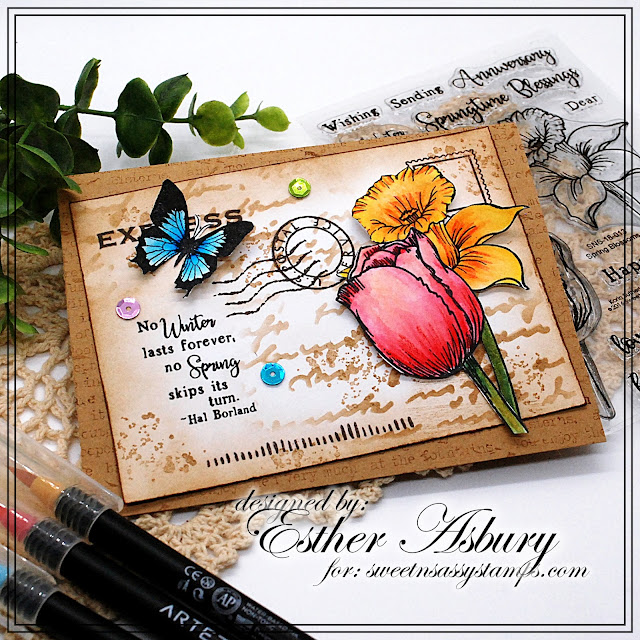
Esther here today -- My second favorite Sweet 'n Sassy stamp set is probably Going Postal. (Texture Tiles 4 comes in at number one since it has four plaid stamps in it!) I combined the postal set with Birds n Blooms to create this pretty vintage postcard greeting for a friend who loves all things nature related.

Check out the YEAR END SALE currently in progress.

 ~~This post contains affiliate links at no extra cost to you~~~

Supplies and Tools:


Monday, June 13, 2022

Happy Everything


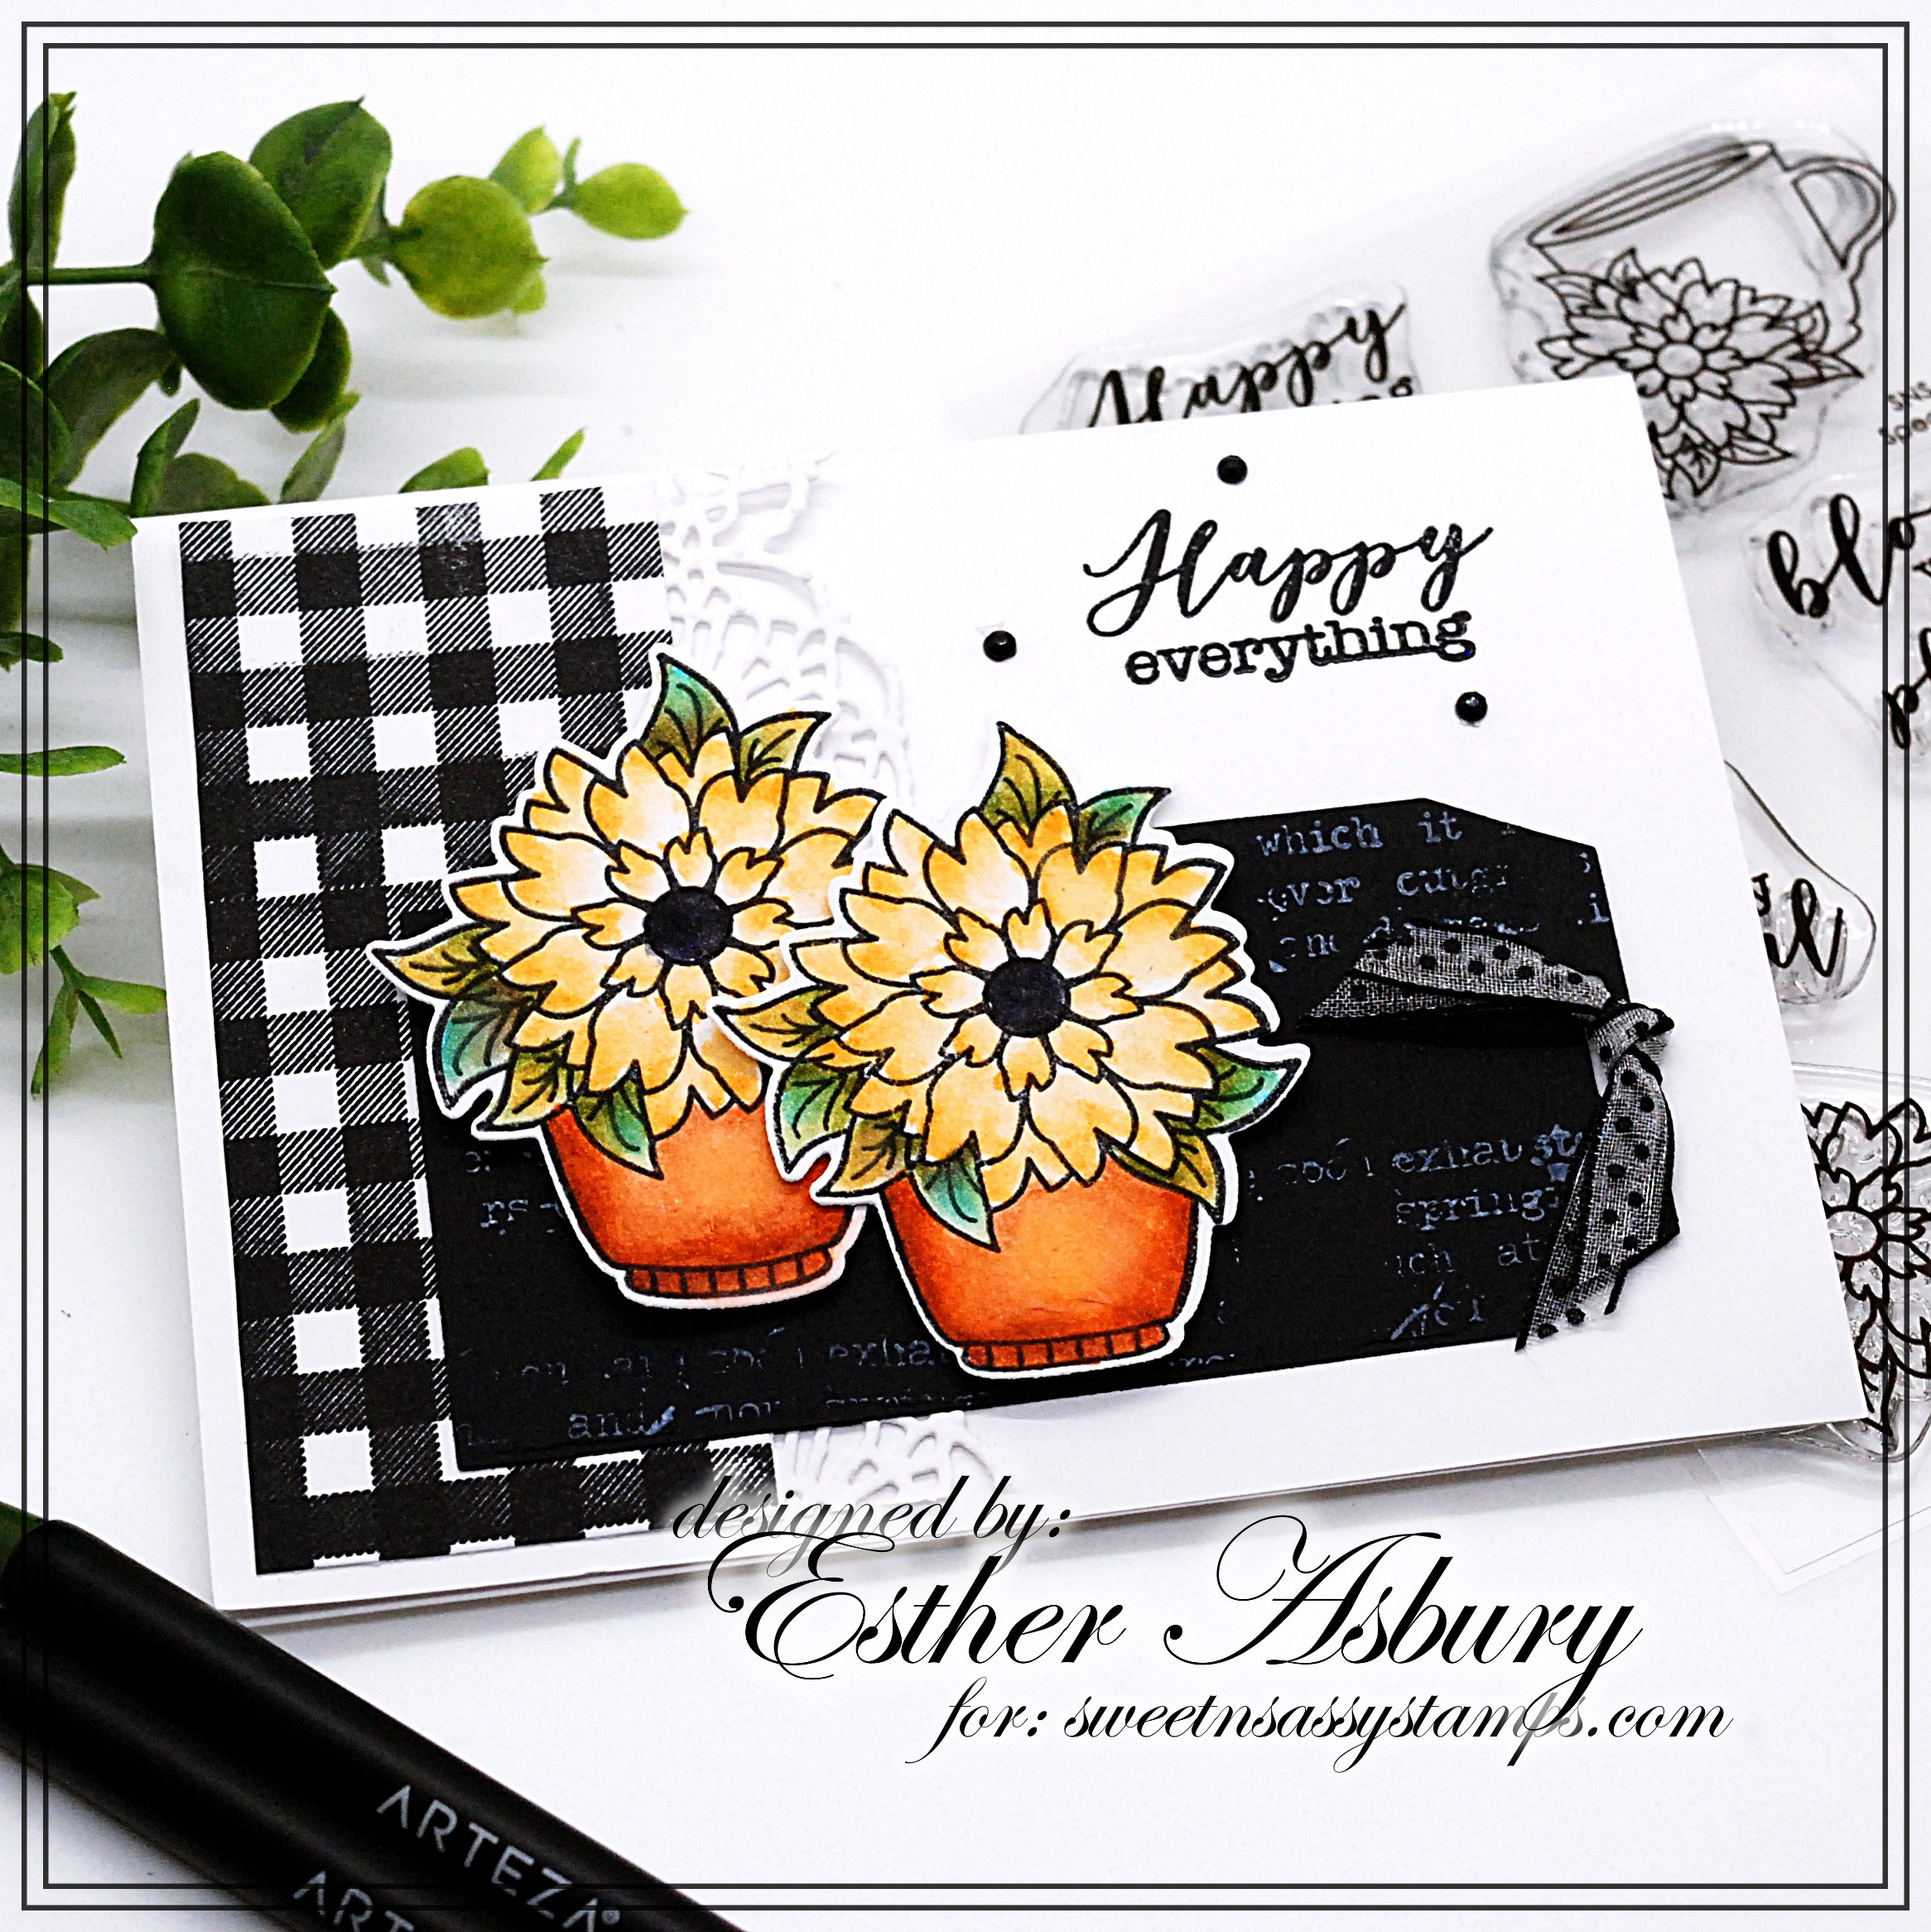
Hello, Esther here today with this summery floral card. To create my card I stamped one of the flower pots from the Special Blooms Stamp Set twice on mixed media paper and colored them with my Arteza Real Brush Pens before die cutting with the coordinating Special Blooms Dies. I die cut a tag from black card stock and added some white text using the Typewriter Text Background stamp. The gingham was stamped in Versafine Clair Nocturne Ink using one of the images from Texture Tiles 4 . A bit of ribbon, three rhinestones, and some paper lace complete this card. 

~~This post contains affiliate links at no extra cost to you~~~


Monday, February 14, 2022

Spring Blossoms


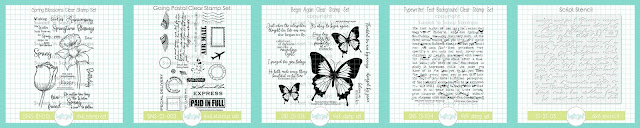
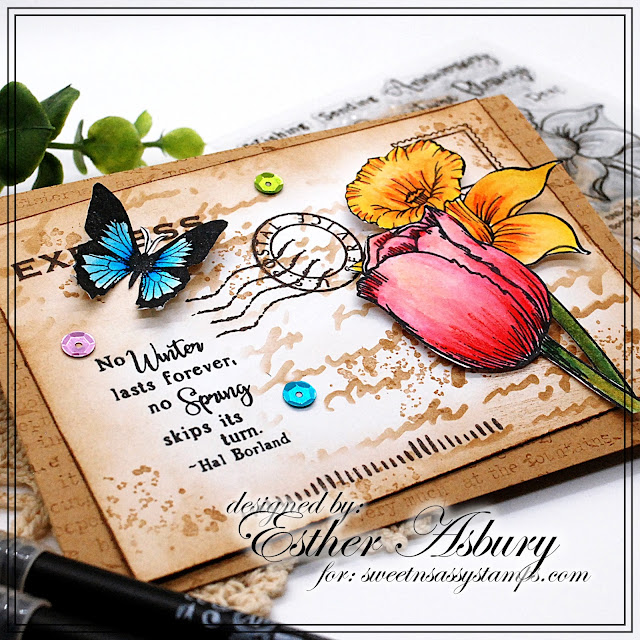
Esther here today sharing this pretty spring card! I started by stamping the Typewriter Text Background   in Vintage Photo Distress Ink (Ranger) on kraft card stock. Next I used the Going Postal stamp set to create a background on white card stock using Versafine Clair Fallen Leaves Ink. I used vintage photo distress ink again to add the  Script Stencil to in the corners and to ink around the edges of my cardstock. 


    ~~~This post contains affiliate links at no extra cost to you~~~

 The flowers are from the Spring Blossoms stamp set and were stamped in Versafine Clair Nocturne Ink  and colored with Arteza Real Brush Pens. I added a little butterfly to the corner from the Begin Again  stamp set. A few sparkly sequins finish off this card. 

Wednesday, August 25, 2021

Falling Leaves


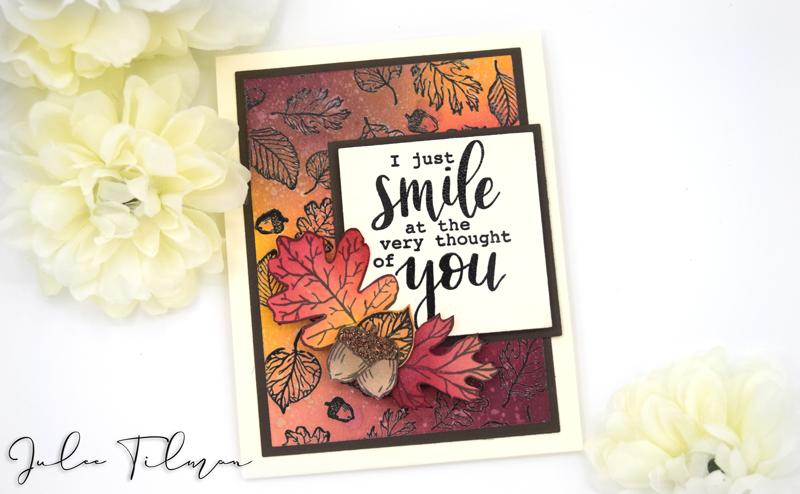
Hi friends! It's Julee popping in with a fun autumn card featuring the August Stamp of the Month, Fall Background. I knew I wanted to do a blended background for this image, so decided to emboss it on white cardstock in dark ink for an emboss resist effect.

Once the leaves were embossed, I blended with Catherine Pooler inks (Merlot, Clay Mask, Catching Rays, and Rouge) all over the panel, then buffed with a clean cloth.  I sprinkled with water for a distress effect, then dried, and blended the same colors over the watered areas to bring back some of the vibrancy.


Next I pulled out the previously released Autumn Splendor set. The images in this set are larger versions of the ones in the background, so they pair beautifully together.  I stamped a couple of the leaves and two acorns, then blended with the same colors of ink and fussy cut.  For the smaller leaf in the center, I used one of the leaves left over when I cut my background panel down to size.  I arranged these in a cluser, then added to the lovely embossed sentiment from the My Thoughts of You set.

Fall Background is available for purchase, or you can earn it as a free gift with a $60 order in the month of August. Just add it to your cart and the discount will apply once your order total qualifies. If you're looking for another fabulous fall set, check out this week's Stamp of the Week, Leaf Silhouettes. It's on sale for just $5 through 8/30. Here's a card I made previously with it, the coordinating dies, and the Typewriter Text Background.


Thanks so much for stopping by! I hope you have a fantastically creative day!


Monday, August 9, 2021

Back to School


Esther here today with a fun "back-to-school" themed card to share with you using several fun supplies from Sweet n Sassy Stamps! 
 
 
To create that fun chalkboard background I simply inked up the alphabet stamp set (in white pigment ink) while it was still on the stamp backing, and pressed it into my black card stock. I found that laying a book on top and pressing down a bit helped to ensure that all the letters got stamped, and was much quicker than stamping each letter separately! I lightly spot stamped the typewriter text background over top for extra interest.

~~~This post contains affiliate links at no extra cost to you~~~

Supplies and Tools:

Wednesday, July 21, 2021

Dream Big by Charmaine Canham


Good Morning Flowers! 

I have a quick and fun card to show you today. I wasn't in the mood to color, so I grabbed the next best thing guaranteed to make a big impression!  I just got the Fantastic Flowers stamp set and wanted to play with my Distress Oxide Sprays. Here are the instructions for this happy pairing!

I started with stamping three flowers and clear heat embossing them.
This way, you can easily clean the spray from the black embossed lines. 

Here I used three Distress Oxide Sprays that work well together. Use an old box to spray into and in a well-ventilated area. Alternate the colors, drying them in between spraying again.


Next, stamp the Typewriter Text Background stamp with a dye ink or
 Amalgam ink, like Gina K's, onto the cut-out flowers. This will give the flowers more interest.


For the actual card base, I decided to use a slimline card (8 1/2 x 3 1/2) and spray
that with Distress Oxide spray and Mica Spray for some shine. 


Stamp the leaf stamp with VersaMark and white heat; emboss this. Make sure to use
your antistatic tool and wait for the base to dry.


No card is complete without "bling"! I had an old circular flower die and cut three circles. Glue these to the center of each flower. I then added a gemmed brad to each after piercing a hole through the center with my punch tool. 


Curl and shape the flowers with your hands, and place foam tape under each flower.
Stamp a small sentiment and "hide" it in the folded flowers. 

I hope you enjoyed today's card. Let me know what you think!


Talk soon!
Charmaine 


Friday, May 28, 2021

Scribble Flowers


(This post may include affiliate links at no cost to you.)

Today I have two different projects using an all time favorite Sweet N Sassy Stamp - Scribble Flowers.

The first project is a CAS card with some very unique pieces. I stamped the Texture Tiles 11 Background onto a piece of tissue paper with archival ink. I adhered it onto a piece of cardstock I cut it into strips with a pierced die then I inked up each piece with Distress Oxides and added it to a card base. Then I water colored the leaf from Scribble Flowers in coordinating colors, fussy cut it, and glued it onto the card. A simple Birthday greeting from Birthday Wordfetti and that is all there is to this one.

This image has an empty alt attribute; its file name is snss-scribble-flower-1.png

My next project is a mixed media ATC Coin. These little canvases are so much fun to work on and this little 2.5" circle has a lot going on.

I created the background with Distress Oxides and the smooshing technique. Using Archival Inks and the Typewriter Text Background, I added a little texture. Then I Copic colored the Flower and bee from Scribble Flowers. Finally, I added a sentiment from the Faith Wordfetti Set and that is all there is to this one. I really love it!

This image has an empty alt attribute; its file name is snss-god-is-bigger-coin.png

I hope you were inspired today! Thanks for stopping by!
Lyn


PS - The entire store in on sale for 15% off until the 31st if you want to grab any of these sets!

Monday, May 10, 2021

Thinking of You


 Happy Monday! Esther here today sharing a beautiful bird themed card. The set I used is called Singing Praises and it's illustrated by Nina Brackett.  


 All Nina Brackett sets are 25% off this week!

 Above are a few of my favorite cards (and tags) using her line of stamps

    ~~~This post contains affiliate links at no extra cost to you~~~

TIP: The wreath die I used on this card was actually too small to fit around my text circle so I cut a second one, snipped a piece out and glued the new section into the first one to  make it larger. I've also shrunk this wreath on past cards by snipping a section out  and gluing the ends back together. Just a fun way to stretch your supplies and make them work for your card design.

Supplies and Tools:

Monday, April 26, 2021

Morning Glories Two Ways

Esther (from Shoregirl's Creations) here today sharing two cards using the Sympathy Morning Glories stamp set.


This first card is a one layer card with the morning glories stamp around the edges of a watercolor panel in  Versafine Clair Nocturne Ink. I then used a dabbing method to watercolor the flowers and leaves. (I dabbed on two colors of watercolor paint and used a wet paint brush to spread the color around.) After my paints were dry I added some text using the Typewriter Text Background  stamp and black soot distress ink. I then splattered the piece with white acrylic paint. The final step was adding a sentiment from the Timeless Hymns stamp set and a few black jewels. 


My second card is a clean-and simple card with lots of fussy cutting and paper piecing. 


To color my image I created two ink smooshed backgrounds (on mix media paper) using dusty concord and worn lipstick distress ink for the first and shabby shutters and rustic wilderness for the second. I stamped the morning glories on the first one and the leaves and stems on the second. Next I fussy cut all the flowers and leaves, and stamped a third image stamped in Versafine Clair Nocturne Ink on white card stock. I glued the leaves down first and popped up the flowers with foam mounting tape. I fussy cut around this third image and added a bow using purple burlap string.

The black background was embossed with Swirl Motif 3D embossing folder from Altenew, and I stamped the sentiment in Yeti ink from Lawn Fawn. 

 ~~~This post contains affiliate links at no extra cost to you~~~

Monday, April 12, 2021

Masculine Cards


Esther (from Shoregirl's Creations) here today sharing two masculine cards I created with the NEW Everyday Greetings 2 stamp set. Both of them are no-coloring cards, though the second one has plenty of color on it! 

This first card is a fun birthday card that features the Gear Up and Time Well Spent sets as well as the Typewriter Text Background .  The watch and sentiment were stamped in Versafine Clair Nocturne Ink while the grunge elements were stamped in walnut stain distress ink.

   ~~~This post contains affiliate links at no extra cost to you~~~

My second card is a silhouette card. The background is dusty concord, chipped sapphire, speckled egg, stormy sky distress ink blended together to form sky and water. I used just a bit of white pigment ink to lighten up the center of my card and create the illusion of moonlight across the water. To add a little twinkle to my night sky, I spread some white gesso through the Starry Night Stencil.

The lighthouse and trees are from the Landscape Silhouettes set, and I added grass along the bottom with Scene Silhouettes: Tall Grass and the Cattail Die. The waves were created with a small stamp from Scene Silhouettes: Trees. All the stamping was done in Versafine Clair Nocturne Ink. 

   ~~~This post contains affiliate links at no extra cost to you~~~