Showing posts with label texture tiles 5. Show all posts

Friday, March 26, 2021

BUNNIES, BUNNIES, BUNNIES!

Today I have a super sweet post filled with the cutest cuddliest... bunnies! Who doesn't love bunnies amiright? Sweet N Sassy has some truly adorable bunnies in both clear stamps and digital stamps....

FIRST we have this so cute little guy from this month's Hoppy Spring set. I inked him up on a Neenah Desert Storm card stock base, masked him, them covered the background with the new Textures 11 flowers using Versa Mark for a tone-on-tone look. I unmasked and those flowers moved to the background so I could color my bunny with colored pencils and have a one layer card.

This image has an empty alt attribute; its file name is snss-background-bunny-copy.jpg

Next I have another clean and simple card, but this time, I didn't fill in the white space. (I did, however, die-cut and mount my panel for a little dimension :)) This card uses a new digi called Bunny Love. It comes with a sweet sentiment that I have used on many a project lately! I created my "card front" in a word doc with the bunny and sentiment placed just where I wanted them. I printed, colored him with Copic markers, and die-cut the layers - that is all there is to it!

This image has an empty alt attribute; its file name is sumebunny-copy.jpg

My last project is a mixed media ATC (Artist Trading Card) that I created for a team swap. I used Distress Oxides on heavy watercolor paper to start my card. I added texture with Typewriter Text BG, Texture Tiles 5, and the new Grunge Dots Stencil. I created a word doc with a bunch of my images and sentiments from Valentine Bunny with Heart and Bunny Love respectively and had a fun day of coloring and fussy cutting. I added a little washi from my stash to "ground" my bunny and balance my ATC then glued my image and sentiment down... I signed the back and mailed off to my friends - SO MUCH FUN!

This image has an empty alt attribute; its file name is snss-bunny-copy.jpg

I hope you were inspired today - HOP to it and go great something this weekend!

By the way, there are still a few more days to get in on the SNSS moving sale!

This image has an empty alt attribute; its file name is 159275691_10225983633918852_835637448339034559_o-1.jpg

Thanks for stopping by!
Lyn

Monday, April 13, 2020

Paper Bag Pocket of Encouragement


Hello Friends! Esther here, and today sharing a Paper Bag Pocket of Encouragement. It's stuffed full of Bible verses, hymns, and inspirational sayings to cheer and encourage.

Here's how I created my pocket
(Maybe you'll see a pink and white polka-dot / denim version later this year!!) 

  1. Start with a lunch sack
  2. Fold the top down and glue in place
  3. Punch or die cut a partial circle in the center of the bottom flap
  4. Use decorative scissors along the top of the bottom flap
  5. Fold bottom flap up
  6. Cut designer paper to decorate your panels

~~~This post contains affiliate links at no extra cost to you~~~

Supplies and tools:


I hope you're inspired to make your own little paper bag pocket of encouragement!! 
If you use Sweet n Sassy stamps, be sure to share on our VIP Facebook page!


Saturday, April 11, 2020

Blessings are found where you seek them


These days it can be hard to find the blessings, but I think it's important to keep looking for them. So I made this little card as a reminder.


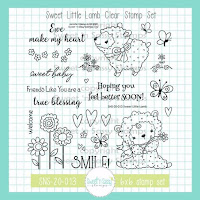
I stamped a background with the little hearts from Texture Tiles 5. I stamped the heart from Sweet Little Lamb with the same ink and cut it out. After that I colored the image with that ink too. I stamped the message from Blessings in Disguise with black ink.
I masked the bottom and top of my card to make the light pink part of my card and colored the middle with Distress ink. To finish the card I added a couple of clear sequins.


https://www.sweetnsassystamps.com/texture-tiles-5-clear-stamp-set/  https://www.sweetnsassystamps.com/sweet-little-lamb-clear-stamp-set/

https://www.sweetnsassystamps.com/blessings-in-disguise-clear-stamp-set/


I hope you're inspired to create!
- Lucinde

Saturday, March 14, 2020

Lots of love, with lots of hearts


Hello everyone! Today I want to share a card with this cute piggy :). I love the little hearts he's throwing around.


I stamped the image on marker paper and colored it with alcohol markers. After that I die cut the circle with a stitched border and distressed the edges with a purple ink. I stamped the heart background with the background tiles and added a matching patterned paper to the card. I used a piece of washi tape and some sequins to finish the card.

https://www.sweetnsassystamps.com/texture-tiles-5-clear-stamp-set/
https://www.sweetnsassystamps.com/lots-of-love-clear-stamp-set/

I used Lots of Love and Texture Tiles 5 for this card.

I hope you're inspired to create!
- Lucinde

Saturday, February 15, 2020

Dream Big

Hello Sweet 'n Sassy friends! Today I am sharing a card I made using the new layering set Dragonfly Dreams and Texture Tiles 5.  I have always loved layering sets and this one is beautiful! 


To make this card I utilized a layout created by fellow design team member Lee Ann Barrett and the first technique in Korin's live video from the January stamp-a-thon in the VIP Group on Facebook.

I used canson xl watercolor paper, artist loft watercolors, round paintbrush, black embossing power, circle dies and VersaFine Clair Nocturne ink. For this technique you want to start with wet paper. Then dip your wet paintbrush into your first color and dab it over the paper (mine was an A2 size), repeat with other colors. Then dry your piece and add more layers of color as desired.


Korin only used two colors in the video and she picked her piece up and tipped it in different directions letting the colors run together. I was afraid to do that for fear I would have a muddy mess. I did dry and add more color until it was bold enough for me. Korin's background had the more traditional watercolor look to it and mine does not. My bolder more defined lines works for this design.

Once it was dry, I used Texture Tiles 5 to add black dots. Then I used double stick tape on the back, positioned it on the front of my card and trimmed around the edges. Next, I stamped the words onto yellow cardstock, die cut out and attached to black circle. I thought the blue strip of paper was too plain and decided to stamp the words I believe in you on it. Finally, I heat embossed the dragonfly with black embossing powder on blue paper, fussy cut out and attached it and the words to front of card. I hope you will watch Korin's video and give her background techniques a try.

Until next time, I hope you have an awesome day!
Karen

Wednesday, February 12, 2020

February New Release Blog Hop + Giveaway

Welcome to our February Release Blog Hop!

We've got a spring in our step with the new February release and are so excited to share the projects we've been working on with you! Read on for a bit of inspiration and a little walk through of our new release, then hop along to the blogs linked below for all sorts of papercrafting inspiration.

Plus, there's a GIVEAWAY! Leave a little shout out in the comment section on each stop along the way for a chance to win a $10 gift voucher to the Sweet 'n Sassy Stamps shop. Winner will be announced here on the SNSS blog, Wednesday, February 19.


Here's the official hop list. If a link misbehaves along the way,
hop on back here to pick  up where you left off.


February is my big masculine birthday month with both hubby and my dad celebrating around Valentine's day.  I was so excited to see the  Birthday Borders set in this release, along with a more masculine themed sentiment builder set in the Sentimental Mash-up set.  The Birthday Borders comes with 4 border stamps. They're repeating patterns, so they're easy to match up to extend further if you want. Or in my case, it made the decision to do a little stamp surgery easier!


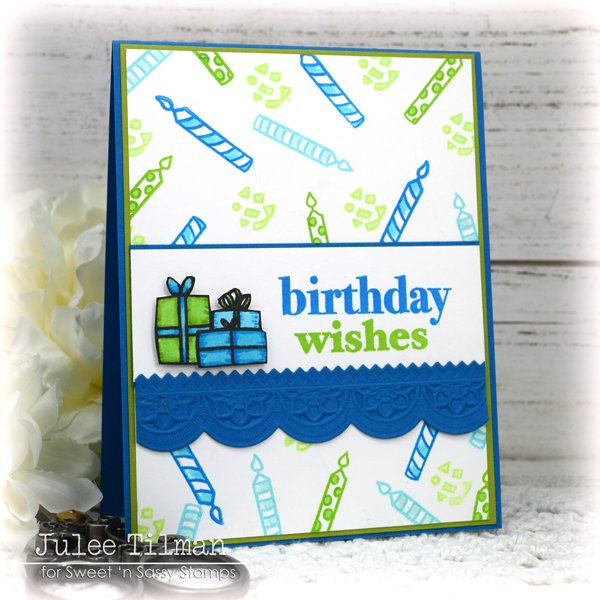
I cut the last three candles from the candle border individually as well as the final cluster of confetti from that border strip and then proceeded to stamp them randomly in blues and greens as the background for my card.  Next I stamped the presents border and colored with Copics.  I fussy cut just the first section of presents to pop up on my card.  I stamped the birthday and wishes stamps from Sentimental Mash-up on a white panel, then matted with blue and added a die cut border to finish things off. Easy peasy!

Korin made some absolutely adorable cards with our new alpha set. I love how the SNSS alphas are the perfect size for cardmaking as well as journaling!


In this gorgeous notecard, she pairs the new Springtime set with the Loop da Loop Alpha and Lots of Love.  A few ink splatters and a doodled frame and this card is ready to hit the mailbox!


If you watched Korin's fun live stream during our Winter Stamp-a-thon you might have seen how she made this totally rad watercolor card.  The card features Loop da Loop Alpha, Love Wordfetti, Vintage Love, Texture Tiles 5, and Texture Tiles 1. Isn't it fabulous?


Aren't these sweet little Valentiness from Guest Designer Jill Holdorf featuring the Loop da Loop Alpha just so cool? Love those layered hearts!


Okay, the next stop on the hop is my blog, Poetic Artistry

Here's a little look-see at the sets included in the FEBRUARY release...

First up is the January stamp of the month, Sentimental Mash-upOur February stamp of the month is another must-have in your stamping collection. It includes a lovely collection of builder sentiments in mixed-fonts that are perfect for both masculine and feminine creations. This set is available for purchase for $15.95, OR you can get it as a FREE gift with a $75 purchase (after any discounts and before shipping and tax) during the month of February! Just add it to your cart and the discount will automatically apply once you've qualified.


Jenn Nilsson brings spring to life with her adorable Springtime set. Chicks, rain boots, an umbrella, and flowers, now all we need is winter to go away!


Dragonfly Dreams indeed! This set by Korin is just so breathtaking. The definition on the wings and bodies is amazing!

Our Creative Worship set this month is the whimsical Loop da Loop Alpha from Rebecca Rios. These sketchy scripted letters are so much fun!


Our final set for February is the fun Birthday Borders set from Korin. Balloons, cupcakes, confetti, and presents... who's ready to celebrate?


That's our February Release in a nutshell! So many fabulous sets to choose from! What's your favorite? 


May you be blessed today and always!

Friday, February 7, 2020

Springtime ATC Coins

Hi Sweet 'n Sassy Friends! It's Julee Tilman popping in to share a little of what I've been creating with the new release.

During our Winter Stamp-a-thon, Lyn's challenge was to make ATC Coins, which are 2.5" circle pieces of art you can trade with other artists. I didn't have time to create any during the challenge window, but couldn't wait to try them out once I found a little me time!


At the end of the session I had six ATC Coins. I started with a 8.5 x 11 piece of cardstock and coated with one layer of gesso to prime it for paint.  Then I squirted on some distress paint in chipped sapphire, evergreen bough, salty ocean, and tumbled glass, blending in with my fingers.  I then added some brick stenciling randomly across the page with white Dylusions paint.  Once this was dry, I randomly added bits of stamping using the Texture Tiles 1 set and archival ink.  When everything was dry, I cut six circles from the page with a 2.5" circle die, placing the die where I thought it would give the most interest.  These top two coins are made with the Birthday Borders set and have already been sent out for trade!  The sweeter sentiment is from the So Sweet Cocoa set and much love is from Sentimental Mash-up.


The rest of my coins use the adorable new Springtime set. I stamped the butterflies and boots a few times on cardstock, then colored with Copics and fussy cut.  For the spring has sprung coin, I then colored in the white space on the image cut out so it appeared more natural. I softened the  coin up a bit with some white stamping with the hearts from Texture Tiles 5, then stamped my sentiment in archival ink.  The dream big sentiment is from Dragonfly Dreams and I stamped the butterfly in archival ink directly on the coin, then cut out the butterfly I had colored minus the antennae and popped up the wings.


The thinking of you sentiment is from Birds & Blooms and I used the same treatment with the butterflies, adding a bit of thin washi tape to break up my design.  My final coin uses the lovely boot image and I paired it with a sentiment from the Sentimental Wordfetti set.

I traded a couple of these, but also thought they would work great on card fronts, so created a couple cards using them.


For this one, I matted the coin with a black scalloped circle, then divided my pattern paper in half, adding a die cut border to break things up.  I stamped the flowers from the boot image at the bottom and lightly colored in, then added a few more butterflies to finish off the card.


My second card uses the same scalloped circle to mat the coin, but a few more layers of patterned paper.  I stamped one with the dots from Texture Tiles 5 and then finished off with a butterfly accent.

Thanks so much for stopping by today! I hope you have a fabulously creative day!

***This post contains affiliated links at no cost to you ***

Saturday, February 1, 2020

Boots & Sketch Challenge

Hello Sweet n' Sassy friends! I am sharing a card today made with the cute new set Springtime.
I used the sketch for the February SNSS VIP Group Challenge on Facebook designed by our very own Julee Tilman. If your not already a member we would love to have you join us!


 The sketch I used to create my card.


I started by looking through my pattern paper until I found something that would work with the boots. I was super excited to find the bee paper!  I stamped the images on Canson XL watercolor paper with VersaFine Clair Nocturne ink. I used my Arteza Real Brush Pens to color them (sunset yellow, bumblebee yellow, wisteria purple, rouge pink, green tea, ice blue, elephant gray and red). Afterwards, I die cut the boots with a wonky stitch circle die and fussy cut out the butterfly and ladybug. I also die cut out another circle for matting  and found a coordinating piece of scrap cardstock for the banner.

I stamped the polka dots from Texture Tiles 5 onto my banner and attached the butterfly. I stamped the sentiment from Love Wordfetti onto a scrap piece of white cardstock. I chose those words because I like having cards in my stash that can be used for anything.  I assembled the pieces as seen, glued the ladybug on and added some white string to finish off my card.

I know, I added something to the sketch by adding a strip with the words to it. It was the only way I could figure out how to add a sentiment. I do have an idea for another card that will follow it exactly.


For more cards made with the sketch check out the Facebook group throughout the month to be inspired. Why not create your own and enter it in the VIP group for a chance to win a gift code to Sweet n' Sassy Stamps

Until next time, I hope you have an awesome day!

Karen


Thursday, January 23, 2020

Lots of Love

{jane bosi}  This brand new set, Lots of Love, is so adorable!!  It combines perfectly with Texture Tiles 5 for some super sweet cards!


As I continue in my recovery from surgery earlier this month, I'm praying for you and yours!
Peace, Jane

Wednesday, January 15, 2020

January Release Blog Hop

Welcome to our January Release Blog Hop!

We're feeling the love for the January release and are so excited to share the projects we've been working on with you! Read on for a bit of inspiration and a little walk through of our new release, then hop along to the blogs linked below for all sorts of papercrafting inspiration.

Plus, there's a GIVEAWAY! Leave a little shout out in the comment section on each stop along the way for a chance to win a $10 gift voucher to the Sweet 'n Sassy Stamps shop. Winner will be announced here on the SNSS blog, Wednesday, January 22.


Here's the official hop list. If a link misbehaves along the way,
hop on back here to pick  up where you left off.


For my first card I pulled out the Love Wordfetti set, with the idea of doing a sunny card with the you are my sunshine sentiment.  I grabbed some patterned paper, then grunged it up a bit with the Typewriter Text Background and Delightfully Delicate Background stamps.  I then stamped the several times across the bottom of the panel. Next I started sponging yellow inks in, then unfortunately grabbed an inkpad that had the wrong lid on it! It was a rich brown instead of a yellow, so my card took on a darker feel than I wanted, but I went with it anyhow.

The butterfly is from Made New and I embossed it in copper on vellum, then colored the wings with Copic markers.  I added the hello beautiful sentiment popped up and accented with some sequins and thread to finish off the card.

My next card pairs the Love Wordfetti set with the January Stamp of the Month: Texture Tiles 5. I just love these background stamps!  I started by inking up my stamp with three inks at a time for the rainbow background. First I stamped with candied apple, carved pumpkin, and mustard seed, then mowed lawn, salty ocean, and wilted violet.


Next I found an old rainbow die in my stash and cut it from white cardstock.  I then sponged the red, orange, yellow, and green inks onto it, then taped together, coated with Versamark ink and embossed with sparkle embossing powder.  The you are my happy place sentiment from Love Wordfetti is embossed in white on a thin black strip of cardstock and adhered in the corner.

Okay, the next stop on the hop is my blog, Poetic Artistry

Here's a little look-see at the sets included in the JANUARY release...

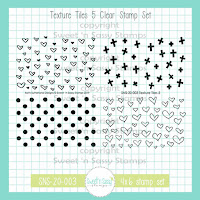
First up is the January stamp of the month, Texture Tiles 5Our January stamp of the month is a definite must-have in your stamping collection. It includes some super versatile heart, polk dot, and cross background tiles. This set is available for purchase for $15.95, OR you can get it as a FREE gift with a $75 purchase (after any discounts and before shipping and tax) during the month of January!


In our Lots of Love set, illustrator Jenn Nilsson brings us an adorable set of valentine critters, sure to steal your heart!


Korin brought us the beautiful Grace So Amazing set this month. These grace filled sentiments are simply gorgeous paired with images, but steal the show on their own!


Our Creative Worship set this month is the elegant With Love Alpha set. These beautiful scripted letters make for the most beautiful words!


And if you've loved our previous wordfetti sets, you'll be happy to see this fabulous new Love Wordfetti set. So many fun phrases for Valentine's Day, as well as throughout the year.


That's our January Release in a nutshell! So many fabulous sets to choose from! What's your favorite? 


May you be blessed today and always!