Showing posts with label Long Stem Silhouettes. Show all posts

Tuesday, March 2, 2021

Spring Has Sprung!

 Hello Friends!

I know the calendar says it is winter, but my mind tells me that it is spring, or at least heading towards spring!  Warmer temps, sunshine and longer days have me wanting to use spring images on cards in all the pretty pastel and bright colors.  

The new Hoppy Spring is the perfect set for this.  Goodness, I love everything about this set, from the adorable bunnies, to the eggs and the adorable bitty chicks.  


Doesn't this card just scream spring?!  I started with coloring the eggs- I had another idea, but it did not work out like it was in my head so on to plan B.  I colored the adorable bunny with Copics and fussy cut him out.  I used 3 of the pastel colored eggs around him.  For the background, I stamped the clover- like image from the Long Stem Silhouettes Stamp Set- I stamped with two different colors of green and did first, second and third generation stamping to get the illusion of depth.  I grounded everything with a sentiment strip that I colored in ombre fashion with Copics, then stamped the sentiment using two different sentiments from the Hoppy Spring Stamp Set.  

The sentiment strip and bunny are popped up on foam tape.  A few sequins finish the card.  


For this card, I wanted to use the new Fern Background Stamp for a technique that I watched Jennifer McGuire do.  I started out by selecting bunches of sentiments (I have listed all of the sets at the end of this post).  I placed them on my cardstock in my MISTI and then closed the door, keeping all of the sentiments perfectly placed.  I actually made 3 backgrounds doing this- so easy- once they are in the MISTI, you can stamp them as many times as you want.  But I am getting ahead of myself.  I stamped the sentiments with white pigment ink.  Once dry, I stamped the Fern Background Stamp in ink that was a close color to the cardstock for a tone on tone look.  

Once my background panel was done, I die cut a circle in the panel.  I then die cut a white frame for the opening. Behind this circular opening, I adhered a pretty,  springy, pastel, floral paper.  My sentiment was made with the new Blessings Die.  I love this die and for the price, you can't beat it.  The word, 'sending' is from the Hoppy Spring Stamp Set.  I heat embossed it in white on black cs.  I love how the black ties in with the black in the patterned paper.  3 little yellow sequins finish off the card.  

If you have not checked out the Sweet n Sassy Stamps March Release, head over to the store; there are so many great new products.  The Fern Background Stamp is also the stamp of the month and is free with a $60 purchase.  The Hoppy Spring Stamp Set also comes with dies in a bundle, saving you some $$. And if you need the whole release (trust me, it is worth it) you can save over $30 when you purchase the New Release Bundle.   

And here are the stamps that I used various sentiments from for the Blessings card~


Thanks so much for stopping by!  

Lee Ann  

Thursday, February 21, 2019

butterflies x4


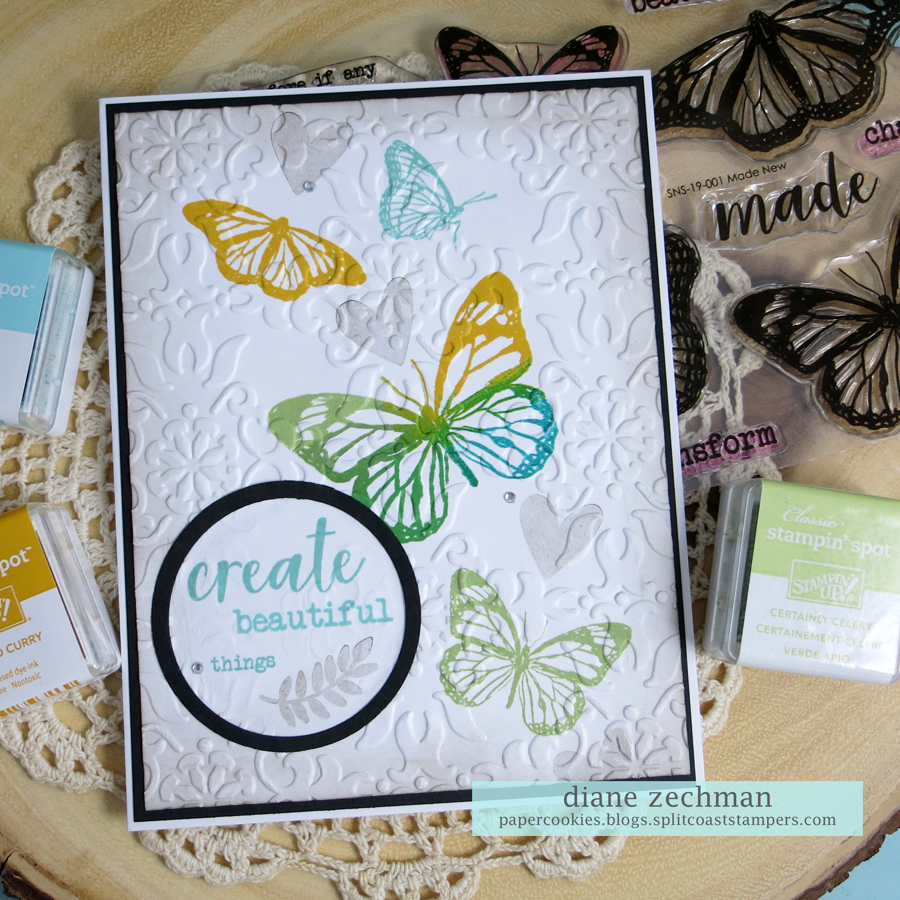
Good morning! I have FOUR cards to share using the Sweet ‘n Sassy February Stamp of the Month: Made New. These butterflies are so pretty and very versatile. Last week I shared two other cards with them...they're so fun to use! For my cards today I also used these SNSS stamp sets: Forever & Always, Typewriter Blocks Alpha, Nature Silhouettes, and Long Stem Silhouettes.
 
I stamped them in lots of colors for my background on the first card, then the black one was popped up with dimensionals.
 
 
I colored a rainbow of butterflies on my second card...

 
For the third card I die cut the top corner and sponged some inks on the layer behind it. Flowers were stamped with the same colors and the butterfly was colored to match.

 
This last card started out a disaster as I had one mistake after another. I was too stubborn to toss it after all the effort put into it so I kept going. LOL! In the end, I liked it after all. :)

 
Have a great day!
Diane


Friday, June 8, 2018

Brotherly Love


Hi Sweet Friends!  Julie, here and today I am sharing a card using the brand new stamp set, Brotherly Love along with previously released sets, Through the Trees (NinaB Designs) and Long Stem Silhouettes.


Look at all of the fun images in the Brotherly Love set!  The possibilities of combinations are endless- perfect for all sorts of occasions (including Father’s Day, Birthdays, Anniversaries) as well as Bible Art Journaling!


To create this card, I stamped the images Brotherly Love onto designer paper along with white and chocolate cardstock (I used a retired blue/woodgrain type of paper).  I fussy-cut all of the images and colored the face and sunglasses with water-based markers (my husband thought that this looked like him- if he had a beard :-)).

After paper piecing the man’s image, I heat embossed the tree image from Through the Trees onto white cardstock and used a square stitched die before mounting it onto espresso cardstock.

I layered the additional designer paper and cardstock for the card front (adding the ribbon and pewter slide to the corner) before adding the heat embossed sentiment from Long Stem Silhouettes and the paper pieced guy from Brotherly Love  with dimensional foam.

I finished off the card with a clear glitter pen to add shimmer to his sunglasses.

This was such a fun card to create and I cannot wait to design more “guys” in the future- lol!!


Don’t forget, we have a brand new Stamp of the Month, Texture Tiles 2 free with a net $75 (US$ order after all discounts and before shipping) plus any net $75 US receives free shipping- woohoo! 

Thanks again for taking the time to stop by! I hope all of you have a blessed week!

Monday, March 12, 2018

A couple cards from the March release!

Hello! I am sharing a few cards today using stamps from the March release
For the first card, I used Birds & Blooms and Texture Tiles 1.
 
 
I wanted to use two of the Texture stamps together, with two colors, but I didn't like the combo I tried first so I ripped the bottom off and flipped it over. Sometimes those accidents make us get creative and the results are better than what we originally visualized! lol.
 
On my second card, I used Texture Tiles 1 and Long Stem Silhouettes. I kept the card to two colors and let most of the background show. A paper flower in my stash was the perfect color to match!
 
 
For my last card, I used the awesome new SNSS alphabet, Skinny Minnie Alpha, with an oldie but goodie... So Sweet Cocoa!

 
I stamped Cocoa Mouse and the alpha letters by lining them up in the MISTI. Then I simply used a ruler to quickly draw some lines to "box him in".
 
Have a great day!
Diane


Monday, September 4, 2017

Thoughts of You

Hello Sweet Friends!  Julie here and today I am sharing a quick Clean and Simple (CAS) card created with the Nature Silhouettes, Nature Silhouettes 2 and Long Stem Silhouettes Clear Stamp Sets (all designed by Korin Sutherland).

I love the different scenes that you can create with all three of these stamp sets as well as the font on the sentiments in Long Stem Silhouettes


To create this card, use various distress oxide inks for the background.  Stamp the pads onto a silicone sheet, spritz with water and press a piece of white cardstock.  Lift up and dry with a heat tool, repeat the process until the background is finished (I used three different colors for this panel- twisted citron, worn lipstick and peacock feathers).

After layering the images from Nature Silhouettes and Nature Silhouettes 2 images onto the background with versafine onyx black ink, trim and layer onto black cardstock, add to a white card panel and stamp the sentiment from Long Stem Silhouettes using versafine onyx black ink.

Heat emboss the bird image with clear embossing powder, fussy-cut and adhere with dimensional foam to finish off the card. 

Thanks for taking the time to visit us today and I hope I have inspired you to create something this week- hugs and God Bless, sweet friends!

Friday, August 25, 2017

you're too kind

Good morning!
 
Today I am sharing this card using the Long Stem Silhouettes and Kindness Matters stamp sets.
 

I added a 4 x 5 1/4" piece of white craft foam underneath the white panel (a Jennifer McGuire trick) to pop it up from the base.  I love how it gives a nice thickness and quality feel to the card.  The flowers were stamped 1st, 2nd, and 3rd generation to give it some depth, and I used my trusty Bow-Easy tool to make a nice bow.  How pretty is that hand-written "kind"?
 
Have a great day!
Diane
 

Saturday, May 13, 2017

Pretty Potted Floral Birthday

Hello Sweet Friends!  Julie here to share a Mixed Media birthday card using the Pretty Potted Florals  Clear Stamp Set (NinaB Designs) and Long Stem Silhouettes Clear Stamp Set (designed by Korin Sutherland)  - both available from Sweet ‘n Sassy Stamps.


To create this card- stamp the Pretty Potted Florals image with archival black ink and watercolor with water based markers.  Die cut and mount onto black cardstock.

Use a sponge dauber with dijon ink and a flourish stencil for the background, mask the horizontal strip, apply white picket fence distress stain to tone down the background around the masking, score  a few lines near the horizontal strip before trimming and mounting onto black cardstock.

Mount the background panel and horizontal strip onto black cardstock, mount onto the white card base and add the floral image panel with dimensional foam.

Heat emboss the sentiment from Long Stem Silhouettes with white embossing powder onto black cardstock, create the banner by hand and add to the card front with dimensional foam.

To finish off the card, use a clear glitter pen to add shimmer to the floral petals as well as the background panel and add the pearl to the flower center. 


Thanks for stopping by- hugs and I hope all of you have a blessed week, sweet friends!

Wednesday, August 3, 2016

Clean and Simple

Hello friends, Stephanie here with a clean and simple card for you.  Shhh, I am giving you a little sneak peak at a new stamp set called Scribble Flowers that will be available on Friday!  I am just using 1 of 23 stamps that are in the set, you really don't want to miss this one!  I have stamped my little flower on watercolor paper and painted it using watercolor markers and a brush.  The sentiment is from Long Stem Silhouettes which I stamped and embossed.  This yummy background  paper is from Authentique.  Make sure you stop back on Friday to check this new set out and Oh, don't forget right now you can pre-order the Christmas stamps at a discounted price until the 5th, there are 9 new sets to choose from but if you love them all and just have to have them all, you can get them all in a bundle for a great discounted price! For more information about the Christmas stamps check out this post-Christmas Preview.

Thursday, May 26, 2016

Thoughts of You

{judy} Stamping is such therapy for all sorts of ills. It doesn't "fix" things, but it certainly allows whatever I am feeling to take its course and allows a calmness to return. Yesterday a dear friend passed away and making this sympathy card for his wife helped me with all the emotions I was feeling. Does creating something do that for you? It's a blessing and a help, I think!

This was a simple card to make. I used the Reverse Masking Technique by cutting a circle frame and then sponging on the inside with Distress Ink. I kept the frame intact and stamped my group of flowers from Long Stemmed Silhouettes, then removed the frame and stamped the sentiment so it would be part way out of the sponged circle. I added some pearl bling and a little butterfly brad for embellishments.

I hope that whatever you create today brings you joy -- and peace!


Monday, April 11, 2016

Birthday Wishes

Hello! It's Monika here today, bringing you a birthday card... not just any birthday card, but the one I made for Korin, who celebrated her birthday last week. You might have seen it on the Sweet 'n Sassy Stamps Facebook page, but I didn't want you to miss this pretty number... so here it is again:

 
I used Kindness clear stamp set with the coordinating Kindness Flower/Cloves die set. The flowers were stamped on vellum with VersaMark ink, heat embossed with white embossing powder, then die-cut with the coordinating dies.
 
 
For the background, first I water colored the right side with purple ink, then I stamped one of the flowers from Long Stem Silhouettes clear stamp set with the same color. The greeting came from Birthday Innies clear stamp set. I also used a retired leaf die set for the leaves. Pearls and green thread finished off the card perfectly.
 
Thank you for stopping by,
Monika


Friday, April 8, 2016

Be Encouraged

Hello sweet friends!  What a fun week we had celebrating Korin's Birthday.  We hope you enjoyed the special birthday discounts and entering the contest for the free giveaway!  Because of the overwhelming response, it may take a little while to compile the list for the random selection, but be sure to stay tuned…we will be announcing the winner of that fabulous gift bundle soon!  

I do have two cards to share with you today!

The background was made by covering an acrylic block with Peacock Feathers, Abandoned Coral, and Candied Apple distress inks and spritzing them with water before pressing them onto a piece of Bristol Board card stock.  The Long Stem Silhouettes image was stamped on the background after it dried.  A sentiment from the Be Encouraged 2 stamp set was white embossed on a piece of vellum and stitched to the card.  Black thread was used to frame the sentiment.  Prills were added to the center of the flowers.

This second card was for Korin's birthday…we know how much she loves her fur babies!

The paw prints from Kitty Love were white embossed on Neenah card stock and sponged with Antique Linen, Brushed Corduroy, and Ground Espresso distress ink.  The sentiments are from Kitty Love and LOL Cats and were white embossed then stamped again with Jet Black Archival ink.  The kitty in the middle is from the Valentine Critters stamp set and was cut with the matching Valentine Critters Die.


Thanks so much for stopping by…have a wonderful weekend!
Until next time…happy stamping!

Hugs,
Cathy

Monday, March 28, 2016

Thoughts of You

Hello Sweet Friends!  Julie here to share a card created with the new Creative Worship stamp set, His Wings (designed by Korin Sutherland) along with Long Stem Silhouettes from Sweet 'n Sassy Stamps.


I stamped the three feather images using Versamark™ Ink onto Vellum, heat embossed the images with white embossing powder and once the embossing powder cooled, I colored the feathers using water based markers- soft yellow and soft blue and fussy cut each of the feathers.

I inked the sentiment using soft gray ink onto a piece of white cardstock, trimmed and mounted the panel onto the white card base using dimensional foam.

His Wings
Long Stem Silhouettes
I mounted the vellum feathers onto the card front using small narrow strips of dimensional foam behind the shafts of the feathers and added the rhinestones to finish off the card.


Hugs and have a blessed week, sweet friends!