Showing posts with label Singing Praises. Show all posts

Monday, May 10, 2021

Thinking of You


 Happy Monday! Esther here today sharing a beautiful bird themed card. The set I used is called Singing Praises and it's illustrated by Nina Brackett.  


 All Nina Brackett sets are 25% off this week!

 Above are a few of my favorite cards (and tags) using her line of stamps

    ~~~This post contains affiliate links at no extra cost to you~~~

TIP: The wreath die I used on this card was actually too small to fit around my text circle so I cut a second one, snipped a piece out and glued the new section into the first one to  make it larger. I've also shrunk this wreath on past cards by snipping a section out  and gluing the ends back together. Just a fun way to stretch your supplies and make them work for your card design.

Supplies and Tools:

Tuesday, January 5, 2021

Roses are Red and So are Penguins!

 Hello Friends!  

I hope everyone enjoyed Christmas, New Year's and time off with your families.  

As you have probably already noticed in stores, we are headed full speed towards Valentine's Day.  I got this wacky idea (trying to think outside the box, lol) that I needed a red penguin on a Valentine's Day card.  Here is the end result!


So, I kind of love him!  I did add a heart to his tummy- I used a heart stamp from the Sweet Little Lamb Stamp Set.  This sweet guy is from the Winter Hugs Stamp Set, as is the sentiment.  He was colored with Copics and then fussy cut out.  I was a bit stumped from there.  Several different backgrounds, layouts, and color schemes later, I was still without anything but this cute bird.  I rifled through some patterned paper and happened across this pink and red graphic paper that is perfectly 'Valentiney'.  Best part is it already had the heart shape die cut from it from some previous project.  It was the perfect way to finish off this cutie.  I added some sequins and stamped Happy Valentines Day on the side- the stamp I used is from the Lots of Love Stamp Set.  I tried to get a picture here, but with bad lighting due to a very dreary day, I could not get a good photo of the inside of the card.  Here are both stamp sets that I used~


This next card is also monochromatic red and it started out as a Valentine's card as well, but as you can see, it did not end up as such.  


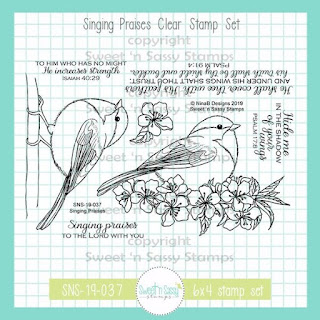
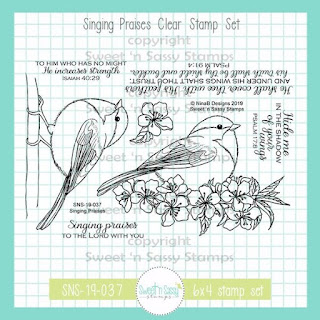
Isn't this just the best bird image?!?!  If you like realism (like me!) then this is THE bird image for you.  This guy is from the Singing Praises Stamp Set.  I stamped him with Versafine Onyx Black Ink using my MISTI and then water colored him with my well loved Ken Oliver Colorburst Watercolors.  The bird was fussy cut out.  

For the background, I decided to use the faux water coloring technique.  The floral image is my favorite in the Flower Garden Stamp Set.  Once the background was dry, I die cut a circle out of it and them popped up the negative panel on the card base. I stamped the sentiment and added a few sequins and called it done.  If you want to see my inspiration for this card, head over to my blog!  

Please excuse the photos, all.  I am still getting used to a new computer, new editing program and trying to take photos with my phone.  I will get there eventually!  
Don't forget, the January Release Bundle is available through January 9th- you can save over 10%!  
And with your purchase of $75 or more you get free shipping!  AND, with a purchase of $60 or more, you get the January Stamp of the Month- Happy Mail- for free!  


That's a lot of free! 

Thanks so much for stopping by and have a wonderful week!

Lee Ann  

Tuesday, February 18, 2020

Mixed Media, 3 Different Ways

Hello Friends! 

Today seemed like a good day to try something a bit different.  There were lots of bits and pieces on my desk- colored images, monoprints, and various other backgrounds.  I thought it would be fun to put some of these items to use and create mixed media cards.
 I think a lot of us have a certain idea of what mixed media is in our heads- lots of texture, layers, and lots and lots of products- sprays, pastes, metal items, tissue paper, pencils, crayons, gel mediums to name a few.  However, in the card making world, many consider a mixed media card to be two or more mediums on a card. 
So, here we go.  I have 3 different cards, varying in complexity and using different mediums. 
The first is super CAS!


The two mediums are watercolor and acrylic paint. 
Here is the how to~
The background panels are from a single monoprint using acrylic paint and a stencil.  If you are not familiar with monoprinting, it involves using a gel plate like the ones here.  Acrylic paint was dropped on and rolled out with a Printing Brayer.  The leaf panel is two stamps- the leaf is from the Autumn Splendor Stamp Set and the doodled square is from the Just Be Stamp Set. I stamped and masked the leaf onto water color paper, then stamped the square.  The image was then watercolored with Ken Oliver Color Bursts and fussy cut out. I doodled lines around my background panels using a Sakura Pigma Micron Pen.  Some acrylic paint splatters finish off the leaf image. 
The next card has a bit more going on~


The flower, which is from the Mason Jar Bouquet Stamp Set, was stamped with Versafine Onyx Black Ink on water color paper, painted with Ken Oliver Color Bursts and fussy cut out.  The background is stamped multiple times with the floral branch from the Birds and Blooms Stamp Set and colored with Prismacolor pencils.  I added dies cuts from a new die I was trying out and heat embossed a sentiment from the Singing Praises Stamp Set.   
This third card is what you may consider to be a more traditional mixed media project.  It was inspired by our own Julee Tilman! 


I had another flower laying around, wanting to be used on a card.  It was stamped on watercolor paper with Versafine Onyx Black Ink , water colored with Ken Oliver Color Bursts and then fussy cut out.  My mixed media panel was one I made when trying to replicate something that Julee had made.  Well, mine fell really short!  I was going to toss it, but, when placed next to the color orange, it suddenly came to life.  I also had a piece of patterned paper that had been spritzed with a couple of different shimmery sprays; the colors worked perfectly with the orange rose and the teal panel.  The sentiment is from the new, Sentimental Mash Up Stamp Set.  This card uses water colors, sprays, embossing paste and distress oxides. 

There you have it, 3 mixed media cards, all with very different looks.  Which do you like best? 
I hope I have inspired you to get messy today!

Thanks for stopping by and have a blessed week! 
Lee Ann 

Saturday, January 25, 2020

Hide me in the shadow of Your wings


Hello everyone! Today I want to show you two cards I made with the Singing Praises stamp set. The birds are a joy to color.


This time I used watercolors to color my images. I like the soft look and feel it gives to the cards, even though I used pretty bright colors.


I stamped the images on watercolor paper and used watercolor pens and a water brush to add color to the images.


I used a rectangular die to cut out the images and added matching background papers to the cards. These images are so beautiful that they don't need a lot to make great cards.

https://www.sweetnsassystamps.com/singing-praises-clear-stamp-set/

I hope you're inspired to create!
- Lucinde


Tuesday, January 7, 2020

Bird and Blooms

Hello and Happy New Year Friends! 

I enjoyed a lot of crafting over Christmas break and pulled out my watercolors for this card. 


I combined two fantastic sets- Birds and Blooms and Singing Praises Stamp Set
I stamped the branches two times onto watercolor paper and colored with my Ken Oliver Colorbursts.  This bird.  I just love this chubby bird!  It was also stamped on watercolor paper and then colored with colorbursts.  I fussy cut the bird out and popped it up on dimensionals over the branches. 
The sentiment is from the Mason Jar Bouquet Stamp Set.  I used a Sakura white Gelly Roll Pen for the white highlight on the eye.   A few sequins was all it needed to finish it off. 
Thanks so much for stopping by.  Have a blessed week!

Lee Ann  


Monday, September 16, 2019

Singing Praises


Happy Monday, Sweet 'n Sassy Stampers!
It's Ceal here to share with you today a couple cards using the Singing Praises set with two different looks.

The first card I stamped the image with embossing ink and watercolored it with Zig watercolor markers. I stamped the Wood slice from the Wood Backgrounds set as the background. The greeting is from the Thoughtful Words set. 


The second card uses the same set Singing Praises but this time I created a fall card with it. I stamped the bird and masked off the branch and then stamped the leaves from the Give Thanks set. I colored them all with Copic markers. The greeting is from the Incredibly Blessed set.


Monday, August 26, 2019

#1 Teacher

Hello friends, Stephanie here.  Today I have a cute little note card perfect for a child to give a teacher on the first day of school.  I love this new set Back To School by Jennifer Nilsson.  I colored with Copic markers and used a bunch of scraps for my background.
My second card features Singing Praises which is the Stamp of the Month by Nina Brackett.  Oh my goodness, just a precious stamp set so near and dear to my heart because I am a bird lover.  I colored with Copic Markers and again used up scraps.  I fussy cut the little flowers and added some pearls to the center.  You can get this set free for a few more days when you place a $75 order.  Hurry, you don't want to miss out!

Saturday, August 24, 2019

Hide me in the shadow of your wings


Hello everyone! Today I want to share a card I made with 'Singing Praises'.


I stamped the image on watercolor paper and colored it with watercolor markers and a water brush. After that I decided I wanted to add a message on the card too so I stamped the Psalm on the watercolor panel. I kept the card simple and added the watercolor panel to a dark blue card and that's it.
https://www.sweetnsassystamps.com/august-stamp-of-the-month-singing-praises-clear-stamp-set/

I hope you're inspired to create!
- Lucinde a.k.a. Lucilight

Tuesday, August 20, 2019

Friendship Warms the Heart

Hello sweet friends!  Cathy here and I have a couple of cards to share with you today using products from the August release.  First up is a card created with the Tea For Two stamp set.  What a cute set...perfect for sending warm wishes!


A background was created with some papers from my stash and a little stamped texture using one of the stamps from the Texture Tiles 3 stamp set.  The steam from the Tea for Two stamp set was stamped over the texture and a heart shaped frame was cut using some Spellbinders Dies.  The teapot, cups and tea bag were colored with Copic Markers, cut with my Scan 'N Cut and popped onto the card.  The split sentiment was embossed above and below the heart frame to finish the card.

My second card features the Stamp of the Month which is available free with a $75 purchase until the end of the month.


Twilight and Sand Castle inks were swiped down a sheet of white card stock.  The wood grain stamp from Texture Tiles 2 was used with Black Jack ink to create texture.  A wood grain texture plate was then used to emboss the panel before it was cut into four sections.  The sections were mounted to a piece of pink card stock.  A Tim Holtz die was used to cut two spirals and the bird from the Singing Praises stamp set was Copic colored to resemble a bluebird, cut with the Scan 'N Cut and mounted to the card.  A sentiment from Sentimental Wordfetti was embossed on a banner die cut to finish the card.

The stamp sets used are available from the Sweet 'n Sassy Stamps Store.


Thanks so much for stopping by!

Hugs,
Cathy

Tuesday, August 6, 2019

The Cutest Bunny Ever

Hi friends! It's Julee popping in to share what I've been creating with the new August release. The stamps this month are so cute and fun. I just can't even. This bunny in a cup image from Tea for Two has to be the cutest bunny ever. I'm probably biased because I love anything coffee or tea related, but it's pretty cute, right?


So today's card uses the ADORABLE new Tea for Two set. I just can't even with the cuteness of this set. I had previously cut and colored all the images with Copic markers, and I put them to good use on this clean and {sort of} simple card. Lots of white space with a bit of blue I added by blending on some tumbled glass distress oxide and then stamping in the same color with the grid stamp from Texture Tiles 1. This texture set has to be one of my most reached for sets. It's just perfect for adding a subtle hint of something to make your images stand out.


The sentiment is die cut with a circle die and then I added one of the sweet little ladybug images to it. Had fun creating a few little clusters of images (aren't those lady bugs adorable?), then finished off with a black mat and a white card base.

Tea for Two Clear Stamp Set

Texture Tiles 1 Clear Stamp Set

My second card uses the gorgeous new August Stamp of the Month Singing Praises. It's available exclusively as a FREE gift with a $75 order during the month of August.

Here, I started by stamping the bird onto smooth bristol cardstock. I then colored him in with Copic markers. Now, I like birds in stamping, but am pretty leery of them in real life. We had an incident a few years ago where a crow decided to make it's nest in the tree right outside our front door and it and it's murder of lookout friends swooped in for the attack every time I went to the mailbox. Since then I have a healthy respect for these winged creatures and keep my distance! That said, I have no idea what kind of bird this is, but I picked some colors I thought would look nice and went to my happy coloring place!


After I was done coloring, I masked him off and blended distress oxides to make a sky, splattering a bit of white paint around for a bit of texture. The Psalm 17:8 verse is stamped on a circle die cut and then blended with the same distress oxides and matted on a white circle. I tucked the sentiment under the shadow of his wings to go with the verse. Then I stamped, colored, and fussy cut the flowers and added them to the branch. The base of my card is embossed with the 3D Lumber Texture Fade and blended with gathered twigs and early espresso inks.
Thanks so much for stopping by today! I hope your day is sweet!