Showing posts with label Texture Tiles 2. Show all posts

Monday, April 11, 2022

Song Birds


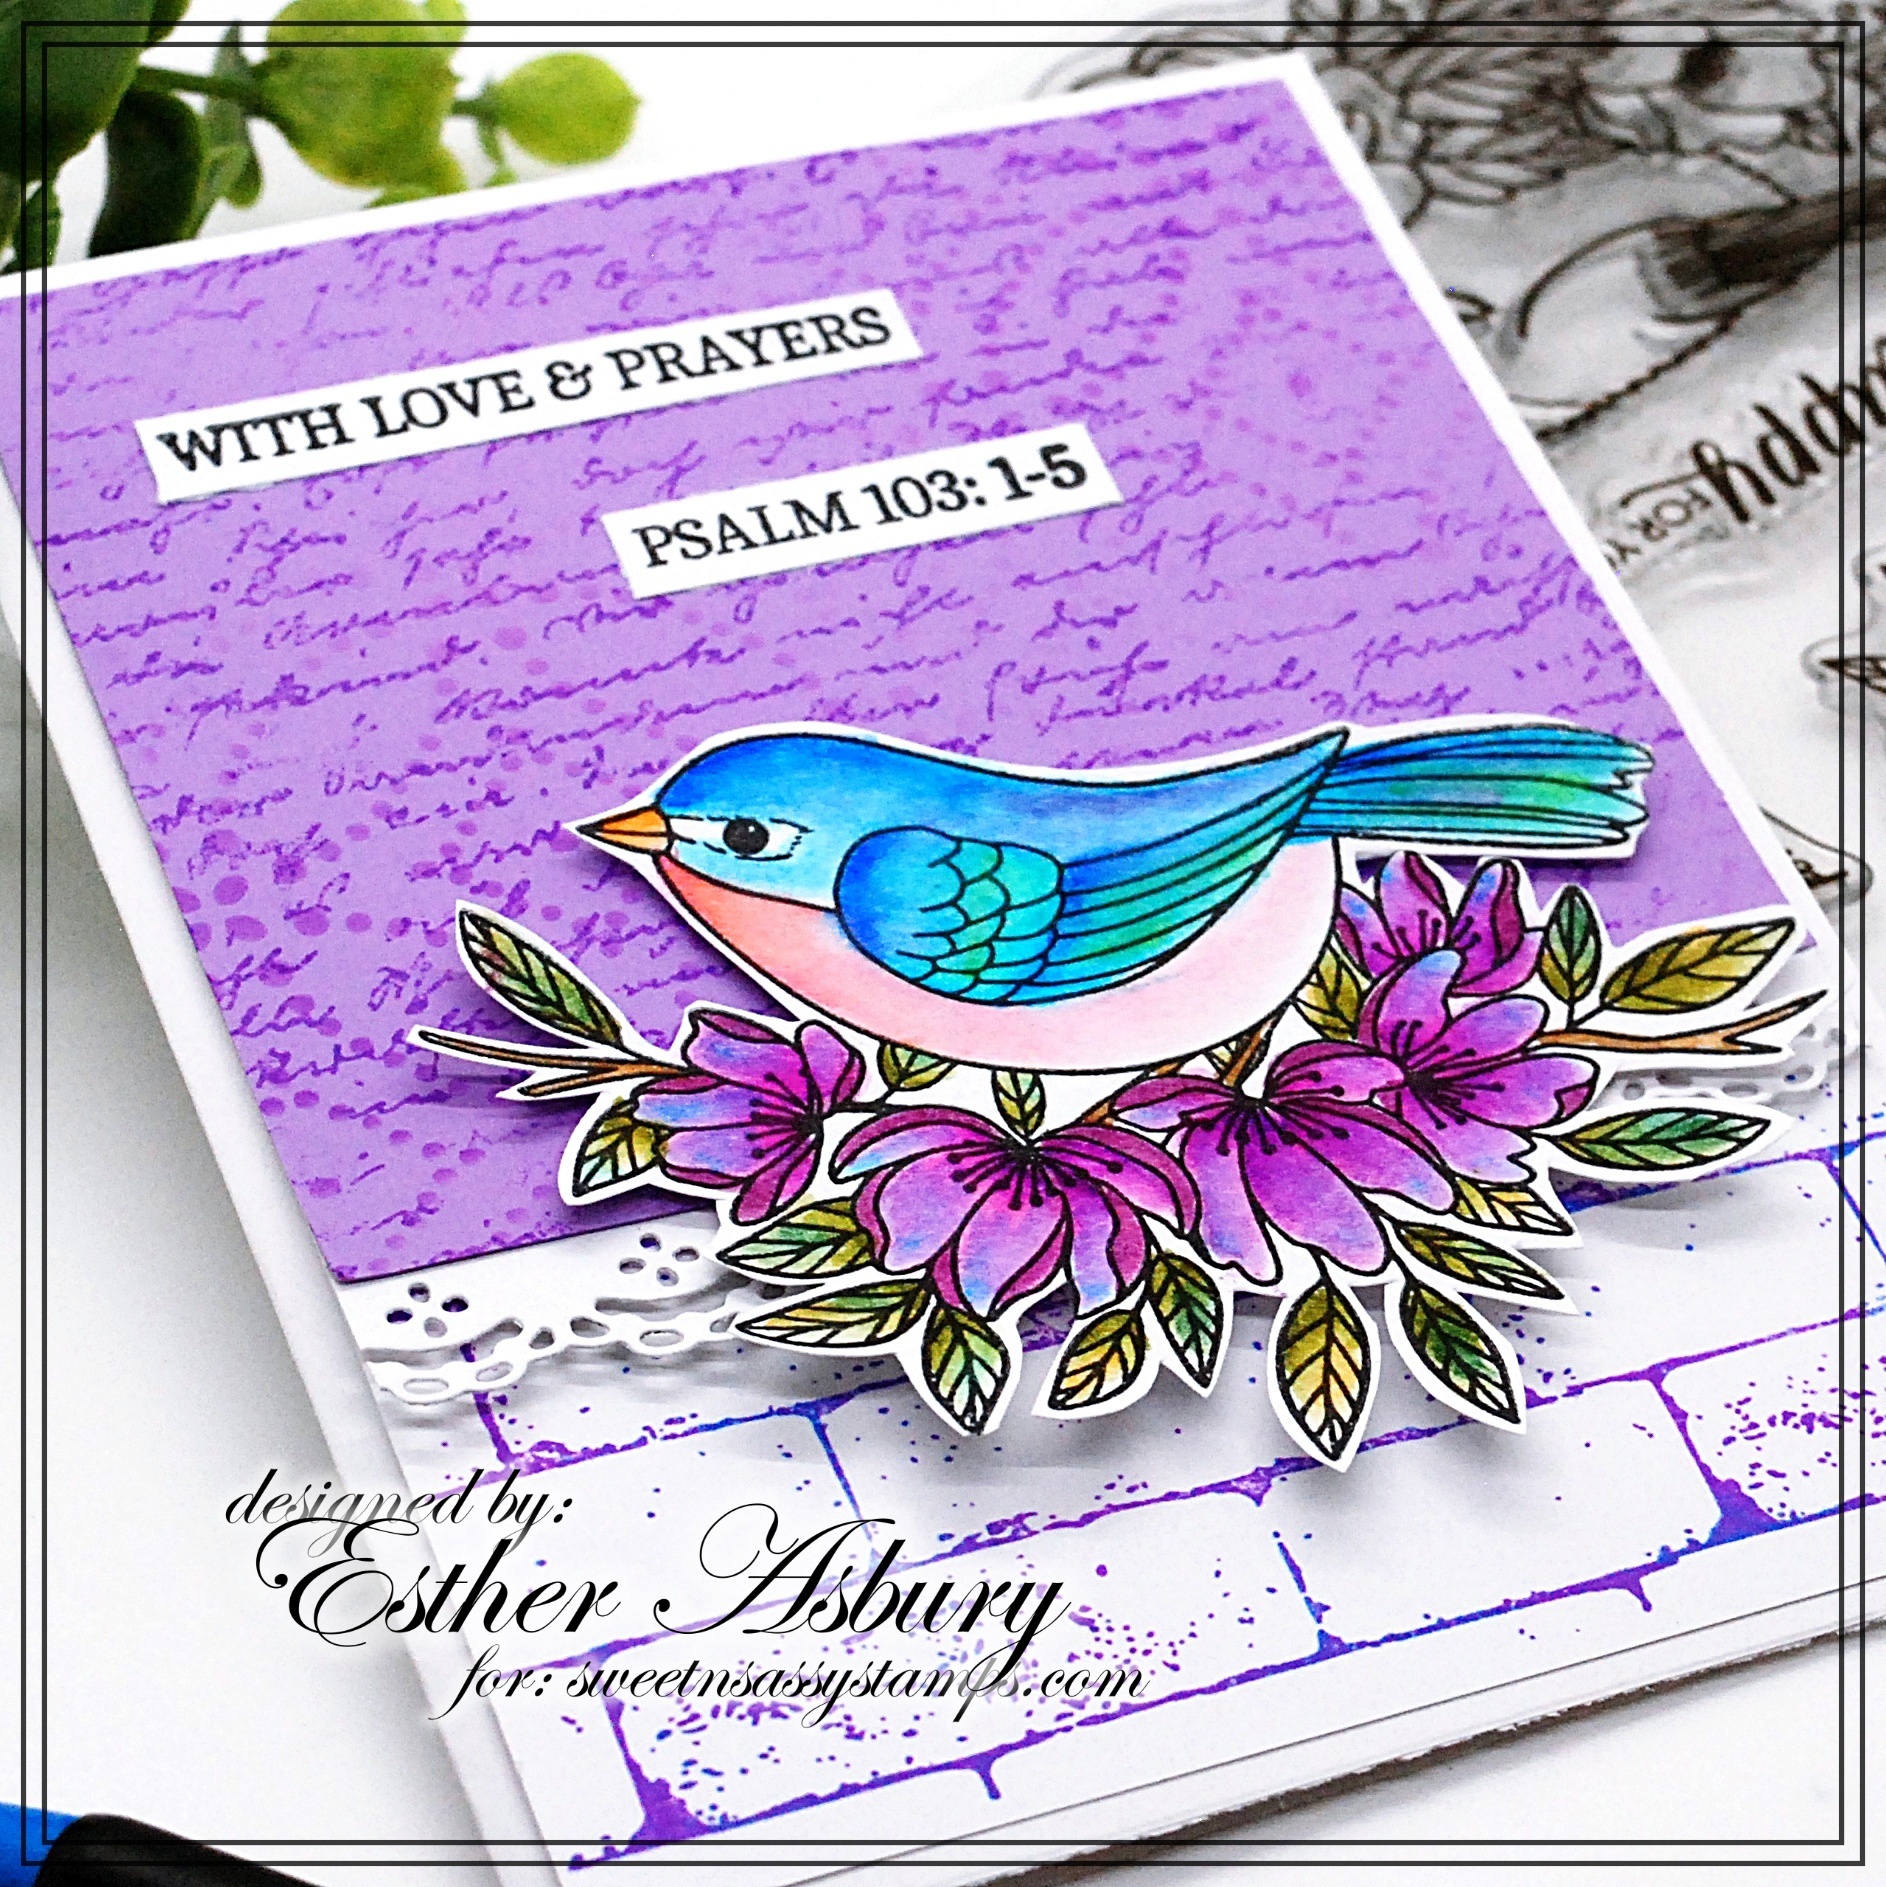
Esther here  today with a cheery bird card featuring two  BRAND NEW stamp sets from the April Release.

 ~~~This post contains affiliate links at no extra cost to you~~~

To create my card I stamped the Script Background stamp in wilted violet distress ink (Ranger) on purple card stock. I lightly stenciled the Delightfully Delicate Stencil in the same color in two corners and added two sentiments from Church Family. I attached a strip of lace die cut with the Doily Border Dies under the purple panel and glued it over a piece of white card stock stamped with bricks from Texture Tiles 2 .

The bird image is from the NEW Song Birds stamp set and was stamped in  Versafine Clair Nocturne Ink and colored with Arteza real brush pens. I used some foam mounting tape to pop it up off my card.

Monday, March 28, 2022

Praying for You Wreath


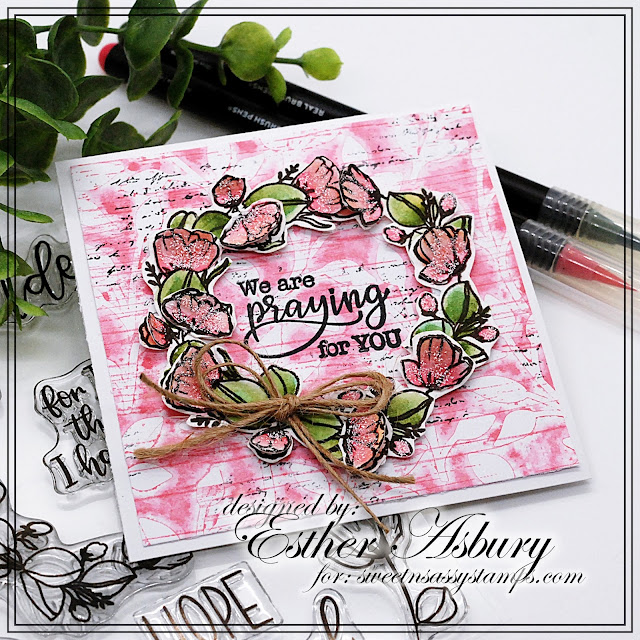
Esther here today sharing this floral wreath card that uses some of the NEW products from the March 2022 Release

Don't forget about the SPRING SALE going on right now --- 20% off site wide! 

For my card today, I started by inking up my Leaf Branch Stencil with worn lipstick distress oxide and stamping it on mixed media paper. I went over it with a brayer to ensure the color transferred well. Next, I stamped the wood grain stamp from Texture Tiles 2  over top, and then added some text from one of the Texture Tiles 1 stamps. 

I stamped the little floral spray from God is Sovereign  six times on watercolor paper, colored three of them with Arteza Real brush pens, and fussy cut them. Next, I cut the images into little pieces and arranged them into a wreath. To create the 3D flowers, I colored just the flowers on the second set of three images, fussy cut them, and glued them over top the flowers on the wreath. I added some Frosted Lace Stickles over the flowers for a bit of sparkle and a twine bow to one side of the wreath.The sentiment is from Forever Loved and is stamped in Versafine Clair Nocturne Ink.

~~~This post contains affiliate links at no extra cost to you~~~

Thursday, June 4, 2020

time well spent

Good morning! Today I have two cards to share with some great new Sweet ‘n Sassy Stamps sets called Time Well Spent (the June Stamp of the Month) and Gear Up. I also used the Texture Tiles 2 set. These are great for Father's Day (which is coming up soon!) or any other time that you need a masculine card.
I used the brick pattern for the background on my first card and then sponged the panel. The time piece was popped up with dimensionals.

For my second card, I cut the top of the time piece off and turned it into a watch. The band is an old Santa's belt die from my stash! You could easily just layer it onto a strip without the buckle or possibly create one with small rectangle dies.


Have a good day!
Diane


Monday, March 30, 2020

Dragonfly Dreams


Hello Sweet 'n Sassy friends!
Ceal here, to share a couple cards with you featuring Dragonfly Dreams from our February release.  I love how the wings on the dragonfly are so realistic. 

To create the card above I started with a white top folding card base, a white panel and a purple panel. I randomly stampd the dragonflies masking them off as I stamped them in Wild Lilac, Lovely Lavender and Sea Glass. On the two larger ones I embossed the bodies in Lilac Shimmer and Under the Sea embossing glitters by WOW embossing. The sentiment is from the Sentimental Wordfetti set.  


The card below uses the same Dragonfly Dreams set but this time I gave the card a little more mixed media look. I started with a white top folding card base, a purple panel for a mat and a white panel for the focal panel. 
I stamped the parge dragonfly and then masked it off and randomly stamped portions of the Psalm 23 Background in a light purple and then added some texture in a darker purple using the Texture Tiles 2 set.  Next I used a stencil to create the flourish background. I added a second set of smaller wings and embossing them with Lilac Shimmer embossing powder. To finish the card I added some epoxy drops to the body and the sentiment from the Scripty Thoughts set. 


I have used affiliate links that are no additional cost to you, for all links please head over to my blog, Simply Beautiful.  

Saturday, April 20, 2019

Delightful Daisies

 Hello! It's Monika here today showcasing Delightful Daisies clear stamp set.

I wanted something bright and cheerful. I started out with heat embossing the flower image with white embossing powder on water color card stock. Next, using Jane Davenport Mermaid water color brush, I loosely (and very messily) colored the flower in then spritzed it with water and let it dry overnight... you get such an organic and cool look this way... it's different every time as you can't really (easily) control the flow of the color... after the image dried, I fussy cut it...


The background was stamped with Texture Tiles 2 clear stamp set... I just repeatedly stamped the image to cover the area... it is a very forgiving image so you don't have to be super careful with it...


I stamped the greeting on a die cut tag (retired SNSS die) and adhered the tag to the stem... then adhered a baker's twine bow to the tag. To further embellish my card, I added black Nuvo drops. 

I hope I have inspired you to craft today!

Thank you for stopping by!

Have a blessed Easter celebration! HE LIVES!

Monika


Monday, September 17, 2018

Winter Birds

Hello! It's Monika here today with couple of Christmas card, showcasing Winter Birds clear stamp set.

For my first card, I wanted to make my own background, so I stamped most of the foliage images with gray ink on a white A2 card stock, then added gold mist to darken the area where the focal images were going to be...


Next I stamped the cardinal and some of the foliage images on watercolor card stock and colored them with Kuretake Gansai Tambi watercolor before cutting them out.
To add more texture/dimension to my card, I distressed the edges of the panel.

My second card is a birdhouse shaped card. I love making shaped cards... circle is the most basic, but from time to time, I just have to make one of my birdhouses. :)


 I usually use a template, but I couldn't find it this time... so I had to improvise. I folded an 8-1/2" x 5-1/2" white card stock in half (wanted to make sure it would fit in an A2 envelope) and using a ruler I sketched out the shape and cut it out... then I traced the front panel onto a brown card stock (minus the roof), cut it out, and stamped it with the 'tree bark' image from Texture Tiles 2 clear stamp set. Next I punched the circle openings of the brown piece and the front panel of the white base card. The red roof strips were punched with an old Fiskars hand punch then were adhered to the base card with dimensional adhesive.


The images were stamped on water color card stock and colored in with ZIG watercolor markers. I stamped an extra bird and poinsettia flower so I could cut parts of the images out and popped them up with dimensional adhesive.
The fence was die-cut with a retired SNSS die.

I just love the way it turned out... do you like making shaped cards? 

Thanks for stopping by,
Monika


Saturday, September 8, 2018

mighty fortress

Good morning! Today I have two cards to share using some Sweet ‘n Sassy stamps from the September Release. Here I used Mighty Fortress which was created for the bible journaling line.
 
I found an image of a hymn page and resized it to fit my card, then printed and stamped over them. On my first card I also used an image from Texture Tiles 2 to stamp a stone wall. Several words were stamped onto the red cardstock which was torn away.


For my second card I made a skinnier card, 3 1/2 x 5 1/2, and simply placed the fortress in the corner.
 

Have a great day!
Diane
 

Tuesday, August 21, 2018

Happy Scarecrow

Good morning! Today I have two cards to share using some Sweet ‘n Sassy stamps from the August Release. Here I used Happy Scarecrow and Texture Tiles 2.
 
For my first card, I stamped the scarecrow in the middle and masked him. Then I stamped the stone texture image and sponged it with gray ink. The top was sponged with a rays stencil. How cute is this happy scarecrow?


The leaves and pumpkin were popped up.


My second card is CAS. I simply stamped in black and layered on the colored elements.
 

Have a great day!
Diane
 

Monday, August 13, 2018

Fruits of the Spirit

Good morning! I am sharing some cards today using Sweet ‘n Sassy Fruits of the Spirit from the August Release. My first card is a simple layout with a scalloped oval cut from the embossed blue layer. Instead of adding a sentiment, I decided to just use the verse stamp in the set.


For my second card, I added a die cut basket and stamped it with one of the Texture Tiles 2 stamps. I also stamped the bricks image on the background and sponged the bottom gray.


Here's a close up of the Texture Tile on the basket.


The fruits were designed for bible journaling but work well for cards too.
Have a great day!
Diane


Wednesday, June 27, 2018

Happy Birthday! Choosing Faith with that Special Blend


Hi Sweet Friends!  Julie, here and today I am sharing a card using the June Stamp of the Month, Texture Tiles 2  along with the previously released stamp sets, Choose Faith and Special Blend.


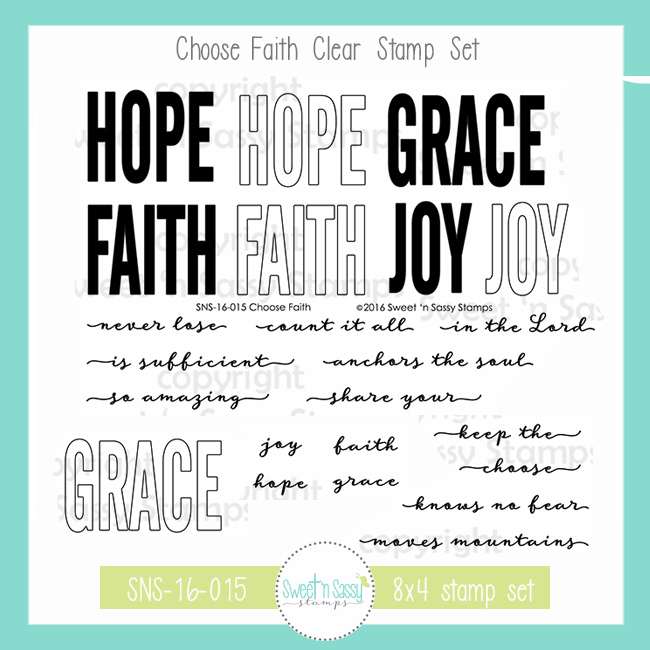
I had fun creating my own background paper by first creating a wash of worn lipstick distress ink onto white cardstock, then stamping the solid words from Choose Faith (Grace and Joy) with a light pink ink and following with the brick wall image from Texture Tiles 2 using navy ink.

I heat embossed the stacked cup image and sentiment from Special Blend onto white cardstock, watercolored the cup image using water-based markers and die cut the image with s stitched rectangle die.

All of the panels were mounted onto navy cardstock and I finished off the card with a bit of a paper doily, a few buttons and shimmer and shine from a glitter pen and clear enamel drops (on the coffee).


Don’t forget, you have only a few more days left to obtain the Stamp of the Month, Texture Tiles 2 free with a net $75 (US$ order after all discounts and before shipping) plus any $75 or more order receives free shipping (US)- woohoo! 

Thanks again for taking the time to stop by! I hope all of you have a blessed week!


Tuesday, June 26, 2018

Love That Texture!

Hello sweet friends!  I love adding texture to cards!  Whether it's bricks, wood grain, pebbles, or tree bark, the new Texture Tiles 2 stamp set is a must have for creating that perfect texture.

The brick tile from Texture Tiles 2 was stamped on a Gelli Print scrap found in my scrap file to create the brick wall.  Check out how realistic it looks!  The flowers are from the Pretty Potted Florals stamp set and were Copic colored, cut out, and popped onto the wall.  A sentiment was added from the Scripty Thoughts stamp set to finish the card.

How about some tree bark?  Drag several shades of Distress Ink down the length of some card stock and stamp the wood grain tile with a darker shade.  A background was created with Distress Oxide inks and the pebbly tile from Texture Tiles 2.  The adorable birdie, clouds, and sentiment are all from the How Tweet stamp set.


Be sure to check out these stamp sets and others that work perfectly with the wonderful Texture Tiles 1 and Texture Tiles 2 stamp sets at the Sweet 'n Sassy Stamps Store.  Even better...The Texture Tiles 2 stamp set is FREE with your $75 purchase until June 30th!

Thanks so much for stopping by!  I hope I've inspired you to try stamping some texture on your next creation!

Hugs,
Cathy