Showing posts with label Texture Tiles 4. Show all posts

Monday, July 11, 2022

Christmas SALE!!!


Esther here today with a Christmas card all done up in classic blue and white. I used chipped sapphire distress ink for all my stamping and even colored the die cut heart and background matting with it as well.This week is our annual "Christmas in July" sale with all the Christmas and winter themed items 20% off using coupon code: festive22. 

Click here to go the Christmas Sale page.


     ~~~This post contains affiliate links at no extra cost to you~~~

Supplies and tools:

Monday, June 27, 2022

Happy Bday


Esther here today with a fun masculine themed birthday card that features the NEW Grunge Gears Stencil which I stenciled onto mixed media paper in Chipped Sapphire and Prize Ribbon distress ink. I stamped the Vintage Van in Versafine Clair Nocturne Ink and colored it with Arteza Real Brush Pens. The sentiment is a combo of Boss Lady Alpha Dies and Typewriter Blocks Alpha stamped in Spiced Marmalade distress ink. To finish my card off I used Texture Tiles 4 to create some faux washi tape and stapled it to the top corner. 

~~This post contains affiliate links at no extra cost to you~~~

Monday, June 13, 2022

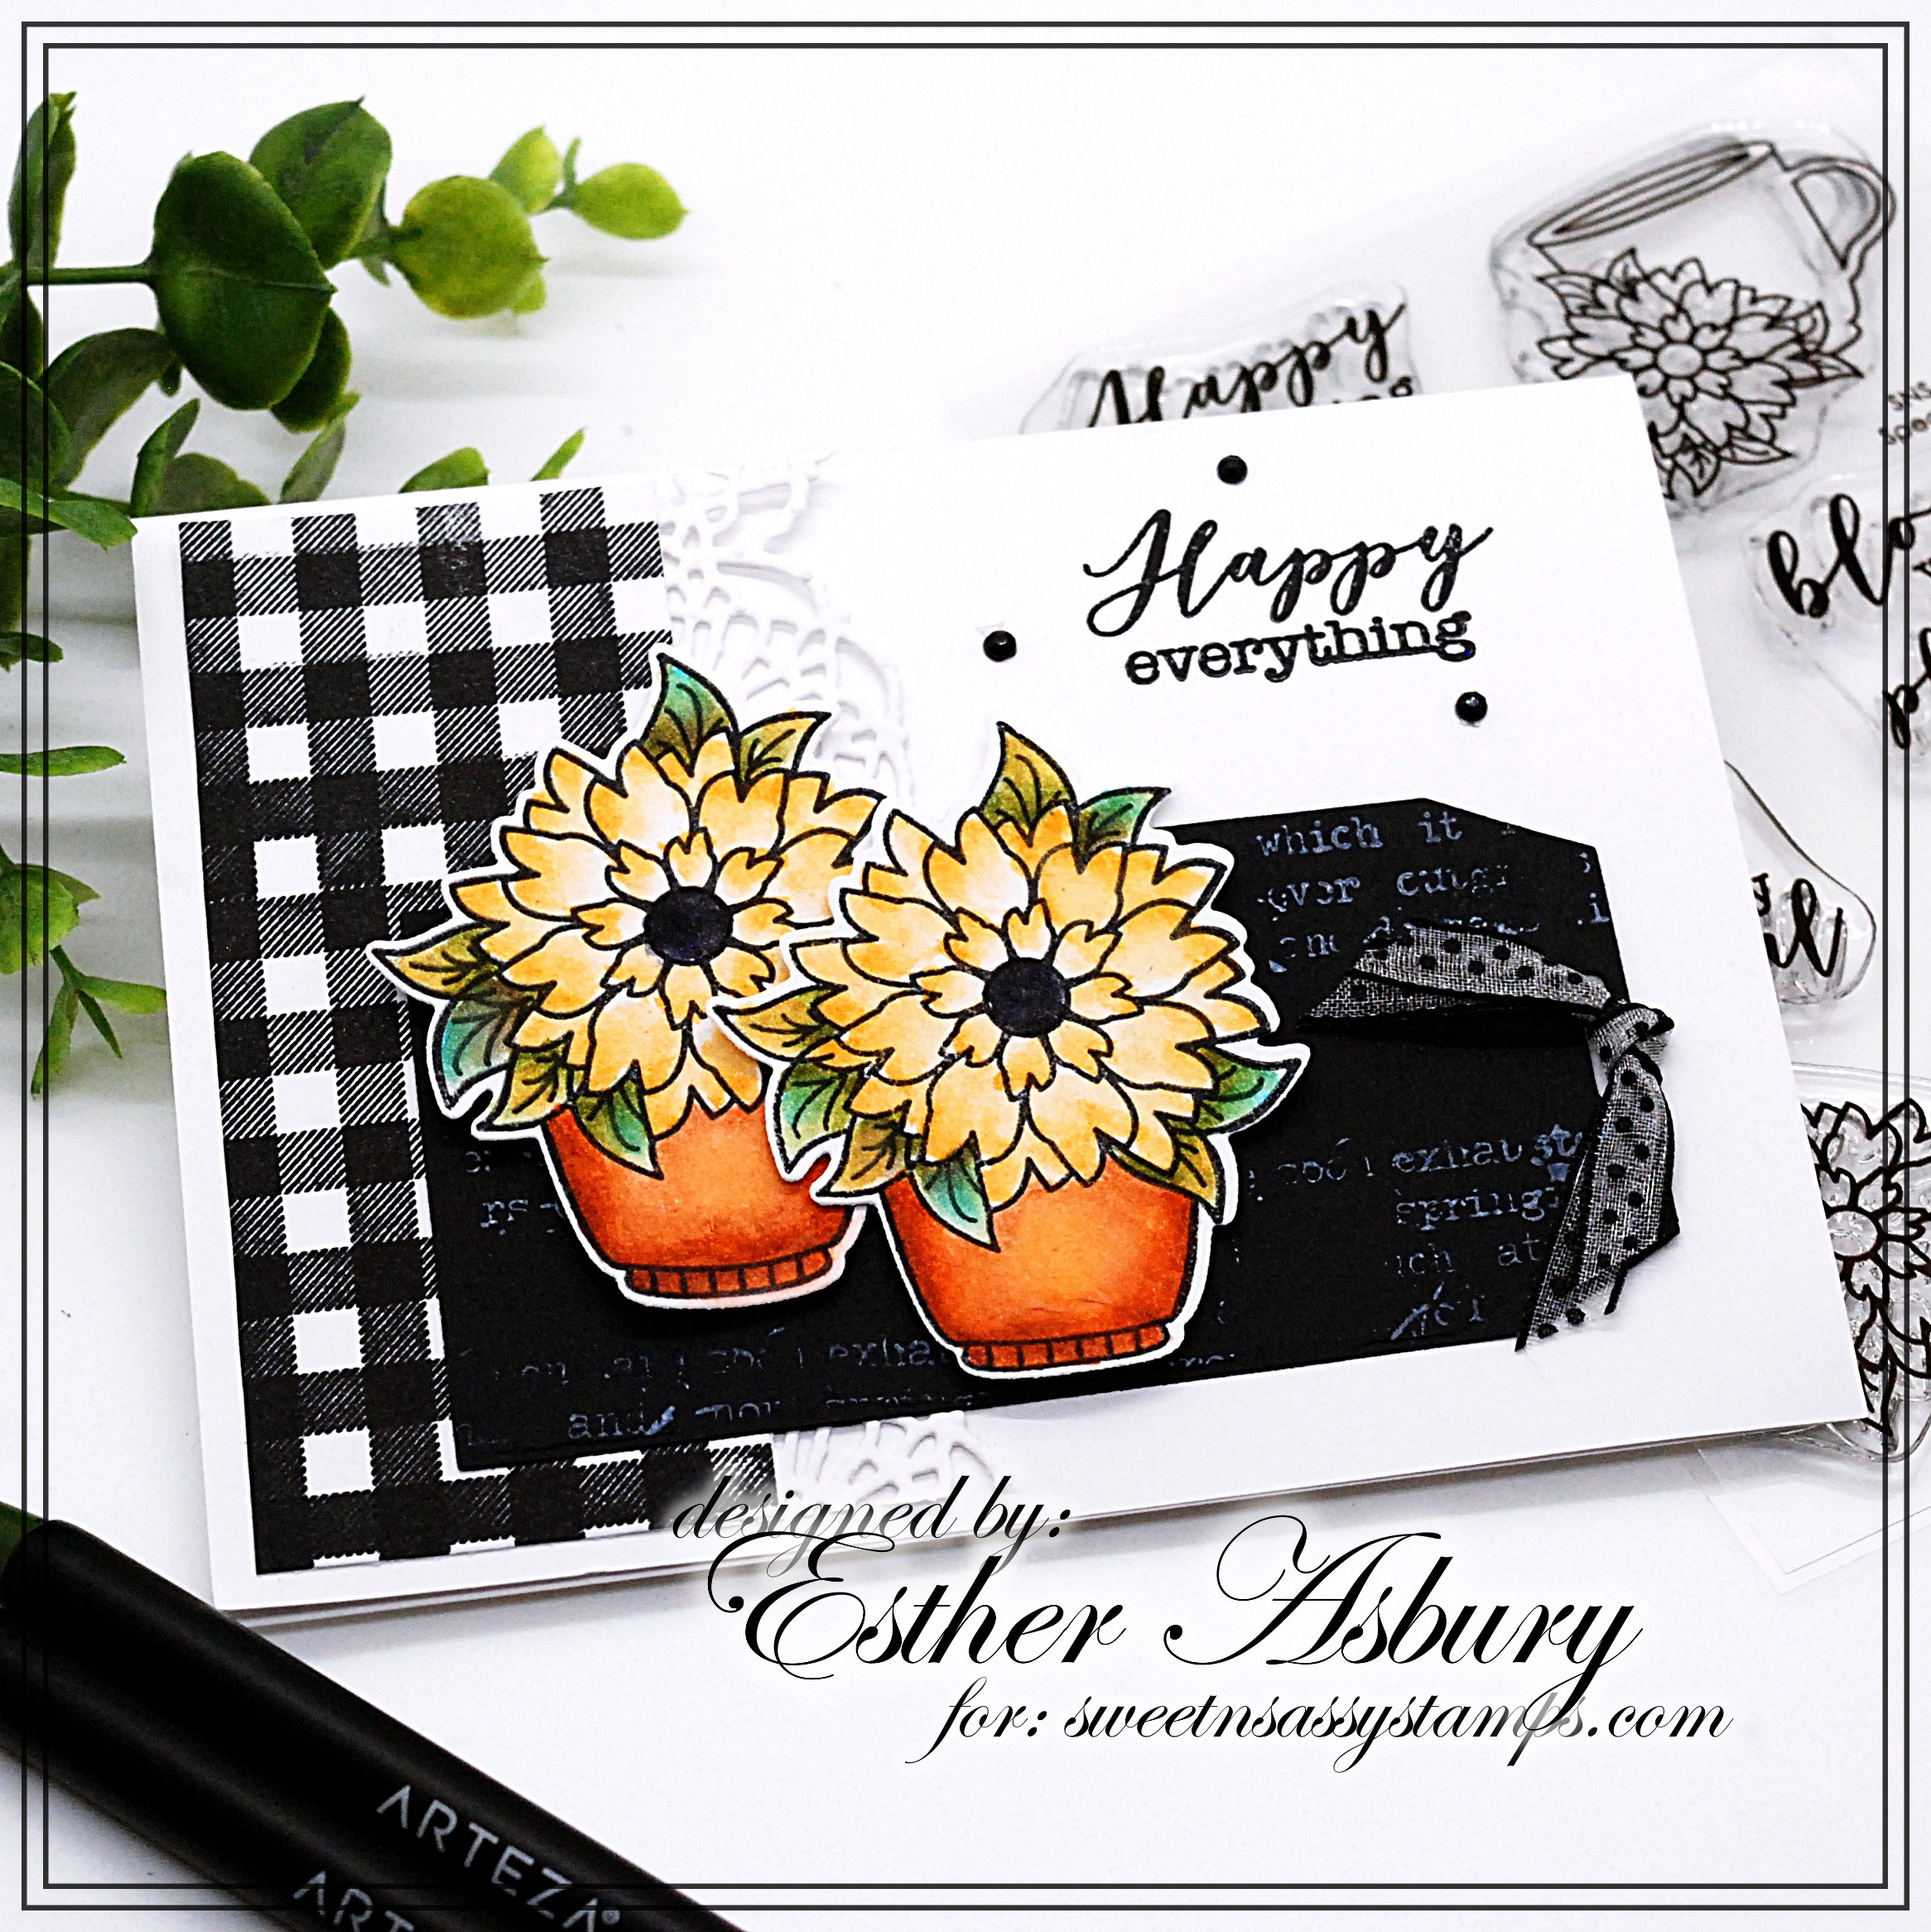
Happy Everything


Hello, Esther here today with this summery floral card. To create my card I stamped one of the flower pots from the Special Blooms Stamp Set twice on mixed media paper and colored them with my Arteza Real Brush Pens before die cutting with the coordinating Special Blooms Dies. I die cut a tag from black card stock and added some white text using the Typewriter Text Background stamp. The gingham was stamped in Versafine Clair Nocturne Ink using one of the images from Texture Tiles 4 . A bit of ribbon, three rhinestones, and some paper lace complete this card. 

~~This post contains affiliate links at no extra cost to you~~~


Monday, February 28, 2022

He heals the brokenhearted


Esther here today sharing a soft pink card using my favorite stamp and die set from the February Release --- Beautiful Bouquets. I created the gingham background using Texture Tiles 4 and added a sentiment from Fear Not. The pretty little flourish comes from the Decorative Frames Toppers set. To soften the embossed background just a little, I lightly rubbed some white ink over the raised part.

   ~~~This post contains affiliate links at no extra cost to you~~~

Supplies and Tools:

Monday, September 27, 2021

Autumn Coffee


Happy Monday! Esther here today with this autumn themed coffee card. I started by using my stamping platform to stamp one of the plaid designs from Texture Tiles 4  in rusty hinge distress oxide with a bit of walnut stain layered over top. I inked around the edges with vintage photo distress ink and stamped the coffee rings from Texture Tiles 9 in fallen leaves Versafine Clair ink. Next, I stamped the right panel with the coffee beans from Texture Tiles 9 on kraft card stock and inked those edges as well. The sentiment inside is from the Fall Breeze Stamp Set  and is colored with Arteza real brush pens.
 I cut a medium sized tag using the Tag Collection dies from Tim Holtz and lightly stenciled  the Chicken Wire Stencil in vintage photo distress ink. After stamping and coloring some of the images from the Fall Breeze Stamp Set  I die cut them with their coordinating dies (Fall Breeze Die Set). Last of all I inked a piece of kraft card stock with walnut stain distress ink and die cut it with the Coffee Word Die

After arranging all the pieces on my tag, I scored and folded the edge and attached it to the right side of the card under the coffee bean panel. 

Click here to check out all the beverage themed stamps in the Sweet n Sassy Stamps store.

Come back Wednesday for a fun National Coffee Day blog hop with prizes.

 ~~~This post contains affiliate links at no extra cost to you~~~

Monday, July 12, 2021

One Stamp Two Ways

Hello friend, Esther here today sharing two cards that use the same stamp in very different ways. 


For this first card I embossed the Blooming Anemones in gold on watercolor paper and used my Zenacolor Watercolor Paints to color it. I then used vintage photo distress ink to stencil the Script Stencil in the background and also inked around the edges with it. 

Next, I die cut the new Friend Die from watercolor paper and inked it up with walnut stain distress ink. I then cut a second one from white card stock and layered it for added dimension. The last step was adding a few white paint splatters for extra interest. 


My second card also features the Blooming Anemones stamp set. This time I embossed it in white on a piece of vellum and fussy cut it. 

Heat Embossing Vellum Tip: If you're having trouble with your vellum crinkling up when you heat emboss -- try embossing from the underside. It works like a charm and doesn't warp the vellum!

I then stamped a panel using Texture Tiles 4  and kitsch flamingo distress oxide and layered it over a piece of white card stock embossed with the intertwine 3D embossing folder from Sizzix. The sentiment (Faith & Hope Word Dies) was die cut from mix media paper and inked with kitsch flamingo and picked raspberry distress oxide.  Last of all I added three pink sequins for a bit of sparkle and bling!


  ~~~This post contains affiliate links at no extra cost to you~~~

Monday, September 28, 2020

Christmas Cards


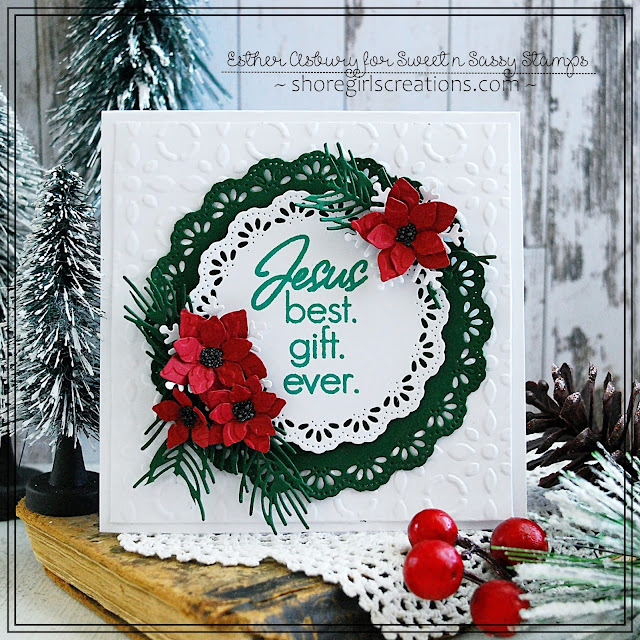
Hello everyone, Esther here with two Christmas cards featuring BRAND NEW holiday stamp sets from Sweet n Sassy Stamps!

For this first card I went with the traditional red and green. I did some simple stamping and die cut it with doily dies. To add a bit of texture I embossed the flowers before gluing them together. I'm not sure if you can tell by the picture, but two of those flowers have snowflakes behind them -- just to add interest and dimension! 


~~~This post contains affiliate links at no extra cost to you~~~
 
Supplies and Tools:
  • Best Gift Ever (Sweet n Sassy Stamps)
  • Purr-fect Posies Die Set  (Heartfelt Creations)
  • Power Outage Prills (Heartfelt Creations)
  • Feathered Lace Nested Circle Dies (Gina Marie Designs)
  • Pine Branch (Sizzix - Tim Holtz) 
  • Create a Flake Dies (Spellbinders)
  • Christmas Quilt Embossing Folder (Couture Creations)
  • Elite M-Bossabilities (Spellbinders)
  • Pine Needles Distress Oxide (Ranger)
  • Foam Mounting Tape
 

My second card uses non-traditional colors and features the NEW "Christmas Gnomes" set.


 I created a fun little winter scene and added a country flavor with a gingham checked background using my favorite Texture Tiles set. Since I love little details, I added some tiny stars and two black snowflakes.


Supplies and Tools:


Monday, July 13, 2020

Deserts and Bees


Hello Friends, Esther here with two fun cards to share with you! This first one is a desert scene using the Landscape Silhouette stamp set. I inked up the top half of a watercolor paper with pink and purple distress oxides and added some paint splatter stars. Originally I had masked off the moon, but had a little "whoopsie" with my ink so I ended up cutting a large white circle  to cover it up.  It was my first time to use the Landscape Silhouette stamp set, and I'm loving how it turned out!


~~~This post contains affiliate links at no extra cost to you~~~
Supplies and Tools:
  • These Sweet n Sassy Stamp Sets
  • Canson Watercolor Paper
  • Circle Nestabilities (Spellbinders)
  • Fishtail Banners (Stamp Simply)
  • White Acrylic Paint
  • Brilliance Moonlight White Ink (Tsukineko)
  • Jet Black Archival Ink (Ranger)
  • These colors of Distress Oxide (Ranger)
    • Seedless Preserves
    • Dusty Concord
    • Wilted Violet
    • Black Soot


My second card features the BRAND NEW "Bee Sweet" stamp set.


After coloring my beehive I stamped and fussy cut some of the little bees. I then added glitter and  popped them up around my hive with dimensional tape!


Supplies and Tools:
  • Bee Sweet (Sweet n Sassy Stamps)
  • Texture Tiles 4 (Sweet n Sassy Stamps)
  • Canson Mix Media Paper
  • Arteza Real Brush Pens
  • Petals and Blooms Designer Paper (The Paper Studio)
  • Circle Nestabilities (Spellbinders)
  • Large Scallop Nestabilities (Spellbinders)
  • Fishtail Banners (Stamp Simply)
  • Crochet Dies (Sizzix - Tim Holtz)
  • Clear Glitter (Studio G)
  • Peeled Paint Distress Oxide (Ranger)
  • Antique Linen Distress Ink (Ranger)
  • Jet Black Archival Ink (Ranger)


Friday, March 8, 2019

Texture Tiles 4 (x3) - Bee Amazing!

Hi Friends!

Today I have some more fun projects using one stamp (well two really) from Sweet N Sassy creating three looks. The new Texture Tiles 4 makes for some great background and to tie my projects together, I added the bee from Sweet as Honey. Of course I have also used other sets (I will point them out as I go) but these are the focus on all of my projects.

My first project is a mixed media art journal page (in my 6x6 journal). This is my more complex project as it uses the most stash supplies and got me the inky-est :)

Recipe:
  • Background - Tim Holtz Tissue Wrap Melange; Distress Paint in Peeled Paint, Mowed Lawn, Broken China, Cracked Pistachio, Mermaid Lagoon
  • Background stamps - Texture Tiles 1 using Archival Inks Manganese Blue
  • Splatters - White and Black Arcylic Dylusions
  • Corner texture - Tim Holtz Stencil with Black Modeling Paste (TCW)
  • Sentiment (big) God is For You Clear stamp set from SNSS inked with Gina K Black Amalgam Ink, (little) From Tim Holtz Small Talk sticker book.
  • Border Image - Texture Tiles 4 stamped repeatedly around the edges over and over.
  • Bee image from Sweet as Honey stamped with Gina K Black Amalgam and colored with Copics Y17, Y19, Y15 and W0, W1, W3, W5 (with Wink of Stella on wings)- popped up with foam felt and adhered with Multi Matte Medium
  • Highlights added with White gel pen

My Second project is a less complex and uses the four plaid tiles to create "quilty" look.
I used a circle stitched die from Simon Says Stamps and a Circle die from Spellbinders to cut out the image using the out of the box die technique. I added a foam dot under the bee's wings to make them look more dimensional.
Recipe:
  • For the Bee, I used a circle stitched die from Simon Says Stamps and a Circle die from Spellbinders. For the squares, I used square stitched die from Simon Says Stamps and a square die from Spellbinders.
  • Bee image from Sweet as Honey stamped with Gina K Black Amalgam and colored with Copics Y17, Y19, Y15 and W0, W1, W3, W5 (with Wink of Stella on wings).
  • Background Image - Texture Tiles 4 - all four stamped with Gina K Black Amalgam Ink on Neenah Solar White
  • Sentiment - So Thankful
  • My background paper is cut with A Jillian Vance Design Basic Polka Dot Die

My Final Project is a Clean And Simple card on kraft.
Recipe:
  • My rectangles are all cut with A Jillian Vance Design Basic and/or Polka Dot Dies
  • Background Image - Texture Tiles 4 - stamped with Versa Mark for a tone on tone look
  • Bee image from Sweet as Honey stamped with Gina K Black Amalgam and colored with Polychromos pencils. I stamped right on top of the plaid background and colored over it.
  • Sentiment - "Bee" from Sweet as Honey and "Amazing" from Bitty Minnie Alpha
  • I added twine and enamel dots then popped the center panel up with foam felt
I hope you are inspired - see how you can stretch your stamps by trying multiple ways to use it. And no matter what else you do, HAVE FUN!!

Thanks for stopping by!
Lyn


Friday, January 4, 2019

Punny Love

Hello sweet friends!  It's hard to believe that 2019 has arrived (where did 2018 go?)...hope you all had a fantastic New Year's Day!  Sweet 'n Sassy Stamps is starting 2019 off with a bang.  I've been having so much fun with the new Punny Love Stamp Set in the January Release.  I have to warn you...once you start playing with this set, it's hard to stop.  I have four cards to share with you today using this adorable stamp set!

The hearts from the Grunge Elements 2 set were white embossed on a piece of heavy mixed media paper and the panel was smooshed over watered down Oxide Inks on my craft mat.  The grid from the Texture Tiles 1 stamp set was then stamped over the panel for added texture.  The donut image was colored with Copic Markers and Glossy Accents applied over the icing.  A few sequins were added to finish the card.

The muffin card was made the same way except the script stamp from Texture Tiles 1 was used instead of the grid.

The third card is very clean and simple.  All images were colored with Copic Markers and Glossy Accents was added to the hearts.

The plaid background on the fourth card was made using one of the plaids from the Texture Tiles 4 Stamp Set.  Of Course eggs...even EGG-stra special ones need salt and pepper so the splatter from Texture Tiles 1 was used to sprinkle the card.  Glossy Accents was again used on the row of hearts.
See what I mean...how fun!

Here are the stamp sets used to create all the cards above:


Be sure to check out the whole new release over at the Sweet 'n Sassy Stamps Store!


Thanks so much for stopping by...Happy stamping in the new year!

Hugs,
Cathy