Showing posts with label Delightfully Delicate Background. Show all posts

Saturday, April 3, 2021

Best Wishes

Hello everyone, I am loving all the new goodies in the April Release! For today's post, I chose to play with Just Married and Make Music Stencil to create a card you can use for either a wedding or birthday card. 


I began by stamping the image and sentiment with VersaFine Claire Nocturne ink on white cardstock. I colored the image with Nuvo watercolor pencils and fussy cut out. I die cut the pink panel first and then dry embossed with the Make Music stencil using my die cut machine. I found die cutting first is better so it doesn't flatten out the dry embossing.

As I was going to assemble the card I felt it needed something more. So, I decided to stencil the Delightfully Delicate Stencil with pink ink on the white card base. I assembled as seen, cutting a banner end on the sentiment strip and adding some light pink sequins. I also popped up the pink panel, cake image and sentiment strip with foam tape. 

The Sweet 'n Sassy Stamps VIP Group on Facebook hosts a monthly challenge. The April challenge is a themed one, upload any creation with a springtime theme. I think my card fits the bill. We would love to have you join us!


 Thanks so much for stopping by!

Karen

Saturday, December 19, 2020

All My Love

Happy Saturday! I'm sharing two vintage style cards with you today featuring Vintage Romance. I couldn't decide on which color combo I wanted to do, so I did both. Let me know which one you like better. Don't worry, it won't hurt my feelings if you like one more than the other. 

I kept the layout the same for both cards. I changed up the backgrounds to create a different vibe for each one. I stamped the sentiments and images with VersaFine Clair Nocturne ink and colored with Arteza Watercolor Brush Markers.

For my first card, I went for a more traditional vintage look. 


I stamped the Typewriter Text Background with vintage photo distress ink on kraft cardstock. Next, I stamped one of the small pieces from Grunge Elements 2 with antique linen distress ink, cut the panel with a stitched rectangle die and ink blended vintage photo around the edges. I cut a lacy crochet die in black and attached to the front of the panel. I stamped the sentiment and used vintage photo around the edges again and matted on black. I assembled as seen popping the perfume bottles up with foam tape.

For my second card, I decided to brighten it up a bit.


I stamped the Delightfully Delicate Background in a light green on white cardstock and cut with a stitched edge rectangle die. I stamped the sentiment directly on the panel. I used the same lacy crochet die again, but in white. I attached it to the front of the die cut panel and matted on light green. I had a little bit of a crooked cut so I distressed the edges of the green piece to hide it. I assembled as seen popping the images up with foam tape.


Thanks so much for stopping by and have a fantastic day,

Karen


Wednesday, April 29, 2020

Shabby Chic Cards

Hi Sweet 'n Sassy friends! It's Julee popping in with a couple of mixed-media shabby chic cards I created with the April release. This style is one of my favorite styles to create in.


For my first card I used the Country Garden set, stamping the jar of flowers an coloring with copics.  Next I stamped the sentiment on a 3x4" panel of cardstock and smooshed with squeezed lemonade, stormy skies, and chipped sapphire.  I then stamped partially with the Delightfully Delicate Background and Texture Tiles 1 sets for a little texture.  The flower pattern in the upper left corner is stenciled with embossing paste for a little extra interest.

The background for the card is a panel of designer paper that I smooshed with the same colors then sponged the edges.  I finished with a bit of ribbon and a little glitter on the image.


My next card uses a sentiment from the Friendship is a Blessing set. I started with some scraps of Prima paper, adhering them together, then lightly scraping with gesso to mute the colors a bit.  I then stenciled with a dot fade pattern in weathered wood distress oxide, adding sponging all around the edges.  A scrap of lace covers the seam of my two papers.


I used another scrap of paper for  the rectangle pattern, also adding a bit of gesso and sponging.  The sentiment is stamped onto a gessoed cardstock circle and then sponged and stenciled.  My finishing accents were a bit of wrinkled seam binding, some paper flowers, and an ephemera bird image.


Thanks so much for stopping by today! I hope you have a fabulous day!

***This post contains affiliated links at no cost to you ***

Monday, April 13, 2020

Paper Bag Pocket of Encouragement


Hello Friends! Esther here, and today sharing a Paper Bag Pocket of Encouragement. It's stuffed full of Bible verses, hymns, and inspirational sayings to cheer and encourage.

Here's how I created my pocket
(Maybe you'll see a pink and white polka-dot / denim version later this year!!) 

  1. Start with a lunch sack
  2. Fold the top down and glue in place
  3. Punch or die cut a partial circle in the center of the bottom flap
  4. Use decorative scissors along the top of the bottom flap
  5. Fold bottom flap up
  6. Cut designer paper to decorate your panels

~~~This post contains affiliate links at no extra cost to you~~~

Supplies and tools:


I hope you're inspired to make your own little paper bag pocket of encouragement!! 
If you use Sweet n Sassy stamps, be sure to share on our VIP Facebook page!


Friday, November 20, 2015

Delightful Poinsettia

Hello sweet friends! Cathy here with some fun things to share with you, the first being
our Birthday Celebration Special for this week…
25% off all dies
From now until Thursday, November 26th!
Use code BDAYDIES25 during checkout and enjoy this fabulous sale!

 There are a little less than two weeks left of our birthday party celebration!  I hope you've been enjoying all the Throwback Features, prizes, and specials we've been having throughout the month of November.  Today's Throwback Feature is Delightfully Delicate Background, but before I get to that, it's my turn to share a little about myself and my stamping journey.

I'm also known as Cathymac on my blog and on Splitcoaststampers.  I live with my husband, Mike, and our current Golden Retriever, Kody, in southern Lancaster County in Pennsylvania.  My favorite vacation spot is the beach.  When not stamping, I enjoy reading, taking walks with Kody, helping others, and I'm very involved with several ministries at my church, one of which is teaching the little ones.  I enjoy making cards for friends, family, and for the Encouragement Ministry at my church.

I was introduced to stamping over twenty-five years ago while still teaching elementary school.  Like many, I got my start as a Stampin' Up! Demonstrator. I've been a fan of Sweet 'n Sassy Stamps ever since I met Korin about six years ago.  I love the variety of styles and the emphasis on scripture in the Sweet 'n Sassy line of stamps.  After being a guest designer for a month, I was asked to join the design team and I've been here ever since.  Now that I'm retired (after teaching for 35 years), I enjoy going along to the Paper Craft shows, helping with "Make and Takes," and teaching a few classes.  Korin was the first person to encourage me by giving me the opportunity to be on her design team and by investing in me as a stamper.  I have learned a great deal about the stamping industry through her.  I admire her creativity and count it a blessing to be her friend along with the other members of this talented and caring design team.  

I don't think I can pick out just one favorite Sweet 'n Sassy stamp set, but Landscape Silhouettes would certainly be at the top of the list.  Here are a few cards made with this stamp set:


My advise for a new stamper would be to join a stamping group or browse some of the many card galleries such as Splitcoaststampers or on Pinterest to get ideas.  Playing along with some of the challenges out there is a good way to learn new tips and techniques.  If possible, take some classes at a local stamp store or on line and don't be afraid to try new things.

Now on to the Throwback Feature for today...


After white embossing the Delightfully Delicate Background, Evergreen Bough, Pine Needles, and Worn Lipstick Distress inks were sponged over the embossing.  The Poinsettia was stamped twice, sponged, and cut to be popped up and layered onto the card.  The Delightfully Delicate Background was lightly stamped on the top layer of the Poinsettia with Worn Lipstick ink. The sentiment from Christmas Innies was stamped in the bottom corner.  Prills and a silk bow were added to finish the card.  The Delightfully Delicate Background is perfect for adding just the right bit of texture to your stamping project.


 Thanks so much for stopping by…have a wonderful weekend and enjoy our 25% off sale on dies!

{{{Hugs}}}
Cathy

Saturday, November 22, 2014

A Woman That Feareth...

Hi all!  It's Kim (Schofield) and I'm so excited to be back with the Sweet 'n Sassy design team!  Today is my first time back sharing a project on the blog - yeah!  Check out all the details below...

While today's project is a traditional card size (5.5"x4.25"), I mounted the design on heavy chipboard and am thinking of it as a tiny canvas, being held by an easel.  The verse is a good one to keep out on my desk...remind me of what's really important. :-)

To start, I stamped and embossed the large background design from the Leafy Flourish set on a piece of vintage book paper.  I used Wendy Vecchi's Archival Ink and embossing powder (Watering Can) on the flourish design.  That combo left me with just spots of embossed areas vs. the entire piece being shiny.  The ink very quickly soaked into the paper, which meant that the powder only stuck to a few areas...love the worn, vintage look!

After my "canvas" base was cut, I layered with black and cream cardstock.  I also ages all of my edges with Gathered Twigs Distress Ink.

Next, I die cut a circle and used the Delightfully Delicate Background stamp to add a design to the circle, before stamping the verse.  (I also added a tiny piece of polka dot paper and faux stitched the two pieces of paper together.)

Once my verse circle was finished, I got to work on those beautiful poppies from the Precious Poppies set.   I used black Archival Ink to stamp the image on heavy watercolor paper and colored the images using Prismacolor Watercolor pencils (LOVE them!)

The last step was to cut out the flowers and attach them to my card.  I attached the first flower flat and then used foam tape to attach the other flowers.

I hope you enjoyed today's card!  Now run out and grab yourself some of these beautiful stamps!!

Tuesday, July 22, 2014

Baby Congrats

Hi Everyone!

I have a sweet post today; one in which I stepped out of my comfort zone and tried a collage style card.
 I know when I start back to work next month, there will be several teachers who will be expecting, so I decided to build my stash of baby cards.


My bear was colored with Copics; this sweetie is from the Valentine Critters Stamp Set, but does great double duty as a baby card image. I fussy cut the bear out; to help the bear stand out more, I mounted the bear image on a bear shaped mat that I fussy cut out, then layered it on a tag die cut (Kaiser Craft), floral die cut (Glitz Designs), and cheese cloth.  I die cut two leaves using the Thankful Blooms Die Set; I cut them from white card stock and colored them with Copics, mimicking the leaves in the floral die cut.
The base of the card was stamped with the Delightfully Delicate Background Stamp.  I added a scalloped edge using the Scallop Border Dies.  Of course, there is nothing like a seam binding bow to finish off what turned out to be a very girly baby card!

Thanks so much for stopping by today; have a blessed week!

Lee Ann  :)


Sunday, July 20, 2014

Faith. Hope. Love.


Good morning!

Jessica here this morning popping in to share a card that I made that uses several Sweet 'n Sassy Stamps make a 'shabby chic'  love themed card.  I love the sunflowers from the Prim Blessings stamp set and paired them with the Delightfully Delicate Background as well some dots from the Lots of Spots stamp set.


First, I stamped the sunflower images in Versamark ink and white embossed them.  Then, using Distress Markers, I watercolored them in and let it dry.  Then, using some light inks, I stamped the backgrounds not worrying if they got on the sunflowers since I used such light inks.

Such a fun card - but one that I had a hard time getting the correct colors to show through on the camera for you... sorry about that!

Have an enjoyable day filled with faith, hope and love!
Jessica


Sunday, July 13, 2014

Texture in Nature

Hello everyone!  Happy Sunday!  The other evening I drove to church in a drenching rain, but the sun was shining, so naturally when I arrived, I looked for a rainbow.  I wasn't disappointed!  Though faint, it was still there.  After church, I came out to see the most gorgeous sky…the different blend of blues and pinks, including the most beautiful turquoise color, was amazing.  I had to stop and thank the Lord for creating such beauty for us to enjoy!  This prompted me to grab some of Sweet 'n Sassy Stamps' Nature Silhouette sets and do some creating of my own.

The background for the first card was made by wadding up a piece of wax paper and using it to dap VersaMark ink on a piece of mixed media paper.  This was clear embossed.  The panel was then dragged through puddles of distress inks on my craft sheet.  Another piece of paper was used to dab up the remaining ink on the craft sheet to create the panel behind the Cattails die cut.  The embossing was ironed off to remove the glossy look and to allow the sentiment from the Script Birthdays set to be stamped on the card.  Texture paste was added to the fishtail banner through a TH Burlap stencil.  Some jute thread and a button were added to finish the card.

The same background techniques were used for this card.  Water was spritzed through a dotted stencil to remove some of the ink on the large background.  This was overstamped using the same colors of distress inks on the Delightfully Delicate Background.  A stencil and modeling paste were used to add the butterfly.  The embossing on the smaller panel was again ironed off so the Nature Silhouette image could be stamped.  Globs of hot glue, inspired by Karen Dunbrook, were added for more texture.  The sentiment is from the God is Bigger stamp set.  Felt and burlap flags and a button finish the card.

Hope these cards have inspired you to add a little texture to your card creations, and while you are at it, take some time to enjoy the colors and textures in nature…God's gorgeous creation!

Thanks so much for stopping by…enjoy your day!
Hugs,
Cathymac

Saturday, July 5, 2014

they lived happily ever after...


Good morning!

Jessica here with a wedding/anniversary card to share with you today in honor of my parent's 45th wedding anniversary today!  I used several Sweet 'n Sassy Stamp sets for the focal panel:  Prim Blessings, Delightfully Delicate Background, and Lots of Spots.


I stamped the images from Prim Blessings in Versamark ink on cream card stock and embossed with White embossing powder and then used Distress markers to water color.  Then, I stamped the Delightfully Delicate background and a few of the images from Lots of Dots in light brown ink so that it would fade into the background.  I spritzed just a bit of a light aqua/turquoise marker on the background to match the patterned paper sunflower tag.

Have a great day and Happy anniversary, Mom & Dad!
Jessica


Thursday, June 19, 2014

Happily ever after

Hello friends! Giovana here today. We are in wedding season and I thought it would be fun to share with you a Wedding card.
This card is super simple, I started stamping the Delightfully Delicate Background on a piece of white cardstock in Versamark ink, then added white embossing powder and heat set. After that I sponged the piece with Tumbled Glass and Broken China Distress inks. Then I stamped the sentiment from Prim Blessings Set in Jet Archival Ink.
Die-cut a stitched label, stamped the image in Memento Tuxedo Black and colored the image with Spectrum Noir markers, I used TN1, TN2, TN3, DR3, FS3, BT1, BT2.
Added the label to card with dimensionals. Finally, I added ribbon and pearls.


Hope you like it!
Have a great day.

Wednesday, March 12, 2014

Jesus is Risen ~

Good morning, Mary here sharing that Jesus Christ is Risen//He is Risen Indeed! I love this image from He Lives! The image is coloured using copics and die cut using spellbinders. You can also cut this out using the matching Rugged Cross die. All this is layered onto Delightfully Delicate background embossed in white and sponged with various colours of blue QQ powder puff inks. I embellished with silky ribbon and rhinestones.
Materials Used:
Stamps: He Lives, Delightfully Delicate background
Inks: Copics, Memento, Versafine, QQ powder puff inks
Paper: MME, SU
Accessories: Ribbon, Rhinestones, Spellbinder, SU punch

Sweet'nSassy will be present at the Heirloom Productions Show in Allentown this weekend! Stop by and say hello. They will be doing some make'ntakes that will sure to wow you!

Thank you for stopping by! 

Tuesday, February 18, 2014

Delightfully Delicate Pin Cushion

Hello Sweet 'n Sassy Friends!

Last week Sweet n' Sassy Stamps released their February stamp sets.  One of those sets was a delicate background stamp that some of our customers thought had a quilted look.   One lady said she would love to see this delicate design stamped on vellum and embossed.   Well, your wish is my command (she smiles).

I have had a small sewing hoop on my desk since Christmas just waiting for the right moment.   Here's what I did.  I stamped the Delightfully Delicate Background on a piece of vellum with Ranger Distress Ink (Victorian Rose) and embossed it with Judikin's Clear Embossing powder - beautiful!   Then I cut it with a classic scalloped circle.    I also cut 2 larger scalloped circles, one out of winter winter soft felt, and one from craft cardstock to place on the back of the hoop.   Lay all of these aside for now.

This is so easy you're going to love me for the idea *wink*   I used some adhesive backed pink lace and ran it around the hoop - yep, that easy!   Next I applied a string of pearls at the bottom and top of the hoop band.  I placed some batting inside the hoop for a little puff, then laid the winter white felt on top with my smaller scalloped embossed circle on top of that (you could sew these scallops together).   At this point you can embellish anyway you choose.  I added some 1/16" baby pink ribbon and spray of roses, little blossoms, leaves and a stick pin that I created.  A few little pearls on the Delightfully Delicate scalloped circle and you have a faux quilted pin cushion.  If you choose to put a few pins in this, make sure they are small in length.

I hope you've enjoyed this little project.   Wouldn't this make a sweet Mother's Day gift?

Thank you so much for your visit, I'll see you next time.
Blessings,
Susie ~


Monday, February 17, 2014

Delightfully Delicate Word Art...

Hello! It's Monika here today, bringing you an elegant card. 

How do you make a quick card with a little bit of interest? Do some heat embossing and voila... everyone will want to know how you did it. Heat embossing is in style again and it is very easy to do.


I started with stamping Delightfully Delicate Background stamp on a white piece of card stock with Versamark ink.Then I heat embossed it with clear embossing powder. Next, I sponged the image with fired brick and mustard seed distressed ink (Tim Holtz). After I achieved the desired look, I wiped the card with a piece of paper towel to take the excess ink off. 
It looks so pretty and elegant, don't you think?


The greeting is from Inspirational Word Art 1 clear stamp set. The card itself is only 3-1/2" wide... making your card look extra long is another nice touch. To finish off the card, I rounded the bottom corners... then attached some yarn, a paper flower, cheese cloth, and silver rhinestones to it.

The inspiration to my card came from CASE Study Challenges #178

Thanks for stopping by,
Monika

Sunday, February 16, 2014

Mid Winter Shape Up

Hello Everyone!
 We have made it half way through February and I have to believe that spring is right around the corner!  That said, these cold winter days do make good crafting days!
I have 3 cards to share with you today~


I used the very versatile Shape Up Stamp Set for this masculine and very mailable birthday card.  The shape was stamped in a repeating pattern to create my background.  The sentiment panel uses a technique I do not use enough- stamping a sentiment over an image. I used a stamp from the Serene Silhouettes Stamp Set and using kraft ink, stamped off once and then stamped onto my card stock.  I added the sentiment and drew a line around the panel with a fine tip marker.  I have been hoarding this ribbon for quite some time, but this seemed the perfect card to use it on. 

This next card uses another image from Shape Up and also uses its coordinating die.


I also used the  Bloom and Grow set as well as the Delightfully Delicate Background.  I stamped my three hexagons and die cut them out.  The flower was stamped and fussy cut out and I used the Small Leaves Die for the leaves (well, I guess that was obvious!).  My background panel was stamped in red on kraft card stock using the Delightfully Delicate Background image.  I added a decorative edge using the Scalloped Border Dies.

Lastly, I have a cheery card made with the Keep in Touch Stamp Set~


Washi tape is the main ingredient on this card.  I added diagonal strips of 4 different tapes to a panel of white cs and popped it up on dimensionals.  The rest of the background is dry embossed.  I curved the sentiment stamp to be able to stamp it around the inside edge of my circle.  The phone was die cut out with its matching die and popped up on dimensionals. 

Thanks so much for stopping by!

Have a blessed week!

Lee Ann  :)

Sunday, February 9, 2014

February Release Blog Hop Day 2: Delightfully Delicate Background

Welcome to DAY 2 of our February Release Blog Hops!

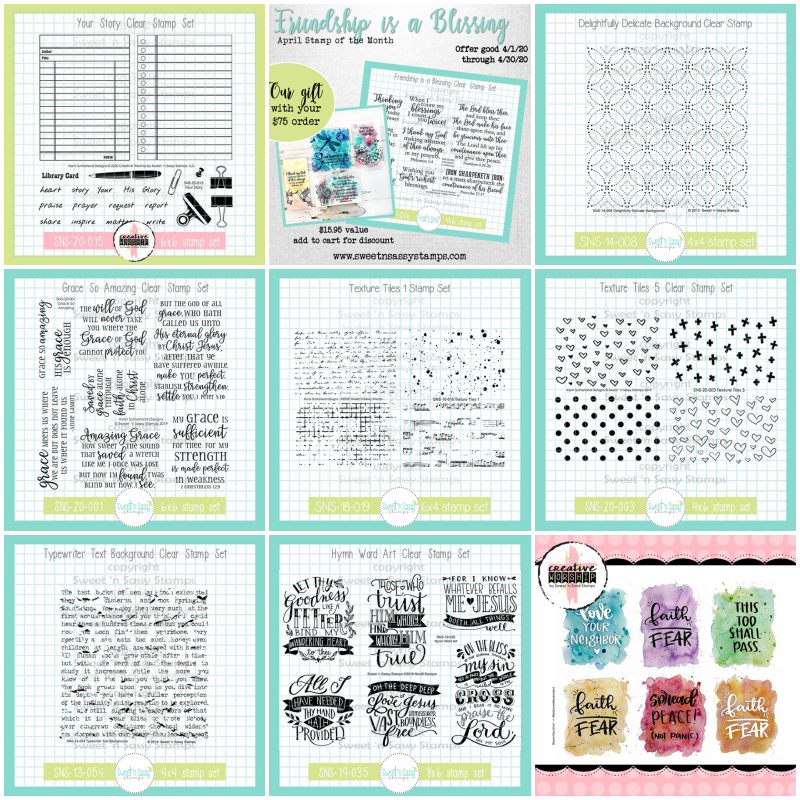
Today the DT is thrilled to share the new Delightfully Delicate Background with you.  This gorgeous image is a seamless background stamp that can be used to make as large a background as you wish!  You'll love the dainty touch it adds to your projects!
  •  Image measures approximately 3.75" x 3.75
  • Stamp is $11
The DT has shared their gorgeous samples in the thumbnails below.  Stop by each of their blogs and comment for a chance to WIN one of (2) $20 gift codes to our store!

Don't miss these other opportunities to win:
(1) $20 gift code drawn from all comments on Friday's release blog post
(1) $20 gift code drawn from all comments on full reveals in our SCS forum
(1) $20 gift code drawn from all participants in our release challenge hosted on blog

The deadline to comment for a chance to win is midnight EST Friday, February 14th.  The list of winners will be announced on our blog by Monday, February 17th.

Thanks so much for joining us!  Enjoy the hop!