Showing posts with label Love Wordfetti. Show all posts

Wednesday, February 9, 2022

Coffee & Chocolates Gift Card Holder


Hi sweet friends! It's Julee here, popping in with a fun gift card holder idea for a valentine, birthday, or just because. First things first, this is not my original idea. I made one years ago from a tutorial on someone's blog, but I can't remember who posted it. So I measured the prototype I had and drew up my own instructions. You can click on the image for a larger version, then save and print for reference.

It's a fun template, which has a belly band to hold a gift card, and depending on the size of circle you cut, can hold a mini coffee cup, a k-cup, or with no circle you can fill it with chocolates. I of course, went with a coffee theme, and used my new set, Latte Love.


For this holder I added a little embellishment to the k-cup with removable glue dots. The treat yourself sentiment is from the Birthday Wordfetti set, and I added my cup image and steam from Latte Love to the belly band.

You can also make this easily into a treat/gift card holder by not cutting a circle in the base.  I tucked  three ghirardelli squares wrapped in ribbon inside, but you could also use single reese's peanut butter cups, or any little goody bag tucked in the 2.5" square portion. 


If you have mini coffee cups, then you can use an approximate 2" circle for the hole.  I bought my cups off Amazon and filled this one up with chocolates for my boys' awesome teacher.  I deconstructed one of the cups and cut it down to make a template for the mini cup belly band, then cut that from patterned paper and embellished with a heart from the Hearts Die Set.  The happy valentine's day portion is from the Love Wordfetti set, and the rings of coffee behind the Latte Love sentiment piece is from Texture Tiles 9.


Here are the written instructions (included in the graphic above):

  1. Score 11 x 2.5” in cardstock on the long side at 0.75”, 3.25”, 4“ and 6.5” 
  2. If making a coffee cup or k-cup holder, adhere the 2.25” square mat (if using) in the square you will cut the circle from (right of the 0.75” scored edge), then die cut or punch circle. For a chocolate holder, you do not need to cut a circle. 1. Score 11” in cardstock on the long side at 0.75”, 3.25”, 4“ and 6.5” 
  3. crease and burnish scored lines
  4. Apply adhesive to front 0.75” flap then fold up so circle hole is facing up and attach adhesive portion to the longest section
  5. Mat with patterned paper and embellish as desired.
  6.  Score 6.5" x 0.75" belly band piece 1.75” from each side, crease and burnish, then apply adhesive to one end and wrap around holder.
Thanks so much for stopping by today! I hope you're inspired to make one of these gift card holders.  If you do, be sure to share it over in the VIP Facebook group so we can ooh and ahh over it!

Monday, July 19, 2021

Happy Place


Hello Sweet ‘n Sassy Stampers!
It’s Ceal, here.  Today I am sharing a card made with our new set, God of comfort. This set is actually a creative worship set but I wanted to show you could also use it for card making. 


To create this card I started with a top folding white card base, a white panel and a panel of design paper. I stamped the image and colored it using alcohol markers and then created texture on the bear by using blending solution with a terry cloth.
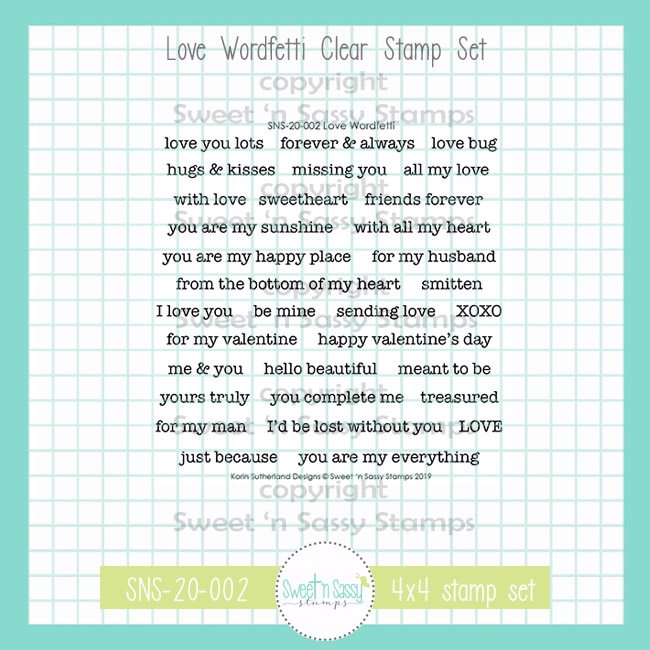
The sentiment is from the Love Wordfetti set.


Saturday, February 6, 2021

Love Bug

Happy Saturday everyone! Ever since Vintage Van was released, I have wanted to use the van to create a Valentine's Day card. I had a blast creating it!


The background on this card started out as a test piece for another card I made for the January release. I messed up the embossing and decided to test out background colors on it. Once I was done testing out the colors I was going to toss it, but decided to hang onto it for a bit and I'm glad I did.

I embossed the hearts from Grunge Elements 2 with clear embossing powder on white cardstock and cut with a stitched rectangle die. I ink blended with cracked pistachio, weathered wood and chipped sapphire distress oxide inks. At first, I wasn't sure I liked this combo but it grew on me.

I stamped the Van and love sentiment from Vintage Van with VersaFine Clair Nocturne ink on white. I colored with the above distress oxide inks along with mustard seed and black soot. I stamped the sentiments from Love Wordfetti on white and trimmed down to size. It's hard to see in the photo but I popped the sentiments and van up with foam tape. 


 Love Wordfetti and Grunge Elements 2 are part of the awesome Overstock Sale

going on for the entire month of February. Check it out!


I hope you enjoyed today's card and thanks for stopping by!

Karen

Monday, February 1, 2021

Happy Mail


Hello Sweet 'n Sassy Friends! 
It's Ceal, here to share with you today. The next time I post on the company blog will be after Valentines so I decided to share a couple more valentines cards. 
To create these I started with some Kraft card bases and white panels. I used the Happy Mail set that was our Stamp of the Month for January. 
The first card I stamped the envelopes, colored them and then masked them off and stamped the text from the Texture Tiles 1 set over them. To finish the card I added the sentiment from the Love Wordfetti set.

The second card I stamped the mailbox also from the Happy Mail set, colored it, masked it off and created some clouds. the greeting is also from the Love Wordfetti set. 


Tuesday, January 19, 2021

Sweet Valentines Using Old and New

 Hello!  

I have a couple of Valentines to share with you today, both of which are a mash up of old and new Sweet n Sassy Stamps Stamp Sets.  


This card is so easy; just 3 little stamps and done!  I stamped the airplane from the new Going Postal Stamp Set.  The 'old' is the wonderful heart 'jet stream', which is actually the steam from the Tea for Two Stamp Set.  I love this double duty for these hearts!  The sentiment is perfect for this combination of images and is from the Happy Mail Stamp Set.  And that's it!  No coloring, masking or anything time comsuming.  I added three die cut clouds and some patterned paper.  

Card number two also uses the Happy Mail Stamp Set~


I stamped two of the envelopes from the set multiple times and connected them with dashes.  At the end of the trail is the adorable hot dog from the Lots of Love Stamp Set, another 'oldie but goodie'.  The images were stamped on watercolor paper and colored in with Daniel Smith Watercolors.  The sentiment, from the Love Wordfetti Stamp Set, connects everything together.  

What do you have in your stash that you can mash together?  For Valentine's cards, these sets can't be beat!  

Thanks for stopping by and have a blessed week!

Lee Ann  

Saturday, January 16, 2021

My Happy Place

 Happy Saturday everyone! I'm sharing this clean and simple Valentine's Day card with you today.


I began by cutting a white cardstock panel with a stitched edge rectangle die. I stamped the banner from Happy Camper across the top with VersaFine Clair Nocturne ink and the small hearts from Sweet Little Lamb in red along the bottom. Then, I stamped the camper (Happy Camper) on white and the sentiment from Love Wordfetti on pink.  I colored the banner and camper with Arteza Real Brush Pens and fussy cut the camper. I assemble as seen, cutting banner ends on the sentiment strips.


I hope you enjoyed today's card and have a great day!

Karen

Saturday, January 2, 2021

But First.....Coffee

I am super excited for this months release!! I love coffee and coffee stamps! I have been eagerly awaiting January's release so I could finally play with some of the new coffee themed sets. 

For my card I combine two of the new sets, I Like Big Cups and Coffee Talk 2, with three older sets (Fill Me UpLove Wordfetti, and Forever & Always). This card also fits the love theme for the January VIP Challenge in our Facebook group.


I began by heat embossing the loved a latte sentiment with Versamark and clear ep powder on bristol smooth paper. I cut it with a stitched rectangle die and blended spun sugar distress oxide ink over most of the piece making sure to leave some white space. 

I stamped the coffee cups with VersaFine Clair Nocturne ink onto white cardstock and pattern paper. I stamped the lids a second time on white and the coffee sleeves on pretty in pink cardstock. I fussy cut the cups, lids and sleeves. I stamped the sentiments on the coffee sleeves masking one of the sentiments so I got just the word coffee. 

I paper pieced the cups together. I stamped Happy Valentine's Day on white and cut a banner tail. I stamped the small heart in honeysuckle ink and cut out. I assembled the card as seen on a pretty in pink card base popping the coffee cups up with foam tape.


I hope you enjoyed today's card and thanks for stopping by!

Karen


Friday, December 11, 2020

Rose Backgrounds

Today I have two clean and simple cards using the new Rose Background set. This stamp feels quite vintage to me so I chose color to compliment that.

For the first card, I stamped the background on Neenah Dessert Sand 4.25"x 4.25" card base and colored it with a combo of Copic markers and Polychromos color pencils. I added a simple sentiment and that is all for this one.

The second card uses the Rose Background inked in Festive Berries Distress Oxides. I used a water brush to fill in the roses and then added a little green to the leaves. I then stamped over the flowers with Texture Tiles 7 and added a sentiment from Love Wordfetti which is a perfect match for this texture tile set.

There you have it - two CAS cards with a little vintage feel. I hope you are inspired!

Thanks for stopping by!

Lyn

Tuesday, March 17, 2020

For Such a Time as This

Hello All!

I have a couple of cards to share with you today using the Succulents Stamp Set.


These were easy-to-color images that I did not get all detailed with, nor did I think about things like light source much.  I just did some basic coloring with Copic markers.
The 3 images were fussy cut out; then came trying to figure out what to do with them.  Nothing seemed quite right until I landed upon a monoprint made with acrylic paint and my gel plate.
The background panel was cut with a stitched rectangle die.  The succulents were attached, using foam tape to pop up the top most image. The sentiment is from the Love Wordfetti Stamp Set.

Anyone who knows me knows I am a colorist.  I typically shy away from silhouette stamps.  I was determined to use a silhouette stamp from this set.  The outcome was this wreath, made with the larger of the two silhouette images in the stamp set.


I stamped my wreath in desert-like colors and then fussy cut the wreath out.  I die cut a white frame and then used my Wood Background Stamp Set to create a wood grain effect on the frame.  I stamped in a light grey ink.
The inside panel of the frame was done on a medium grey cardstock and again stamped with the woodgrain stamp, this time in time in a darker grey ink.
The sentiment is from the Sentimental Mash Up Stamp Set.  I stamped the 'Hugs' in Onyx Black Versafine Ink directly onto the card and then heat embossed it with clear ep.  'To you' was stamped on a dark gray strip and heat embossed in white.
After spritzing the wreath with an irridescent Shimmer Spray, I popped it up on dimensional tape, surrounding the word 'Hugs'.  I glued the 'to you' onto the wreath and added a few sequins to finish it off. 
I made these cards to send to my parents to encourage them during this unsettled time.  Being in their 80s, they are pretty much house bound for the long haul.
It sure is easy to get caught up in the panic of it all, but believers can get out there and share God's love.  For we were created 'for such a time as this.'  

Have a blessed day all! 

Lee Ann 

Saturday, February 1, 2020

Boots & Sketch Challenge

Hello Sweet n' Sassy friends! I am sharing a card today made with the cute new set Springtime.
I used the sketch for the February SNSS VIP Group Challenge on Facebook designed by our very own Julee Tilman. If your not already a member we would love to have you join us!


 The sketch I used to create my card.


I started by looking through my pattern paper until I found something that would work with the boots. I was super excited to find the bee paper!  I stamped the images on Canson XL watercolor paper with VersaFine Clair Nocturne ink. I used my Arteza Real Brush Pens to color them (sunset yellow, bumblebee yellow, wisteria purple, rouge pink, green tea, ice blue, elephant gray and red). Afterwards, I die cut the boots with a wonky stitch circle die and fussy cut out the butterfly and ladybug. I also die cut out another circle for matting  and found a coordinating piece of scrap cardstock for the banner.

I stamped the polka dots from Texture Tiles 5 onto my banner and attached the butterfly. I stamped the sentiment from Love Wordfetti onto a scrap piece of white cardstock. I chose those words because I like having cards in my stash that can be used for anything.  I assembled the pieces as seen, glued the ladybug on and added some white string to finish off my card.

I know, I added something to the sketch by adding a strip with the words to it. It was the only way I could figure out how to add a sentiment. I do have an idea for another card that will follow it exactly.


For more cards made with the sketch check out the Facebook group throughout the month to be inspired. Why not create your own and enter it in the VIP group for a chance to win a gift code to Sweet n' Sassy Stamps

Until next time, I hope you have an awesome day!

Karen


Friday, January 31, 2020

Fun Valentines

Hi Sweet 'n Sassy friends! It's Julee, popping in to share a couple of fun valentines I made this month. These were both inspired by the fabulous challenges in our Winter Stamp-a-thon. Did y'all have fun with that? We're hoping to do a few more throughout the year!


My first card uses the darling sloth image from Lots of Love. I colored him with a mix of watercolor markers and copics, then paper pieced the hearts.  I thought the Everlasting Love sentiment from Faith Wordfetti would go well with a sloth, so stamped that on the side of my panel and then doodled a frame.  A bit of Tumbled Glass distress oxide sponged around the edges finished off the stamped panel.

For the background I used 1/2" strips from the Lovestruck Authentique pad, taping together with double sided tape and then finished off my square card with a bit of lace trim. Easy and so much fun!


My next Valentine was inspired by Sheri's theme challenge to use the color red and a heart on a valentine.  I love this you ring my bell sentiment from the Back to School set and thought it would be perfect for a valentine for hubby!  I stamped the bell, colored with Copics and cut out.  The sentiment is stamped and matted to layer behind and I added it to a heart die cut of patterned paper.

I added a little sponging with black soot ink to the designer paper I chose for my background, then taped some thin black washi at the bottom and pulled out the Love Wordfetti set to add in the xoxo valentine xoxo portion in candied apple and black soot inks.


Thanks so much for stopping by today. I hope you're inspired to get inky!

***This post contains affiliated links at no cost to you ***

Tuesday, January 28, 2020

Valentine Treats!

Hello Sweet Friends!  Sheri here today with a couple Valentine treat ideas!  They both feature the NEW Lots of Love and Love Wordfetti stamp sets.💓
 
***THIS POST CONTAINS AFFILIATE LINKS AT NO ADDITIONAL COST TO YOU***

My first project I created for last weeks Stamp-a-thon Event that we hosted over in our VIP FB Group.  Not a member yet?  You can find us HERE.  It's a candy wrap designed for a 1.69 oz bag of M&M's.  You can find the PDF file with the directions HERE.
 

My next project is a little altered treat box that anyone would love to receive! I used a die to cut the box out but there are tons of templates that could also be used.


http://shrsl.com/1p6qi
http://shrsl.com/1ou1d

Happy Stamping!!

Monday, January 20, 2020

Lots of Love for Valentines


Happy Monday!
It's Ceal, here with you today. Did you enjoy our Stampathon that was held on Saturday over on our VIP Facebook page
If you haven't played along yet you have all week to get your entries in. There will be a $50 Gift code to the online store given to a random participant. 


Now for my cards, they are super simple. I stamped the images from the Lots of Love set using black Copic friendly ink and then colored both of them with Copic markers.  Both of the greeting are from the Love Worfetti set.
These images are so adorable and fun to color as well. The Lots of Love and Love Wordfetti are both must haves for your valentine cardmaking.