Showing posts with label Retirement Sentiments. Show all posts

Wednesday, November 9, 2016

Happy Birthday!

Hello! It's Monika here today with a set of birthday cards.
I needed to make some birthday cards so I decided to go Clean & Simple (CAS) and make a number of cards (several of the same designs). 
 
 
I had the Chunky Alpha clear stamp set out on my desk so I incorporated some of the letters into the greeting. It's fun mixing up your greetings and letters... there are so many different ways you can mix n' match images.
On the first card, I masked off the first letter of the words from the Companion Words clear stamp set, and used the letters from the alphabet set to make it more interesting:
 
 
On my second card, I stamped HAPPY with pink ink and stamped birthday with black ink. It game me a nice contrasting look:
 
 
On my last card, I used 2 different stamp sets to stamp out the greeting. Happy was part of a retirement greeting from the Retirement Sentiments clear stamp set, but I masked off the rest of the words:
 
 
I worked with 2 different shades of the same color... one dark and one light...
The cupcake image came from Birthday Bash clear stamp set. It has a coordinating die set (which is not available at the moment), but you can just stamp up the frosting image, cut it out and use that as a template to make the sparkly frosting. I had a bunch die-cut from ages ago so I used those to make several cards.
 
Thanks for stopping by,
Monika


Monday, June 8, 2015

Tutorial Monday: Sharpie Dip

{Jane Bosi}  Happy Monday, Sweet friends!  I'm excited to share this Monday's tutorial with you--it's both colorful and easy--two of my favorite things!!  And, as an extra happy bonus, you are likely to have all of the necessary supplies right in your home!
You will need several complimentary sharpie markers, rubbing alcohol, and eyedropper (pipette) a piece of white card stock and a piece of acetate.  An acrylic block could be used as a substitute for the acetate, however, most Sweet 'N Sassy stamp sets come backed with an extra piece of acetate.  You are not going to ruin it, so it's almost like it was meant to be :)
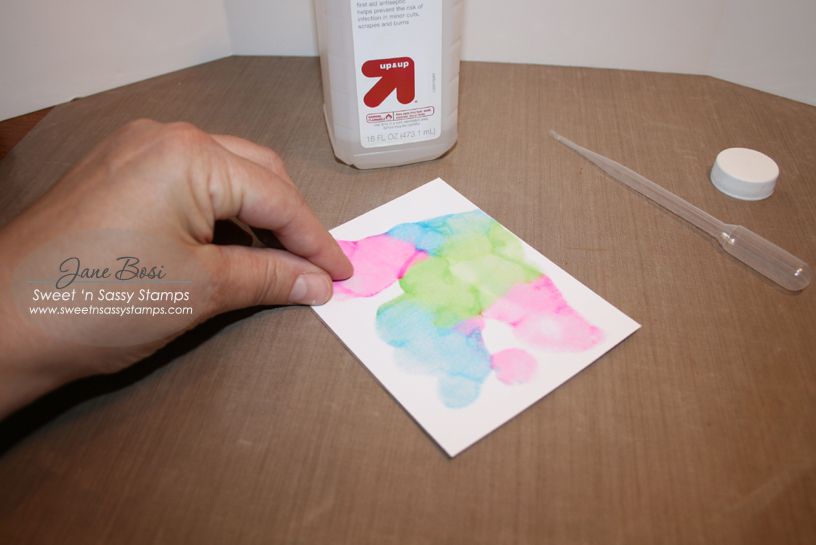
Begin by laying color patches with the sharpie markers on the sheet of acetate.  Any random pattern will do!
Using the pipette, add drops of rubbing alcohol to the entire surface of the colored acetate.  The rubbing alcohol will spread and blend the inks.
Immediately, cover the prepared acetate with the white card stock.  Gently press around the entire card stock piece to transfer the inks.
Depending on the outcome of the dipping, you can use either the front or back side for the next step.  It really is your personal preference.  In the above samples, the back side picture is my preference due to the mingling of colors and intensity.  Some of the colors on the front side are muddied.  The back side on this particular piece was much prettier.  You will see what I mean when you start to play around yourself!
To complete your project, all you need is your favorite images from Sweet N Sassy Stamps and some black ink.  The contrast of the black ink and the background colors is awesome, in my opinion :)  You can tell from the opening picture, I had a hard time stopping!  Below, is each card alone with a few more details:
 This card features New Creature--butterflies and sentiment.
 Also New Creature and Retirement Sentiments.  I rarely use white as a card base, but with this colorful front, the white really works.  The butterfly wings are highlighted with a white signo pen, also.
I created this collage card using Parisian Postcard---a simply gorgeous set--by randomly stamping images everywhere.  Later, I colored the flowers only and added a sentiment from Wait On The Lord.

I hope you've enjoyed this tutorial as much as I have enjoyed making it.  We sure would love to see your creations, so feel free to share in our comment section!  Most of all, go on get inky!

Don't forget to be awesome!
TTFN, Jane

I Got Crafty With:


Sunday, April 19, 2015

Happy Retirement!

Since I had been a teacher most of my working life, and I am getting older (I retired from teaching in 2013), this new Retirement Sentiments set (available for preorder) is going to get a lot of use! I have a lot of friends who will be retiring this year and in the next few years.

Today I made a quick and easy card using one of the sentiments from the set and some pre-cut shapes. The scalloped edge along the bottom is cut from some really sparkly blue paper (always hard to photograph) using the smaller die from the SNSS Scallop Border die set.

Be sure to check out the rest of the April release here!