Showing posts with label Encouraging Thoughts. Show all posts

Tuesday, June 15, 2021

Florals and More

 Hello! 

Have you been enjoying all of the June release inspiration?  

Being the floral lover that I am, I could not resist another card using the new Botanical Branches as a filler.  


I used the pussy willow stems from the Botanical Branches Stamp Set, coloring them in gray with Copics.  The roses and leaves are from the True Beauty Stamp Set and were colored in grays and yellows.  Gray and yellow. The color combination has to be one of the most perfect combos there is!  

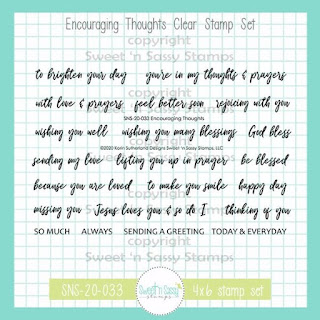
All of the images were fussy cut out. An embossing folder was used on the background panel.  All of the pieces were put together and adhered to the card front.  The sentiment is from the Encouraging Thoughts Stamp Set; It was stamped on a grey sentiment strip.  A few sequins finish the card. 

I liked this grouping of images so much that I recreated it in tag form.  I needed this tag for a Bible study I will be starting.  I am not usually one for tags, but something about this was freeing!  


My tag was first sponged with distress inks in various shades of green.  Next, texture was added to it but using a darker green with the Fern Fronds Stencil.   Lastly, I spattered a bit of white acrylic paint on the background. 

Then I used the same rose from the True Beauty Stamp Set and colored it with Copics after stamping with Memento Tuxedo Black Ink.  The branches are again from the new Botanical Branches Stamp Set and were colored with Copics.  Everything was fussy cut out.  I added a bit of vellum to the bottom right corner just to soften things a bit then arranged the elements and adhered them to the tag.  I finished the tag off with my printed steps and hand lettered title.  A couple of ribbons finish it off.  

That's it for me!  Thanks so much for stopping by and have a blessed day!

Lee Ann  

Monday, June 14, 2021

Scribble Flowers


Happy Monday! Did you know that Sweet n Sassy Stamps recently added several new die sets to the store? One of the sets they added coordinates with their awesome Scribble Flowers that I used on my bright and cheery card for today. (To check out their entire steel die collection click here)

     ~~~This post contains affiliate links at no extra cost to you~~~

 Supplies and Tools:

Tuesday, June 1, 2021

Versatile Botanical Branches

 Hello, Hello! 

Happy Summer to all of you! 

Have you checked out the new release from Sweet n Sassy Stamps?!  This is a seriously awesome release!  My favorite set is the new Botanical Branches by Nina B.  First off, they are just gorgeous; but second, they are so versatile!  They are perfect fillers for floral sprays but they can also stand alone on a card, as in my first card~


 This gorgeous berry branch was colored with Copics and then fussy cut out.  I added an embossed panel to my card base.  Then, for interest and another pop of yellow, I cut in half a square die cut frame I had in my stash.  It happened to be stamped with an image from the Flower Garden Stamp Set and watercolored with distress ink.  The square halves were adhered to the base and the berry stem was popped up on foam tape.  The sentiment, which is from the Encouraging Thoughts Stamp Set was stamped on a sentiment strip and adhered, along with a few sequins to finish the card. 

Next up, I have used the Botanical Branches set as filler for a floral bouquet.  The flower is from the True Beauty Stamp Set.  


I started with the back panel- color blocked 5 wide stripes with watercolor.  While that was drying, I stamped the flower with distress ink and then colored it with distress inks.  I did the same for the leafy branches that are from the Botanical Branches Stamp Set.  The leaves were heat embossed in white embossing powder on vellum and everything was fussy cut out.  The elements were assembled in the lower left corner and adhered to the card.  The sentiment is from the Birthday Wordfetti Stamp Set and was stamped on blue cs.  A few sequins were added.  

You can check out the entire new June Release HERE!  And check out the new release specials while you are there.  

Thanks for stopping by!

Lee Ann  


Monday, May 10, 2021

Thinking of You


 Happy Monday! Esther here today sharing a beautiful bird themed card. The set I used is called Singing Praises and it's illustrated by Nina Brackett.  


 All Nina Brackett sets are 25% off this week!

 Above are a few of my favorite cards (and tags) using her line of stamps

    ~~~This post contains affiliate links at no extra cost to you~~~

TIP: The wreath die I used on this card was actually too small to fit around my text circle so I cut a second one, snipped a piece out and glued the new section into the first one to  make it larger. I've also shrunk this wreath on past cards by snipping a section out  and gluing the ends back together. Just a fun way to stretch your supplies and make them work for your card design.

Supplies and Tools:

Saturday, April 17, 2021

Dotted Flowers

Hello Everyone! I have seen the dotted coloring technique with markers and really wanted to give it a try, but I don't own any markers. So I took a look at my collection and got super excited when I realized the Happy Day set had a stamp with three small dots in it and an idea was born. 

I actually created these dotted flowers last month, but never got around to making cards with them. I decided to utilize them this month and incorporate two of the new April Release'sButterfly Background and Everyday Greetings 2


I stamped the flowers with Versafine Clair Nocturne ink on white cardstock. Because this ink can stay wet for a while for embossing I decided to heat set them so I could get started on the dot stamping. I picked three different, yet coordinating colors, starting with the lightest color first.

First color, notice I don't cover the entire space with color.


Second color, fill in more while still leaving white space for the third color.


Third color, now you really start to see it coming together. At this point, I went back to the first color and repeated the steps. I continued to do this until I was happy with how it looked.


I repeated this process with three different greens for the leaves and fussy cut the images. I stamped the sentiment from Encouraging Thoughts with black ink on Kraft and layered a piece of Summer Sun cardstock behind it . I stamped the Butterfly Background with Vintage Photo Distress Oxide ink on Kraft as well. I die cut the butterfly panel, along with pattern paper and more Summer Sun. I assembled as seen and popped the flowers and sentiment strip up with foam tape.


For my second card, the flowers were done in three different blues. The Butterfly Background was stamped in Aqua Sky on white cardstock and die cut. I stamped the sentiment from Everyday Greetings 2 on the same color blue cardstock as the base. I assembled as seen, pooping the white panel up with foam tape and adding three small pearls to the front.

I had a blast creating dotted flowers and made a whole bunch of them. If you own the Happy Day set I hope you will give it a try and share your creations in the Sweet 'n Sassy Stamps VIP Group on Facebook. 


I hope you have enjoyed today's cards and thanks for stopping by!

Karen

Monday, February 22, 2021

Two cards - One background


 Hello friend. Esther here today sharing two cards I created with one striped background. My first card features the BRAND NEW Alleluia Lilies and coordinating Alleluia Lilies Dies that I used to practice some no-line watercoloring. I stamped the Background Builders: Stripes on white card stock and added some spot stamping with Psalm 23 Background. I trimmed it into a long strip and matted it on green card stock.  To add a bit of interest to the white card front I used the Delightfully Delicate Stencil and some peeled paint distress oxide. The sentiment is stamped in Versafine Clair Nocturne Ink.

~~~This post contains affiliate links at no extra cost to you~~~
r)  

My second card uses the leftover piece of striped paper that I created with the Background Builders: Stripes set turned the other way and used across the bottom of my card. 


  I created a focal point for my card using Flower Garden and Sweet As Honey, which I colored with Arteza Real Brush Pens. The top part of my card is a collage consisting of Flower Garden, Cheerful Hexies, and Psalm 23 Background. The Fence Die divides the two sections and a sentiment from Encouraging Thoughts is stamped in Versafine Clair Nocturne Ink  ink across the bottom.


~~~This post contains affiliate links at no extra cost to you~~~


Friday, August 7, 2020

Thoughts and Prayers

Hello everyone, today I want to show you a card I made with the encouraging thoughts stamp set and the scribble flowers set. This card is pretty easy to make and a great way to let someone know you're thinking about them.

I made a background with soft hearts on white paper with a stencil and some green ink. After that I stamped the sentence and image on it. I colored the image with watercolor markers and blended the green color to a lighter shade in the top of the leaves. 

I added a bit of Wink of Stella on top of the leaves to give them a bit more sparkles. To finish the card I added a couple of sequins and adhered everything on a blue-green background.

I hope you're inspired to create!
- Lucinde

Monday, July 27, 2020

Succulents & Bees


Hello everyone, Esther here sharing two fun cards with you! On this succulent card, I did some masking on watercolor paper to create this fun collage.  I colored my succulents with Arteza Real Brush Pens and fussy cut them before popping them up over a plain white (embossed) background. Keeping the background simple really helps to make the main image "pop."


~~~This post contains affiliate links at no extra cost to you~~~

Supplies and Tools:


My second card features the honey jar and bees from the NEW "Bee Sweet" stamp set.


 I included lots of "frilly" accents on this one with die cut lace and doilies!


Supplies and Tools:.
  • Bee Sweet (Sweet n Sassy Stamps)
  • Encouraging Thoughts (Sweet n Sassy Stamps)
  • Arteza Real Brush Pens
  • 3D Lumber Embossing Folder (Sizzix -Tim Holtz)
  • Crochet Dies (Sizzix -Tim Holtz)
  • Hello Doily Dies (Sizzix)
  • Circle Nestabilities (Spellbinders)
  • Fishtail Banner Dies (Stamp Simply)
  • Barnwood Pretty Designer Paper (The Paper Studio)
  • Jet Black Archival Ink (Ranger)
  • Dusty Concord Distress Oxide (Ranger)


Friday, July 17, 2020

Thoughts and Prayers

Hi sweet friends! It's Julee, popping in to share a fun card with the new release.


I started by coloring this beautiful flower image from the Flower Garden set with Zig clean color real brush markers.  I then blended speckled egg distress ink around the edges and set aside.


I chose a background paper from the Sky collection from 49 and market, then added a bit more interest to it with the Texture Tiles 3 set and speckled egg ink.  The paper pad has some fun little image pages that you can fussy cut, so I cut the little chevron element from that, then matted my image panel with crumb cake cardstock that I tore on one edge and also added some interest with the Texture Tiles 3 set and also a bit of dry brushed gesso.  This panel is wrapped with twine and I accented with a paper flower and button.

The little butterfly was stamped, colored, and fussy cut, then added as a little accent to the top right corner.  I finished with a sentiment from Encouraging Thoughts.

Thanks so much for stopping by! I hope you've been inspired.


***This post contains affiliated links at no cost to you ***

Saturday, July 11, 2020

You're in my thoughts


Hello everyone! Today I want to show you a card I made with the Sympathy Morning Glories stamp set.


I stamped the image on watercolor paper and colored it with watercolor markers. I stamped a message from the Encouraging Thoughts stamp set. A great match with this image! I distressed the edges of the image and added a blue background paper behind it.
And of course a couple of sequins to finish the card ;).

https://www.sweetnsassystamps.com/sympathy-morning-glories-clear-stamp-set/

https://www.sweetnsassystamps.com/encouraging-thoughts-clear-stamp-set/

I hope you're inspired to create!
- Lucinde

Saturday, June 20, 2020

Ink Shaded Pattern Paper

I recently came across a video using a technique called Ink Shaded Pattern Paper. I thought it would be great to try out with the new Dazzling Dahlia set from Sweet 'n Sassy Stamps.


I started by finding some coordinating pattern paper and ink that would work for blending with them. Then I used garden green and pumpkin pie ink to blend over the top of the pattern paper. I stamped the flower and leaves in Versafine Clair Nocturne ink on them and fussy cut out.

I dry embossed the Kraft panel with a honeycomb folder and then die cut with a stitched rectangle die. I stamped the sentiment from Encouraging Thoughts and cut out with a  stitched sentiment strips die. I assembled as seen and added black enamel dots to finish. This pattern paper is actually quite bold, but blending a coordinating ink over it gave it a more subdued look while allowing the pattern to still show through. I really like how it turned out!


Thanks so much for stopping by and have a fantastic day!

Karen