Showing posts with label Happy Day. Show all posts

Wednesday, June 2, 2021

Perfect Preparation by Charmaine Canham

Hello friends!
I am so very excited to show you today's card.
 I am mixing old with new for a whimsy and fun project. 

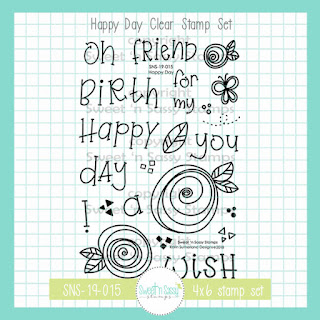
I started with a gel print from a recent play with my five-year-old daughter. I just love how she used these colors with her little fingers, not knowing how it will look at the end. Sort of just like today's sentiment... we don't know how it will end, but we know God is preparing us. I white heat-embossed the flowers from the Happy Day stamp set and cut them out by hand.


Next, I silver heat embossed the branches from the new Botanical Branches on white vellum.


The beautiful sentiment comes from an older set, The Future.
This was stamped with a black detail ink and clear heat embossed. 


Now to arrange the blooms and branches. I used double-sided foam tape and regular double-sided tape. The vellum branches are placed right under the blooms with foam tape for movement.
Don't overthink it, just play.


I did add a sliver of black cardstock on the left to balance the sentiment on the other side. 


Isn't she just fun? I hope you liked today's card and mix your old and with new stamp sets!
Have a fabulous day!


Follow me on Facebook and Instagram for almost daily inspiration.


Saturday, April 17, 2021

Dotted Flowers

Hello Everyone! I have seen the dotted coloring technique with markers and really wanted to give it a try, but I don't own any markers. So I took a look at my collection and got super excited when I realized the Happy Day set had a stamp with three small dots in it and an idea was born. 

I actually created these dotted flowers last month, but never got around to making cards with them. I decided to utilize them this month and incorporate two of the new April Release'sButterfly Background and Everyday Greetings 2


I stamped the flowers with Versafine Clair Nocturne ink on white cardstock. Because this ink can stay wet for a while for embossing I decided to heat set them so I could get started on the dot stamping. I picked three different, yet coordinating colors, starting with the lightest color first.

First color, notice I don't cover the entire space with color.


Second color, fill in more while still leaving white space for the third color.


Third color, now you really start to see it coming together. At this point, I went back to the first color and repeated the steps. I continued to do this until I was happy with how it looked.


I repeated this process with three different greens for the leaves and fussy cut the images. I stamped the sentiment from Encouraging Thoughts with black ink on Kraft and layered a piece of Summer Sun cardstock behind it . I stamped the Butterfly Background with Vintage Photo Distress Oxide ink on Kraft as well. I die cut the butterfly panel, along with pattern paper and more Summer Sun. I assembled as seen and popped the flowers and sentiment strip up with foam tape.


For my second card, the flowers were done in three different blues. The Butterfly Background was stamped in Aqua Sky on white cardstock and die cut. I stamped the sentiment from Everyday Greetings 2 on the same color blue cardstock as the base. I assembled as seen, pooping the white panel up with foam tape and adding three small pearls to the front.

I had a blast creating dotted flowers and made a whole bunch of them. If you own the Happy Day set I hope you will give it a try and share your creations in the Sweet 'n Sassy Stamps VIP Group on Facebook. 


I hope you have enjoyed today's cards and thanks for stopping by!

Karen

Thursday, March 18, 2021

fern background

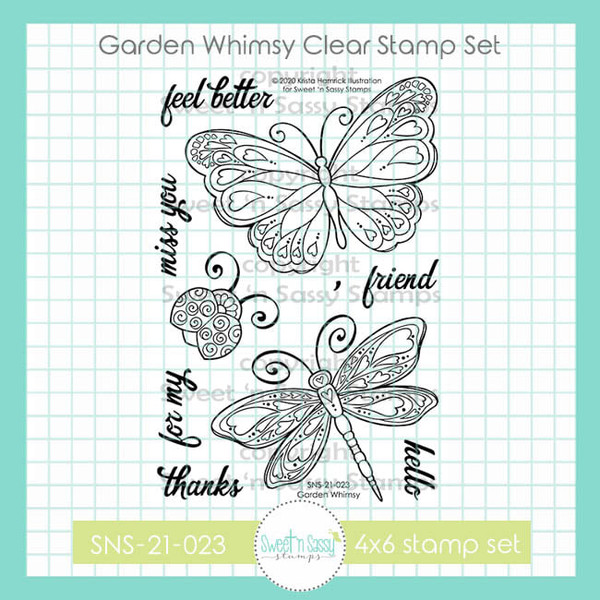
Good morning! Today I have 2 cards in which I used the March Stamp of the Month: Fern Background, along with Garden Whimsy and Happy Day. For the white border on my first card and the die cut center on the second one, I also used Bookmarks & More Dies.

The fern stamp makes such a pretty background and I love it in purple! I definitely need to make more purple cards! I embossed a little texture on the black layer and colored the flowers with Copic markers. 


The second card turned out bright and fun. I blended a few colors of Distress ink and stamped the ferns on top. The panel was cut down and layered onto a horizontal gate-fold card. I used a die from Bookmarks & More Dies to cut a window in the center. (I lined it up, cut one side, then lined it back up and cut the other side.) A left-over strip from the background was adhered to the left side of the card. The dragonfly was stamped onto another piece of ink-blended cardstock. This time I added a bit of blue.


The card opened...I added the scrap pieces that were die cut from the front panel to the inside.


Have a great day!
Diane


Tuesday, March 9, 2021

Everday Greetings

 Hello Sweet Friends!  Sheri here today with a couple cards featuring the NEW Everyday Greetings stamp set from the March 2021 Release.
 
I thought it would be fun to pair the Everyday Greetings set with the whimsical flowers from the Happy Day stamp set and to use different coloring mediums on each card to come up with completely different looks.
 
Clean & Simple with Copic Markers
 
1. Stamp the flowers using alcohol friendly ink and color with copic markers.
2. Add Sparkle to the flowers with Stardust Glitter Pen and Fussy cut.
3. Attach a 2 1/2" Striped piece of pattern paper to white panel and arrange flowers as desired.
4. Add Sentiment, assemble card and add dew drop embellishments.
 
Card Measurements:
White A2 Top Fold Card Base: 4 1/4" x 5 1/2" (4 1/4" x 11", scored at 5 1/2")
White Layer: 3 15/16" x 5 3/16"
Black Strip Pattern Paper: 2 1/2" x 2 1/2"
 
Clean & Simple with Ink Blending
 
1. Stamp the flowers with embossing ink and heat emboss with fine detail white embossing powder.
2. Next take any ink blending tool of your choice and ink blend the flowers and leaves with peach & green inks.
3. Fussy cut the flowers out and arrange them on the small rectangle panel and stamp sentiment with black ink.
4. Take the Grunge Dots Stencil and dry emboss the white background panel for added texture.
5. Assemble card and add dew drop embellishments.
 
Card Measurements:
White A2 Top Fold Card Base: 4 1/4" x 5 1/2" (4 1/4" x 11", scored at 5 1/2")
Peach Mat: 3 5/8" x 4 7/8"
White Stitched Panel:3 1/2" x 4 3/4"
Peach Strip: 3 1/2" x 3/4"
Peach Rectangle Mat: 2 3/8" x 4 1/8"
White Stitched Panel: 2 1/4" x 4"


-----------------
 
LAST CHANCE
Offer ends 3/9/21
 
Happy Stamping!!

Monday, March 8, 2021

Hopping by with Blessings


Esther here today sharing a fun little spring bunny card. To create my background I sprinkled some Merlot Color Burst powders on a piece of watercolor paper, spritzed with water, and heat set. Then I stamped one of the roses from HAPPY DAY in VERSAFINE CLAIR NOCTURNE INK all over the background.  I stamped one of the bunnies from HOPPY SPRINGand colored it with Arteza Real Brush Pens before fussy cutting. I die cut the BLESSINGS DIE from black card stock and added some white polka dots with a gel pen.  I glued the die cut sentiment to a white tag and added "hopping by with" in seedless preserves distress oxide. 

   ~~~This post contains affiliate links at no extra cost to you~~~


Saturday, March 6, 2021

Your Kindness

Good morning Sweet 'n Sassy Stamp friends! Today I am excited to share this card with you. I recently received the sentiment set Kindness Matters and I am so glad I finally got it. I love the mix of fonts and different ways to put the sentiments together! 


I paired the sentiment set with a few other goodies to create this bright and bold thank you card. I started by creating the background with the Delightfully Delicate Stencil and picked raspberry distress oxide ink on white cardstock. I love this stencil! I layered the white panel on black and attached to a pink passion card base.

Then, I cut one of the bookmarks from Bookmarks & More Dies, trimmed it to fit the stenciled panel and stamped the sentiments from Kindness Matters with VeraFine Clair Nocturne ink. Next, I embossed the three flowers from Happy Day with VersaMark and black embossing powder on white cardstock. I colored them with watercolor brush pens and fussy cut out. Finally, I attached the flowers popping the two bigger flowers up with foam tape.


I hope you enjoyed today's card and thanks for stopping by!

Karen

Monday, July 20, 2020

Bee Sweet Card Set


Hello, Sweet 'n Sassy stampers!
It's Ceal here to share with you a card set I made using the Bee Sweet set. 
The first two cards you may have seen already on my blog if you joined our release bloghop. If not you have until 10pm EST on the 21st to leave comments so you will want to do that. 

I have complete details on how I made each card, along with the links on my blog Simply Beautiful, be sure to head over for those. 


Saturday, June 13, 2020

Happy Days


Sometimes all you need is a large sentiment and some patterned papers to make a card :). Today I want to show you two cards I made with the messages from the stamp set 'Happy Day'.


I stamped the messages on the same paper as my card stock and used a rectangular die (with stitched edges) to cut them out.


I stamped one of the smaller images from the stamp set next to the words on the cards and colored them with watercolor markers.


I searched for colorful patterned papers and a couple of matching stickers / paper flowers to give the cards a bit more color. And finished them with enamel dots and sequins.

https://www.sweetnsassystamps.com/happy-day-clear-stamp-set/

I hope you're inspired to create!
- Lucinde