Showing posts with label So Grateful. Show all posts

Wednesday, June 23, 2021

Jar of Blessings


Hi friends! It's Julee popping in today with a card made with a mash-up of old and new stamps and dies. As soon as I saw the Botanical Branches set, I knew I wanted to add these to a mason jar. Cue the mason jar from the Get Well Critters set.  I stamped the jar, then masked off the lid to stamp the branches. I then colored with Copics, accented with stickles and hand trimmed.

The background of the card is done with the June Stamp of the Month, Grunge Stripe Background. I really love this background! I stamped on kraft with brown ink, then sponged around the edges with brown ink for a glow in the center.


The horizontal strip is soft sky cardstock stamped with the swiss dot pattern from the Texture Tiles 8 set. I cut the Blessings Word Die several times from white and then kraft paper, then layered them together for depth and sponged just the bottom portion with black ink. The many is from the So Grateful set and I popped it up on dimensionals above the die cut sentiment to finish off the card.

Thanks so much for stopping by today! I hope your day is filled with blessings.


Saturday, November 11, 2017

Peaceful Sympathy

Hello Sweet 'n Sassy Stampers!  Have you been having fun with all of our 10th Birthday Celebration activities?  

Yesterday we gave away two wonderful sentiment stamp sets to one lucky winner.  The cards I am sharing today use both the So Grateful and Keep in Touch, Too sets that were given away.

Both cards use a stencil mono printing technique found on Karen Dunbrook's Blog for the background.  Apply inks (Oxide inks were used here) to the back of a stencil.  Spritz with water and press onto a heavy piece of card stock.  Several prints, each getting a little lighter, can be obtained by continuing to spritz and press onto different pieces of card stock.  More colors can be added to each panel, turning the stencil slightly as each layer is added.

Since I found myself needing a sympathy card this week, I reached for the beautiful Peaceful Peonies stamp set.  The same Oxide Ink colors used for the mono printing were applied to my craft mat and spritzed with water.  The craft mat was used as a stamp pad to randomly stamp the peony on another piece of card stock.  One of the sentiments from the same set was stamped randomly over the flowers to finish the background.  The inks on the craft mat also became a paint palette for watercoloring the focal image.  The sympathy greeting from the Keep in Touch, Too stamp set was white embossed on a cut vellum banner and stitched to the card.  The design of the card came from Freshly Made Sketches.

The same mono printing technique was used to create the background for this card.  The Typewriter Text Background was lightly stamped over the panel.  Silhouette images from the Nature Silhouettes set were stamped on the left side.  A quote from Faith Quote Blocks was added along with a white embossed sentiment from the So Grateful stamp set.

Thanks so much for stopping by!


Be sure to check out our Facebook and Instagram pages for more fun discounts and giveaways during the month of November...We're celebrating all month!!! 

Have a wonderful day!
Hugs,
Cathy

Friday, November 10, 2017

Autumn Blessings

Hello Sweet Friends!  Julie here and today I am sharing a quick Mixed Media card using the So Grateful Clear Stamp Set (designed by Gloria Stengel) along with the Skeleton Leaf Background Clear Stamp (designed by Korin Sutherland). 


To create this card, I tapped a few distress oxide inks onto my craft mat, spritzed lightly with water and placed a piece of 4 ¼” x 5 ½” white cardstock into the ink.  

I repeatedly lifted the cardstock and pressed back into the ink (smooshing the ink until I was satisfied with the coverage :-)) and used a heat tool to dry the panel thoroughly before proceeding to stamp the Skeleton Leaf Background  with versafine onyx black ink onto the panel.

I trimmed the stamped leaf background panel into thirds, mounted each panel onto black cardstock and trimmed close to the edge. All three were mounted onto the card front with dimensional foam.

I stamped the sentiment from So Grateful onto vellum and embossed with gold embossing powder.  I trimmed the sentiment panel and used a bit of adhesive behind some of the letters and corner to adhere it to the card front.  

I added a looped black satin ribbon bow along with a antique metal brad to hide some of the adhesive and a few copper sequins to finish off the card .

This was a fun card to create and I hope I have inspired you today! 


Also, don't forget about our 
10th Birthday Celebration!!

   
FREE GIFT WITH PURCHASE

Through the entire month of November EVERY $50 order* will also include the “So Happy” stamp set, a $15.95 value, 
at no additional charge!! No coupon required.  

*Order must total $50 after discounts and 
before tax and shipping.


Plus, there more birthday promotions- a chance to win free stamps for a year, free printables, and more!! 

Thanks for taking the time to visit us- hugs and God Bless, 
sweet friends!

Monday, October 16, 2017

Autumn Blessings

Hello Sweet Friends!  Julie here and today I am sharing a fun Autumn card using So Grateful and Tree Background Clear Stamp Sets (both were designed by Korin Sutherland).


To create this card, distress oxide inks were added to a piece of vanilla cardstock to achieve the multi-colored background, then the Tree Background image was stamped in espresso ink and heat embossed with clear embossing powder and once cooled, die cut using a pierced tag die.

The sentiment from So Grateful was also heat embossed in the same manner as above and once cooled, a few jewel drops were added for additional texture.

The card was finished with a bit of dry embossing, layering some pretty designer papers along with twine and a wooden button.  

This was a fairly quick card to create and celebrate this beautiful autumn season here on the East Coast!  

The So Grateful stamp set allows you to create projects to celebrate so many different occasions and blessings- a must have in your collection for sure!


I hope I have inspired you today to get out your stamps and create something fun! 

Thanks for taking the time to visit us- hugs and God Bless, sweet friends!

Saturday, October 7, 2017

autumn thanks

Good morning!
 
Today I am sharing these cards using the So Grateful, Autumn Leaves, and Skeleton Leaf Background stamp sets.  They are 4 1/4" square, perfect for a little note of thanks.
 

I inked the leaf background image with 2 colors before stamping, a yellow and a peach.  Then I swiped the same inkpads over a scrap of white cardstock to stamp the Autumn Leaves on.  Although they look black, the leaves and sentiment are a dark brown.  The cards were simply finished with a few orange sequins.
 

Have a great day!
Diane
 

Wednesday, December 17, 2014

2014 Year in Review - Day 11: So Grateful

Hello again sweet friends!  Have you had a chance to check out the sale going on from now until the end of the month at the Sweet 'n Sassy Stamps Store?  Our featured stamp sets have been marked down by 25%!

Our feature for today is:
This beautiful stamp set of thankful wishes was designed by Gloria Stengel and is wonderful for building your own sentiment.  The different fonts look beautiful when paired together!


After we've celebrated Christmas with friends and family, it's time to send out the thank you notes.  Janette's beautiful card is perfect for an after Christmas thank you!  Love the embossed texture and the sparkly silver frame for the message made by combining two of the sentiments from So Grateful!


If you need a few quick and easy thank you cards, this design by Jessica would be perfect!  Stitch two panels of designer paper together and add your segmented sentiment from So Grateful…how beautiful!

Here is another look at a few more cards created by the Design Divas 
in 2014 using the So Grateful stamp set:


A little cheesecloth tucked behind layers of Graphic 45 papers makes such a gorgeous presentation on this card created by the designer of So Grateful, Gloria Stengel!  

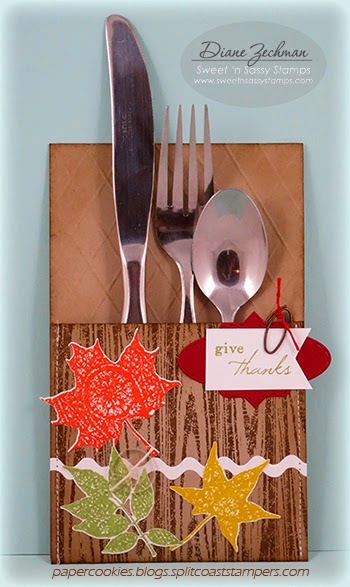
How creative!  Diane made a silverware holder that would look fabulous on a Thanksgiving table, but by changing a few elements, this idea would be perfect for any table decor!  The sentiment from the So Grateful stamp set was paper clipped to a label from the Bookmarks & More Die Set.  The Season of Change leaves cut with the coordinating Season of Change Leaf Dies look wonderful with the wood grain background made with the Grunge Borders stamp set.


 By embossing the matched sentiments from So Grateful on a piece of vellum, Bridget was able to achieve an elegant look for her note of appreciation.  The gold embossed Skeleton Leaf Background is just gorgeous!


Just one script word from the So Grateful stamp set is all that is needed to send  an uplifting note to a friend.  Lee Ann's beautifully colored Flowers in Bloom image was cut with the coordinating Flowers in Bloom Die and the partial Scallop Border adds balance to her gorgeous card.


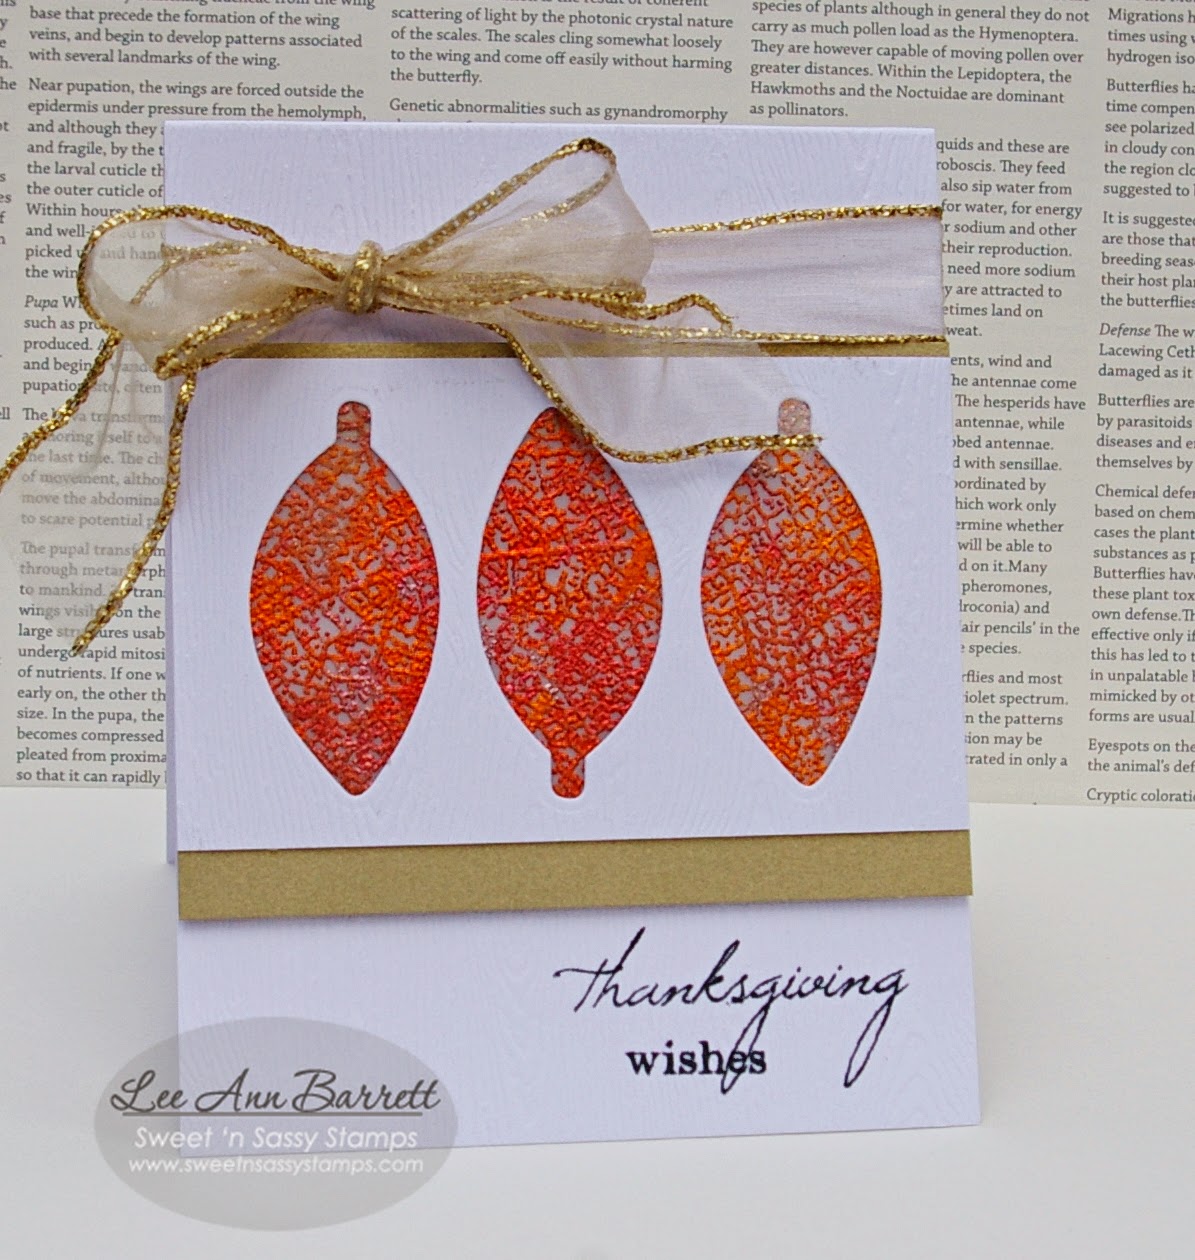
This clean and layered Thanksgiving card was created by Lee Ann.  I love the way the Skeleton Leaf Background peeks through the Leaf Silhouettes die cuts!  Gorgeous!
  
Now head on over to the Sweet 'n Sassy Stamps Store to grab this versatile stamp set while supplies last!  You may just find a last minute Christmas gift while you are there!

We have a fun stamp set to feature tomorrow so be sure to join us once again!

Thanks so much for stopping by…you are a blessing to SNSS!

Wednesday, November 5, 2014

give thanks

Hello friends!  Where has the year gone?  Thanksgiving will  soon be upon us so today I have a super simple project to dress up your holiday table and help put the emphasis on giving thanks.

I created a super simple Silverware Pocket that would look great at each place setting.  (Or they would look cute to fill them up and place them all in a basket if you have a large family gathering and serve the food buffet style.)


I didn’t add the napkin behind the utensils so I could get a photo of the scored back but you can easily slip a napkin in there too and they’d be good to go!  Directions are here on my blog for creating this fun and easy pocket.  I used Season of Change, So Grateful, and Grunge Borders stamp sets, and the Season of Change Leaf dies and Bookmarks & More dies.

I also have a CAS Christmas card to share today if you like to get ahead on making your Christmas cards!  I used some Sweet 'n Sassy stamps along with silver and gold cardstock, plus gold embossing powder to make this sparkly and shimmery holiday greeting.


The gold embossed snowflakes are from the Spectacular Snowflakes stamp set.  The sentiment is from Mod Ornaments and was embossed with white e.p.  The little scallop border was diecut with a die from the SNSS Bookmarks and More set of dies.

I hope today's projects will inspire you to get started on your holiday creations!
♥ Diane


Wednesday, October 22, 2014

Fall Flowers

Hello Everyone!

I hope you are enjoying these autumn days; I know I am.  We are having some much deserved sunshine after days and days of rain.  The leaves are now starting to turn and the air is crisp.  There is nothing like fall colors, is there?
Today's card focuses on fall colors, using the Flowers in Bloom Stamp Set.  I would typically use this for spring and summer, but decided fall definitely works just a well.


The Flowers and butterfly are colored with Prismacolor Pencils and then cut out with the Flowers in Bloom Die. This Pink Paislee dp worked perfectly with the colored image.  I added a scalloped edge for interest, using the Scallop Border Dies.  The sentiment is from the wonderful set, So Grateful.  I just love this font. 
The white bow and linen thread add to the delicate look of the card. 

Thanks for stopping by today!  Be on the look out for a special treat coming this Friday! 

Happy Stamping! 

Lee Ann  :)

Monday, September 29, 2014

Many Blessings, So Thankful ~

Good morning Sweet'nSassy fans and friends! Mary here with two cards to share with you using Flowers in Bloom with the newly released matching die. This is one of my favourite flowers to colour. This time I sponged directly on the flower using distress inks and coloured the stems with coloured pencils.

Both cards are also using burlap that was stiffened using glitter ModPodge. The sentiments used are from Gloria Stengel's So Grateful Sentiment set. I love the versatility of these words! Have a blessed Week!!
Materials Used:
Stamps: So Grateful, Flowers in Bloom
Papers: SU, Heartfelt Creations
Inks: Versamagic Aspen Mist, Versamagic Perfect Plumeria, Versafine black
Accessories: Burlap, modpodge, SNSS flowers in Bloom die, ribbon, Cheery Lynn doily die

Saturday, September 13, 2014

Autumn Wreath

Hello Everyone!

I just love the September release as it is all about the fall season, which happens to be my favorite.
The new Leaf Silhouette Dies are fantastic!  There are smaller leaf dies that not only die cut but emboss as well!  I used the small maple leaf die to make an autumn wreath.


See what I mean?  These leaves are a perfect size for making wreaths.  I made mine out of  Craft Metal to give my wreath a wonderful shine.  I started by die cutting a cardstock wreath using two circle dies.  Next, I die cut my leaves and arranged them on the wreath for placement.  Then I started gluing my leaves down- some are glued with Crystal Effects and others are popped up using dimensionals. 
The sentiment, which is from the Leaf Silhouettes Stamp Set, is embossed in gold on vellum.  I added a scalloped border for interest, using the Scallop Border Dies.  
You can get complete details on my blog.   

I went CAS with my second card.  Don't like to color?  No problem!  Look how you can add color to your line images by using the Grunge Elements Stamp Set!  


 I used several of the "splotchy" images to color the flowers and butterfly from the Flowers in Bloom Stamp Set.  I did not worry about 'coloring outside the lines' as it gives the finished image a trendy, watercolored look.  The background is colored with a BG Copic marker.  I used pointillism with darker BG Copics on the background around the flower heads and butterfly.  The sentiment is from the brand new So Grateful Stamp Set.  I love it for its versatility and the great fonts!  I hope you give this technique a try!  It is fun and easy!

Thanks so much for stopping by!
Have a fabulous fall weekend!

Lee Ann  :)

Friday, September 12, 2014

September 2014 Release Day!


Hello, Sweet 'n Sassy  friends!  It's our September 2014 Release Day!  Autumn is such a wonderful time of the year.  Just think of cool crisp mornings, warm colors, ripe, juicy apples, changing leaves, and Thanksgiving and you have the makings of our fabulous release!
  • Stamp set includes 24 mix and match words 
  • Stamp set measures 4" x 4"
  • Designed by Gloria Stengel
  • $11

    Beary Bountiful Autumn

    • Stamp set includes 2 images and 5 sentiments
    • Stamp set measures 4" x 6 "
    • Designed by Korin Sutherland
    • $15

    Falling Leaves
    • Stamp set includes 2 images and 2 sentiments
    • Stamp set measures 4" x 4"
    • Designed by Korin Sutherland
    • $11

    • Stamp set includes 1 image
    • Stamp set measures 4" x 4"
    • Designed by Korin Sutherland
    • $11
    Here are the Sweet Perks Club stamps and dies that can now be purchased individually!

    • Stamp set includes 2 images and 7 sentiments
    • Stamp set measures 6" x 4"
    • Designed by Korin Sutherland
    • $15
    • Die set includes 2 dies
    • $12.50

    Forest Silhouettes Dies
    (Coordinates with the Forest Silhouettes stamp set)
    • Die set includes 9 dies
    • $22.75
    (Coordinates with the Flowers in Bloom stamp set)
    • Die set includes 1 die
    • $10.25

    Leaf Silhouettes Dies
    (Coordinates with the Leaf Silhouettes stamp set)
    • Die set includes 10 dies (5 are embossing dies)
    • $17.75

    Please also join us today for our release day blog hop featuring our talented DT creations.  You are going to FALL for all of their gorgeous projects! :)  The DT blog links can be found in the Linky Tool at the end of this blog post.

    One random commenter from one of the DT blogs will be selected to win a $10 Gift Code to be used at the Sweet 'n Sassy Stamps Store.  You have until Thursday, September 18th at midnight EST to leave your comments.  The winner will be posted on the Sweet 'n Sassy Stamps Blog on Friday, September 19th!

     One more thing before we let you go...

    We can't forget our fun Release Day Challenge!
    "Create a Fall Themed Card"   

    Just a few guidelines to remember as you play:
                
    - You don't have to use a Sweet 'n Sassy Stamps image to enter (although we sure love when you do!)
    - Please create a NEW card (no back linking)
    - We ask that you enter your card in no more than 3 challenges
     - You'll have until Thursday, September 18th at midnight EST to enter

    - We'll draw 1 winner from this week's challenge to receive a $10 credit to the Sweet 'n Sassy Stamps Store!  
    If there are 25 participants, (not including the DT), we'll draw 2 winners!
    - Please use code SNSSEPT2014RC when uploading to Splitcoaststampers or other galleries 

    To enter simply share a link to your creation below, but don't forget to visit the DT blogs to see their beautiful release creations!

    Thanks for joining us today!  Be sure to join us again on Friday, September 19th to see if you've won!