Showing posts with label Flower Blocks 3. Show all posts

Saturday, June 27, 2015

Flower Blocks III ~

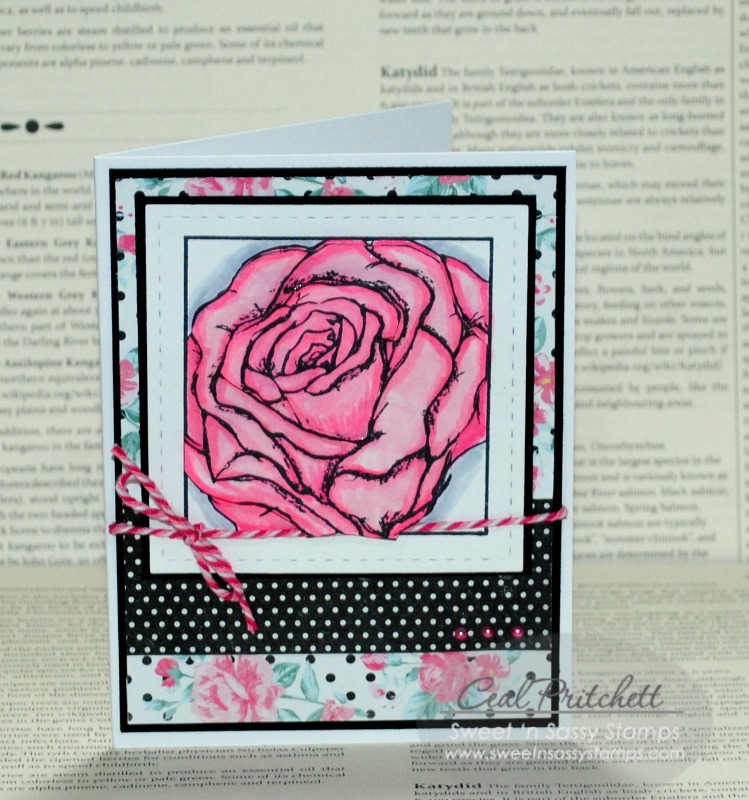
Happy Saturday morning Sweet'nSassy friends! Mary here with another favourite image from Flower Blocks 3 to share with you today. This lovely Rose is coloured using copics and layered onto coordinating MME papers. 

Grab your favourite lined SNS image, your favourite medium, your favourite drink and cozy up for some colouring today. It's a perfect day to be indoors on a rainy day. Share your results with us on SCS or your favourite social media.

Materials Used:
Stamps: Flower Blocks 3
Inks: Copics, Memento black, QQ powder puff inks
Paper: SU, MME Dp
Accessories: Pearls, SU banner die 

 http://cdn2.bigcommerce.com/server1800/d6aaa/products/1142/images/3139/SNS_14_002FlowerBlocks3__19061.1394114528.1280.1280.png?c=2

Friday, June 19, 2015

Look What's Back!

Hello, sweet friends!  Have you heard the news?  Look what's back!  It's Cathy here sharing a few cards made with some of Sweet 'n Sassy Stamps favorite stamp sets that are now back in stock.  


Precious Poppies is a stamp set full of beautiful poppy images and wonderful sentiments in gorgeous fonts.  A frame for the poppies was made using distress inks and the wrinkle free technique.  The poppies were watercolored using the same inks used for the frame.  Mixed Media paper was used for the poppy panel and the frame.


Our popular Flower Blocks 3 stamp set is back in stock.  These beautiful big flowers are fun to color or paper piece.  I went back to my coloring roots and dug out my Prismacolor Pencils and Gamsol to color the rose from the Flower Blocks 3 stamp set.  The sentiment is from the Wishing You Well stamp set, also back in stock!


We just finished a week of VBS at our church and we had the kids make cards for our Encouragement Committee.  One of the stamp sets we used was Landscape Silhouettes which is now available!  We kept the design simple and used the wonderful sentiments from the Be Encouraged stamp set.  The kids had such a good time making the cards and I know those who receive them will love the fact that they were made by the children.

Here are the stamp sets now available at Sweet 'n Sassy Stamps Store 
used to make these cards:

Here's a list of all the stamp sets and dies that are now back in stock:


These stamp sets sell out FAST…so hurry on over to pick up those sets that you have been waiting for!!

Thanks so much for stopping by today!

Monday, April 13, 2015

Tile Tutorial


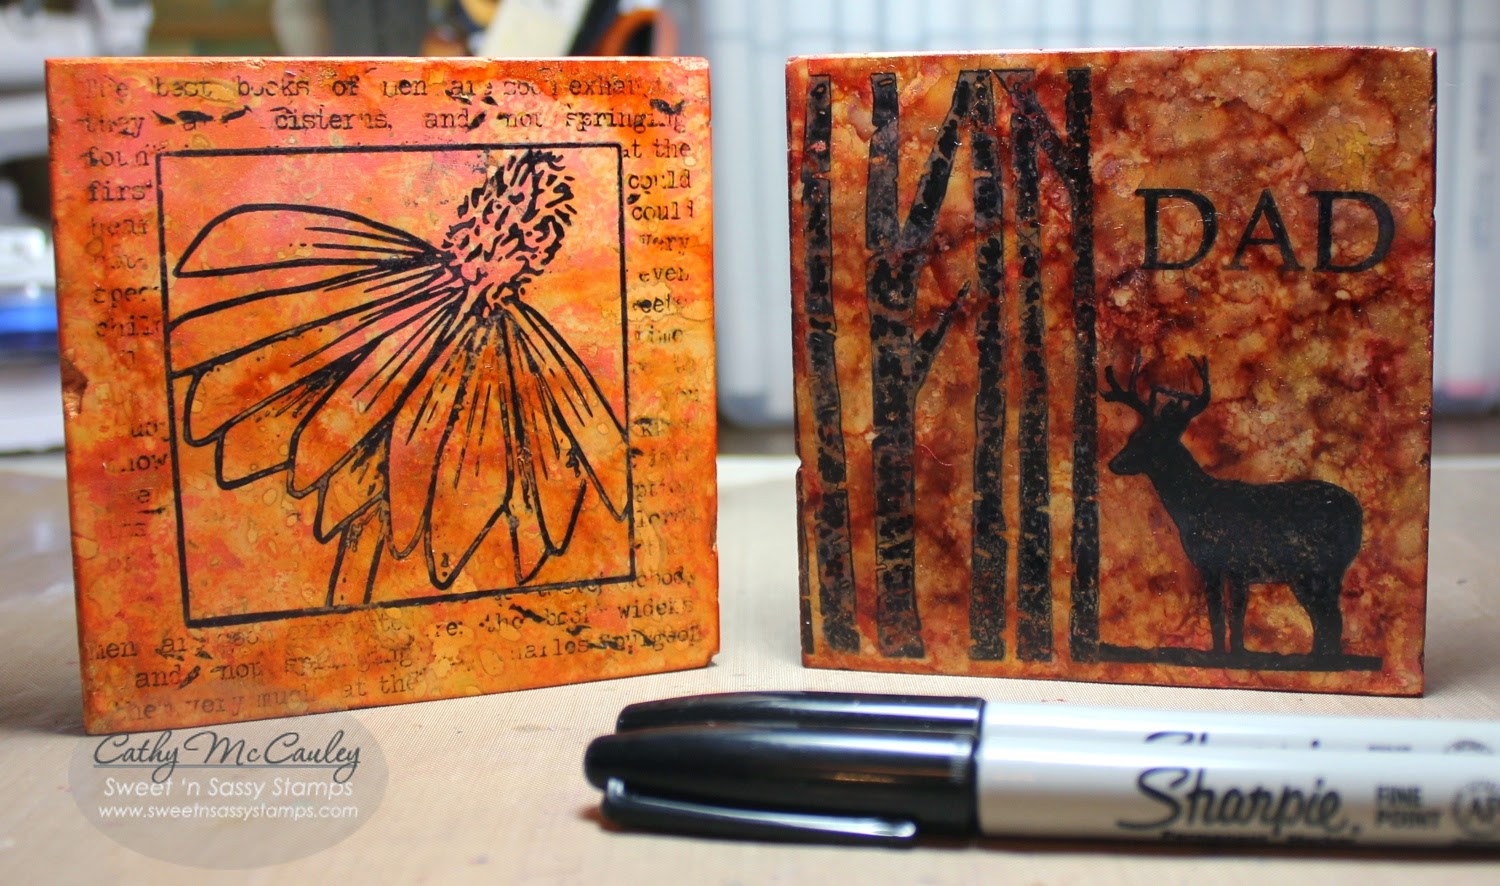
Happy Monday, everyone!  Cathy here with a new Design Diva Demo for you!  Before retiring from teaching, I used to make coasters out of unglazed tiles for my parent helper gifts at the end of the school year.  I often get asked at paper craft festivals how they are made, so I thought I would share my process in this tutorial.

Begin by gathering all of your materials.

Supplies:
Non-Stick Craft Sheet
4" x 4" Unglazed Tiles (purchased from building supply store)
Adirondack Alcohol Inks in a variety of colors
Adirondack Metallic Mixatives (Optional)
Alcohol Blending Solution
Felt Applicator Tool
Archival Inks
Sweet 'n Sassy Stamps
Sharpie Markers (Black and White)
Paper Towels
Vinyl/Latex Gloves
Cork
Tacky Glue
Spray Varnish

Lightly sand your tiles and wipe off the fine dust with a damp paper towel or baby wipe.  Make sure the tiles are completely dry before beginning to apply the inks.


Be sure to put on those vinyl/latex gloves if you don't want inky fingers!  Choose three or four colors and give a little squirt of each into the felt on the applicator tool keeping each of the colors separated on the felt.  Then add a little squirt of metallic mixative to the middle of the felt. (Optional)  If you use the metallic mixative, you must remember to shake it well before using. 


Dab and swirl the colors onto the tile remembering to cover the sides as well.  No need to worry too much about what it looks like at this point…just be sure to cover the tile with color.


Now comes the fun part!  Squirt some Blending Solution on the felt applicator tool.  You can even squirt some right on the tile if you want.  The more blending solution you use the lighter the colors will be.


Continue dabbing and swirling with the Blending Solution until you get the look you like.


Here are several color combinations, although using exactly the same colors will yield entirely different results.


Allow the tiles to dry.  You can stop at this point, but we are going to add some stamped images to the tiles, so grab your Archival inks and choose the stamp sets you want to use.  


Generally I like using SNSS silhouette images, but the for the tile on the left, the coneflower from the Flower Blocks 3 set was used.  The middle was masked and the Typewriter Text Background was stamped in Jet Black Archival ink, then the coneflower was stamped.  Tender Thoughts and the new For My Father set was used for the tile on the right.  A black Sharpie pen works great for any touch ups that are needed.


Nature Silhouettes 2, Faith, and Serene Silhouettes stamp sets were used to make the tile on the left.  For the tile on the right, the Typewriter Text Background was stamped using Deep Purple Archival ink.  The flourishes from the Leafy Flourish
Background and More stamp set were then stamped using the Jet Black Archival ink.  White accents were added using a white Sharpie Paint Pen.

To make your coasters water proof, give the tiles several coats of clear glaze or acrylic varnish.  Allow the tiles to dry between each coat…about 1/2 hour.  (I applied 4 coats of Clear Glaze to mine.) Be careful to use the spray in a well ventilated room or outside.


Trim cork to fit the back of the tile using a craft knife.  Apply Tacky Glue to the back of each tile making sure to cover all the way to the edges. Stick the piece of cork to the back and place a lightweight object on top of the tile until the glue dries.


The tiles are now finished and ready to be used or given as gifts!


Here are the Sweet 'n Sassy Stamps used for the tiles above:

I hope you've enjoyed this tutorial!
Have a marvelous Monday!  

Saturday, August 30, 2014

Summer's End

Hi Everyone!

It is hard to believe the kids are back in school already; before you know it, the nights will be chilly and the sweaters will come out of the drawers. 
Fall is one of my favorite times to go to the Botanical Garden; we have a fabulous one here in St. Louis.  I love those last few flowers that are hanging on into late fall, which are often cone flowers.  This Flower Block 3 image reminds me of those late fall flowers and was perfect to color up as we head into a new season.


I was wanting to do some sort of 'technique' on this card and I found a wonderful tutorial on a faux watercolor technique.
I started by heat embossing the image with white embossing powder on mixed media paper.  I made 3 separate images. On one image I used a blue Distress Ink Pad and sponged some ink onto the sky.  Then I spritzed it with water so the color would move around.
Next, I rubbed a yellow Distress Ink Pad directly onto a second image, followed by a bit of orange ink.  Again, this was spritzed generously with water followed by pearlized spray to give it a wonderful pearl sheen.  
The third image was colored the same way the second one was.  All were allowed to dry.  Once dry, One of the yellow/orange flowers was fussy cut out.  This image was then adhered to  the sky panel colored in blue.  The second orange/yellow image was fussy cut out, not including the cone of the flower.  Some petals were eliminated as well.  Once layered on top of the main panel with dimensionals, you get great depth with the two fussy cut layers of petals.
This technique is super easy- there is no time consuming coloring and is perfect for all of the Flower Block images. 

Thanks so much for stopping by and have a relaxing Labor Day Weekend!

Hugs!

Lee Ann  :)

Sunday, July 6, 2014

The Rose


Happy Sunday!
It's Ceal here to share with you today.  I hope everyone had a great holiday weekend.  The weather was perfect here in Colorado. 
Today I am sharing a card with you using Flower Blocks 3, I just love these flower block sets they are so fun to color and also to paper piece.  The Flower Blocks 1 set is the Friday Feature and you can save $4.00 on it through this Thursday.  So be sure to grab yours.

Thanks for looking!

Sunday, June 15, 2014

A Happy, Thankful Father's Day!

Good Morning Friends and Happy Father's Day!!  Jacquie here to share a "GUY" creation with you!  I always find it a challenge to create something for a man, don't you?  So, I am always glad to find those elements that are NOT gender specific!  AND?  Those elements are exactly what I used today!

No matter who your card is for, be it your Father or someone who has been just like a Father to you?  Being thankful is something I am sure you will want to express.  So, why not make a thank you card?  We are all thankful for the men in our life and today is a GREAT day to tell them!  Check out my take on a thankful, Father's Day card!


Hope you like my thank you creation!  Be sure to thank those men in your life today, no matter who they are!  Happy Father's Day!  Have a WONDERFUL day and thanks for stopping by!

CREATION ELEMENTS:


Monday, May 12, 2014

Just Because........

Good Morning Friends!  How are you?  Jacquie here, to share a spotty creation!  Thanks so much for stopping by!  As you know, our challenge this week is to create something with SPOTS!!  So, I created a CAS card with a GREAT sentiment!  It is ALWAYS a good time to send a greeting, just because!!


I used our Friday Feature set, Lots-a-Spots clear stamp set and a sentiment from our Flower Blocks 3 clear stamp set.  I LOVE the way simple can look!  I had thought about adding something more?  Then I decided it was enough, just the way it is!  Hope you like and hope you will join us for this week's CHALLENGE!  All you have to do, is PAGE DOWN to play along!  Thanks again for stopping by and letting me share with you; have a WONDERFUL day!!

Wednesday, April 2, 2014

For a dear friend.

Hello friends! Giovana here today bringing you a Spring color card! I think we all had enough of snow, cold and crazy winter weather and although Spring is here, some places are still having winter like weather.

Anyway, this is the card I have for you today, I stamped the pretty flower from the new Flower Blocks 3 set in Memento Tuxedo Black and colored it with Spectrum Noir makers, then added Star dust Stickles to give it a little bit of the glittery effect.
The background was stamped using Grunge Elements in Orange Zest and the sentiment from Flower Blocks 1 in Cactus Green StazOn inks.

(NOTE: StazOn inks will stain your stamps, it doesn't bother me much to have stained stamps, but if you don't like that, use dye inks like Memento)


Hope you like it!
Have a great day!

Saturday, March 22, 2014

thankful rose

If you've seen the March Sweet 'n Sassy release, you may have fallen in love with the third set of Flower Blocks that Korin has released.  For the hops I used the cute coneflower to make some cards but today I've turned to a different flower and used the rose.


My rose was stamped and heat embossed on vellum cardstock, colored on the reverse side with markers, and layered onto a scrap of white cardstock.  The light blue frame was then popped up around it with dimensionals.  The black border and matching die is from the Borders & Backgrounds Stamp & Die Bundle.

I made a few cards of this design for thank you and birthday occasions, but this would also be pretty for Mother's Day!

Have a wonderful weekend!
♥ Diane