Showing posts with label distress inks. Show all posts

Wednesday, June 16, 2021

So Tweet by Charmaine Canham

Good Morning and Happy Wednesday! 

Korin has this sweet little stamp and dies set on sale this week, and I thought I
should revisit this cutie and make a sweet evening scene for these two lovebirds!


 How Tweet Stamp and Die Bundle is an older set but so fun to play with. Here is what I did:

I started with a gel print I made but wasn't happy with (but held on to it for days like today!), and it just happens to have blue and orange-pink sections, perfect for our male and female birdies. Since the print was made with acrylic paint, heat emboss the ink to prevent smearing.

Next, I purchased this die from The Ton and have not used it. I think this will be perfect to showcase the stars aligning for these two birds. 

I use Bristol Smooth paper because it is perfect for blending with oxides, I have found. 

After blending the sky, spritz some Shimmer spray on it for a starry glittery sky. Also, glue this piece onto another white piece of cardstock for the white stars to show through from behind.


Play with the placement of the birdies and clouds. I hand cut all the pieces; I wish I had the dies, but it was therapeutic to do. Also, use dimensional foam tape under some elements for interest.


I use Versafine Clair ink for detailed stamping and sentiments.


It was a relatively quick card to make (it would have been faster with dies), but I
 really enjoyed making a cutesie (a different type for me) card. 


I hope you liked today's card and will leave me a comment here or on Instagram.
 I always enjoy reading your feedback!
Have a great day!

Charmaine

Follow me on Facebook and Instagram for almost daily inspiration
Check out my new Website, CharCards.net

*Post includes affiliated links at no cost to you*


Tuesday, June 15, 2021

Florals and More

 Hello! 

Have you been enjoying all of the June release inspiration?  

Being the floral lover that I am, I could not resist another card using the new Botanical Branches as a filler.  


I used the pussy willow stems from the Botanical Branches Stamp Set, coloring them in gray with Copics.  The roses and leaves are from the True Beauty Stamp Set and were colored in grays and yellows.  Gray and yellow. The color combination has to be one of the most perfect combos there is!  

All of the images were fussy cut out. An embossing folder was used on the background panel.  All of the pieces were put together and adhered to the card front.  The sentiment is from the Encouraging Thoughts Stamp Set; It was stamped on a grey sentiment strip.  A few sequins finish the card. 

I liked this grouping of images so much that I recreated it in tag form.  I needed this tag for a Bible study I will be starting.  I am not usually one for tags, but something about this was freeing!  


My tag was first sponged with distress inks in various shades of green.  Next, texture was added to it but using a darker green with the Fern Fronds Stencil.   Lastly, I spattered a bit of white acrylic paint on the background. 

Then I used the same rose from the True Beauty Stamp Set and colored it with Copics after stamping with Memento Tuxedo Black Ink.  The branches are again from the new Botanical Branches Stamp Set and were colored with Copics.  Everything was fussy cut out.  I added a bit of vellum to the bottom right corner just to soften things a bit then arranged the elements and adhered them to the tag.  I finished the tag off with my printed steps and hand lettered title.  A couple of ribbons finish it off.  

That's it for me!  Thanks so much for stopping by and have a blessed day!

Lee Ann  

Tuesday, June 1, 2021

Versatile Botanical Branches

 Hello, Hello! 

Happy Summer to all of you! 

Have you checked out the new release from Sweet n Sassy Stamps?!  This is a seriously awesome release!  My favorite set is the new Botanical Branches by Nina B.  First off, they are just gorgeous; but second, they are so versatile!  They are perfect fillers for floral sprays but they can also stand alone on a card, as in my first card~


 This gorgeous berry branch was colored with Copics and then fussy cut out.  I added an embossed panel to my card base.  Then, for interest and another pop of yellow, I cut in half a square die cut frame I had in my stash.  It happened to be stamped with an image from the Flower Garden Stamp Set and watercolored with distress ink.  The square halves were adhered to the base and the berry stem was popped up on foam tape.  The sentiment, which is from the Encouraging Thoughts Stamp Set was stamped on a sentiment strip and adhered, along with a few sequins to finish the card. 

Next up, I have used the Botanical Branches set as filler for a floral bouquet.  The flower is from the True Beauty Stamp Set.  


I started with the back panel- color blocked 5 wide stripes with watercolor.  While that was drying, I stamped the flower with distress ink and then colored it with distress inks.  I did the same for the leafy branches that are from the Botanical Branches Stamp Set.  The leaves were heat embossed in white embossing powder on vellum and everything was fussy cut out.  The elements were assembled in the lower left corner and adhered to the card.  The sentiment is from the Birthday Wordfetti Stamp Set and was stamped on blue cs.  A few sequins were added.  

You can check out the entire new June Release HERE!  And check out the new release specials while you are there.  

Thanks for stopping by!

Lee Ann  


Tuesday, December 15, 2020

Vintage Love

 Hello Friends!  

While Christmas is still about 2 weeks away, the December Sweet n Sassy Stamps release has me making Valentines.  The My Punny Valentine Stamp Set is so  cute, with lots of simple and fun images with punny sentiments.  The sewing machine image is perfect for girlfriends so I got busy creating.  


These are a nonstandard size card- about 4.25 x 3.75 inches.  I wanted a vintage look for the cards, using the same color scheme and basic card layout.  I opted for stenciling a design on the left instead of patterned paper.  the sewing machines were colored with Copics, fussy cut out and popped up on dimensional tape.  I have gotten into thrifting and vintage items lately, so this image was right up my alley.  

OK, so this  is not really a Valentine card, but the set, Vintage Romance,  makes some beautiful Valentines.  But these perfume bottles are great for other occasions as well.  I made this card for my mom.  


Pastels are not really my thing, but I challenged myself- which means this whole card was a struggle.  The perfume bottles were colored with Copics and fussy cut out.  I stamped the sentiment, which is from the Time Well Spent Stamp Set, onto a light aqua background and used a scrap of paper that I had used to pick up left over distress inks on my craft mat after doing the smooshing technique to add more interest along the bottom.  In the end, I love how this turned out.  

If you haven't checked out the December release yet, head over to the store to check them out!  The Much Love Stamp Set is free with a purchase of $75 or more.  


Thanks for stopping by- I won't be back on the Sweet n Sassy Stamps blog now until the new year, so have a Very Merry Christmas!

Lee Ann  


Tuesday, December 1, 2020

Vintage Romance and a Christmas card

 Hello, Hello!  

I hope you all had a very blessed Thanksgiving, despite the fact that some of our gatherings may not have looked like they did in past years.  I have learned to be grateful for and enjoy the quiet, no frills holidays as I have no family in town.  That means more turkey for me!   

Jenn Nilsson knocked it out of the park with her newest stamp set in the December release, Vintage Romance.  Have you checked out the whole release yet?  If not you really should go see all of the pretties this month.  

There are no references to Valentines Day in this set, so it is really quite versatile- I'm thinking anniversaries and birthdays in addition to Valentine's Day.  

My first card is done in red with a touch of blue, perfect for a Valentine card for your sweetie~ 

 The locket was colored with Copics and fussy cut out.  I paired it with a bit of a background panel I had in my stash; it was made by inking up bubble wrap and stamping with it!  A bit of red patterned paper and a kraft colored mat are all that was needed to finish the card.  The sentiment is separate from the blue panel as I wanted to pop it up on dimensional tape.  

The next card using the Vintage Romance set is a lovely bit of mixed media and no red to be found anywhere on the card!  


This beauty was colored with Copics and fussy cut out- I searched 'perfume' bottle on the web and found a perfume bottle of green glass.  That was my inspiration.  

The background was done with a stencil and embossing paste.  To get the gold specks, I dropped in course ep while the embossing paste was still wet.  When the paste was partially dry, I hit the ep with the embossing gun.  Once the paste was dry, I used some distress inks as watercolors and painted the background in.  

This set- it is a must have!  I love, love, love the images~


And how could I not share a Christmas card with it being December 1st??


The background is basic ink blending with Distress inks.  I used Picked Raspberry,  Seedless Preserves, and Chipped Sapphire inks.  Using my MISTI, I stamped the trees on the left with Versafine Onyx Black Ink, then stamped the tree on the right, and then stamped the deer.  I filled in the ground with a black Sharpie.  The moon was stamped on white cs and fussy cut out.  All of these images as well as the sentiment are from the Thrill of Hope Stamp Set.  I used watered down acrylic ink for the snow.  

That's all for me!  I hope I have inspired you to get creative- not an easy thing to do during the busy Christmas season!  Thanks for stopping by, 

Lee Ann  

Tuesday, November 3, 2020

Snarky is My Superpower!

 Hello Hello!

It is so good to be back after a month long break.  We are celebrating Sweet n Sassy Stamps' 13th birthday this month!  I can still remember the first stamp set I bought from SnSS- cutest snowman ever!  We have so many fun stamp sets to share with you this month; many of them are birthday themed.    

One of my favorite sets is the A Little Snarky Stamp Set-oh how we have needed this set!  LOL!  


I colored the snarky lady with Copics and fussy cut her out.  My card background was done using a stencil and sponging on color in ombre fashion.  I have finished it off with my favorite sentiment, Sarcasm is My Superpower (and it is, lol).  

Next up.  Make a Wish Stamp Set~


This is such a versatile set!  Love, love, love it.  The piece of cake was colored with Copics and then fussy cut out.  I stamped and masked a single candle multiple times to get a grouping of candles.  These were colored with Copics as well and fussy cut out.  I picked out another stencil, this one scattered numbers, perfect for a birthday card.  I sponged the background, then stamped the sentiment from the Humorous Birthday Innies Stamp Set.  I grounded the cake and candles with a black circle and added black sequins to finish off the card.  

Lastly, I had a little bit of fun with the Make a Wish Stamp Set!  Is it bad that this is the first thing I 'saw' when I saw this icing???  


I kept the card CAS, stenciled a background and popped up the 'emoji' on dimensional tape.  I added a sentiment from the A Little Snarky Stamp Set.  

Head over to Sweet n Sassy Stamps to check out all of the November release stamps.  Buy the bundle and save some money!

Thanks for stopping by!  Have a blessed week all!


Lee Ann  

Tuesday, July 21, 2020

Mixed Media and Garden Flowers

Hello Friends!

Today's post is all about using background panels and scrap pieces of panels that I have had in my stash.  I paired these panels with various different images from the Flower Garden Stamp Set.  As you will see, you may not even recognize that the same stamp set was used in each card.


First up, nothing says summer like a beachy/sea themed card!  I love this mermaid from the Mer-Mazing Stamp Set.  She was stamped on Neenah Solar white cs and colored with Copics, then fussy cut out. And that crab!  I love this crab!  He is the cutest!  Colored and fussy cut as well.
I used a water color panel that was done with water color paper and Ken Oliver Color Burst Powders.  I used the water colored panel as my base and then built upon that.
For the image panel, I sponged some Salty Ocean Distress Ink onto the panel and followed that up by using a circle stencil and sponging Mermaid Lagoon ink.  Finally, the seaweed.  It is actually from the Flower Garden Stamp Set; as soon as I saw this image I knew I wanted to use it for an underwater scene.  The seaweed was stamped with Memento Tuxedo Black ink and quickly colored with Copics.  The sentiment was stamped using my MISTI, in Versamark Onyx Black Ink.
I popped up the top half of the mermaid and the crab on dimensional adhesive, added some sparkle to her and added Glossy Accents to his eyes.  A few sequins finish it off.

Next up, a simple card with NO coloring.


No flowers here; this time I stamped the bitty butterflies from the Flower Garden Stamp Set and fussy cut them out.  They were grounded with a black cs circle and a white cs strip.  The sentiment is from The Future Stamp Set and is heat embossed in white ep.
The background panel is one I created with when crafting with a friend; I had just received some new Distress goodies in the mail and went to town spritzing and spraying.  I love how this panel turned out.  It was the perfect panel for this card.   Sequins added to the butterfly bodies finish the card.

Lastly, a pretty straight forward, floral card~


These whimsical flowers screamed for bright colors!  I pulled out a coloring medium I had not used in a long, long time.  I stamped the image on water color paper and colored them with Inktense Water Color Pencils.  They really popped on a background panel that was done with Distress Sprays.  I fussy cut the flowers out and popped them up on dimensional adhesive.  I added some strips of white cs (per the CASE This Sketch sketch) and added my sentiment, which is from the Mason Jar Bouquet Stamp Set.
That's it for me!  3 background panels used, same Flower Garden Stamp Set used, resulting in 3 very different cards!
I hope I have inspired you; thanks for stopping by!

Lee Ann 

Thursday, May 14, 2020

Bind My Heart

{jane bosi} Happy Thursday, Friends!  Today, I am sharing a card which features the largest butterfly from the Begin Again set.  I just adore this entire set--I bet you do too!!

I started my card by using the direct to stamp watercolor technique.  My distress inks work best for this technique, I think, but I bet you could also use other dye inks.  I like the way the distress inks bleed and blend together.

After the butterfly image was completely dry, I stamped over it with a sentiment from Hymn Word Art.  I could not say it better myself!  In this mixed up world, I am very aware that His goodness is THE binding I need for my ever distracted, wandering heart.  It is the constant prayer of my heart.

Blessings--Jane

Tuesday, May 5, 2020

Begin Again with Butterflies

Hello All!

Have you checked out the May release yet?  Goodness, I just can't stop playing.  I consider myself a colorist, but the large butterfly in the Begin Again Stamp Set has me playing all sorts of ways.  '
The MOJO had run dry so I have been watching videos to try new things and remind me of old things.  I came upon a video highlighting the faux watercolor technique.  This is a super easy and fun technique where you ink up your stamp with ink and spritz it with water, then stamp on your paper (something that will take water well)- I used watercolor paper. This is what I ended up with; and guys, I played and played and played!

I was getting more creative by the time I got to this card and did some splattering as well.  The sentiment is from the new Encouraging Thoughts Stamp Set, which is also the Stamp of the Month.  Goodness, the font!  I just love he font in this set, and as you can see from the rest of the cards, I used many sentiments in the set!  


This sentiment is from the So Thankful Stamp Set.  


This sentiment is from the Sympathy Morning Glories Stamp Set

After playing with this technique, I went a bit further with it, first stamping the sentiment with the technique I had been using, and then stamping with Versamark in and heat embossing with clear embossing powder.  This allowed me to paint on the background without disturbing the main image. 


As this is a distress technique, I used distress inks for all of my cards.  Some are first generation stamping, some are second and some are third.  Some are heat set after stamping and then stamped over again.  Some are stamped over and not heat seat after the first stamping.  They are all different; in other words, just have fun and play to see what you get!  And, sometimes I got mud, lol.  
In then end, I splattered each card with a bit of watercolor paint in a coordinating color.  
Also note that unless you area only going to stamp one time, you need a stamp positioner to do this. I used my MISTI through the whole process which is what allowed me to stamp multiple times on the same image. 
This set of cards is going to be gifted to a friend of mine who buys a lot of my cards.  This stamp and technique is perfect for making a gift set! 
Thanks for stopping by!  I hope you give this a try!

Lee Ann  

Don't forget, Encouraging Thoughts is the stamp of the month and is FREE with your order of $75 or more! 

The new release is currently available at a discounted price as the May Early Bird Bundle -offer ends May 9th!  


Tuesday, April 7, 2020

Beautiful Birds and a New Technique

Hello All,

Hope you are all doing well in this strange world we find ourselves in.  Today I am sharing two cards using the Beautiful Birds Stamp Set.  I decided to try an altered version of a technique I saw a couple of years ago, but it was done with flowers and Copic markers.
 

The general idea is to start your panel with watercolor paper and distress inks.  Some call this ink smooshing (Karen did a tutorial on this the other day) and some call it wrinkle free distress technique.  I smooshed some red and brown distress inks on to my craft mat and spritzed it.  I then placed my watercolor paper into the droplets.  This was then dried.  I repeated the steps multiple times to get the desired look.  I had in mind where I wanted my cardinal to go, so I tried to get my ink colors in appropriate areas. 
Once my paper was dry, I placed it in the MISTI and stamped the bird in red distress ink and the branch in brown distress ink (as best I could) right over the inked area.  I then painted the image with my Ken Oliver Colorbursts (which would be directly onto the distress inked areas).  I tried to keep the whole thing 'loose' but I found myself wanting to add in shading and detail.  When all was done, I stamped the feathers around the beak in black and then colored it in completely with a black Prismacolor pencil.  I added some details to to other areas as well with the Prismacolor pencil
Lastly, I spritzed some white acrylic paint on the image and also added 'snow' with a white gelly roll pen.  The sentiment is from the Christmas Wordfetti Set and is heat embossed in white. 
The bird was die cut out and framed with some die cut patterned paper.  The sentiment and a few sequins finish it off. 
The second card uses the Beautiful Birds Stamp Set as well.


The process was the same; ink smooshing in greens and blues.  Then the image was stamped in blue and green.  I cam back in with the watercolors to add additional color and details to the image.  I did overstamp the image with a dark ink to make the image crisper as things got a little muddied.  Details were added with Prismacolor pencils.  The sentiment is from the Precious Poppies Stamp Set.
The panel was die cut and adhered to the card base.  The sentiment is popped up on dimensional tape and sequins were added. 
This was a fun experiment and I am pretty happy with the results.  Here's to hoping you have time to play this week!  
There is still time to grab the new release bundle and get a 10% savings!  And to sweeten the deal, shipping is free when you spend $75 or more!  Wait, a little sweeter still- get the Stamp of the Month, Friendship is a Blessing, with a purchase of $75 or more through the month of April. 


Thanks for stopping by,

Lee Ann 

Monday, March 23, 2020

Background Stamps Two Ways


Hey friends, Esther here sharing two cards with you featuring the new Psalm 23 Background stamp. On the first card I used it for it's intended purpose -- as a background. On the second card I created a scenic background and used it as the main feature!


To create my first card I  embossed the dandelion in white embossing powder on blue card stock, and then added some random leaves in a moonlight white ink. I distressed the edges and inked them in chipped sapphire distress ink. Since I love lace and doilies, I added a pretty strip of white lace to one side before adhering it over my Psalm 23 background. The dragonfly was embossed in blue, colored with real brush pens, and then made to sparkle with some Nuvo glitter drops.

~~~This post contains affiliate links at no extra cost to you~~~
Supplies and Tools:
  • Blessings In Disguise (Sweet n Sassy Stamps)
  • Psalm 23 Background (Sweet n Sassy Stamps)
  • Dragonfly Dreams (Sweet n Sassy Stamps)
  • Canson Mixed Media Paper
  • Real Brush Pens (Arteza)
  • Crochet Thinlits (Sizzix - Tim Holtz)
  • Versamark Watermark Ink
  • White Embossing Powder
  • Lapis Embossing Powder (Stampendous)
  • Brilliance Moonlight White Ink (Tsukineko) 
  • Faded Jeans Distress Oxide (Ranger)
  • Chipped Sapphire Distress Ink (Ranger)
  • White Blizzard Glitter Drops (Nuvo)
  • Foam Mounting Tape


For my second card I created a scene using three different scene silhouette stamp sets before embossing the new Psalm 23 Background stamp over top. I wanted to keep this card fairly simple so a paper crimped background and some elegant photo corners were all I added.


(You can purchase these three silhouette sets as a bundle and save money!!  CLICK HERE for the Woodland Bundle)


Supplies and Tools:

Saturday, February 8, 2020

All I have needed...

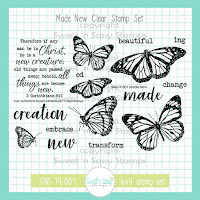
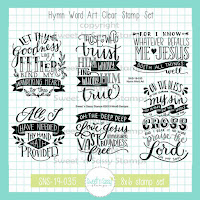
Hello everyone! Today I want to show you a card that I made with the butterflies from 'Made New' and one of the quote blocks from 'Hymn Word Art'.


I made a background with Distress inks. I added the color to a transparent sheet and sprayed it with water. After that I added my paper on top of the ink. That creates a random background with colors that blend into each other.

I colored the butterflies with watercolor markers and added a bit of sparkle with Wink of Stella to the quote (that's hard to see in the picture).


The edges of the panel are distressed with the purple Distress ink I used for the background. I adhered the panel on top of a patterned paper with a couple of silver details.

https://www.sweetnsassystamps.com/made-new-clear-stamp-set/

 https://www.sweetnsassystamps.com/hymn-word-art-clear-stamp-set/#

I hope you're inspired to create!

- Lucinde