Tuesday, September 30, 2014

Well, hello there!

I know!  I am shocked that I am posting, too.  I just thought I would share a couple of fun pictures from our trunk show this past weekend at Scrapbook Super Station in Butler, PA.  Dan the man, AKA Mr. Sassy, and I had a great time sharing our products with the wonderful customers in the Pittsburgh area.  We look forward to doing it again!

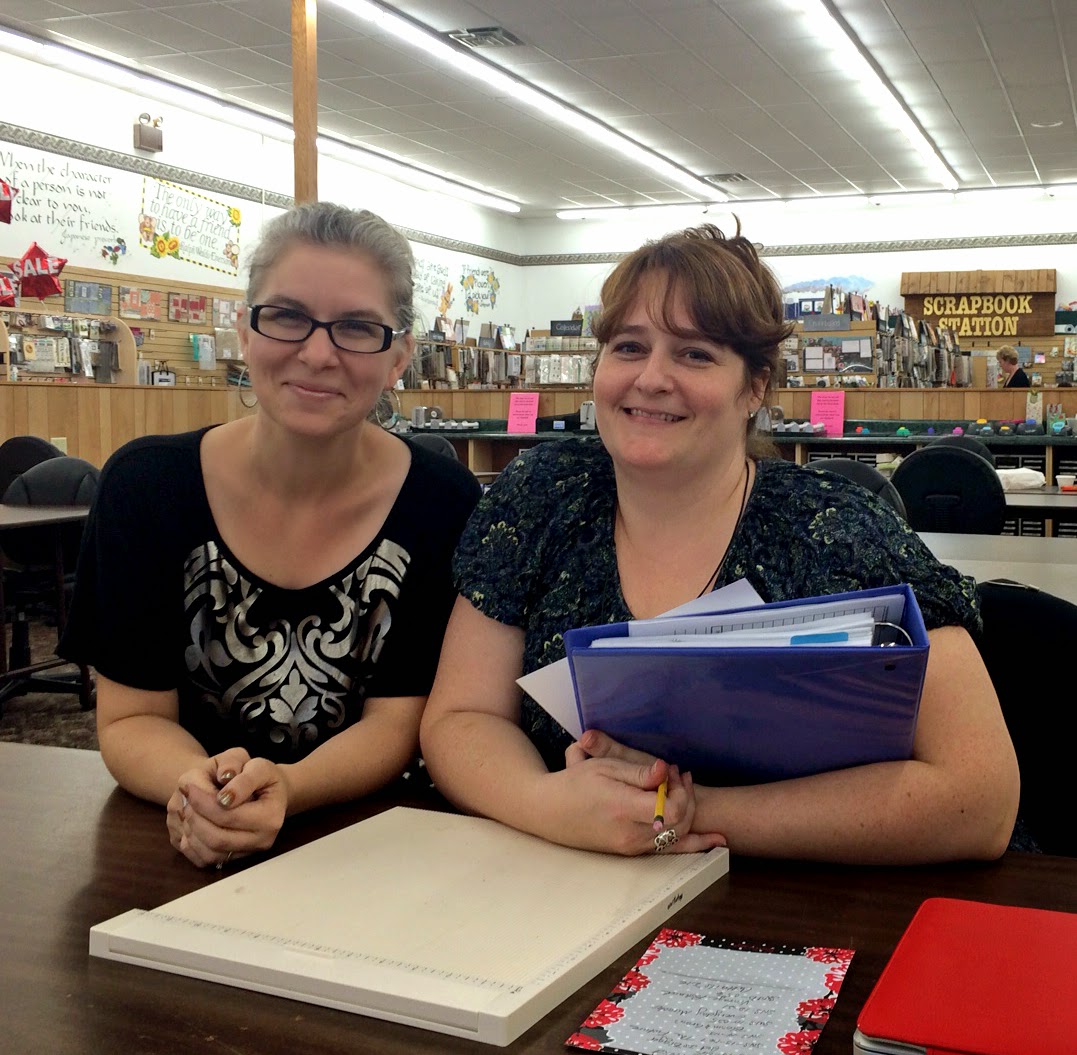
 Here I am with Amy Shepherd, the fabulous owner at Scrapbook Super Station.  She has created an amazing place for scrapbookers and stampers to enjoy their love and share it with each other.  Her business has been open for 16 years!  That is practically unheard of in this industry!  I am so glad I had the opportunity to meet her and spend time in her delightful store.

 Look, it's Vicky Gould from SCS!  Love this lady!  So glad I was finally able to meet her in person. :)

 Here is our make 'n take area with the full display in the background.  


And here's a close up of our fun make 'n take featuring Christmas Morn.


Thanks for stopping by today!  Come back tomorrow for our October Happenings post!  You don't want to miss it!

Monday, September 29, 2014

Many Blessings, So Thankful ~

Good morning Sweet'nSassy fans and friends! Mary here with two cards to share with you using Flowers in Bloom with the newly released matching die. This is one of my favourite flowers to colour. This time I sponged directly on the flower using distress inks and coloured the stems with coloured pencils.

Both cards are also using burlap that was stiffened using glitter ModPodge. The sentiments used are from Gloria Stengel's So Grateful Sentiment set. I love the versatility of these words! Have a blessed Week!!
Materials Used:
Stamps: So Grateful, Flowers in Bloom
Papers: SU, Heartfelt Creations
Inks: Versamagic Aspen Mist, Versamagic Perfect Plumeria, Versafine black
Accessories: Burlap, modpodge, SNSS flowers in Bloom die, ribbon, Cheery Lynn doily die

Sunday, September 28, 2014

Give thanks...

Hello! It's Monika here today, bringing you a Fall card. 

I am loving the new Leaf Silhouettes die set. Especially the tiny dies with the dry embossing.

My first card was made for Friday's challenge at SplitCoast Stampers. You had to use something 'natural' on your card. I decided to make a wreath out of raw twine. 


The background was stamped with the wood grain image from Grunge Borders. I was trying to make it look like a door with those panels. The greeting is from Leaf Silhouettes clear stamp set.


The sweet little leaves were die-cut out of a piece of hand-made card stock. I water colored the paper with orange, green, and yellow... then spritzed brown ink on top... I was going to use thread too, but at the end, it didn't work with the wreath.


I love how these leaves look. Can't seem to stop using them... here are couple of my previous cards (just in case you missed them), using Leaf Silhouettes:


I hope I have inspired you to make something fun today...

Thanks for stopping by,
Monika


Saturday, September 27, 2014

Happy Fall

Hello! It is Gloria with you today. I have created a cute fall card for you, using the Beary Bountiful Autumn September Release stamp set.


Rhubarb is getting is scarecrow on! I stamped Rhubarb with brown ink and colored him with Copics. I also stamped the greeting and used a die cut template to cut it out.


I wanted to mix in some teal accents with the traditional fall colors.


I used the Leaf Silhouettes die set to cut some leaves for the inside of the card. I stamped a sentiment from the Beary Bountiful Autumn in brown ink.

Thanks for looking!

Gloria

Friday, September 26, 2014

October Sweet Perks Club


Hello stamping friends!

Our 2nd batch of Sweet Perks Club stamp & die bundles are NOW AVAILABLE to order!  We think you are really going to LOVE what we're offering this month! :)

Please note:  This month's stamp & die bundles include stamp sets that are already in our current line (meaning they are NOT new).  Please make sure you check your stash before ordering so you do not end up with duplicate stamps.  Thank you!  

So, how does SPC work?

On the last Friday of the month (today) we will share the next month's SPC bundle(s) (yes, there may be more than one to choose from!). The bundle(s) will consist of one stamp set and one coordinating die set---the quality you have come to know and love from us. The bundles will be available to at a 20% discount with FREE SHIPPING for only 2 weeks!  When the two weeks are up, the products in the bundle(s) that are not already available will be made available for purchase on our website for the FULL retail price.

While saving 20% is a pretty sweet deal, that isn't all!  After all, it's called the Sweet PERKS club!!  When you purchase one (or more) of our SPC bundles you will ALSO receive 10% off ANY additional purchases you make that month!! SWEET! 

For those of you who aren't comfortable with committing to a typical club, YOU get to pick and choose when to participate.  When you do, you get that month's perks, when you don't, you don't.   Pretty simple, huh?

Of course, the savings are GREAT, but we're also throwing in some freebies to reward your continued club participation. 

Check out these SWEET PERKS!
  • When you purchase 2 or more SPC bundles in one month you will receive a small surprise gift in that month's SPC shipment.  Who doesn't love fun little surprises? :) SWEET!
  • Once your total of SPC bundle purchases reaches 6 (within a 6 month time frame) you will receive a FREE 4x6 stamp set of your choice.  WHAT?  Yes!  YOU get to pick your FREE gift for fulfilling a typical 6 month club term.  EVEN SWEETER!
  • Once your total of SPC bundle purchases reaches 12 (within a 12 month time frame) you will receive a FREE SPC BUNDLE of your choice valued between $25 and $30!  THE SWEETEST!
Please be sure to keep track of your SPC bundle purchases so you can let us know when you have earned your FREE gifts!

We may even add more perks for "club members" as time goes on.  We are also hoping to be able to offer some tutorials featuring the products offered in the "club".

Please also keep in mind, because this is new to all of us, we will be doing this on a trial basis to feel things out and make sure it works well for everyone.  As with anything new, there may be little kinks that need to be worked out so we really appreciate your patience with us.  If necessary, the program could be tweaked or discontinued at any time. 


You can check out our FOUR awesome 
October SPC Bundles available NOW by clicking HERE.

But how about a little Sweet Perks Club eye candy before you go...

http://www.sweetnsassystamps.com/sweet-perks-club-christmas-penguins-bundle/
 
This adorable card was made by the talented Cathy McCauley.  Her coloring of the sweet penguin is wonderful, as always, and I love the patterned paper she chose to coordinate with the image.  See those little dew drops?  What a great added touch of texture and shine!

http://www.sweetnsassystamps.com/sweet-perks-club-welcome-jesus-bundle/


Here's another beauty by Cathy McCauley.  You gotta love that giant smile on the face of this sweet and simple snowman.  You can just feel the joy as he celebrates the birth of Jesus Christ our Savior!
http://www.sweetnsassystamps.com/sweet-perks-club-beary-christmas-bundle/

If you like to add a little laughter to the holiday season then this guy is for you!  I think the wreath makes him look wonderful, don't you? :)

http://www.sweetnsassystamps.com/sweet-perks-club-christmas-joy-bundle/


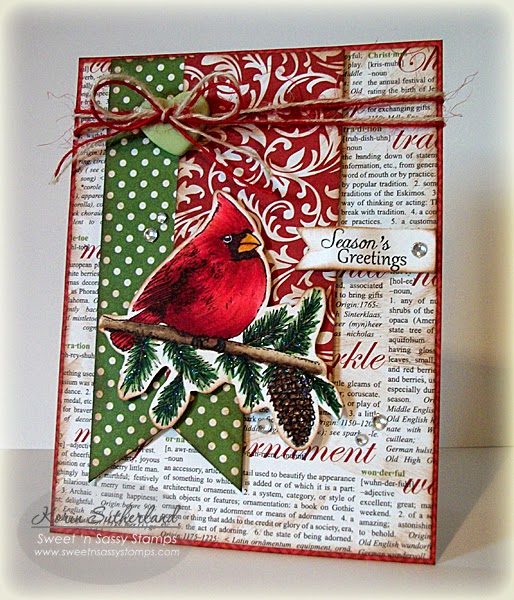
This chubby cardinal is perfect for those classic Christmas cards.  There is just something about red and green for Christmas and this image certainly lends well to that!  Add bit of sparkle to the pine needles and pine cone and you have a lovely Christmas creation.

Thursday, September 25, 2014

Birthday Mum

Hi Everyone!

I hope you are enjoying all of the fall inspiration that the Design Team has been sharing.  I love all things fall, so why I decided to make something other than a fall card is beyond me!  I chose to 'repurpose' one of the new sets, Autumn Mum Greetings, and use it for a birthday card in bright and bold colors instead of fall colors. 


This is such a gorgeous flower that I could not resist coloring it in a bold pink.  I masked the image multiple times to create the corner bouquet.  I colored the main flower using Copics for the petals and a black Sharpie for the leaves.  Once I finished coloring, I masked the flower and sponged around the card edges with black ink.  I have never sponged with black ink before and I think there is a bit of a learning curve, but I still like the results.  The sentiment is from the Forest Silhouettes Stamp Set; it is stamped in Versamark and embossed in white.  I added sequins for a bit of shimmer and shine. 
Now I cannot take credit for this technique.  The talented Deepti, who some of you may know from the blogging world, described this technique, which is called the Focal Black and White technique; she has lifted it straight from the world of photography! 
That is it for me today; I hope you give this technique a try and I hope you try to 'repurpose' one of your Sweet 'n Sassy Stamps!

Hugs! 

Lee Ann  :)

Wednesday, September 24, 2014

beary happy fall

Hello friends!  The card I am sharing today uses Sweet 'n Sassy's new stamp set called Beary Bountiful Autumn.  I chose to use the image of the bear picking apples and colored it with Copics.


What a cute stamp set!  He looks like he is stocking up for the winter.  I am actually looking forward to apple picking season too.  We always make and freeze our own applesauce.  Last year I had a good idea and added some peaches to our apples for a peach applesauce.  It was SO good!  It quickly became our family's favorite.  So this year I plan to open a few jars of our home canned peaches to add to the apples.  Yum!

Have a wonderful day!
♥ Diane

Monday, September 22, 2014

Mum Blessings


Hi there, It's Ceal here with a CAS card to share with you today using one of our new releases Autumn Mum Greetings. There is also a coordinating die cut to the set as well Autumn Mum Die.
My card was super easy to make, I started by stamping the images with Versamark ink and then embossed them with white embossing powder. Next O took my inks and sponged them in Blackberry Bliss, Hello Honey and Tangelo Twist. I finished it off by adding my greeting.

Sunday, September 21, 2014

a Season of blessings.


Good morning!

Jessica here with a CAS card to share today using the beautiful new Leaf Silhouettes dies along with a sentiment from the Leaf Silhouettes stamp set.

I die cut the embossed leaf die cuts out of some white core textured paper and sanded around the embossed lines in spots here and there to add some texture.


This is such a fun little die set - have you added it to your collection?

Have a great rest of your weekend!
Jessica

Friday, September 19, 2014

2014 Fall Release…Take 2

Hello Sweet 'n Sassy friends!  It's really beginning to look and feel like Fall in our little part of the country, and that's just fine with me because I love the colors and cool, crisp days of Autumn…don't you?  God's creation provides so much inspiration for creativity, and Sweet 'n Sassy Stamps provides the perfect stamp sets and dies for making fall themed cards that reflect what we see in nature.  Today we're going to take a closer look at some of the new products from the September Release, but first...

The random winner of our "Fall Themed" Release Day Challenge is #14:
These colors are perfect for fall and that owl peeking out of the 
tree is just adorable!

Jennifer, please send an e-mail to Jacquie@sweetnsassystamps.com
to claim your gift code!

If you have not had a chance to check out the new stamp sets and dies released by SNSS this month, head on over to the Sweet 'n Sassy Stamps Store to see what's new! 

Before you go, take a look at a few gorgeous cards created by the Design Team Divas using products from the new release.

The embossing on Giovana's gorgeous card really makes the veins on the Skeleton Leaf Background stand out!  The leaves were cut with the Leaf Silhouettes Dies and the sentiment is from Gloria's new So Grateful stamp set.

Bridget used the Flowers in Bloom stamp set and the Flowers in Bloom Die to create this dazzling card with her favorite colors and white space!  

Lee Ann created a gorgeous fall scene using the Forest Silhouettes and Falling Leaves stamp sets and the Forest Silhouettes Dies.  The birch trees from the Tender Thoughts stamp set were embossed for the perfect background.

Apple-picking Rhubarb from the Beary Bountiful Autumn stamp set is too cute for words and perfect for sending harvest blessings!  The arrow from the What's Up? Arrow Dies draws attention to the greeting.

For more gorgeous samples just click on the links below.  
If you have made a card using any of the new stamps and dies from the September Release feel free to add your card to the gallery.  We'd love to see your creations as well!  The Linky List will be open until Thursday, September 25, 2014.

Thanks so much for joining us today…we hope you've enjoyed your visit!

Thursday, September 18, 2014

Give Thanks


Hello, it's Bridget here with a autumn card in non-traditional pastel colors 
using the Leaf Silhouette Stamp Set and the newly released Leaf  Silhouette Dies.  
 I love the bold, modern style of these leaves - very fun to work with!
The background is created with a technique using watercolors 
or ink and a stencil, which I learned in the 
Watercolor for Cardmakers Online Class.
Many people prefer using watercolor paper but other types of card stock work 
fine because it doesn't involve over-working the paint/ink too much.  
However, a word of warning, many types of card stock will buckle and warp -  I 
taped down the edges of the panel with easily removable masking
tape to avoid excessive warping, but if it does 
happen, you can adhere the panel to another piece of card stock or 
else put it between the pages of a large book and sit on it for a while to flatten it out!
I brushed the panel with plenty of of water, then added various colors of ink 
with the brush - the paint or ink should spread and blend if you've added
enough water.  If not, give it a spray of water until you see it start to really blend.
Here I used Ranger Distress Shabby Shutters, Scattered Straw, 
Antique Linen, Broken China and Worn Lipstick.  I then lay the stencil over the
 wet panel and set some jars of buttons on top of the stencil so that it's 
pressed down into the paint/water fairly evenly - you could probably use anything 
that has a bit of weight to it but also allows some air flow.   Then you have 
to let it sit and dry!  Go have a cup of coffee or do some cleaning up around 
your craft area!  Don't be tempted to take the stencil off too soon 
before it dries - so maybe you've got time for a cup of coffee AND tidying up!  
When the stencil is removed the result is something like this - the paint/ink has 
gathered where the stencil is pressed against the paper, creating darker areas, leaving
the stencil pattern in lighter shades. 
I popped up the stamped, die-cut leaves and added a strip of vellum with the sentiment.
Thanks for stopping by today!

Wednesday, September 17, 2014

Many Thanks.........

Hello friends!  Jacquie here to share with you!  I thought I would share one of my FAVE September Release creations!

I used the Forest Silhouettes Clear Stamp Set and the matching Forest Silhouettes Die Set for this project.  These are a GREAT pair, as they really make card making simple.  I stamped my trees with Versafine black ink, made a little snow with a sponge of Danube Blue Memento ink, and finished off my base with a little clear Stickles.  Have to have some sparkle for the snow, on the ground and the trees!

Once all that was ready, I stamped my bird in Black Versafine, cut it out with the matching die, popped it up with foam tape, and added my sentiment.  Lastly I added a silver ribbon and voila!  A simple thank you card for a guy or a girl!

Hope you enjoyed my creation!  I look forward to seeing what you all create with our NEW September Release stamps and dies!

Have a WONDERFUL day!


Tuesday, September 16, 2014

Leaves and Forest Silhouettes~

Good morning everyone! Mary here to share some leafy inspiration! Korin recently released some amazing new dies for current sets available in the store.
 
My first card is using the leaf silhouettes and newly released matching leaf silhouette dies! I layered these squares onto the leaf skeleton background that is perfect for quick colourful and textured coverage.

The second card is using the falling leaves stamp set with the Forest silhouette dies! I love the look of these images against the sponged background. For the "floor" I sprinkled some stampendous embossing fragments, tinsel and powders and melted them all together. I adhered the deer to the floor with the leaves falling gently. So serene.

Have a wonderful Day!

Materials used: 
stamps: Falling leaves, Skeleton leaf BG, Leaf silhouettes
Paper: SU 
Inks: Versafine inks, SU inks, Ranger distress inks
Accessories: Stampendous powders, SU punch

Monday, September 15, 2014

Autumn Mum Greetings...

Hello! It's Monika here today, bringing you a card using the brand new Autumn Mum Greetings clear stamp set


 While the stamp set has a coordinating die set, I opted not to use it and cut the images by hand... I used Tim Holtz distress markers to ink up the image. First I inked up the flower with yellow and pink, then I stamped the image on water color paper. Next I inked up the leaves and stamped those (twice). Then I went over the stamped images with a wet brush, pulling the ink around and essentially color the images.


The background DP was splashed with gold glitter mist. The label was cut with Bookmarks & More die set. The sketch for this card came from Retro Sketches #92.

I hope I have inspired you to try this fun technique or just make something fun today...

Thanks for stopping by,
Monika


Sunday, September 14, 2014

Autumn Greetings

Hello! It is Gloria with you today. Wasn't that a GREAT September Release on Friday? What a sweet collection of autumn-themed stamps and dies!

I made a simple tag and pocket project to share with you today, using some of the new goodies!


I found this kraft envelope, (3 1/2 x 6 inches) in my stash, and I made a gift card and tag holder out of it. I rubbed the edges with ink, and then I stamped the leaves from the Falling Leaves stamp set in various colors of orange, red, and gold ink across the center of the envelope.

I die cut the tree from the Forest Silhouettes die set out of brown cardstock and "planted" it to look like the leaves had fallen off the branches. I cut the fence from the Fence and Grass die set out of cream cardstock. I rubbed the fence with a bit of tan ink and added it to the envelope with foam squares.

I stamped the sentiments from the Autumn Mum Greetings stamp set onto gold paper with brown ink. I trimmed the sentiments to look like signs and added them to the envelope with foam squares.


To make the matching tag, I trimmed a Graphic 45 kraft tag a tiny bit on each side to make it fit into my envelope. I rubbed the edges with ink and stamped the sentiment from the Autumn Mum Greetings stamp set with brown ink in the center of the tag.

I used the leaf dies from Leaf Silhouettes die set to trim out a few paper scraps. I rubbed the leaves with ink and added them to the corner of the tag. I tied some ribbon and twine to the top of the tag. The back of the tag is blank to enable me to add a gift card or write a message. 

Thanks for looking!

Gloria

Saturday, September 13, 2014

Autumn Wreath

Hello Everyone!

I just love the September release as it is all about the fall season, which happens to be my favorite.
The new Leaf Silhouette Dies are fantastic!  There are smaller leaf dies that not only die cut but emboss as well!  I used the small maple leaf die to make an autumn wreath.


See what I mean?  These leaves are a perfect size for making wreaths.  I made mine out of  Craft Metal to give my wreath a wonderful shine.  I started by die cutting a cardstock wreath using two circle dies.  Next, I die cut my leaves and arranged them on the wreath for placement.  Then I started gluing my leaves down- some are glued with Crystal Effects and others are popped up using dimensionals. 
The sentiment, which is from the Leaf Silhouettes Stamp Set, is embossed in gold on vellum.  I added a scalloped border for interest, using the Scallop Border Dies.  
You can get complete details on my blog.   

I went CAS with my second card.  Don't like to color?  No problem!  Look how you can add color to your line images by using the Grunge Elements Stamp Set!  


 I used several of the "splotchy" images to color the flowers and butterfly from the Flowers in Bloom Stamp Set.  I did not worry about 'coloring outside the lines' as it gives the finished image a trendy, watercolored look.  The background is colored with a BG Copic marker.  I used pointillism with darker BG Copics on the background around the flower heads and butterfly.  The sentiment is from the brand new So Grateful Stamp Set.  I love it for its versatility and the great fonts!  I hope you give this technique a try!  It is fun and easy!

Thanks so much for stopping by!
Have a fabulous fall weekend!

Lee Ann  :)