Showing posts with label scallop border dies. Show all posts

Monday, October 25, 2021

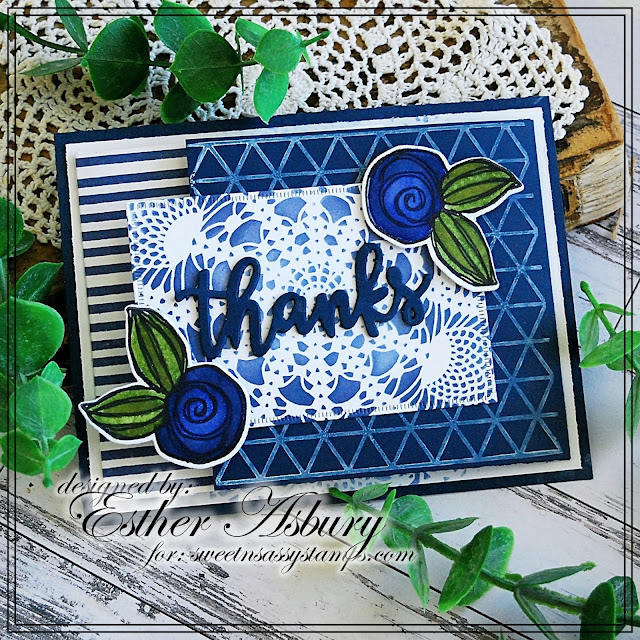
Thanks so much!


Happy Monday! Esther here today with fun fold thank you card all done up in blues (my favorite color!). I used several NEW products including the doily stencil, geometric background stamp, and those pretty scallop border dies.

~~~This post contains affiliate links at no extra cost to you~~~

 Supplies and Tools:

I just love the elegance of that doily stencil, so I included it on the inside of my card as well as the front panel. It's light enough that I can write my message over top.

Tuesday, October 5, 2021

Endless Love | #SNSSVIP1021

 PRODUCT LINKS BELOW CONTAIN AFFILIATE LINKS AT NO COST TO YOU
 
Hello Sweet Friends! Sheri here with a card for the October 2021 VIP Challenge over in our Facebook Group. Each month we host a new challenge and a chance to WIN a $10 Gift Code to the SNSS shop. One random winner is selected each month.  You can find the details on how to play along HERE.
 
This month we are challenging you to "THINK PINK" in honor of Breast Cancer Awareness Month!

 
You just need to create a project featuring the color Pink using at least one SNSS product! Don't have an image that will work...we have a FREE digital image over in the VIP Group that you can download and use!
 
For my sample I created a Christmas card featuring the NEW Endless Love stamp set with a Pink & Red color combo. I love using non traditional color combos and it was perfect for our challenge!
 
Card Measurements:
White A2 Top Fold Card Base: 4 1/4" x 5 1/2" (4 1/4" x 11", scored at 5 1/2")
Red Mat: 4" x 5 1/4"
Pink Panel: 3 7/8" x 5 1/8"
Gold Scallop Border: 1/2" x 5 1/8"
Red Rectangle Strip: 1 3/4" x 5 1/8"
Red Circle Mat: 2 3/4"
White Circle: 2 5/8"
 
Steps to Create Card:
Cut A2 Top Fold Card Base: (4 1/4" x 5 1/2", 4 1/4" x 11", scored at 5 1/2") 

Cut Red Mat: 4" x 5 1/4" 

Cut Pink Panel: 3 7/8" x 5 1/8", you will then dry emboss it with the Peppermint Stripe Stencil to add texture. You can also use any embossing folder.

Cut Gold Scallop Border strip using the Scallop Border die set.

Cut Red Rectangle Strip: 1 3/4" x 5 1/8", you will then emboss with the Cuttlebug Swiss Dot Folder or any folder from your stash.

Cut Red Circle Mat: 2 3/4"

Cut White Circle, stamp sentiment from Endless Love stamp set in black ink. 

Stamp two of the floral images from the Endless Love stamp set. Color with your favorite coloring medium and fussy cut them out. I used Copic Markers.

Assemble the card. I used foam tape to pop up the circle and both floral images.
 
For embellishment I added a few gold pearls.


Happy Stamping!!

Wednesday, September 15, 2021

Holiday Wreath and an Instagram Hop


Hi friends! It's time for the SNSS September Release Inspiration Hop on Instagram. You can head over to the SNSS Instagram feed to start the hop. There's lots of inspiration with this month's release as well as a chance to win by commenting on the hop posts, so be sure to head on over there for some fun!


 Today I'm featuring the beautiful Holiday Wreath set, paired with a few other goodies.


For my first card, I colored the wreath in some winter blues, adding a bit of glossy glaze and some sparkle lacquer to accent the flowers, berries, and pinecones in the image. I hand trimmed the image and added foam tape to the back for dimension.

The scallops are cut with the Scallop Border Dies from aqua and navy, then offset and layered for a fun accent on the card. I finished with the Merry Christmas sentiment from my Endless Love set and a thin navy mat.


For my second card, I went with pinks and reds for my color scheme, coloring the Holiday Wreath with Copic markers and adding some frosted lace stickles to the pine cones.  I hand trimmed again, and this time chose to stamp the Christmas Text Background on pink cardstock for a fun background. I finieshed off with a sentiment from Christmas Wordfetti embossed onto a sentiment strip, and then a few scattered sequins.


Thanks so much for stopping by today! I hope you have a fabulous day.

Tuesday, April 7, 2015

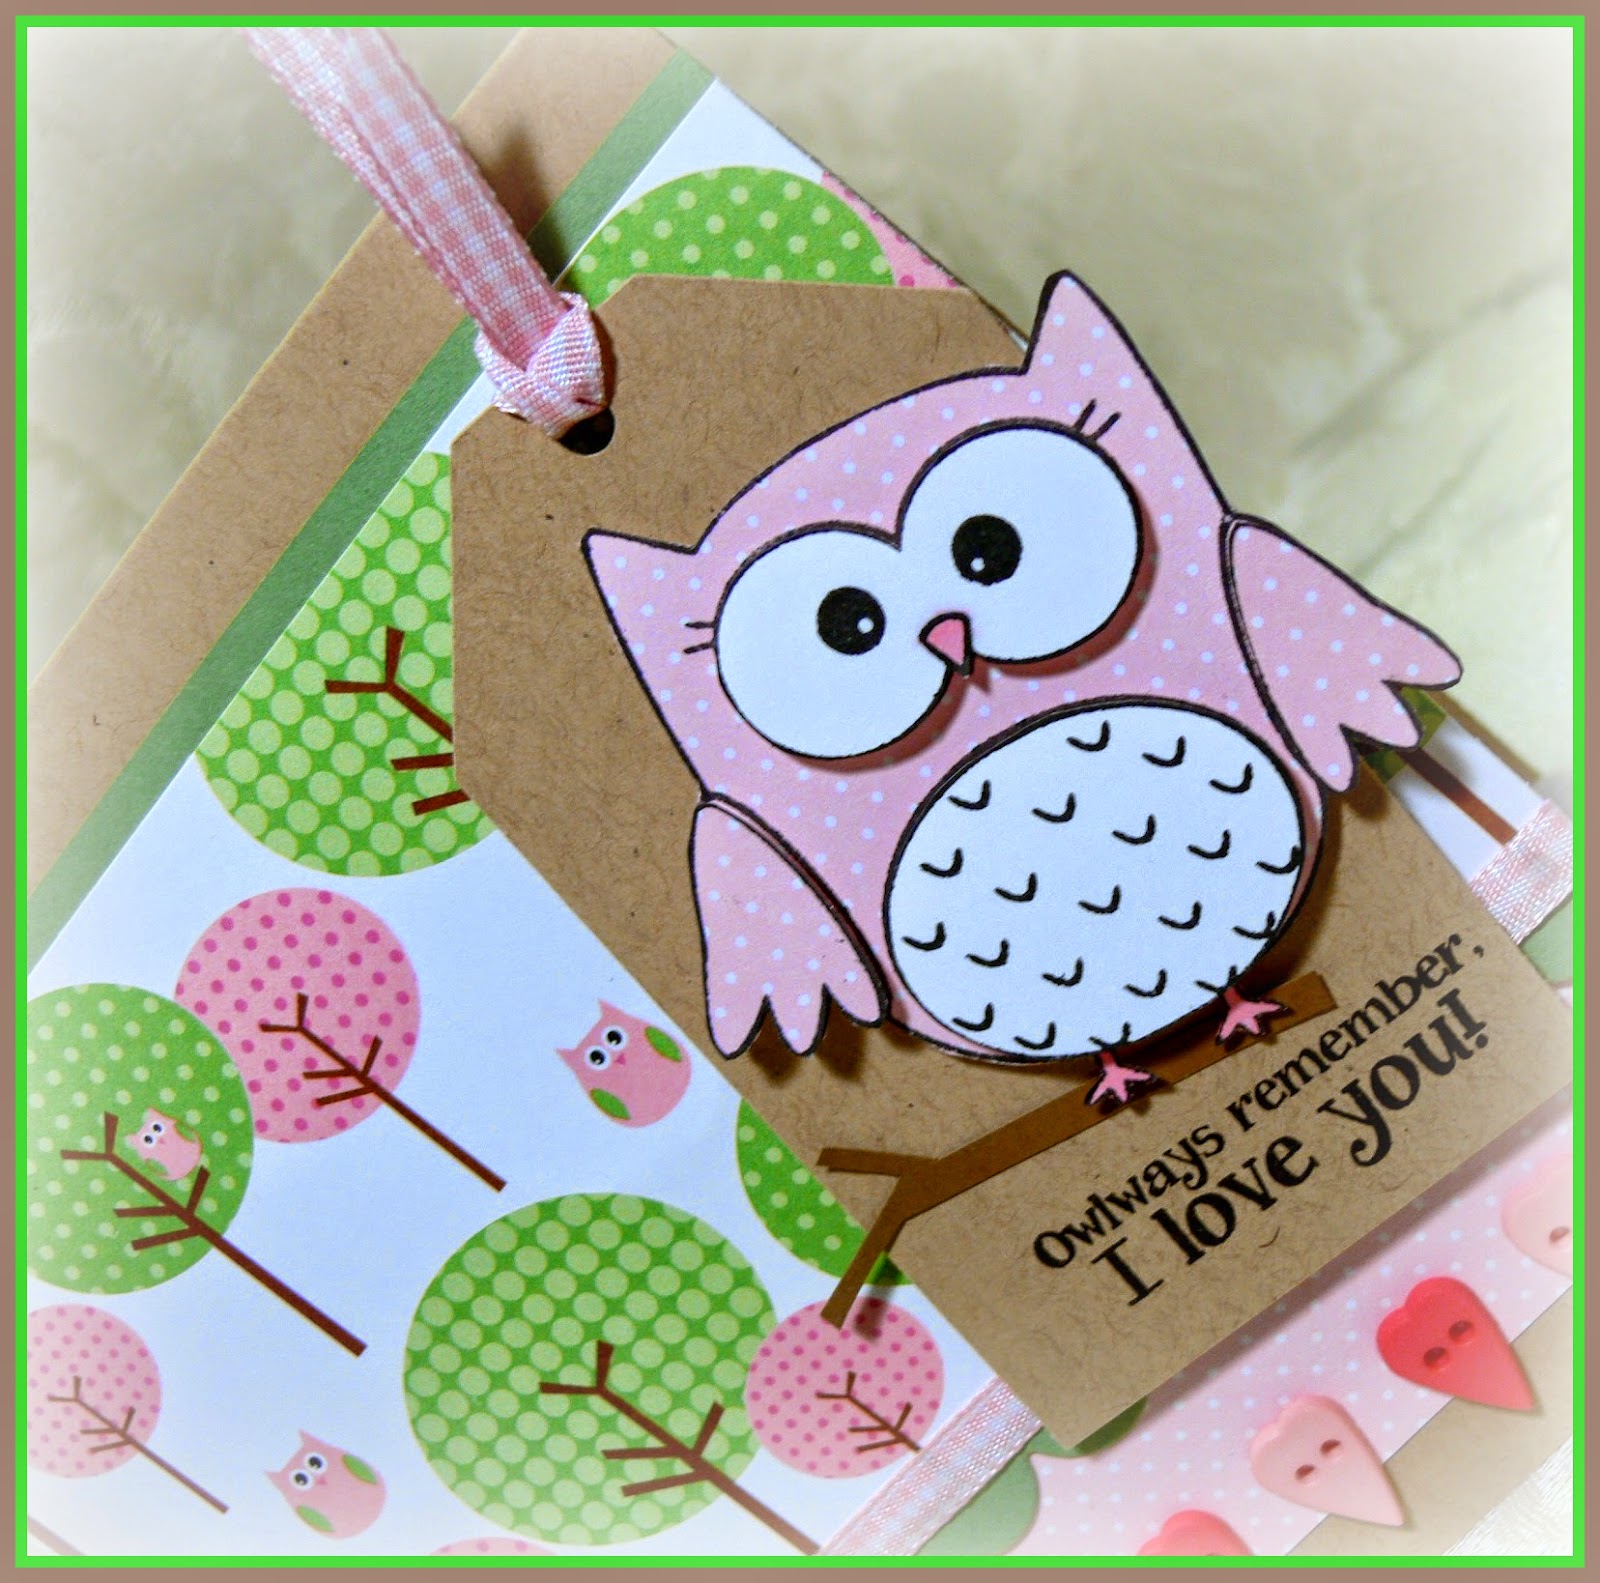
Owlways Remember

I love stamps that can be used for all seasons and occasions. Owl Be There is one of those sweet, fun stamp sets.
It comes with cute-as-can-be sentiments. I love the artwork on this. IRL, the buttons are the same darker pink as in the cute designer paper  (Recollections). Here they look a little red, but they are PINK! I hand cut my little branch for the owl to sit on. I added an extra layer of wings, eyes and feathered tummy for dimension.
The green scallops are cut with the Scallop Border Die Set. Although I didn't use it here, there is a wonderful Owl Die to match!
I love how this turned out, and I know I will use this set again and again! Thanks for stopping by today!


Tuesday, March 17, 2015

not old

Hello and happy St. Patrick's Day!  My card today isn't green...but I do have a fun one to share using my Sassy Cindy stamp set.


The inside sentiment reads (plus shipping & handling).  ;)
Here's a closer pic of Sassy Cindy... she was popped with dimensionals, along with the speech bubble.


There's plenty of fun sentiments in the stamp set to pair with her to make for all your gal friends.  She was quite perfect for a birthday card I needed to make!

Have a great week~
♥  Diane


Tuesday, March 10, 2015

Somebuggy to Love


Hello Sweet 'n Sassy Friends,

Jenny here with a fun Spring like card with
the cutest little bug.  The temp has been in the 40's which
feels like a heat wave around here!  My puppies
were so excited to get out for a long walk in the sunshine.
I was excited to break out some warm weather designer paper
to go with this darling stamp set called Somebuggy Loves You.

I inked this little guy up and colored him with my Copics,
before cutting him out and adhering him to some DP.
Next, I stamped on my sentiment.
Using several Sweet 'n Sassy dies I created
some scalloped borders adding some red card stock
for pops of color.  For some extra love I tied
some cord around his antenna to a  heart balloon.
Lastly, I added a bright sequin and adhered a couple
of hearts from the scalloped hearts border negative.


You can find all the Sweet 'n Sassy products
I used below.  For a more detailed list,
hop on over to my blog.

I'm off to drag the grill out to cook dinner
tonight now that the days are longer. 
Do you think it's too early?  (lol!) 

Hugs,

Jenny

--------------------------------------------


Thursday, November 27, 2014

Merry Christmas

Hello friends! Happy Thanksgiving to all my American friends who are celebrating this holiday today!!  I love Thanksgiving, in Peru, we don't celebrate it and since I move to the States I have adopted this celebration, just love it!!

Ok, today, I have for you a very simple and pretty Christmas card! I used Christmas Silhouettes stamp set, I stamped the berries on a piece of white cardstock in Versamark ink, then added White Embossing powder and heat set. I used Light blue and black gelatos to create the embossing resist.
Then, stamped and die-cut the Christmas tree in Golden Glitz Delicata. The sentiment was stamped in a piece of Kraft Cardstock.
Added the panels to card base and tie on red twine. Finally I added Ruby Liquid Pearls to the berries.

Also sharing that this is my last post as a Design Team member for Sweet 'n Sassy Stamps. I've decided to step down and take care of my health and family. I want to thank Korin for the opportunity to design for her and her business. Wishing her the best in all the upcoming things.


Many blessings to you all!
Giovana

Thursday, November 6, 2014

Winter Cardinal

Hello Everyone!

Are you as thrilled as me that we are into the month of November?  I love this time of year- not quite crazy busy yet, but all of the anticipation of the holiday season.  Christmas cards seem to be on everyone's priority card making list right now; I used the Christmas Joy Stamp Set for this traditional Christmas Card.


This chubby cardinal is one of my all time favorite bird images, if not my favorite. I colored him with Copics and then fussy cut out around the pine cone and lower branches of the pine bough for an 'outside the box' look.  There is a new matching die for this image, but since I did not want to cut the entire image out, I did not use it.  The sentiment, which is from the Winter Girls Stamp Set, is stamped in a strip across the card; it is embellished with a scalloped strip that was die cut with the Sweet 'n Sassy Stamps Scallop Border Die.   I added buttons and twine to add to what I consider to be a cozy, somewhat country feel to this card.  I also added glitter to the branch and pine cone for a bit of shimmer. 

That's it for me- Thanks for stopping by today! 

Lee Ann  :)

Saturday, September 13, 2014

Autumn Wreath

Hello Everyone!

I just love the September release as it is all about the fall season, which happens to be my favorite.
The new Leaf Silhouette Dies are fantastic!  There are smaller leaf dies that not only die cut but emboss as well!  I used the small maple leaf die to make an autumn wreath.


See what I mean?  These leaves are a perfect size for making wreaths.  I made mine out of  Craft Metal to give my wreath a wonderful shine.  I started by die cutting a cardstock wreath using two circle dies.  Next, I die cut my leaves and arranged them on the wreath for placement.  Then I started gluing my leaves down- some are glued with Crystal Effects and others are popped up using dimensionals. 
The sentiment, which is from the Leaf Silhouettes Stamp Set, is embossed in gold on vellum.  I added a scalloped border for interest, using the Scallop Border Dies.  
You can get complete details on my blog.   

I went CAS with my second card.  Don't like to color?  No problem!  Look how you can add color to your line images by using the Grunge Elements Stamp Set!  


 I used several of the "splotchy" images to color the flowers and butterfly from the Flowers in Bloom Stamp Set.  I did not worry about 'coloring outside the lines' as it gives the finished image a trendy, watercolored look.  The background is colored with a BG Copic marker.  I used pointillism with darker BG Copics on the background around the flower heads and butterfly.  The sentiment is from the brand new So Grateful Stamp Set.  I love it for its versatility and the great fonts!  I hope you give this technique a try!  It is fun and easy!

Thanks so much for stopping by!
Have a fabulous fall weekend!

Lee Ann  :)

Thursday, June 5, 2014

Thankful for Mother.


Good morning!

It's Jessica with a couple of cards to share with you that I made recently using several fun Sweet'n Sassy Stamps products!


My second card uses the same Mother die and Thankful Innies stamp set along with the fun Happy Home stamp set.  LOVE the images in this little stamp set - so fun to play with!


Have a wonderful rest of your day!
Jessica

Monday, May 26, 2014

Thankful for You ~

Good Morning SNSS fans and family! Mary here to share a holiday card with you.  At Sweet'nSassy we are so thankful for all the Servicemen and women in the Armed Forces on this Memorial Day. We remember the Fallen and the families left behind. Their sacrifice will not be forgotten.

My card uses the recently released You're a Star and used the matching stars die to create my layers of stars. To create the border I used the stars border from the hearts and stars border dies and layered it on the scallop border die. The background is embossed using provocrafts CB folder. The sentiment is from the Flower Blocks2 set and the banner is trimmed and cut by hand. 

Materials Used:
Stamps: You're a Star, Flower Blocks2
Inks: SU Not quite Navy
Paper: Miscellaneous DP, SU
Accessories: CB folder, SNSS Dies - Stars, hearts and borders, scallop border

Thank you for stopping by! Have a wonderful Holiday.


Saturday, May 17, 2014

Thank you for everything

Hello friends!! Hope you are having a fantastic day. Today, I have a Clean and Simple card for you, it took me only 13 minutes!! Pretty good, right? I used Thankful Blossoms Set and Thankful Blossom Dies, and Typewriter Text Background set.

Here are the details:

  • Cut a card base from Pink Cardstock. A2 size.
  • Cut a piece of Watercolor paper 3.5" x 4.75", mist it with Taxi and Estate Green colors. Set aside to dry.
  • Stamp blossom in red ink and leaves in green ink. Die-cut pieces with coordinated dies.
  • After watercolor paper is dried, stamp Typewriter Text background in Vintage Photo Distress ink.
  • Stamp sentiment in Jet Black Archival Ink,
  • Adhere the blossom and leaves to panel with foam adhesive. Die-cut a large scallop border and adhere it behind panel.
  • Add red sequins.
  • Add panel to card base with foam adhesive.

Hope you like it!
Have a wonderful day.

Tuesday, March 4, 2014

Grandmother's Garden

Hello Everyone!

Despite the weather, I think everyone is thinking spring right about now.  I have a sneak peek for you of a wonderful new set that is all about spring!  When I saw these new stamps, I immediately thought about vintage images of flowers and gardens or something you might find sitting on your grandmother's kitchen table.  I took the vintage idea further and colored my rose in neutral vintage tones with Copics.


The rose was fussy cut out and then adhered to another rose image that was stamped on patterned paper.  The rest of the card is just a matter of textures and layers, using an embossing folder, banner, lace, doily and the Scallop Border Dies.  I added a pop of color with the button.  The sentiment is from the Treasured Stamp Set; Mother's Day will be here before we know it!

Thanks so much for stopping by and I hope you can join us for the March Release this Friday, March 7th!

Have a blessed week!

Lee Ann  :)


Sunday, February 16, 2014

Mid Winter Shape Up

Hello Everyone!
 We have made it half way through February and I have to believe that spring is right around the corner!  That said, these cold winter days do make good crafting days!
I have 3 cards to share with you today~


I used the very versatile Shape Up Stamp Set for this masculine and very mailable birthday card.  The shape was stamped in a repeating pattern to create my background.  The sentiment panel uses a technique I do not use enough- stamping a sentiment over an image. I used a stamp from the Serene Silhouettes Stamp Set and using kraft ink, stamped off once and then stamped onto my card stock.  I added the sentiment and drew a line around the panel with a fine tip marker.  I have been hoarding this ribbon for quite some time, but this seemed the perfect card to use it on. 

This next card uses another image from Shape Up and also uses its coordinating die.


I also used the  Bloom and Grow set as well as the Delightfully Delicate Background.  I stamped my three hexagons and die cut them out.  The flower was stamped and fussy cut out and I used the Small Leaves Die for the leaves (well, I guess that was obvious!).  My background panel was stamped in red on kraft card stock using the Delightfully Delicate Background image.  I added a decorative edge using the Scalloped Border Dies.

Lastly, I have a cheery card made with the Keep in Touch Stamp Set~


Washi tape is the main ingredient on this card.  I added diagonal strips of 4 different tapes to a panel of white cs and popped it up on dimensionals.  The rest of the background is dry embossed.  I curved the sentiment stamp to be able to stamp it around the inside edge of my circle.  The phone was die cut out with its matching die and popped up on dimensionals. 

Thanks so much for stopping by!

Have a blessed week!

Lee Ann  :)