Saturday, May 30, 2015

Relax and Soak up the Sun!


Happy Summer!!!  
Our teens have been out of school a week already and we have just gotten home from a trip to the beach!  We have taken trips to the mountains, we have gone out West but we have never been to the beach with the kids so we thought we better head to the beach before our son graduates next year!!! 

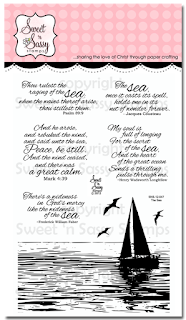
I created this with Sweet 'N Sassy's lovely "Ocean Paradise" Stamp set for my sweet friend.  Her oldest graduated High School last week and now she needs a little vacation!  

Thanks so much for stopping by!
Angie

Friday, May 29, 2015

Friday Feature: Happy Home

Hello Sweet 'n Sassy friends!  Welcome to this week's Friday Feature.  You will love all of the awesome samples we have for you today using one of Sweet 'n Sassy Stamps adorable stamp sets! 

Welcome to this week's Friday Feature!

Today's feature is:
Happy Home
  • Includes 5 images & 7 sentiments
  • Houses measure approximately 1" x 1 1/4"
  • Illustrated by Diane Zechman

The Happy Home clear stamp set with its whimsical fonts and darling images will have you creating adorable scenes on your cards that are perfect for many different occasions.

Just take a look at some fabulous samples created by the Design Divas:


Welcome to the neighborhood!  Judy used the images from the Happy Home stamp set to create an adorable neighborhood on this cute as can be side step card!  The Happy Happy die set was used to add the finishing touches to this fanciful little scene!


Jane used the houses and trees from the Happy Home stamp set to create her own little neighborhood for the background on her darling tag card!  How cute!


A subtle watercolored background, a little paper piecing…add a little bling, and Voila…you have a playful little card congratulating the owners of a new home!  What new home owner wouldn't love to receive Monica's card using whimsical elements and the Happy Home stamp set?

Here is another look at some samples from the past:


As you can see, the Happy Home stamp set is an adorable and versatile stamp set to have in your collection!

You can get Happy Home today through Thursday, June 4th for just $9.90!!
No Coupon Needed!

Now head on over to the Sweet 'n Sassy Store and pick up your Happy Home stamp set.  Have a wonderful day!

Thursday, May 28, 2015

My Favorite Flower

My favorite garden flowers are Oriental Poppies. I love their rich color, and wispy stems that hold such a beautiful bloom. Today I am sharing a card I made with the Poppies Digital Stamp.
After printing, I heat set the ink, and then carefully watercolored my image using dye inks and a watercolor brush. I let it dry, and then ran the image through my Big Shot with an embossing folder for added texture. A few embellishments, and all done!
This makes a sweet all-occasion card, which I will stamp inside once it is needed!

Tuesday, May 26, 2015

flower block basket

Hello Sweet 'n Sassy friends! 
 
Today I am sharing something other than a card.  I like to make 3-D projects also and this time I made a little basket of treats to cheer up a friend going through treatments for cancer.  Leaving a basket of goodies hopefully let her know that I am thinking of her even after my visit.

I used the Sweet 'n Sassy Mini Flower Blocks 1 stamp set to make my flower on the front.


a close up...


My friend said it was her "little ray of sunshine".  :)  I am good about making cards but not always so good at sending them.  lol.  But I would encourage you to lift someone up with a card or small gift such as this... it sure lifted my spirits too!  ‘Truly I tell you, whatever you did for one of the least of these brothers and sisters of mine, you did for me.’ Matthew 25:40

Have a wonderful day!
♥  Diane


Monday, May 25, 2015

Acrylic block watercoloring tutorial

Hello everyone and Happy Memorial Day!  Today I would like to share some ideas with you on how to create some watercolored backgrounds using dye based ink and acrylic blocks.  You can use ink pads or markers on your blocks to create this look.  I am going to show you how I created the cards below.


Here are the supplies you need:


Start out by adding color directly to the block either by pressing an ink pad onto it or by coloring on it with your markers.  I am showing both ways below.


Next, spritz water onto your inked block.  How much will depend on the type of paper you use.  For the ink pads I used watercolor paper and on my marker example I used Stampin UP whisper white.  I generally spray it 3-4 times.  Below is how the block looked after I sprayed it with water.  See how the ink beads up.


Then stamp onto your paper with the block and let the ink absorb into your paper


This is a very easy technique to do and your results will vary each time you do it depending on the colors and paper you use.  You can combine using markers and ink pads which is what I did on my example below.


Here are the SNSS products that I used on my cards

:


Sunday, May 24, 2015

Congrats Grad!

Hello! It's Monika here today, bringing you a graduation card. I've been enjoying making CAS (clean & simple) cards with just a little twist to add a nice interest. 


I started out with making the water color background. I swiped my ink pad on my craft sheet, spritzed it with water, and placed a piece of water color card stock over it, then lifted the card stock up immediately. To speed up the drying time, I used my Heat Tool. It is a fun technique, and you get a different look each time...


 Next I stamped the different greetings on the card stock with gray ink, making my own custom background. How cool is that? 


It is the perfect backdrop to the images from Congrats Grad clear stamp set. They were colored with Copic Markers. I brushed the yellow parts with Clear Wink of Stella for a touch of sparkle. While I fussy cut the images with scissors, there is a coordinating dies: Congrats Grad Die Set.


Thanks for stopping by,
Monika


Saturday, May 23, 2015

The Places You Will Go

 {Jane Bosi}  Happy Saturday, Sweet Friends!!  Today, I am sharing a fun card I created for my second grade son!  I wanted to send him a clear message of encouragement and praise.  All year, he has struggled during independent reading time at school.  He's one of those young 'uns who has a terribly hard time sitting still!  However, he has worked hard to develop as a focused reader.....I'm so proud of him and all that he has accomplished!!

To create my card, I first chose neutral and earthy colors for a masculine feel.  The front of the card is adorn with scraps in greens, yellows and blues.  Then, I fashioned a bookmark using the Bookmark & More Dies.  I stamped one of my favorite sayings from the Bookmark Bits and Pieces set and then added the little book worm and paper airplane.....I just love that airplane!!

Here is the inside of the card, as well:
Reading is one of the biggest delights of my life.  I'm currently reading a series called City of God....it's a fictional work that brings Jerusalem alive with characters who create a wormhole and travel back in time to live out the scenes they've read and studied about.  It's fascinating! 

I love this stamp set that honors and encourages the gift of reading in others! 

Have a great day and don't forget to be awesome!
Jane

Friday, May 22, 2015

Friday Feature: Birthday Word Art

Hello Sweet 'n Sassy friends!  Welcome to another Friday Feature!  
You will love all the samples we have for you today using 
Sweet 'n Sassy Stamps versatile Birthday Word Art stamp set!

Welcome to this week's Friday Feature!

Today's feature is:
Birthday Word Art

  • Includes 13 large sentiments
  • "Belated" sentiment measures approximately 2 3/4" x 1 3/8"
  • Designed by Gloria Stengel
Birthday Word Art is chock full of fabulous sentiments perfect for creating just the right birthday card for your needs!

Here are some colorful samples created by the Design Divas:


Kim used an ombre background created with the beautiful Leafy Flourish Background & More stamp set as a backdrop for her birthday card featuring the number strip and a sentiment from the Birthday Word Art stamp set!  Other stamp sets and dies used include Happy Happy, Decorative Frames, Happy Happy Dies, and the Decorative Plaque Dies.

How cute is this CAS card!  Love how Jenny used a paper clip to circle the numbers indicating the age of the recipient!  

Monika randomly stamped almost all of the sentiments from the Birthday Word Art set on a watercolor washed background to create her amazing card.  The Star Dies were used for subtle dimension and interest!

Here's another beautiful card created by Monika using randomly embossed sentiments from the Birthday Word Art set.  A little vellum and a New Beginnings Butterfly Die cut are perfect accents for her card!


Janette created a cupcake shaped gift card holder using some of the sentiments from the Birthday Word Art stamp set along with the Banner dies.

Here is another card created by Janette using the Birthday Word Art stamp set as a focal point on her ink spattered background and the You're a Star stamp set along with the coordinating Star Dies as accents.


As you can see, the Birthday Word Art stamp set is a versatile stamp set to have on hand when you need to make a birthday card!

You can get Birthday Word Art today through Thursday, May 28th for just $23.40!!
No Coupon Needed!

Now head on over to the Sweet 'n Sassy Store and pick up your Birthday Word Art stamp set.   Be sure to join us again next week for another Friday Feature…have a wonderful day!

Thursday, May 21, 2015

Leafy Flourish

Hi there Sweet 'n Sassy Stampers and thanks for stopping by!
It's Ceal here to share a card made with this week's feature stamp set. Today is the last day that you can get this beautiful background stamp Leafy Flourish Backgrounds & More, for the low price of $23.40 no coupon needed. 
To get the colorful background,  I inked up the background stamp in Versamark ink and stamped off once to get the subtle look, then sponged different colors Pan Pastels over the background. Next I stamped the image from the set Sunshine & Flowers and colored the stems, leaves and outlined the lowers with Copic markers.


Here are the two sets I used on my card


Wednesday, May 20, 2015

Praying Through

Hello everyone!  Cathy here to share a card I made for a man at our church who just suffered a stroke.  I'm hoping this card will bring encouragement to him and his wife.  Since I'm hosting the Sketch Challenge today over at Splitcoaststampers, SC541 was used for the design of my card.

This sailboat image from The Sea clear stamp set is perfect for masculine cards and was stamped on watercolor paper using a waterproof ink...Versafine Onyx Black.  The edges were taped down to a cutting board creating a frame around the image.   Kuretake watercolors were brushed onto the dampened paper.  The panel was propped at an angle and enough water was added to the ocean allowing the color to drip down the image, stopping at the taped edge.  Each layer of color was air dried before the next color was added.  The same method was used to apply the colors to the sky, but the panel was left flat to dry, eliminating the drips.  When completely dry, the sentiment from the God is Bigger stamp set was added along with a few black pearls.

Here are the beautiful stamp sets and dies from the Sweet 'n Sassy Stamps Store 
that were used to create this card:

Thanks so much for stopping by…hope you've been inspired by your visit!
Be sure to stop back again on Friday for a new Friday Feature!
Have a wonderfully blessed day!