Showing posts with label Church Family. Show all posts

Tuesday, April 26, 2022

Church Family (April 2022 SOTM) | With Love and Prayers

 PRODUCT LINKS BELOW CONTAIN AFFILIATE LINKS AT NO ADDITIONAL COST TO YOU
 
Hello Sweet Friends! Sheri here today with a card featuring the April 2022 Stamp of the Month! The stamp set is called Church Family and is FREE with any $65 order. This is a perfect little sentiment stamp set to add to your collection.
 
Sympathy & Encouragement cards are new easy to make and I like to keep them simple. For today's card I used ink blending, a die cut and an embossed sentiment. I started off by cutting a little circle out of masking paper to create a moon in the background. I then ink blended with Distress Oxide Fossilized Amber and Spiced Marmalade. I rounded a piece of black card stock to anchor my Cattails die in the center of the card. The sentiment is from the Church Family stamp set and is stamped and embossed witch white embossing powder and popped up for a little dimension.  

Card Measurements:
White A2 Top Fold Card Base: 4 1/4" x 5 1/2" (4 1/4" x 11", scored at 5 1/2")
Black Mat: 3 5/8" x 4 7/8"
White Stitched Panel: 3 1/2" x 4 3/4"
Moon: 1 1/4"
Black Sentiment Strip: 2 1/4" x 3/8"


 -----


Happy Stamping!!

Monday, April 25, 2022

Tulips


Esther here today with a pretty purple tulip card. The background was created by sponging wilted violet ink through the script stencil and inking along the edges to give the panel more color. A piece of white lace separates the stenciled design from the solidly inked bottom part of the panel. The flowers, leaves, and butterfly were stamped in waterproof ink on watercolor paper and colored with watercolor brush pens.

     ~~~This post contains affiliate links at no extra cost to you~~~

 Supplies and Tools:


Monday, April 18, 2022

The Comforter

Hello Sweet 'n Sassy Stampers!
It's Ceal, here. Today I am sharing a card using several of the April release products. 
To make this card I started with a white top folding card base and a white panel for the background.  To create the background I used the new Sunburst Layering Stencil. and three different colors of purple ink. 
Next I stamped the roses from the Roses for You set, colored them and cut them out with the coordinating die. I popped them up along the edge of the panel using foam tape. 
To finish the card I stamped the verse from the Church Family set with embossing ink and embossed it in white.


*****This post uses affiliate links at no additional cost to you.*****

Friday, April 15, 2022

Simple and quick card to make


 Hello crafty friends! I hope you had a great week! Today I'm sharing a very simple card I made with supplies from Sweet 'n Sassy Stamps. It's always fun to make elaborate cards, but sometimes it's just as fun to make a simple card! And today's card is all about keeping it simple 😊.


I started by trimming my watercolor paper to use as the front panel for my A2 sized card base. On this panel, I used painter's tape to create a frame (roughly 1/4") that I would use as a guide to paint with my watercolors. When I painted this background, I was just relaxing & having fun painting - there was no planning whatsoever. I was letting the colors do their own thing, hahaha!


Once it dried, I removed the painter's tape, put some foam adhesive behind my new front panel, and adhered it to the card base. Then, out of
holographic & black cardstock, I die cut the Friend word die. I also added a sentiment from the new stamp set called Church Family, which I heat embossed on black cardstock with white embossing powder. Both were glued to the front panel. I added some embellishments to finish the card.

Before I let you go, I want to remind you to check out our Inspiration Hop on Instagram. The team has put together some AMAZING inspiration using supplies from this month's new release! Leave a comment on each post from our team and you will be entered to win a $25 gift code. I hope you join in the fun! Start on the SNSS IG page to get some awesome inspiration!


I hope you have enjoyed today's simple card and that it has give you some inspiration to do something fun & creative this weekend! For more inspiration you can follow me on Instagram.


*Products mentioned contain affiliated links at no extra cost to you.*

Tuesday, April 12, 2022

With Love & Prayers

 PRODUCT LINKS BELOW CONTAIN AFFILIATE LINKS AT NO  COST TO YOU
 
Hello Sweet Friends! Sheri here today sharing a card featuring the April 2022 Stamp of the Month! The stamp set is called Church Family and is FREE with any $65 order. This is a perfect little sentiment stamp set to add to your collection.
 
Sympathy and Encouragement cards are never easy to make so I like to have a few on hand.  I like to keep the design simple. For today's card sample I pulled out a few supplies to show that even with limited supplies (stamps, black ink pad, card stock, embossing folder (to add texture), favorite coloring medium, and embellishment of your choice).
  

 Steps to Create Card:
  • Create Top folding A2 Card Base: 4 1/4" x 5 1/2" (4 1/4" x 11", scored at 5 1/2")
  • Cut Kraft card stock panel 3 13/16" x 5 1/16". Next emboss panel to add texture. I used Spellbinder's Plaid Company embossing folder.
  • Cut Green Mat: 2 11/16" x 2 15/16".
  • Cut White Rectangle Panel: 2 9/16" x 3 13/16" 
  • Stamp floral image from the Botanical Branches stamp set. I used alcohol friendly ink as I colored the image with copic markers (YG93, YG95, YG97) 
  • Using embossing ink stamp the With Love & Prayers sentiment from the Church Family stamp set on a strip of black card stock and emboss with white embossing powder. Trim down to 2 5/16" x 3/8". 
  • Assemble card. I did add foam tape behind the focal panel and sentiment for dimension. This step is optional.
  • Embellish card. This step is optional. I used Clear Quartz Solid Sequins. 
Card Measurements:
A2 Top Fold Card Base: 4 1/4" x 5 1/2" (4 1/4" x 11", scored at 5 1/2")
Kraft Panel: 3 13/16" x 5 1/16"
Green Rectangle Mat: 2 11/16" x 2 15/16"
White Rectangle Panel:2 9/16" x 3 13/16"
Sentiment Strip: 2 5/16" x 3/8"


Make sure to check out the FULL April 2022 Release
 
Happy Stamping!!
 

Monday, April 11, 2022

Song Birds


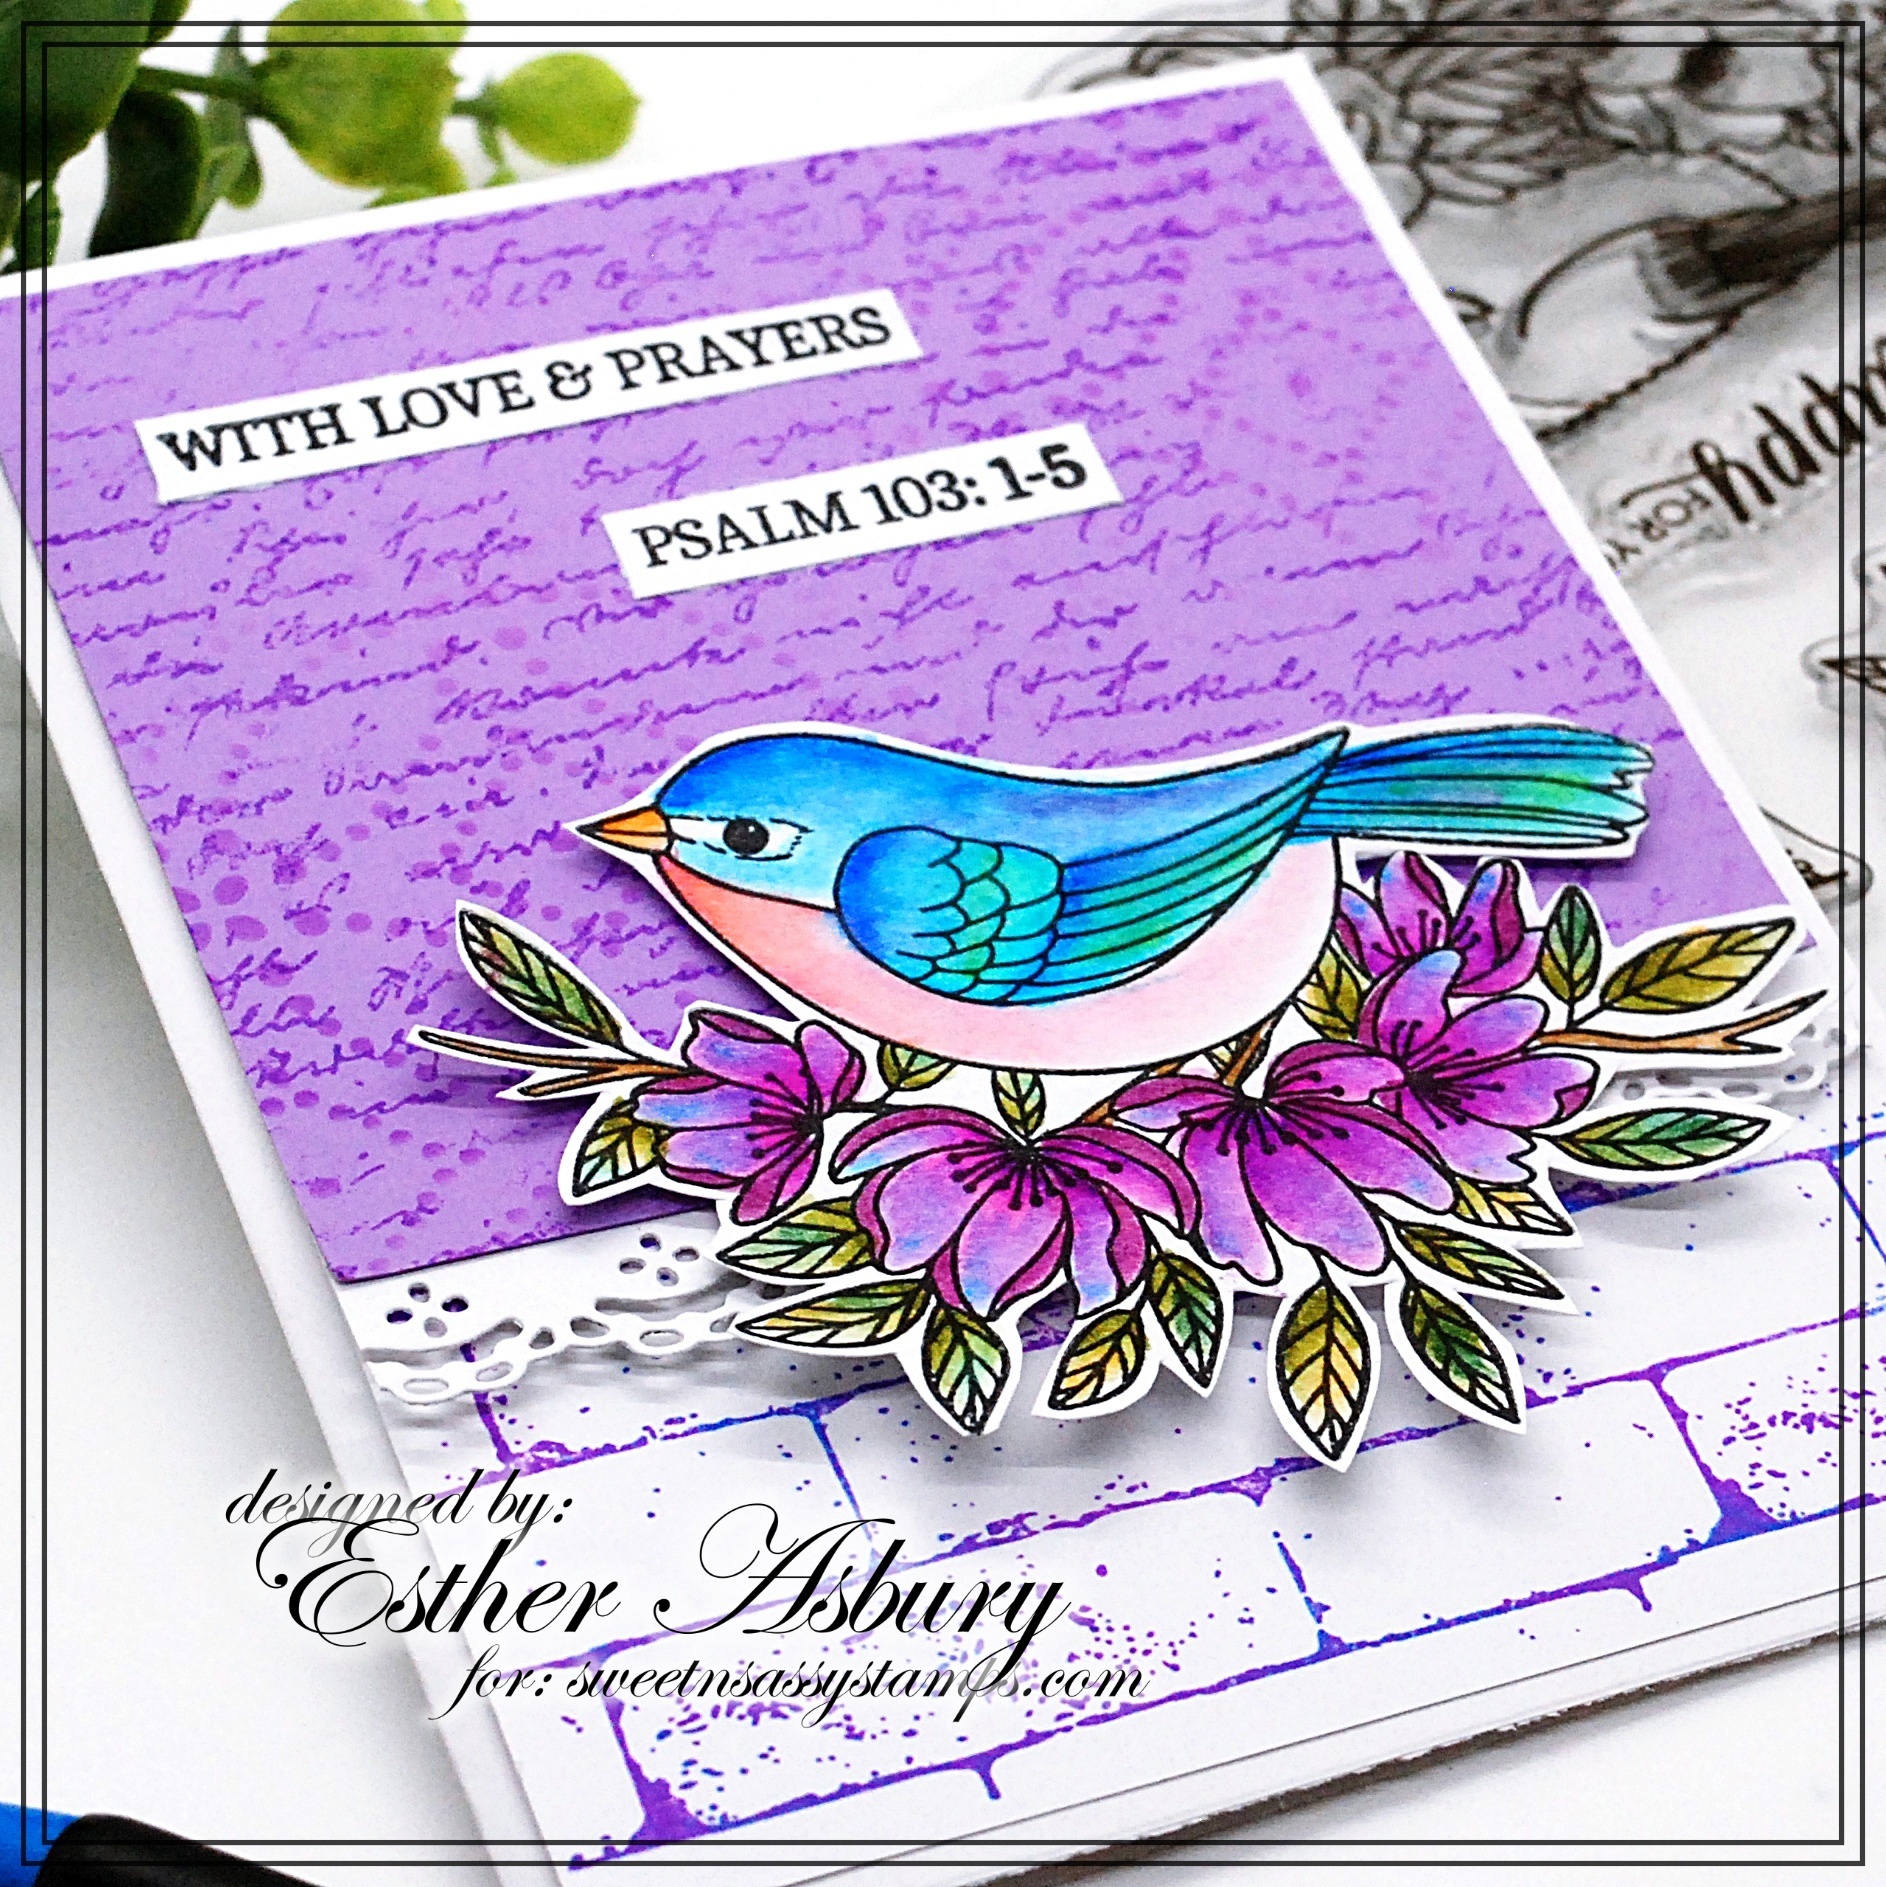
Esther here  today with a cheery bird card featuring two  BRAND NEW stamp sets from the April Release.

 ~~~This post contains affiliate links at no extra cost to you~~~

To create my card I stamped the Script Background stamp in wilted violet distress ink (Ranger) on purple card stock. I lightly stenciled the Delightfully Delicate Stencil in the same color in two corners and added two sentiments from Church Family. I attached a strip of lace die cut with the Doily Border Dies under the purple panel and glued it over a piece of white card stock stamped with bricks from Texture Tiles 2 .

The bird image is from the NEW Song Birds stamp set and was stamped in  Versafine Clair Nocturne Ink and colored with Arteza real brush pens. I used some foam mounting tape to pop it up off my card.

Thursday, April 7, 2022

song birds

 Good morning. The weather is finally feeling like spring here and even God's creatures seem to be celebrating. Do you hear the birds singing? We have a nest with eggs and I'm not sure what type of bird is living there as I haven't seen them yet. Birds are in the Sweet ‘n Sassy Stamps April release too. It's another great one!

Product links: Song Birds (also sold in a Bundle with Dies), Church Family (Stamp of The Month).

I made two fun fold cards with this set. For the first one I cut off half of the card front and turned it, using it for the layered panel. Start with a 4 1/4 x 11 piece of cardstock and score/fold at 5 1/2". Then cut the card front at 2 3/4″. Turn the trimmed piece and layer it back on.


I stamped part of the image again, trimmed, and placed it on the inside. Part of the image was also stamped lightly in the corner with the words.


For my second card, I made a Double Triangle Fun Fold card with a belly band to close it following directions in this video. Don't be intimidated by the triangles...they're actually squares folded in half. It's easy to put together!


No coloring on this one made it a snap to make several quickly and the navy color gives it an elegant feel.


I added the bird to the inside as well and stamped a sentiment from the Church Family set. My patterned paper was one-sided so the inside remained white.


Have a great day!
Diane


Saturday, April 2, 2022

With Love & Prayers

Happy Saturday! The April Release is here and you are going to LOVE it! My first card with the new release features the Stamp of the Month, Church Family. I love the mix of fonts and scripture references included in this set!


I recently sat down and created some backgrounds with the knit stencil. Honestly, I had no plans in mind when I created these backgrounds. I just picked some colors I liked and played knowing the ideas would hit me at some point. 


The blue background was the jumping off point for my card. To create the background, I used cool caribbean cardstock, the knit stencil along with cool caribbean, tempting turquoise and taken with teal dye inks. After I created this background, I searched though my stash of already colored images. I was excited when I came across this butterfly I colored a year ago. Yes, you read that right, a whole year ago when Garden Whimsy was first release. I remember coloring this image, trying to make it work for a card and almost pitching it in the trash when nothing panned out. Now, I am really glad I saved it!

Now that I had the main image selected I knew I had to do more to the background. I added texture and visual interest by stamping the script background in brown, the dots from texture tiles 6 in white and adding black paint splatters to complete the look. 

I stamped the sentiments in black ink, cut to size and added black lines along the edges. I die cut the background panel, matted with black and attached to a white card base. I added some white highlights with a gel pen to the butterfly. I popped the butterfly up with foam tape, glued the sentiments down and added some light blue gems to the front to finish it off. 


I hope you enjoyed today's card and thanks so much for stopping by!

Karen