Showing posts with label Everyday Greetings 2. Show all posts

Monday, October 31, 2022

Deepest Sympathy


Hello Sweet 'n Sassy friends! 

It's Ceal, here.  Today I am sharing yet another sympathy card. It seems like I am needing so many of these lately, I guess that is a part of getting older. 


To make this card it was super easy, I started with a top folding white card base and a white panel. I used the Foliage Silhouettes stamped in gray ink and then and a sentiment from the Everyday Greetings 2 set. 


Affiliate Links are used at no cost to you.

Tuesday, June 14, 2022

Happy Birthday | #SNSSVIP0622

 PRODUCT LINKS BELOW CONTAIN AFFILIATE LINKS AT NO ADDITIONAL COST TO YOU

Hello Sweet Friends! Sheri here today to let you know that a NEW VIP Challenge has started over in our Sweet 'N Sassy Stamps VIP Group over on Facebook. Each month a new challenge is posted with a chance to win s SNSS stamp set! This month in honor of Father's Day we are challenging you with a Masculine Card Theme. You can find the challenge HERE.
 
I just had to use the NEW Grunge Gears Stencil to create another sample. During the Month of June, you can earn this stencil FREE with any $50 order. I also pulled out the Everyday Greetings 2 stamp set. I'm normally not a very messy crafter so this card really took me out of my comfort zone with ink blending and ink splatters. I do have to admit I love how it turned out and how it pops against the white card base.  I hope you are inspired and will stop by and play along!
 
Steps to Create Card:
  • Cut & Score White A2 Top Fold Card Base: 4 1/4" x 5 1/2" (4 1/4" x 11", scored at 5 1/2")
  • Cut Black Mat: 3 5/8" x 4 7/8"
  • Cut White Panel: 3 1/2" x 4 3/4"
  • Take White Panel, Grunge Gears Stencil, Blue Inks (used Gina K Sea Glass, Tranquil Teal, Blue Denim & In the Navy) to create background.
  • Take background and add paint splatters (used White Gouache & Brushed Pewter Distress Paint)
  • Cut Black Strip (3 1/2" x 4 3/4") for Birthday sentiment from Everyday Greetings 2 stamp set and stamp and emboss with VersaMark and White Embossing Powder.
  • Assemble Card. Black mat is popped up with foam tape (optional).
  • For embellishment I added a few black enamel dots.
Card Measurements:
White A2 Top Fold Card Base: 4 1/4" x 5 1/2" (4 1/4" x 11", scored at 5 1/2")
Black Mat: 3 5/8" x 4 7/8"
White Panel: 3 1/2" x 4 3/4"
Black Sentiment Strip: 3 1/2" x 4 3/4"
 
 -------
 
 
Happy Stamping!!

Monday, February 21, 2022

Blooming Anemones


Hello Sweet 'n Sassy friends! 
It's Ceal, here. Today I am sharing a card using this gorgeous floral set, Blooming Anemones.  I love this color combo and have made other designs using this color combo. 
I have attached them here in case you don't follow my blog, Simply Beautiful or my Instagram @cealp. I would love for you to follow me if you don't already. 

This card uses four different sets


This one uses 


Wednesday, May 19, 2021

Thanks so much by Charmaine Canham


Good Morning!!! I get a lot of requests to make sets of cards. I honestly dislike making the same card twice so this has always been hard for me to do.
 Let me show you how I made a quick pack of three Thank you Cards!


I am using three different stamp sets today: Everyday Greetings 2,
 Encouraging Peonies and Texture Tiles 8.


Today, I am using the resist technique. First, clear emboss cardstock with Versamark and clear embossing powder after repeat stamping all over the paper. Heat and set aside.


I made 2 cards with the dots and 2 cards with the peonies.


I used Distress Ink instead of my go-to Distress Oxide
for a more vibrant color. Smear the ink pad over the A2 card base. 


Here is the new Salvaged Patine Distress Ink over the Peonies.


I love these purple peonies!


To finish these cards, repeat stamp the Texture Tiles in either similar monochromatic colors or completely opposite for a more dramatic look.  Layer the sentiment strip with double-sided foam tape.


Which one is your favorite?? To finish the pack, stamp the texture tiles stamp
on the envelope for a "matchy-matchy" and complete look!

Thank you for looking and have a great rest of your week!

Charmaine

Follow me for almost daily inspiration on Facebook and Instagram


Monday, May 3, 2021

Encouraging Peonies

 Hello Sweet 'n Sassy friends!

It's Ceal, here. The month of May we are not having a new release but we are releasing some gorgeous digital stamps all month so be sure to check them out. 
Also every week of May we will feature sets from a different illustrator and there will be a sale. 

This week is Jennifer Nilsson 
sale below 


For my cards I used one of my favorites of her sets, Encouraging Peonies
I started with a white top folding card base and a white panel. I stamped the peony image and colored it using Graph-it markers. I cut a quarter inch off of the side of the panel and then added some gold glitter washi tape to the base. 
The sentiment is from the Everyday Sentiments- 2 set and I embossed it with gold powder. 


My second card also uses the Encouraging Peonies set, I just stamped a different as it is a huge set.  I also used the Graph-it markers to color it and then added the Blessings Word Die


From now through May 6th we are featuring stamp sets by Jennifer Nilsson and if you purchase 2 of her sets you get a third free. 

Wednesday, April 21, 2021

Whimsical Wishes by Charmaine Canham

 Good Morning!

Spring is here, and everything is starting to get back to life!
Today I have a fun and fluttery card that is sure to lift your spirits!


I am using the Garden Whimsy Stamp Set today with a few other mixed media elements.


I start with randomly water coloring a page using Ecoline watercolor, blue and pink, and dry. Next, I white heat emboss the butterfly onto the watercolor page. Cut out, and set aside.

In creating the background, I start with a cloud builder and Tumbled Glass Distress Oxide.
 Fill the whole page with clouds. 


I love playing with different mediums to create textures. That is why I love
The Crafter's Workshop's Light and Fluffy Modeling paste. 


You can smear it through a stencil, heat it for more dimension, and even watercolor it like I did here.
 I heat set it here before I painted it with watercolor and a green  Posca Pen. 


This month we released Everyday Greetings 2, and I used the Best Wishes sentiment for the top right. Make sure to rub the stamp with your fingers before you use it. That removes the film on all new stamps and will ensure that the stamp picks up enough ink. 


I heat embossed this WOW Gold Super Fine embossing powder. Place double-sided foam on the bottom of the body only; this will give the wings "motion" and freedom to move.


To give the card a more whimsical look, I used a Micron 0.1mm pen and added a
frame with doodles all around it.


I hope you liked today's card and enjoy a little whimsy today!!


Butterfly wishes, 
Charmaine


Saturday, April 17, 2021

Dotted Flowers

Hello Everyone! I have seen the dotted coloring technique with markers and really wanted to give it a try, but I don't own any markers. So I took a look at my collection and got super excited when I realized the Happy Day set had a stamp with three small dots in it and an idea was born. 

I actually created these dotted flowers last month, but never got around to making cards with them. I decided to utilize them this month and incorporate two of the new April Release'sButterfly Background and Everyday Greetings 2


I stamped the flowers with Versafine Clair Nocturne ink on white cardstock. Because this ink can stay wet for a while for embossing I decided to heat set them so I could get started on the dot stamping. I picked three different, yet coordinating colors, starting with the lightest color first.

First color, notice I don't cover the entire space with color.


Second color, fill in more while still leaving white space for the third color.


Third color, now you really start to see it coming together. At this point, I went back to the first color and repeated the steps. I continued to do this until I was happy with how it looked.


I repeated this process with three different greens for the leaves and fussy cut the images. I stamped the sentiment from Encouraging Thoughts with black ink on Kraft and layered a piece of Summer Sun cardstock behind it . I stamped the Butterfly Background with Vintage Photo Distress Oxide ink on Kraft as well. I die cut the butterfly panel, along with pattern paper and more Summer Sun. I assembled as seen and popped the flowers and sentiment strip up with foam tape.


For my second card, the flowers were done in three different blues. The Butterfly Background was stamped in Aqua Sky on white cardstock and die cut. I stamped the sentiment from Everyday Greetings 2 on the same color blue cardstock as the base. I assembled as seen, pooping the white panel up with foam tape and adding three small pearls to the front.

I had a blast creating dotted flowers and made a whole bunch of them. If you own the Happy Day set I hope you will give it a try and share your creations in the Sweet 'n Sassy Stamps VIP Group on Facebook. 


I hope you have enjoyed today's cards and thanks for stopping by!

Karen

Wednesday, April 14, 2021

April 2021 Release Blog Hop + Giveaway

Welcome to our April 2021 Release Blog Hop!

Who's loving all the fabulous new releases this month? Today we're excited to be sharing a hop full of inspiration with the April release, plus a chance to win a $25 gift code to the Sweet 'n Sassy Stamps shop

GIVEAWAY: Leave a little shout out in the comment section on each stop along the way for a chance to win a $25 gift voucher to the Sweet 'n Sassy Stamps shop. You'll have 2 weeks to comment, with the winner announced here on the SNSS blog, Wednesday, April 28. Happy hopping!


It's also our first hop with our newest cardmaking Creative Team Member... Charmaine Canham! She's been a repeat guest designer for us, and we're so happy to have her and her lovely creations joining the team. Be sure to give her a welcome shout out (and a happy birthday wish, since today's her birthday) when you hop along!


Here's the official hop list. If a link misbehaves along the way,
hop on back here to pick up where you left off.


This month is also Korin and Colleen's birthday month, so in honor of them all, I thought I'd share a birthday card featuring Colleen's new Grunge Elements 3 set and Korin's new Everyday Greetings 2 set and the Script Stencil.

I started with a gel print background from my stash, then stenciled the script using black embellishment mousse and set it aside to dry.  The sentiment from Everyday Greetings 2 is embossed in silver on black paper and I added the dotted line from Grunge Elements 3, then tore around the sentiment to layer over the card.  When the mousse was dry I stamped the stars hearts and grid circles randomly around the panel in grey and black inks, then added some black ink smudged around the edges to finish things off.

Okay, let's get on with things.


Here's a little walk-through of our April release...

First up is the April stamp of the month, Butterfly Background. This set is available for purchase for $11.95, OR you can get it as a FREE gift with a $60 purchase (after any discounts and before shipping and tax) during the month of April! Please note you MUST add this set to your cart to receive the discount. Once your order qualifies, the discount will automatically apply in your shopping cart.


The lovely sample card in the graphic is from Karen and features Butterfly Background, Everyday Greetings 2, and Happy Day.


Creative team member Colleen Gaddie designed the next set, perfect for backgrounds and mixed media. Grunge Elements 3 is sure to be a much reached for set in your collection.


'Tis the season of new beginnings, and what better way to celebrate the happy couples in your life than with these fabulous images illustrated by Krista Hamrick? The Mr. & Mrs. Stamp & Die Bundle includes both the Mr. & Mrs. stamp set and coordinating die set bundled together at a discount. The stamp set and die set are also available separately at regular price.


Our next bundle brings us our first collaboration with Hillary Krippaene of Creative Faith Co. The Thirsty Soul Bundle includes both the Thirsty Soul stamp set and coordinating die set bundled together at a discount. The stamp set and die set are also available separately at regular price.


This month brings us Everyday Greetings 2, another collection of  hand-lettered all-occasion sentiments from Korin Sutherland.


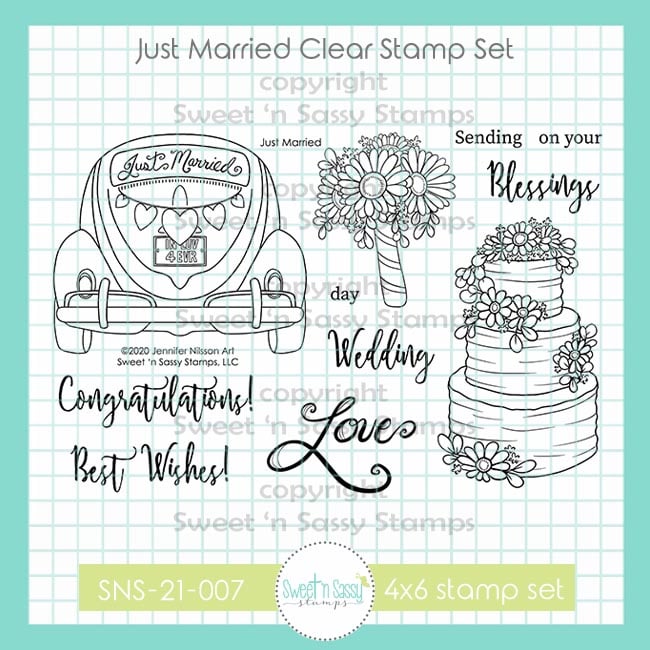
If you loved Nina Brackett's Vintage Van set, then the Just Married set with it's sweet little love bug might be right up your alley.


Along with new stamps and coordinating dies, we have two new stencils debuting this month.


That's our April Release in a nutshell! So many fabulous sets to choose from! What's your favorite? Let us know in the comments.

Your next stop on the hop is Sheri Gilson.

May you be blessed today and always!

    ***This post contains affiliated links at no cost to you ***