Showing posts with label Starry Night Stencil. Show all posts

Monday, July 4, 2022

God Bless America!


Happy 4th Sweet 'n Sassy Friends!
It's Ceal, here. Today I am sharing a quick and easy card using the God Bless America set.  

I started with a white top folding card base, a panel of red glitter paper cut down an eighth of an inch smaller and another white panel cut down an eighth of an inch smaller.  I stamped the sentiment in red and added some blue stars by using the Starry Night stencil. 
 America really does need God's blessings these days. 


Friday, November 19, 2021

Starry Night on a Hillside


Happy Friday my friends! I hope you're having a great day and that your weekend goes even better.

Today I want to share with you a fun card I made using the Starry Night stencil, the Hillside Edges die set, and the Warm Winter Friends stamps.

I trimmed my cardstock to make an A2 base card. On it, I stamped one of the images from the Warm Winter Friends stamp set to create a background. Then I die cut a semi stitched circle and used my distress inks to color the background. Next, I used the Starry Night stencil with white pigment ink to add those cute stars.
 
 
On a separate piece of cardstock, I die cut the Hillside Edge and used my Copics to color the trees, houses, and hills. Once I finished coloring, I splattered some white metallic watercolor to make it look like snow. To finish the card I heat embossed a sentiment from the Warm Winter Friends stamp set.

Remember! Sweet 'n Sassy Stamps is still celebrating their birthday! This week to celebrate, all of the animal stamp sets and stencils are 20% off! No code needed. You can take advantage of this sale to get the Warm Winter Friends stamp set & the Starry Night stencil I used on today's card.


I really hope you have enjoyed today's crafty project! For more inspiration you can follow me on Instagram @harshgurl . Have fun getting some crafty supplies! See you next time!


*Products mentioned contain affiliated links at no extra cost to you.*

Saturday, November 6, 2021

Fake News

Did you hear the news? Sweet 'n Sassy Stamps is turning 14 in November and they have a month of fun things planned to celebrate! So exciting!

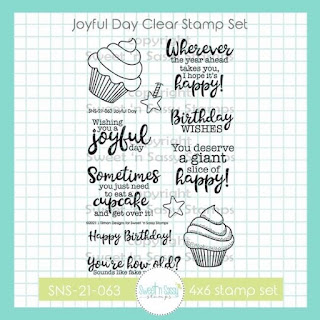
A birthday celebration means a new birthday set!  Joyful Day by Julee Tilman is full of sweet and some sassy sentiments. You know I just had to play with the sassy ones first. I paired the sentiment from Joyful Day with some previously released sets(both are on sale though November 7th).


I stamped the background and images with Versafine Claire Nocturne ink on white cardstock and the sentiment on Barely Banana cardstock then heat set. I colored the images with Altenew Artist Markers and fussy cut out.

I added some green stars to the background with the  Starry Night Stencil and Sprout ink. I wanted to double mat my background but did not have the right green cardstock. So, I cut my mat from white and inked up the edges with the Sprout ink to create a coordinated look. 

I assembled the card as seen, popping the sentiment and images up with foam tape and adding a few gold stars to complete the card. 


Did you know our Sweet 'n Sassy Stamps VIP Group hosts a monthly challenge? November's theme is birthday in honor of Sweet 'n Sassy Stamps turning 14. If your not already a member we would love to have you join us and participate in the fun. 


This sale ๐Ÿ‘‡ends Sunday night.


Joyful Day


A Little Snarky


 Birthday Wordfetti


 Starry Night Stencil


I hope you enjoyed today's card and thanks so much for stopping by!

Karen (๐Ÿ‘ˆ to follow me on Instagram)

Saturday, July 17, 2021

Starry Night Baby Card

Today's card features Sweet Dreams Bunny Digital and Starry Night Stencil for a sweet nighttime baby card. I started this card in June when the digi was released and finally finished it up this month. Sometimes, I intend to finish something right away, but it actually ends of sitting in a pile of stuff to do. Anyone else do this too?


I printed the sweet bunny image and sentiment on regular white cardstock. I colored the image with watercolors and once dry, fussy cut out. Next, I created the galaxy sky background with distress oxide inks(picked raspberry, dusty concord, cracked pistachio and chipped sapphire). When I was satisfied with the blending I spritzed with water and blotted with a paper towel after 1-2 minutes and set aside to dry. Once dry, I splattered white pigment ink, diluted with a little bit of water, with a small round brush and let dry again. Then using the starry night stencil I added stars by gently using the same pigment ink(yeti). I wanted the starts to be soft white instead of a bold white so it didn't compete with my focal image.

I die cut the panel and started messing with placement of the image and sentiment. At this point, I decided to add the white string and ink blend the sentiment with cracked pistachio distress oxide ink. I assembled the card and popped the image up with foam tape. I still felt like it needed something else. So I dug through my stash and found the small stars which just happened to be the perfect shades to work with my card. Plus, they fit the stenciled stars perfectly. Score!!


Thanks so much for stopping by!

Karen

Thursday, June 17, 2021

oh baby

 Good morning! I'm back with a few cards for this month’s Sweet ‘n Sassy Stamps release. I have several cards today using the Oh Baby Stamp & Die Bundle (also sold separately) and the stamp of the month, Grunge Stripe Background. I also used the Starry Night Stencil and Stars Dies.

For my first card, I started with the Grunge Stripe Background and then turned it 90° and stamped it again to create a plaid. I used the Starry Night Stencil and Stars Dies to coordinate with the stars in the stamp set.


This next card is super fun! I made a bunch for some friends' birthdays with a butterfly on the front and they loved them. I thought this sweet baby carriage would be super cute too! I found the directions for this fun fold card here.


To open this gate-fold style card, the sides are bent back and the carriage is attached to the center fold. So fun!


For my last card, I was playing around with stamping the onesie image onto several different scraps of patterned paper from the same pad. I had enough stamped and cut to make three baby girl mini slim cards with this simple layout!


Have a great day!
Diane


Monday, April 12, 2021

Masculine Cards


Esther (from Shoregirl's Creations) here today sharing two masculine cards I created with the NEW Everyday Greetings 2 stamp set. Both of them are no-coloring cards, though the second one has plenty of color on it! 

This first card is a fun birthday card that features the Gear Up and Time Well Spent sets as well as the Typewriter Text Background .  The watch and sentiment were stamped in Versafine Clair Nocturne Ink while the grunge elements were stamped in walnut stain distress ink.

   ~~~This post contains affiliate links at no extra cost to you~~~

My second card is a silhouette card. The background is dusty concord, chipped sapphire, speckled egg, stormy sky distress ink blended together to form sky and water. I used just a bit of white pigment ink to lighten up the center of my card and create the illusion of moonlight across the water. To add a little twinkle to my night sky, I spread some white gesso through the Starry Night Stencil.

The lighthouse and trees are from the Landscape Silhouettes set, and I added grass along the bottom with Scene Silhouettes: Tall Grass and the Cattail Die. The waves were created with a small stamp from Scene Silhouettes: Trees. All the stamping was done in Versafine Clair Nocturne Ink. 

   ~~~This post contains affiliate links at no extra cost to you~~~


Monday, March 29, 2021

Gnome-One Like You

 Hello Sweet Friends!  Sheri here today with a fun card featuring the NEW Gnome-one Like You stamp set from the March 2021 Release.
 
Steps to Create the Card:
  • Create the background panel by taking the NEW Starry Night Stencil and dry embossing it onto a white panel measuring 3 7/8" x 5 1/8". Each die cut machine has their own sandwich so check your user manual.
  • Cut strips of card stock measuring 3 7/8" x 1/4" to create the rainbow belly band and glue to white panel.
  •  Stamp the Gnome with alcohol friendly ink and color with copics. I also added a little sparkle to his hat with a clear overlay Spectrum Noir pen and some glossy accents to the hearts for a little dimension.
  • Cut out 2 5/8" x 3 5/8" Oval for Mat behind Gnome. 
  • Cut Out Star embellishments. Attach to panel with foam tape. Rhinestones are optional.
  • Stamp Sentiment and cut out with 1 1/4" circle die 

Card Measurements:
Kraft A2 Top Fold Card Base: 4 1/4" x 5 1/2" (4 1/4" x 11", scored at 5 1/2")
White Panel: 3 7/8" x 5 1/8"
Rainbow Strips: 3 7/8" x 1 1/2" (Each strip is 3 7/8" x 1/4")
Vellum Oval: 2 5/8" x 3 5/8"
Sentiment Circle: 1 1/4"


-------
Last Chance to SHOP the Moving SALE!!
Sale ends 3/31/21

Happy Stamping!!

Friday, March 19, 2021

Spring/Summer 2021 Coffee Lovers Blog Hop

Hi coffee, tea, and cocoa fans! We're so excited to once again be amidst a long list of fabulous Super Sponsors for the Spring/Summer Coffee Lovers Blog Hop! Nothing better than a little caffeinated creation to put a little SPRING in your step! ๐Ÿ˜‰


The hop kicks off today and runs through Friday, March 26. To be eligible for any of the fabulous Super Sponsor prizes, simply create a NEW coffee, tea, or cocoa project and link it up over on the official Spring/Summer Coffee Lovers Blog Hop post. Enter as many cards as you like, the more the merrier! The deadline to link up is Friday, March 26. And don't forget to check out all the amazing caf/decaf creations along the hop!

Who's ready for summer? I sure am.. and so are my kids, even though it's just the start of Spring Break! Haha! So for my card today, I used the Sunshine in a Cup DIGI. I colored up a few of the images with Copic markers, then fussy cut to add to this fun slimline card. I created the background with the Starry Night Stencil, using it randomly with coordinating inks, then added the sentiment cut with the Speech Bubbles Die Set to finish it off. 


If you love digis, be sure to check out our other Coffee, Tea, & Cocoa DIGIS.

Have you heard our exciting news?! Sweet 'n Sassy Stamps is moving out of its home office into its own space and expanding into a brick and mortar store! More details to come, but To prepare, we're having a moving sale!

Enjoy 15% off sitewide through March 31, with code MOVING!


Here's a little sampling of caffeinated sets and inspiration from the Sweet 'n Sassy Stamps Shop


Card by Sheri features Tea for Two

Tea for Two


Thanks so much for stopping by today! We hope you enjoy the hop!

***This post contains affiliated links at no cost to you ***