Showing posts with label pretty potted florals. Show all posts

Tuesday, August 10, 2021

Many Prayers For You | #SNSSVIP0821

 PRODUCT LINKS BELOW CONTAIN AFFILIATE LINKS AT NO COST TO YOU
 
Hello Sweet Friends! Sheri here with a card for the August 2021 VIP Challenge over in our Facebook Group. Each month we host a new challenge and a chance to WIN a $10 Gift Code to the SNSS shop. One random winner is selected each month.  You can find the details on how to play along HERE.
 
This months we are challenging you with an "Inspiration Photo"
 
 
You just need to create a project using the photo as inspiration. 
 
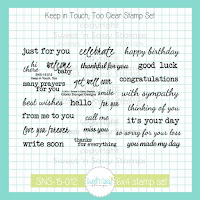
For my sample I created a card with a Sunflower from the Pretty Potted Florals stamp set and a sentiment from the Keep In Touch, Too stamp set. I stamped the Sunflower with alcohol friendly ink and colored with copic markers. I then fussy cut it out.

Card Measurements:
Mini Slimline Card Base: 3 1/2" x 6" (7" x 6", Scored at 3 1/2" on the 7" side)
Polka Dot Pattern Paper: 3 1/2" x 6"
White Scallop Frame: 3 1/8" x 5 5/8"
White Panel: 1 7/8" x 4 3/8"


Here's another card I shared earlier this month using Like a Sunflower and Thank You stamp sets.
 
For card details, click HERE.
 
 
We hope that you will be inspired to play along! 


 Happy Stamping!!
 

Wednesday, May 12, 2021

Pretty Potted Florals and an Instagram Hop

Hi Sweet 'n Sassy friends! It's Julee. Instead of our usual mid-month Blog Hop, today we're putting on our first Instagram Hop! Be sure to head on over to Instagram and leave some comments for the designers for a chance to win a $25 gift code to the Sweet 'n Sassy Stamps online shop. The beginning of the hop and all the details can be found on our Instagram page:  https://www.instagram.com/sweetnsassystamps/


Along the hop, we're playing with a something old, something new theme. I am sharing a card which features one of my very first Sweet 'n Sassy Stamps purchases, Thoughtful Words, and my newest purchase... Pretty Potted Florals.  Both of these sets are illustrated by NinaB Designs and all of her sets are on sale this week! 


I started by stamping one of the potted flowers in Versafine Clair ink and then coloring with Zig Kuretake Clean Color Real Brush Markers and a blender pen. I then stamped just the flower portion again and colored just the inner flower and fussy cut to pop up for some dimension on the stamped image.

The sentiment is from the Thoughtful Words set, and I stamped onto a circle that I stenciled with the Delightfully Delicate Stencil and salvaged patina distress ink.  Some patterned papers from my stash finished things off.


While I was at it, I decided to make another card with Pretty Potted Florals.  This time I attempted  watercoloring with watercolor pans.  I'm a little out of practice and was way too heavy with my paints, so ended up blending out with watercolor markers, then adding some Copic highlights to add some depth.  I fussy cut the image and placed onto a panel I had used to wipe up some salvaged patina ink, then finished off with a sentiment from one of my all-time favorite sentiment sets... My Thoughts of You.


Thanks so much for stopping by today! Be sure to check out this week's sale and I hope you'll join us over on Instagram for the hop!

Tuesday, June 26, 2018

Love That Texture!

Hello sweet friends!  I love adding texture to cards!  Whether it's bricks, wood grain, pebbles, or tree bark, the new Texture Tiles 2 stamp set is a must have for creating that perfect texture.

The brick tile from Texture Tiles 2 was stamped on a Gelli Print scrap found in my scrap file to create the brick wall.  Check out how realistic it looks!  The flowers are from the Pretty Potted Florals stamp set and were Copic colored, cut out, and popped onto the wall.  A sentiment was added from the Scripty Thoughts stamp set to finish the card.

How about some tree bark?  Drag several shades of Distress Ink down the length of some card stock and stamp the wood grain tile with a darker shade.  A background was created with Distress Oxide inks and the pebbly tile from Texture Tiles 2.  The adorable birdie, clouds, and sentiment are all from the How Tweet stamp set.


Be sure to check out these stamp sets and others that work perfectly with the wonderful Texture Tiles 1 and Texture Tiles 2 stamp sets at the Sweet 'n Sassy Stamps Store.  Even better...The Texture Tiles 2 stamp set is FREE with your $75 purchase until June 30th!

Thanks so much for stopping by!  I hope I've inspired you to try stamping some texture on your next creation!

Hugs,
Cathy

Saturday, June 16, 2018

Big Bold Sentiments!


For today's cards, I used  the Script Outline Alpha Clear Stamp Set (new this month at Sweet N Sassy) to create bold sentiments on my cards. In order to let the sentiments speak  for the cards, I went pretty CAS on the cards.

For the first one, I inked up and colored a potted flower from Pretty Potted Florals, doodled a border around it (from my technique lover's challenge at Splitcoast Stampers TLC690) and inked "hi" right on top of it. I added Glossy accents on top to make it pop!


For my second card, I used a stencil from Simon Says Stamps and some Distress Oxides to create a colorful background then stamped out "hello" on top. I went over the word with clear Spectrum Noir Sparkle then sealed in the sparkle with Glossy accents. (It looks cool up close:)

I hope these inspire you to use your alpha stamps in new ways!


Thanks for stopping by!

Lyn


Saturday, June 2, 2018

Mixed Media Fun

For my projects today, I got good and messy with dylusions paints. I painted my card panels up then stenciled on some texture with the same paints. With Sweet N Sassy's new Texture Tiles 2 (this month's stamp of the month), I inked on some more dimension before adding my colored up Pretty Potted Florals and my sentiments from Keep In Touch, Too. This sentiment set is becoming a favorite as it pretty diverse in its offerings!

Here is the first one:


Here is the second one:


Thanks so much for stopping by!

Lyn


Saturday, September 2, 2017

All About You

Hello sweet friends....happy Saturday!  Back in July, Sweet 'n Sassy Stamps released a stamp set celebrating YOU!  This set is soooo versatile it can be used alone or can be combined with almost any other stamp set to create a card for any occasion.  Today I'm sharing just two ways to use

Distress Oxide Inks were used with the Lots-a-Spots stamp set to create a background for the Butterfly Flourish.  A second panel was also made using the same Oxide Ink colors.  Black acrylic splatters were flicked onto both panels.  A decorative square die was used to cut vellum which was then cut diagonally for the corners.  The word "you" from All About You was white embossed, fussy cut, and popped onto the card front with foam tape.  The butterflies from the Butterfly Flourish were stamped again and fussy cut to add to the card.  The word "thank" from the All About You set was stamped and highlighted with a white paint pen.

Typewriter Text Background was stamped on one panel, Floral Pattern Background (currently out of stock) was inked with Oxide Inks and stamped on a second panel, and a Pretty Potted Flower was stamped and colored with Copics on a third.  The three panels were cut into three sections and stitched together to form the card front.  The sentiment from the All About You set was stamped and a Majestic Monarch added.  The top of the flower was stamped a second time, fussy cut, popped onto the card, and a sparkly gem added to the center.

These stamp sets are available at the Sweet 'n Sassy Stamps Store.

THANK YOU for stopping by today!
Have a wonderful weekend!

Hugs,
Cathy

Tuesday, August 29, 2017

it's your day.

Hello! It's Monika here today with a birthday card. I love using flower images on my cards... they are good for any occasions.
So here is a card with a pretty layered flower:


The image came from Pretty Potted Florals clear stamp set. I stamped the flower three times and cut the different layers out after coloring them with water color... I also stamped up three leaf images. I used foam adhesive between the layers (underneath the petals of the top layer) to add dimension to my card. The black oval frame is also popped up with foam adhesive.

 
I just had to add some sweet butterflies (from Majestic Monarchs clear stamp set) that were heat embossed with white embossing powder on vellum. They add such a nice and airy touch to any cards. The background was stamped with Typewriter Text Background clear stamp. I wiped off some of the gray ink from the edges to add a weathered look to it. The greeting was stamped from Keep in Touch, Too clear stamp set.

Here are couple of cards (from the past) using Pretty Potted Florals clear stamp set:


Thank you for stopping by,
Monika


Monday, June 5, 2017

Hello friends! Kim here with you today, I'm so sorry for the delay in posting today. My card today features the Pretty Potted Florals and Words of Life.

I started making my card I began by covering a piece of white cardstock with Pan Pastels. Then I stamped the sentiments from Words of Life repeatably in VersaMark ink on top of the Pan Pastel covered paper. I then went over the piece of stamped paper with the Pan Pastels again. Once the Pan Pastels hit the VersaMark stamped words, the ink grabs the pastel and creates a tone on tone look. Cool, right?

I cut down my paper to fit onto a standard card base. My flower pot was stamped, colored, and fussy cut. I did the same with the butterflies. I die cut and embossed a piece of black cardstock, which serves as a home for my flower pot. 

Why not give the Pan Pastel technique a try sometime...it's a great way to make quick and easy backgrounds! Quick tip...this technique works best with solid stamps. 

I hope you enjoyed today's project! Just a reminder that Sweet 'n Sassy is holding a 25% moving sales! Happy crafting!

Saturday, May 13, 2017

Pretty Potted Floral Birthday

Hello Sweet Friends!  Julie here to share a Mixed Media birthday card using the Pretty Potted Florals  Clear Stamp Set (NinaB Designs) and Long Stem Silhouettes Clear Stamp Set (designed by Korin Sutherland)  - both available from Sweet ‘n Sassy Stamps.


To create this card- stamp the Pretty Potted Florals image with archival black ink and watercolor with water based markers.  Die cut and mount onto black cardstock.

Use a sponge dauber with dijon ink and a flourish stencil for the background, mask the horizontal strip, apply white picket fence distress stain to tone down the background around the masking, score  a few lines near the horizontal strip before trimming and mounting onto black cardstock.

Mount the background panel and horizontal strip onto black cardstock, mount onto the white card base and add the floral image panel with dimensional foam.

Heat emboss the sentiment from Long Stem Silhouettes with white embossing powder onto black cardstock, create the banner by hand and add to the card front with dimensional foam.

To finish off the card, use a clear glitter pen to add shimmer to the floral petals as well as the background panel and add the pearl to the flower center. 


Thanks for stopping by- hugs and I hope all of you have a blessed week, sweet friends!